Transcription
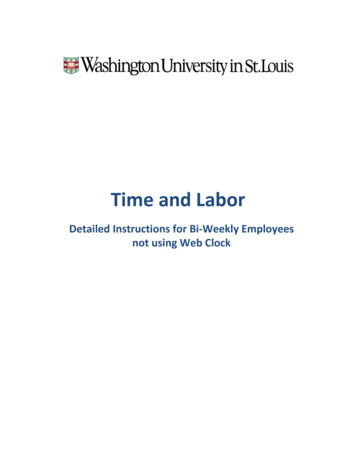
Time and LaborDetailed Instructions for Bi-Weekly Employeesnot using Web Clock
Table of ContentsOverview . 3Logging Into HRMS . 4Time Reporting. 5Time Reporting Scenarios . 9Night Shift Hours . 9Leave Balances . 10Email Notifications . 10Other Self Service Functions . 11View Exceptions . 11View Payable Time Detail. 11View Payable Time Summary . 12Still Need Help? . 12Page 2 of 12Revised: August 2016
OverviewAll non-exempt (bi-weekly) employees are required to report all time worked as well as all timenot worked (e.g., Vacation, Sick, Holiday, Jury Duty, etc.). Reported time must be reviewed andapproved by the supervisor before being paid. If the employee has no weekly standard hours and doesnot work during the pay period, they do not need to fill out a timesheet for that pay period.The University’s Human Resource Management System (HRMS) is used to report employeetime.Logon to HRMS SelfService TimeReportingEnter Time Workedand Time Off; ViewLeave BalancesSubmit timesheet atend of pay periodDepartment PayrollAdministratorreviews and approvespayable timeTimesheet isprocessed byTime and LaborApprover reviews andapproves, denies orchangesPayable time isloaded to employeepaysheetsProcess payroll andleave balancesupdatedPaychecks distributedto employeesTime Reporting Process:Page 3 of 12Revised: August 2016
Logging Into HRMS1.Go to the Human Resources website (http://hr.wustl.edu/) and find the “Loginto HRMS” link.2.On the HRMS logon page, enter your WUSTL Key ID and password. If you don’tyet have a WUSTL Key, enter your Employee ID number and click Sign In. You will beprompted to create your WUSTL Key.3.Your HRMS homepage will be displayed. Your HRMS menu may look different thanwhat is displayed in the screenshot below. However, your homepage should have the same general lookas the one below.Page 4 of 12Revised: August 2016
Time Reporting1.2.Page 5 of 12After logging into HRMS, navigate to Main Menu Employee Self Service TimeReporting to access the Time and Labor employee menu.Click on the Report Time menu item to access your timesheet page. You’llnotice the entire 2-week is displayed. Below your timesheet, your leave balances(Vacation, Sick and Personal) will display, but only if you are benefit-eligible. Thesebalances are as of the end of the prior pay period and are the hours that are availablefor you to use during the current pay period. Balances including any leave time youtook during the current pay period, plus what you accrue during the period, will displayat the bottom of the next pay period’s timesheet.You can also enter comments on your timesheet, either by using the commentsbox at the bottom of the page or by using the comment link on each individual day onyour timesheet. Comments that are meant for your approver to see should be enteredin the large comments box at the bottom right hand corner of the page.Revised: August 2016
3.To enter time worked for a day: 4.Page 6 of 12in the “In” column, enter the actual time you began workin the “Start Meal” column, enter the actual time you began your meal breakin the “End Meal” column, enter the actual time you returned from your meal breakin the “Out” column, enter the actual time you ended your work day and left workthe Time Category defaults to “Regular” when you enter in/out timesthe total hours worked for the day are calculated and displayed in the “Total” columnin/out times can be entered in the following forms: 8:00AM, 8:30a or 0830follow these same instructions for any day worked during the pay periodTo report time not worked (e.g., Vacation, Sick, Holiday) for a day: click on the Time Category drop-down arrow and select the appropriate value enter the number of hours in the ”Hours Not Worked” column (e.g., 8.00)Revised: August 2016
5.It is recommended that you report your hours worked and time-off hours as theyhappen or before it happens (time-off only). When entering hours on your timesheet,use the “Save For Later” button to save entries. Your time will be stored in a “Saved”status.6.You can review your hours by using the “Timesheet Totals – Payable Hours” sectionbelow your timesheet. The hours reported will be totaled by Week 1/Week 2 and HoursWorked/Time-Off.7.Once the pay period is complete and time for all days has been entered, you can use the“Submit For Approval” button to submit your timesheet to your approver for review andapproval. Your time will then be stored in a “Needs Approval” status.Page 7 of 12Revised: August 2016
8.Although your department may have defined its own deadline for bi-weekly employeesto submit their timesheets, the system default deadline is set at midnight of the daypayroll will be processed (typically the Tuesday following the end of the pay period).Once your timesheet has been approved, the status of your hours will change to“Approved”.9.You have the ability to upload attachments related to your time-off to your timesheet.In the lower right section of your timesheet, click on Documents. You will select theAttachment Type (either Doctor’s Note or Miscellaneous). Click Upload and Browse tofind the document. Click Upload again. You will see a line with the document name.You can either View or Delete the document once it is uploaded. Click OK to return tothe timesheet.Page 8 of 12Revised: August 2016
10.If your timesheet is modified by someone other than yourself, you will receive an emailto notify you of the change. The user that has made the change is required to enter acomment on your timesheet that explains their reason(s) for changing your timesheet.The email notification will contain a link to your timesheet where you can review thecomment and proceed as necessary.11.If your timesheet is denied by your approver, you will receive an email to notify you ofthe denial. Your approver is required to enter a comment to explain why it was denied.The email notification will contain a link to your timesheet where you can review thecomment and proceed as necessary. If you correct the mistake on your timesheet afterit is denied, the system will send an automatic email to your approver to notify them ofyour correction.Time Reporting ScenariosNot every employee at the University works a shift that starts and ends on the same day, orworks the entire shift without taking time-off, etc. This section will cover various scenarios that requirespecial instructions for completing a timesheet.Night Shift HoursEmployees working shifts that start on one day and end on the next day, or cross over midnight,must record their in and out times according to the instructions below, based on a shift startingat 8PM on Monday and ending at 5AM on Tuesday: Page 9 of 12in the “In” column on Monday, enter the actual time you began workin the “Start Meal” column on Tuesday, enter the actual time you began your meal breakRevised: August 2016
In the “End Meal” column on Tuesday, enter the actual time you returned from your meal breakIn the “Out” column on Tuesday, enter the actual time you ended your shift and left workLeave BalancesIn Time and Labor leave balances are always available to employees. Benefit eligible employeesaccrue vacation and sick time based upon the University policy. The accruals are processed at the end ofeach pay period. The balances that are visible on your timesheet are as of the end of the prior payperiod, and are what is available to you for use during the current pay period. The time-off you reportdoes not change the values from the end of the prior period. Any activity in the current pay period,including any hours you accrue, will be displayed on the next pay period timesheet.As you saw in the timesheet screenshot at the beginning of this guide, leave balances aredisplayed at the bottom left hand corner of the page. This section simply displays your balances as ofthe end of the prior pay period. If you navigate to a past timesheet, the balances that display at thebottom of that page will be as of the end of the pay period prior to that period.To view additional detail or find other information regarding your leave balances, you can usethe View Leave Balances function (Employee Self Service Time Reporting View Leave Balances). Thispage was created to give employees a historical view of their leave balances. You can view your leaveactivity and accruals by pay period, as well as see how your balance has increased or decreased frompay period to pay period. On the right side of the page, you can see helpful information like yourmaximum balances, how many unverified sick instances you’ve reported during the fiscal year and also aformula for how leave accruals are calculated. At the bottom of the section there is a link to theemployee handbook which includes the time-off policy.Email NotificationsTime and Labor has several email notifications and reminders that are sent to employees andapprovers. Some are sent on a scheduled basis, some are sent only when a certain event happens. Eachemail that is sent includes a link to the appropriate page in Time and Labor. When you click on one ofthe links you will be asked to log in (if not already logged in) and the system will send you directly to thepage. Below is a listing of the possible email notifications or reminders that you may receive along withwhen the emails are sent.Page 10 of 12Revised: August 2016
Situation1. Bi-weekly employees with standardhours who have not reported orsubmitted their timesheet for approval2. Approver has denied an employee’stimesheetRecipientEmployee3. Approver (or Department PayrollAdministrator) reviews a timesheet ,makes a change and re-submitsEmployeeEmployeeWhenScheduled9:00AM the day before bi-weeklypayroll is processed.Event-DrivenWhen the approver clicks the DenyTimesheet button.Event-DrivenWhen the user (which is not theemployee) clicks the Save For Later orSubmit For Approval button aftermaking a change to the employee’stimesheet.DeadlinesIn order for a paycheck to generate, biweekly employees must submit their timesheet before12:00PM on the day before payroll runs. The approver must approve the timesheet before 12:00AM(midnight) on the day payroll runs. Deadlines may change due to holidays throughout the year. On aholiday payroll schedule, employees must submit their timesheet before 12:00AM (midnight) on the daybefore payroll runs. Approvers must approve the timesheet before 11:00AM on the day payroll runs.Other Self Service FunctionsAs you can see from the Employee Self Service Time Reporting menu, there are other optionsbesides Report Time and View Leave Balances. These other functions are rarely used by employees.Therefore, we don’t go into a lot of detail on them. This section will briefly describe what each functionis used for.View ExceptionsOnce your timesheet is approved, additional edits are performed by a program that runsin the background. When the program finds an issue with any time that you reported, it willgenerate an exception. An exception can be a warning (medium severity) or an error (highseverity). If an exception is generated on your timesheet and it requires your attention, yourpayroll administrator or your approver will contact you. To review any exceptions that havebeen generated on your timesheet you can use the View Exceptions function.View Payable Time DetailThe same program that performs the edits (mentioned above) also creates “payable”time. Payable time has a real value for bi-weekly employee. In the event you want to view yourpayable time, you can use the View Payable Time Detail or View Payable Time Summary (below)functions. View Payable Time Detail will show the details of your payable time for each day inthe pay period.Page 11 of 12Revised: August 2016
View Payable Time SummaryThe View Payable Time Summary function allows you to view payable time in asummary form for the pay period. If you choose to look at your payable time you can use thisfunction or View Payable Time Detail.Still Need Help?If, after looking through this guide, you still have questions, please contact your department’spayroll administrator or your supervisor/approver.Page 12 of 12Revised: August 2016
to HRMS" link. 2. On the HRMS logon page, enter your WUSTL Key ID and password. If you don't yet have a WUSTL Key, enter your Employee ID number and click Sign In. You will be prompted to create your WUSTL Key. 3. Your HRMS homepage will be displayed. Your HRMS menu may look different than what is displayed in the screenshot below.
