Transcription
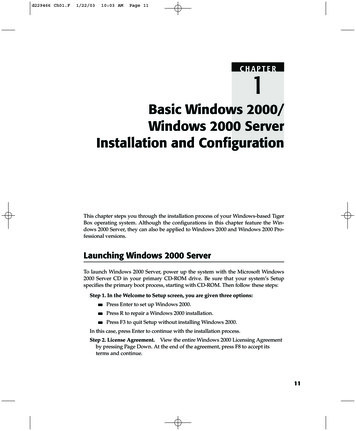
d229466 Ch01.F1/22/0310:03 AMPage 11CHAPTER1Basic Windows 2000/Windows 2000 ServerInstallation and ConfigurationThis chapter steps you through the installation process of your Windows-based TigerBox operating system. Although the configurations in this chapter feature the Windows 2000 Server, they can also be applied to Windows 2000 and Windows 2000 Professional versions.Launching Windows 2000 ServerTo launch Windows 2000 Server, power up the system with the Microsoft Windows2000 Server CD in your primary CD-ROM drive. Be sure that your system’s Setupspecifies the primary boot process, starting with CD-ROM. Then follow these steps:Step 1. In the Welcome to Setup screen, you are given three options: Press Enter to set up Windows 2000. Press R to repair a Windows 2000 installation. Press F3 to quit Setup without installing Windows 2000.In this case, press Enter to continue with the installation process.Step 2. License Agreement. View the entire Windows 2000 Licensing Agreementby pressing Page Down. At the end of the agreement, press F8 to accept itsterms and continue.11
d229466 Ch01.F121/22/0310:03 AMPage 12Chapter 1Step 3. Location Selection and Drive Format. Select an installation location forWindows. In this step, you may create/delete active hard drive partitions; afterwhich, select the partition to which you want to install the operating system,and press Enter. By pressing Enter, you may now choose to format the partitionby using the File Allocation Table (FAT) system or the NT File System (NTFS). Inthis case, select NTFS.FAT OR NTFS? THAT IS THE QUESTIONFAT is the least complicated type of Windows-supported file system. Because it beginswith very little overhead, it is most applicable to drives and/or partitions under 400 MB.It resides at the top of the fixed quantity of allocated storage space, or volume, on thehard disk. For security purposes, two copies of the FAT are maintained in case one copybecomes corrupt.The FAT system establishes a table that the operating system uses to locate files on adisk. Even if a file is fragmented into many sections—that is, scattered around the disk—the table makes it possible for the FAT to monitor and find all the sections.FAT formats are allocated in groups or clusters, the sizes of which are determined bythe correlating volume size. For example, when a file is created, an entry is made in thedirectory and the first cluster number—set by the system—containing data is recognized.This entry either indicates that this cluster is the last of the file or points to the nextcluster.It’s important to note that the FAT must be updated regularly; otherwise, it can lead todata loss. However, also note that each time the FAT is updated, the disk-read heads mustbe repositioned to the drive’s logical track zero. This is a time-consuming process. Note,too, that because there is typically no organization to the FAT directory structure, files aregiven the first open location on the drive. It’s important to be aware that for successfulbooting, the FAT and the root directory must be stored in a predetermined location.The FAT supports only read-only, hidden, system, and archive file attributes. A filenameor directory name may be up to eight characters long, be followed by a period (.), andthen have an extension of up to three characters. The FAT uses the traditional 8.3filenaming convention—that is, all filenames must be created with the ASCII character set.All FAT names must start with either a letter or a number; they may contain anycharacters except the following:Period (.)Double quotation marks (“”)Forward and backward slashes (/ \)Square brackets ([ ])Colon (:)Semicolon (;)Pipe symbol ( )Equals sign ( )Comma (,)(continues)
d229466 Ch01.F1/22/0310:03 AMPage 13Basic Windows 2000/Windows 2000 Server Installation and ConfigurationFAT OR NTFS? THAT IS THE QUESTION (Continued)FAT has two primary advantages: In the case of hard disk failures, a bootable DOS floppy can be used to access thepartition for problem troubleshooting. Under Windows, it is not possible to perform an undelete. However, if the file waslocated on a FAT partition, and the system is restarted under MS-DOS, the file canbe undeleted.FAT has the following two disadvantages: As the size of the volume increases, FAT performance decreases; therefore, the FATfile system is not recommended when one works with drives or partitions largerthan 400 MB. It is not possible to set security permissions on files located in FAT partitions. Also,FAT partitions are, under Windows, limited to a maximum size of 4 GB.The NTFS has features that improve manageability, including transaction logs and filesecurity that help resolve disk failures. Access control permissions can be set fordirectories and/or individual files. For large disk-space requirements, NTFS supportsspanning volumes, which make possible the distribution of files and directories acrossseveral physical disks. Because NTFS performance does not degrade, it is best used onvolumes of 400 MB or more.NTFS file and directory names may be up to 255 characters long, including extensionsseparated by a period (.). Although these names preserve whatever case the names aretyped in, they are not case-sensitive. NTFS names must start with either a letter or anumber; they may contain any characters except the following:Question mark (?)Double quotation marks (“”)Forward and backward slashes (/ \)Asterisk (*)Pipe symbol ( )Colon (:)The advantages of the NTFS are the following: Its recoverability functions mean that disk-repair utilities would never be required. It enables setting file and directory control permissions. Activity logging makes troubleshooting failures easier. It enables large disk-space management and long filename support (up to 255mixed-case characters).The disadvantages of the NTFS are the following: Because of the amount of space overhead, NTFS should not be used on volumessmaller than 400 MB.(continues)13
d229466 Ch01.F141/22/0310:03 AMPage 14Chapter 1FAT OR NTFS? THAT IS THE QUESTION (Continued) It does not have integrated file encryption. Therefore, it is possible to boot underMS-DOS or another operating system, and use a low-level disk-editing utility toview data stored on an NTFS volume. The NTFS overhead does not fit on a floppy disk; therefore, it is not possible toformat a floppy with the NTFS. Windows always uses FAT during the formattingprocedure.Permission control, whether on a FAT or an NTFS partition, is a simple process as long asyou keep in mind the limitations of each type of file system. Basically, NTFS supports bothlocal and remote user permissions on both local and shared files and/or folders, whereasFAT supports only network shares. For example, by setting control access to a shared folderon a FAT partition, all of its files and subfolders inherit the same permissions.Step 4. Setup will copy the installation files to the selected partition. WhenSetup is finished, press Enter to restart the system and continue with theinstallation.Step 5. Windows 2000 Setup Wizard. Windows 2000 Server Setup wizard willcomplete the installation process. Press Next to acknowledge. The wizard willdetect and install devices on the system.Step 6. Regional Settings. You can customize Windows 2000 Server for differentregions and settings. For local settings, click Customize and set the current local,time, date, and currency. Click OK to accept the changes. For keyboard settings,click Customize and select your keyboard properties. Click OK to accept the settings. Click Next when you are ready to continue with the installation.Step 7. Personalizing Windows 2000. Type your full name and the name of yourcompany or organization; then click Next.Step 8. Licensing Mode. Based on Microsoft’s definitions as they are extractedhere, choose either the per-seat or the per-server licensing type; then click Next.PER-SEAT LICENSING A per-seat license associates a Client Access License witha specific computer or “seat.” Client computers are allowed access to any Windows NTServer or Windows NT Server, Enterprise Edition on the network, as long as eachclient machine is licensed with the appropriate Client Access License. The per-seatmode is most economical in distributed computing environments where multipleservers within an organization provide services to clients, such as a company that usesWindows NT Server for file and print services.PER-SERVER LICENSING A per-server license associates a Client Access Licensewith a particular server. This alternative allows concurrent-use licensing: If customersdecide to use the server in per-server mode, they must have at least as many ClientAccess Licenses dedicated to that server to accommodate the maximum number ofclients that will connect to that server at any one point in time. The server assignsClient Access Licenses temporarily to client computers; there is no permanent Client
d229466 Ch01.F1/22/0310:03 AMPage 15Basic Windows 2000/Windows 2000 Server Installation and ConfigurationAccess License association with a specific client machine. If a network environment hasmultiple servers, then each server in per-server mode must have at least as many ClientAccess Licenses dedicated to it as the maximum number of clients that will connect toit at any one point in time. Under this option, the customer designates the number ofclient access licenses that apply to the server during setup. The per-server mode is mosteconomical in single-server, occasional-use, or specialty-use server solutions (withmultiple concurrent connections). Some examples include Remote Access Service solutions, CD-ROM servers, or the initial server of a planned larger deployment.Step 9. Server Name and Password. Enter a name for the computer and theadministrator password (up to 14 characters); then click Next.Step 10. Windows 2000 Components. To add or remove a component, click thecheckbox. A shaded box means that only part of the component will be installed.To see what’s included in a component, click Details. You may elect to install services such as DNS from the Components window; however, for our purposeshere we’ll accept the default settings for accessories, utilities, and services(including Internet International Server [IIS]) and then click Next to continue.Step 11. Date and Time. Verify the correct date, time, and time zone; click Nextto confirm and accept.Step 12. Networking Settings. The setup wizard will install the networkingcomponents. Choose whether to use typical (auto install of common services) orcustom settings (manually configure networking components). For now, selectTypical settings and click Next.Step 13. Workgroup or Computer Domain. Select to make this computer amember of a domain or workgroup. Click Next to continue.Step 14. Installing Components and Completing Setup. The setup wizard willinstall your component selections (this may take several minutes) and will alsoperform final tasks, such as registering components, saving settings, andremoving temporary files.Step 15. Click Finish to complete the setup wizard. Remove the CD-ROM; thenrestart the computer.Step 16. Logging in. After you restart the system, you’ll have to log in with theadministrative password configured during the setup process. For security, thepassword will display as asterisks as you type it in.Basic Windows 2000/Windows 2000 ServerConfigurationThanks to updated management utilities and a slightly enhanced user interface, Windows 2000 Server can be easily configured by using new and improved configurationwizards. If this is your first boot-up of the new operating system, you’ll see the Configure Your Server utility shown in Figure 1.1, which will facilitate some of the basicconfiguration techniques. From the flexible interface at the left menu, simply choosethe services that you want to run on this server. We’ll start with Active Directory.15
d229466 Ch01.F161/22/0310:03 AMPage 16Chapter 1Figure 1.1 Windows 2000 Configure Your Server.N OT E If this is not the first boot-up of the new operating system, and you’veelected not to be greeted by the configuration utility, you can retrieve it fromStart/Programs/Administrative Tools/Configure Your Server. It’s a good idea todo that now so you can follow along here.Active DirectoryActive Directory stores information about network objects, such as user accounts andshared printers, and provides access to that information. Security is integrated withActive Directory through logon authentication and access control to objects in thedirectory. With a single network logon, administrators can manage directory data andorganization throughout their network, and authorized network users can accessresources anywhere on the network. Policy-based administration eases the management of even the most complex network.To make this server a new domain controller, you must install Active Directory. Adomain controller in a Windows 2000 Server domain is a computer running Windows2000 Server that manages user access to a network, which includes logons, authentication, and access to the directory and shared resources. The Active Directory Installationwizard configures this server as a domain controller and sets up the DNS if it is notalready available on the network. DNS is a system for naming computers and networkservices; these names are organized into a hierarchy of domains. DNS is used in
d229466 Ch01.F1/22/0310:03 AMPage 17Basic Windows 2000/Windows 2000 Server Installation and ConfigurationTCP/IP networks, such as the Internet, to locate computers and services through userfriendly names. When a user enters a DNS name in an application, DNS services canresolve the name to other information associated with the name, such as an IP address.You can use this wizard for the following scenarios:No Existing Domain Controller. Sets up your server as the first domain controlleron the network.Domain Controller Already on Network. Sets up your server as an additionaldomain controller, a new child domain, a new domain tree, or a new forest. These entities are defined in the following paragraphs.An additional domain controller is a Windows 2000 domain controller installed intoan existing domain. All domain controllers participate equally in Active Directoryreplication, but by default the first domain controller installed into a domain isassigned ownership of at least three floating single-master operations. Additionaldomain controllers installed into an existing domain do not assume ownership of theseoperations by default.A child domain is a domain located in the namespace tree directly beneath anotherdomain name (the parent domain). For example, example.microsoft.com would be achild domain of the parent domain, microsoft.com. A child domain is also known as asubdomain.The domain tree is the hierarchical structure that is used to index domain names.Domain trees are similar in purpose and concept to directory trees, which are used bycomputer filing systems for disk storage. For example, when numerous files are storedon disk, directories can be used to organize the files into logical collections. When adomain tree has one or more branches, each branch can organize domain names usedin the namespace into logical collections.A forest is a set of one or more trees that do not form a contiguous namespace. Alltrees in a forest share a common schema, configuration, and global catalog. The treesmust trust one another through transitive, bidirectional trust relationships. Unlike atree, a forest does not need a distinct name. A forest exists as a set of cross-referenceobjects and trust relationships known to the member trees. Trees in a forest form a hierarchy for the purpose of trust.N OT E To host Active Directory, you need a partition formatted with theversion of NTFS used in Windows 2000.Creating a New DomainTo create a new domain, we’ll install Active Directory using the Active DirectoryInstallation wizard, which installs and configures components that provide ActiveDirectory service to network users and computers. In the menu listing of the configuration utility shown in Figure 1.1, click the Active Directory icon to reach the screenshown in Figure 1.2. At that screen, click Next; then click Start the Active DirectoryInstallation wizard shown in Figure 1.3. Click Next to continue.17
d229466 Ch01.F181/22/0310:03 AMPage 18Chapter 1Figure 1.2 Active Directory wizard front end.Recall that a domain controller is a computer running Windows 2000 Server, whichstores directory data and manages user domain interactions, including user logonprocesses, authentication, and directory searches. Windows 2000 Server domain controllers provide an extension of the capabilities and features provided by Windows NTServer 4.0 domain controllers. A domain can have one or more domain controllers. Forhigh availability and fault tolerance, a small organization using a single local area network (LAN) might need only one domain with two domain controllers, whereas alarge company with many network locations would need one or more domain controllers in each location.A domain controller in Windows 2000 is also configured using the Active DirectoryInstallation wizard. Active Directory supports multimaster replication of directory databetween all domain controllers in the domain. Multimaster replication is an evolutionof the primary and backup domain controller (BDC) model used in Windows NTServer 4.0, in which only one server, the primary domain controller (PDC), had a readand-write copy of the directory. Windows 2000 Server multimaster replication synchronizes directory data on each domain controller, ensuring consistency ofinformation over time. Changes in the PDC can be impractical to perform in a multimaster fashion; therefore, only one domain controller, the operations master, acceptsrequests for such changes. In any Active Directory forest, there are at least five different operations’ master roles that are assigned to one or more domain controllers.Figure 1.3 Starting the Active Directory wizard.
d229466 Ch01.F1/22/0310:03 AMPage 19Basic Windows 2000/Windows 2000 Server Installation and ConfigurationLet’s create a new domain in Active Directory:Step 1. Once Active Directory is installed, from the Configure Your Server utility,click Active Directory; from the Active Directory window, choose the domaincontroller type to create a new domain by selecting Domain controller for a newdomain; then click Next.Step 2. In the next window, choose to create a new domain tree by selecting Create a new domain tree; then click Next.Step 3. Next, choose to create a new forest of domain trees by selecting Create anew forest of domain trees; then click Next.Step 4. Specify a name for the new domain by typing the full DNS name (see Figure 1.4); then click Next.Step 5. Specify the Network Basic Input/Output System (NetBIOS) name for thenew domain. Earlier versions of Windows will use this to identify the newdomain. Click Next.Step 6. In the next window, specify in the fields provided the locations of theActive Directory database and log, either by accepting the default locations orby clicking Browse to find new ones. Click Next to continue.Step 7. In the next window, you must specify the folder to be shared as the system volume. The Sysvol folder stores the server’s copy of the domain’s publicfiles. Either accept the default location or click Browse to find a new one. ClickNext to continue.Step 8. DNS must be installed. If DNS is not available; the wizard will configureit for the new domain. Select Yes to install DNS, as shown in Figure 1.5; thenclick Next.Figure 1.4 Specifying a new domain.19
d229466 Ch01.F201/22/0310:03 AMPage 20Chapter 1Figure 1.5 Installing DNS for the new domain.Step 9. In the next window, you must select the default permissions for user andgroup objects. You do this by selecting Permissions compatible with preWindows 2000 servers over Permissions compatible only with Windows 2000servers to be compatible with our NT server programs. Click Next to continue.Step 10. In Figure 1.6, specify an administrator password to use when startingthe computer in restore mode; then click Next.Step 11. In the next window, review and confirm the previously selectedoptions; then click Next. The wizard will configure Active Directory, as shownin Figure 1.7.Figure 1.6 Specifying an administrator password for directory restore mode.
d229466 Ch01.F1/22/0310:03 AMPage 21Basic Windows 2000/Windows 2000 Server Installation and ConfigurationFigure 1.7 Configuring the Active Directory installation.Step 12. In the next window, click Finish to close the wizard; then click RestartNow to reboot the server.Now you’re ready to learn how to manage Active Directory.Managing Active DirectoryFrom Start/Programs/Administrative Tools/Configure Your Server, start the wizardagain by clicking Active Directory in the menu listing on the left (refer back to Figure1.1). Click Manage user accounts and group settings, shown in Figure 1.8, to start theActive Directory admin utility, shown in Figure 1.9. This utility is used to managedomain controllers, user accounts, computer accounts, groups, organizational units,and published resources. We’ll begin our investigation of these processes by learninghow to manage domain controllers.Figure 1.8 Starting the Active Directory admin utility.21
d229466 Ch01.F221/22/0310:03 AMPage 22Chapter 1Figure 1.9 Active Directory admin utility.Managing Domain ControllersTo find a domain controller by using the Active Directory admin utility, follow thesesteps:Step 1.In the Console Tree, right-click any node or folder; then click Find.Step 2. Under Find, click Computers; in Role, click Domain Controller (seeFigure 1.10). If you know which folder contains the domain controller, click thefolder in the In field; to search the entire directory, click Entire Directory.Step 3.Click the Find Now button.Figure 1.10 Searching for a domain controller.
d229466 Ch01.F1/22/0310:03 AMPage 23Basic Windows 2000/Windows 2000 Server Installation and ConfigurationYou can delegate administrative control of a particular domain or organizationalunit to individual administrators who are responsible for only that domain or organizational unit. To delegate control by using the Active Directory admin utility, followthese steps:Step 1. In the Console Tree, double-click the domain node to expand the domaintree.Step 2. Right-click the folder that you want another user or group to control; thenclick Delegate Control to start the Delegation of Control wizard, whose welcomepage is shown in Figure 1.11. You can grant users permission to manage users,groups, computers, organizational units, and other objects stored in ActiveDirectory. Click Next to begin the wizard.Step 3. Click Add and/or select one or more users or groups to which you wantto delegate control (see Figure 1.12); then click Next.Figure 1.11 Delegation of Control wizard.23
d229466 Ch01.F241/22/0310:03 AMPage 24Chapter 1Figure 1.12 Selecting to whom to delegate control.Step 4. Select from the common-task list shown in Figure 1.13 or select Create acustom task to delegate to customize your own. When you’re finished, clickNext and then Finish to complete the control delegation.Figure 1.13 Selecting control from the common tasks list.
d229466 Ch01.F1/22/0310:03 AMPage 25Basic Windows 2000/Windows 2000 Server Installation and ConfigurationBy default, domain controllers are installed in the Domain Controllers folder. Certain properties (e.g., Name, Role, and Operating System) are automatically assignedwhen the computer is added to the domain or whenever it is started, and these properties cannot be modified by the administrator. Other domain controller properties canbe modified by using the Active Directory admin utility. To do so, follow these steps:Step 1.In the Console Tree, double-click the domain node.Step 2. Click the folder containing the domain controller. In the details panel,right-click the domain controller that you want to modify; then click Properties.As you can see in Figure 1.14, the following property tabs will be displayed: General Operating System Member Of Location Managed ByStep 3.Click the property tab that contains the property you want to modify.Figure 1.14 Modifying domain controller properties.25
d229466 Ch01.F261/22/0310:03 AMPage 26Chapter 1Managing User and Computer AccountsMicrosoft defines Active Directory user and computer accounts as representing physical entities such as a computer or a person. Accounts provide security credentials forusers or computers, enabling those users and computers to log on to the network andaccess domain resources. An account is used to: Authenticate the identity of the user or computer Authorize access to domain resources Audit actions performed using the user or computer accountAn Active Directory user account enables a user to log on to computers and domainswith an identity that can be authenticated and authorized for access to domainresources. Each user who logs on to the network should have his or her own uniqueuser account and password. User accounts can also be used as service accounts forsome applications.By default, Windows 2000 provides predefined user accounts, known as Administrator and Guest accounts, that you can use for logging on to a computer that is runningWindows 2000. Predefined accounts are designed to let users log on to a local computer and access resources from that computer. As such, these accounts are designedprimarily for initial logon and configuration of a local computer. Each predefinedaccount has a different combination of rights and permissions. As you might assume,the Administrator account has the most extensive rights and permissions; the Guestaccount, the least.Though convenient, predefined accounts pose a significant problem: If their rightsand permissions are not modified or disabled by a network administrator, they couldbe used by any user or service to log on to a network by using the Administrator orGuest identity. To implement the security of user authentication and authorization,you must create an individual user account for each user who will participate, byway of the Active Directory Users and Computers utility, on your network. Each useraccount (including the Administrator and Guest accounts) can then be added to Windows 2000 groups to control the rights and permissions assigned to the account.Using accounts and groups that are appropriate for your network ensures that userslogging on to a network can be identified and can access only the permittedresources.Each Active Directory user account has a number of security-related options thatdetermine how someone logging on with that particular user account is authenticatedon the network. Several of these options are specific to passwords: User must change password at next logon. User cannot change password. Password never expires. Password is saved as encrypted clear text.These options are self-explanatory except for the last one. If you have users logging onto your Windows 2000 network from Apple computers, you should select this optionfor those user accounts.
d229466 Ch01.F1/22/0310:03 AMPage 27Basic Windows 2000/Windows 2000 Server Installation and ConfigurationUser and computer accounts are added, disabled, reset, and deleted with the ActiveDirectory Users and Computers utility. Note the following in regard to these actions: If you create a new user account with the same name as that of a previouslydeleted user account, the new account will not automatically assume the permissions and memberships of the deleted account, because the securitydescriptor for each account is unique. To duplicate a deleted user account, all permissions and memberships must bemanually re-created.To add a user account by using the Active Directory admin utility, follow these steps:Step 1. In the Console Tree, double-click the domain node. In the details panel,right-click the organizational unit where you want to add the user, point toNew, and click User (see Figure 1.15). In First name, type the user’s first name. In Initials, type the user’s initials. In Last name, type the user’s last name. Modify Full name as desired. In User logon name, type the name with which the user will log on, andfrom the drop-down list, click the user principal name (UPN) suffix thatmust be appended to the user logon name (following the @ symbol). If theuser will use a different name with which to log on from computers runningWindows NT, Windows XP (which adds fast user switching), Windows Millennium, Windows 98, or Windows 95, change the user logon name as itappears in User logon name (pre-Windows 2000) to the different name. In Password and Confirm password, type the user’s password. Select the appropriate password options.Figure 1.15 Adding a user account.27
d229466 Ch01.F281/22/0310:03 AMPage 28Chapter 1Figure 1.16 Editing a user account.Step 2. After creating the user account, right-click the new user and click Properties to edit the user account and/or enter additional user account information,as shown in Figure 1.16. You can edit general user information, group memberships, dial-in access, terminal server access, and session settings.Rather than deleting an unused user account, you can disable it as a security measure to prevent a particular user from logging on. Disabled accounts can also serve auseful purpose. Disabled user accounts with common group memberships can be usedas account templates to simplify user account creation. Therefore, instead of manuallycreating the exact same type of account for, say, 20 new users, an account template canbe copied, renamed, and activated for each. Doing so could save a great deal of administrative time.To disable/enable a user account by using the Active Directory admin utility, followthese steps:Step 1. In the Console Tree, double-click the domain no
Launching Windows 2000 Server To launch Windows 2000 Server, power up the system with the Microsoft Windows 2000 Server CD in your primary CD-ROM drive. Be sure that your system's Setup specifies the primary boot process, starting with CD-ROM. Then follow these steps: Step 1. In the Welcome to Setup screen, you are given three options: Press .