Transcription
Coupa Supplier PortalTraining GuideI N S T R U C T I O N A L G U I D E F O R P O R TA L R E G I S T R AT I O N , P R O F I L EC O M P L E T I O N A N D M A I N T E N A N C E , P U R C H A S E O R D E RS ,I N V O I C I N G , A N D PAY M E N T S I N C O U PA
Table of ContentsWhat is Coupa?RegistrationCustomer Profile Page Payment Method Set Up (ACH or V-Card)Coupa Supplier Portal Home PageAdmin RoleOrdersCreating an Invoice (PO)Creating an Invoice (Non-PO)Disputed InvoicesPaymentsContacts
What is Coupa? Coupa is Terracon’s procure-to-pay system for purchase orders, invoice processing, and payments. Coupa is a no-charge, self-service portal available to all Terracon suppliers. Suppliers can register for the Coupa Supplier Portal and submit invoices directly through the portal,eliminating lost invoices. Suppliers can view, manage, and acknowledge purchase orders through the portal. Suppliers can take advantage of (2) electronic payment options – ACH (direct deposit) or V-Card (securevirtual credit card). Suppliers can view payments made through the portal, including the payment remittance. Coupa is an online portal and can be accessed through a laptop or even with the mobile friendly versionon a smartphone.
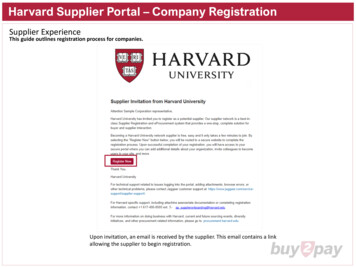
Registration Your Coupa Supplier Portal invitation will be in anemail including a brief introduction and a link toCoupa. Click Join and Respond. The invitation expires after 30 days, so be sure tocomplete registration during that timeframe. If you are not the intended recipient of this invite,please still click the button. There is a place toforward the invite on to someone else.
Registration cont’d Complete profile information. The Email and Password entered will be used to log into the portal. If the invite should be sent to someone else in yourcompany, enter their email in Forward Your Invitationsection. Click Submit.
Customer Profile Page The Coupa home page provides a summaryof your company’s engagement with Coupa. Terracon Consultants Inc should be listed as alink in Latest Customers section. Click thatlink.
Customer Profile Page cont’dSupplier Name and Primary Address All required fields are indicated by a red asterisk * Enter Supplier Name and DBA name as shown onyour W9 form. Enter Primary Address. Note: Address Nameshould not be included as part of the address. Thisfield is for reference only (i.e. Corporate Office).
Customer Profile Page cont’dW9, Diversity Classification, Minority Ownership, Type of Business, On-Site Services Upload signed copy of W9 form (W-8BEN form forCanadian-based company). Enter Federal Tax ID number or Social SecurityNumber, as shown on W9 form. Numbers only, no dashes. Business diversity classification refers to certifiedbusinesses only. Current certification document(s) required. Minority Ownership. Provide minority type and expiration date, if applicable. Select Type of Business closest to goods and/orservices provided to Terracon. You can multi-select. If your company provides on-site services at Terraconproject sites or Terracon office locations, answer‘yes’. If the answer to this question is no, skip to here.
Customer Profile Page cont’dSafety Information Respond to OSHA citation and fatality questions. Provide 3 years of EMR (Experience Modification Rate)and upload supporting document for eachcorresponding year (usually issued by your insurancecompany). Provide 3 years of TRIR (Total Recordable IncidentRate) and OSHA logs for each corresponding year. If your company is exempt from recording this safetydata (i.e. less than 10 employees), emailsupplierenablement@terracon.com and providejustification on why your company may be exempt. Wewill reach out with next steps. **Don’t forget to Saveyour profile at the bottom of the page**
Customer Profile Page cont’dCertificate of Insurance Upload current certificate of insurance document. Multiple certificates can be uploaded. Enter effective and expiration dates. Terracon Consultants must be listed as additionalinsured.
Customer Profile Page cont’dSubcontractor Agreement Upload your signed agreement with Terracon. If your company already has a completed agreement,upload that one. If your company does not already have an agreementwith Terracon, a sample agreement is provided. Complete it electronically and upload or print it,complete signature block, and upload scanned pdf copy. Be sure the uploaded agreement is signed and dated. If services are performed at a Terracon officelocation, there may be a more suitable agreementtemplate to use. Emailsupplierenablement@terracon.com to request moreinformation.
Customer Profile Page cont’dPayment Information Click Add Remit-To button to add a new remit-toaddress. See next slide for more info. Coupa offers 2 electronic payment options: V-Card (Requires you to be able to process credit cardswith no fee) ACH (Direct Deposit) We discourage paper checks, but can accommodate, ifnecessary. Choose ACH, but don’t enter banking info toreceive payment via check. Adding a Remit-To Address isrequired for this form. Click the Grey Add Remit-To Button. Note that payment terms referenced in anagreement will supersede terms associated tothe Payment Type chosen. For example, if youchoose ACH-Net 45, but your agreementreferences paid-when-paid, your paymentmethod will be ACH, but payment won’t bemade until Terracon’s client has releasedpayment.
Customer Profile Page cont’dCreate New Remit-To Address and Legal Entity Click Create New button to create a new remit-toaddress.If you already have remit-to addresses created,choose the correct one. If you create a new remit-to address, you will needto provide information about your legal entity andcountry of origin.Click Continue.
Customer Profile Page cont’dCreate New Remit-To Address and Legal Entity If you use Coupa Supplier Portal with other customers,choose which customers you want to share this remit-toaddress. Enter address you invoice from. Indicate if you use this address as the remit-to address andthe ship-from. If you have different addresses for remit-to and ship-from,uncheck the boxes to allow for additional addresses. Disregard Tax ID and Invoice From Code as they are notrequired for this setup. Click Save & Continue
Customer Profile Page cont’dPayment Type Options Use dropdown and choose preferred Payment Type. For ACH (Direct Deposit), select Bank Account. For V-Card (Virtual Card), select Virtual Card. For Address (Paper Check), select Address. Click Save & Continue.
Customer Profile Page cont’dPayment Type – Bank Account This payment type is for a standard bank-to-bank transfer or directdeposit. Select Bank Currency as USD from dropdown. USD is first choice. Enter Bank Name and Beneficiary Name. Enter Routing Number and Account Number. IBAN and SWIFT are in reference to International Bank Accounts. Ifyou do not have any of this information, skip. Select if the account is Business or Personal. Enter Bank Address. If it is a large, national bank, such as Bank ofAmerica, enter address of the branch closest to you. Not shown here but at the bottom of this page is the Remit-toaddress for this bank account. If you unchecked using the invoicefrom address as a remit-to address, enter that address here. Click Save & Continue.
Customer Profile Page cont’dPayment Type – Virtual Card Virtual Card is reliant on your ability to processcredit cards. If your company does not have thatability, select Bank Account from the dropdownand enter banking information for ACH. No credit card fees can be applied to this paymenttype. Click Save & Continue.
Customer Profile Page cont’dRemit-To Address Continued SetupReview screen for Remit-To Address.Click Next.Add Ship From address only if it is different fromInvoice From address.Click Done.
Customer Profile Page cont’dRemit-To Address Setup Complete Click Add now to complete the Remit-To Addressset up process. This step is required to complete Customer Profile.
Customer Profile Page cont’dFinalize Profile and Submit for Approval Review acknowledgement of terms before completingprofile. Enter Signature and Title of who is completing the onlineCoupa profile. Check box to confirm OSHA 300 and 300A logs areuploaded, if required. Review form to confirm all required fields(*) are completed. Click Submit for Approval. If Coupa provides errors, correct and Submit for Approvalagain. Use Comment section, if desired. Enter comments and clickAdd Comment. Note – comments are only reviewed bySupplier Enablement team.
Customer Profile Page cont’dWhat Now? After your profile is submitted for approval, Terracon’s Supplier Enablement team will review. The profile will be approved if all required information is provided accurately. The profile will be rejected if information is missing or incomplete. Rejected profiles will include comments with what needs to be updated or completed. Correct your profile andSubmit for Approval for review. If your profile is approved, you can now start doing business with Terracon and you will have access tousing the rest of the portal.
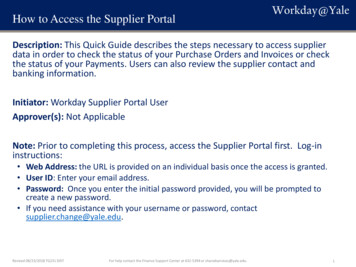
Coupa Supplier Portal Home PageMaintaining Customer Profile Info You should continue to maintain your CustomerProfile information after it’s been approved byTerracon. From the home page, scroll to the bottom of thepage and click Update Info. Update any informationthat needs refreshed (i.e. certificate of insurance,change in diversity classification, change in primaryaddress, etc.). Enter a comment with what wasupdated. Click Submit for Approval. You can also access the profile by going to Profile inthe Main Menu and click Your Customer Profile link.
AdminAdding Users and Assigning Permissions Go to Admin in the Main Menu. The Admin is able to invite other users in thecompany. These additional users can be assignedpermissions based on what access they needthroughout the portal. You can also manage Legal Entities, Remit-ToAddresses, and also merge two Coupa Portals intoone, if the need arises.
OrdersViewing and Managing Purchase Orders Go to Orders in Main Menu to view and managepurchase orders issued by Terracon. If you arelinked with multiple companies in your portal, makesure to select the correct customer to view theirPO’s. To view a purchase order, click on the PO link. Thiswill provide the PO details. To directly invoice against a PO (shortcut), click onthe Gold Coins under the Actions column. To directly create a credit note against a PO(shortcut), click on the Red Coins under the Actionscolumn.
Orders cont’dAcknowledging PO’s and Creating Invoices When clicking the PO# link from the Orders list, you’llget an electronic view of the purchase order. You canalso print the PO document by clicking Print View. After reviewing the PO, if the information is accurate,check the Acknowledged box. This step notifies therequester that you’ve received and acknowledge theorder. All PO details should be reviewed to ensure accuracy.Item description, price, ship to address, etc. When an order has shipped, you are able to addshipment tracking information. This step notifies therequester of any shipping information provided. When it’s time to invoice for the order, you can useCreate Invoice button from this page.
Creating an InvoicePO Invoice When creating an invoice directly from a PO, youwill need to use the dropdown to choose LegalEntity and Remit-To Address. This information wasprovided when your Customer Profile was created. If you have multiple Remit-To Addresses, be sure toselect the address that has the correct paymentmethod. Select your addresses. Click Save.
Creating an Invoice cont’dPO Invoice Creating an invoice from a purchase orderautomatically defaults most of the fields on theinvoice, such as Ship To address, Bill To Address,Requester, Line Description, etc. Enter Invoice Number and Invoice Date. Upload your system generated invoice document, ifdesired. You can also upload supporting documents,such as timesheets, receipts, reports, etc.
Creating an Invoice cont’dPO Invoice When using a PO to create an invoice, the Lines including Description,Quantity, and Price will be pre-populated from the PO. The invoice should mirror the PO format. If a PO has multiple lines, do notconsolidate the invoice into fewer lines. Update the price and/or quantity needed for the invoice being created. When lines are complete, go to Totals & Taxes. Enter Shipping/Handling/Tax for your invoice, as needed. Click Calculate to confirm invoice total. If invoice is ready, click Submit. You can click Save as Draft to come back andcomplete. Once you click Submit, the invoice can’t be modified, so be sure theinformation is accurate. If the invoice was submitted in error, reach out to yourTerracon contact to dispute the invoice in Coupa. This step will allow you toedit and re-submit.
Creating an InvoiceNon-PO Invoice Go to Invoices in Main Menu to view invoices forTerracon. If you are linked with multiple companiesin your portal, make sure to select the correctcustomer to view their invoices. If you do not have a PO, you can create a non-POinvoice. Click Create Blank Invoice.
Creating an Invoice cont’dNon-PO Invoice Invoicing in Coupa without a PO has more manualdata entry involved than invoicing with a PO. Supplier information will pre-populate from yourprofile. Enter required fields: Legal Entity and Addresses. Invoice Number and Invoice Date. Image Scan (Pdf document of your paper invoice or othersupporting documentation). Bill-To Address (Corporate Office). Ship-To Address (Terracon Office Location. goods/servicesprovided. Use search feature). Requestor Name and Email Address.
Creating an Invoice cont’dNon-PO Invoice Enter invoice lines. Qty (Quantity): Goods/services per a unit of measurement. Amt (Amount): Billing Services at lump sum values. Combine like items together, as needed. For example,multiple goods can be combined into one line andlabor can be combined into a separate line. Theorder/project details should be uploaded as supportingdocuments for review by Terracon. Enter shipping/handling/tax in the Totals & Taxessection. Click Calculate to confirm invoice totals. Click Submit.
Disputed InvoiceResolving Disputed Invoices Go to Invoices in Main Menu to view invoices thathave been disputed by Terracon. A Dispute Reason is referenced for each disputedinvoice. Click the Resolve action icon. Click Void if the invoice will be cancelled and recreated. Click Correct Invoice if the invoice can be corrected,make corrections, and re-submit.
Payments Go to Payments in Main Menu to viewpayments made through Coupa. You will only be able to view ACH and V-Cardpayments, not checks.
Contacts For questions about Coupa Supplier Portal, including registration requirements, documents,Safety data, etc, reach out to supplierenablement@terracon.com. For general questions about invoices, payments, or to submit an account statement, reach outto corp-ap@terracon.com.
Coupa Supplier Portal Training Guide INSTRUCTIONAL GUIDE FOR PORTAL REGISTRATION, PROFILE COMPLETION AND MAINTENANCE, PURCHASE ORDERS, INVOICING, AND PAYMENTS IN COUPA. . made until Terracon's client has released payment. Customer Profile Page cont'd Create New Remit-To Address and Legal Entity Click Create New button to create a new .

