Transcription
DESKTOPInternal Drive Installation Guide
Seagate Desktop Installation Guide 2013 Seagate Technology LLC. All rights reserved. Seagate, Seagate Technology, the Wavelogo, and FreeAgent are trademarks or registered trademarks of Seagate Technology LLC, or one ofits affiliates. All other trademarks or registered trademarks are the property of their respectiveowners. When referring to hard drive capacity, one gigabyte, or GB, equals one billion bytes and oneterabyte, or TB, equals one thousand billion bytes when referring to hard drive capacity. In addition,some of the listed capacity is used for formatting and other functions, and thus will not be availablefor data storage. Quantitative usage examples for various applications are for illustrative purposes.Actual quantities will vary based on various factors including file size, file format, features, andapplication software. Seagate reserves the right to change, without notice, product offerings orspecifications.Seagate Technology LLC10200 S. De Anza BoulevardCupertino, CA 95014 U.S.A
Install the drive in your computerInstall the drive in your computerBefore completing the procedures in this guide, install your new drive in your computer usingthe instructions in the printed Quick Start Guide.Make sure your computer detects your drive at start upWith the new drive installed, start your computer. If your new drive connects directly to yourmotherboard and is not automatically detected at start up, you may need to run the SystemSetup (BIOS) program to enable the SATA ports. Entering setup is generally achieved bypressing DEL, ESC, or the F2 key during startup.Refer to the documentation supplied with your system or motherboard to enable the SATAports in the system BIOS.If your new drive connects to an add-in SATA card, there is no need to enter the system BIOSto enable SATA disk detection. The add-in card will automatically detect the drive at start up.SATA host driversAll SATA hosts support 48-bit BIOS and require drivers that will allow the hard drive to beseen by the OS. During the installation, your OS will request mass storage drivers.The drivers can usually be found on a CD or web site of the system, motherboard, or add-inSATA host manufacturer. Be sure to have the latest drivers available for your OS during theinstallation process.DiscWizardDiscWizard is not compatible with Macintosh systems.IMPORTANT! This high capacity drive may require a special device driver for Windows toaccess disk capacity above 2TB. Visit http://www.seagate.com/beyond-2TB for completeinstallation instructions. The DiscWizard software has device drivers that allow you tocreate a second partition and use the capacity beyond 2TB.Always back up critical data before making changes.Choose an installation option Install your new drive as the only drive in your Windows system.If your computer does not have a working hard drive, or this is a new system build, go tothe single drive installation instructions – page 4. Install your new drive as additional storage in your Windows system – page 4. Clone your old Windows boot drive to the new drive – page 5. Install your new drive as additional storage in your Mac – page 7.Seagate Desktop Installation Guide3
Single drive installation (Windows)Single drive installation (Windows)Before you start: DiscWizard is not needed for this operation. The Windows XP operatingsystem requires SATA host drivers for embedded motherboards and add-in SATA hostadapter cards to be loaded from a floppy (diskette) drive. The SATA drivers are usuallycontained on the CD that came with your motherboard or add-in SATA host adapter. Pleaseextract the drivers to a diskette before you start the installation. Windows Vista will allowSATA host drivers to be installed directly from a CD.1. Boot your system to the Windows 8/7/Vista or XP CD. If you’re having trouble booting to theWindows CD, you may need to change the boot sequence in the system BIOS.2. When prompted by Windows to install a third-party SCSI or RAID driver, press the F6 key,then the S key when prompted, to specify additional devices.3. Insert the SATA driver diskette or CD and press Enter.4. Follow the on-screen instructions to finish installing Windows.Additional storage installation (Windows)Note:These instructions assume that you have one existing SATA drive, which you will continue touse as the boot drive, and that you are adding your new Seagate SATA drive to your PC foradditional storage and performance.1. Boot into Windows 8/7/Vista or XP.2. Install the DiscWizard software.Seagate Desktop Installation Guide4
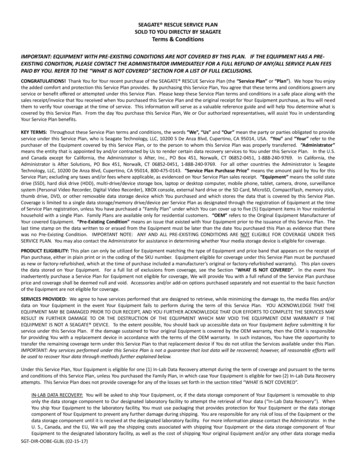
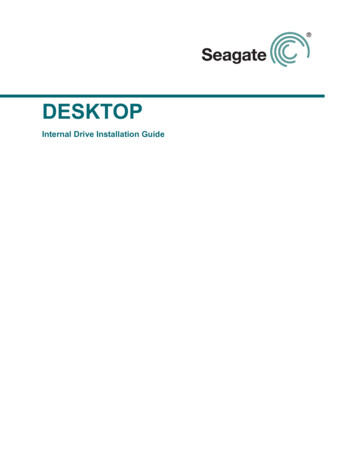
Clone your Windows boot drive to your new drive3. Choose the Add New Disc option to format the drive.Note:Formatting can also be completed by using the Windows Disk Management Utility in theControl Panel. For more information, see the support documentation on the utility CD.Clone your Windows boot drive to your new drive1. Boot into Windows 8/7/Vista or XP.2. Install the DiscWizard software.3. Choose the Clone Disc option and select next.Seagate Desktop Installation Guide5
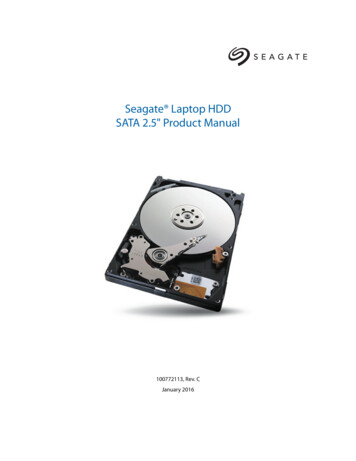
Clone your Windows boot drive to your new drive4. Click Automatic (default) and choose Next.5. Highlight your source drive and click Next.6. Choose your destination and select Next.7. Review the layout and select Next.8. Proceed with reboot.Upon reboot, the clone procedure starts copying your data. Follow the on-screen instructionsand shut down your system after the copy.Windows Vista users need to be ready with the Vista OS disk for security authentication.IMPORTANT: After your system shuts down, physically disconnect the power and datacables from your source boot drive and power the system back on. Upon restart, your systemwill boot to your new replacement drive.Make your new drive the startup driveNote:The system will try to default boot to your original boot drive after cloning. You may need tochange the boot sequence in your system BIOS if you plan on re-connecting your old driveafter cloning.1. Let your cloned drive boot into Windows and make sure all of your files have copied properly.2. Restart your computer and enter the System Setup BIOS by pressing the ESC, DEL, or F2key during startup.3. In the system setup, change the boot sequence to boot from your new SATA drive. If youhave an add-in SATA card, the boot priority may need to change to boot SCSI or externalfirst. You may need to refer to your system documentation.Seagate Desktop Installation Guide6
Additional storage installation (Mac)Additional storage installation (Mac)Note:These instructions assume that you have one existing SATA drive, which you will continue touse as the boot drive, and that you are adding your new Seagate drive to your Mac foradditional storage and performance.If you want to image your old drive to your new Seagate drive and make it bootable, review theApple Disk Utility help files or visit the Apple support site.1. Mount the drive as described in your Mac product manual. Mounting screws and cablesshould be supplied internally on your Mac.2. Boot into the Apple desktop.3. The drive will be auto-detected by the system, and should display a message stating the diskyou inserted is not readable by the computer. Click Initialize to open the Apple Disk Utilitywindow.4. Select your new volume and click Partition.5. Under Volume Scheme, click the drop down menu and select a Partition option.6. Name your volume and make sure the default format of Mac OS Extended (journaled) isdisplayed, then click Partition.7. The partition warning will display. Verify your selection and click Partition to complete theformat.8. After the format is complete, the volume will mount on your desktop and be ready forimmediate storage.Getting HelpSeagate continually updates the information on our website. Please visithttp://www.seagate.com/support for the latest tutorials, FAQs, and troubleshooting articles.Before contacting Seagate Support, obtain the serial number and model number from yourdrive. These numbers can be used to get help from Seagate support, register your drive andlook up information on the Seagate web site.From the Seagate web site, you can obtain the latest comprehensive support information,such as: Knowledge Base: Troubleshooting information, FAQ's, and technical documentation. Software Downloads: Installation software, utilities, and diagnostics. Product information: Current and legacy Seagate products. Warranty Services: Drive returns (RMA), warranty status, and limited warranty statement.Seagate Desktop Installation Guide7
Getting Help Product Support: Installation assistance, specifications, jumper settings, installationguides, and product manuals.Seagate Desktop Installation Guide8
Clone your Windows boot drive to your new drive Seagate Desktop Installation Guide 6 4. Click Automatic (default) and choose Next. 5. Highlight your source drive and click Next.