Transcription
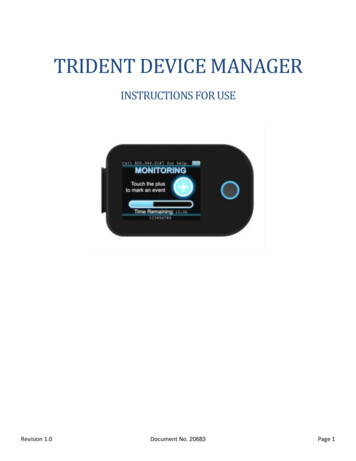
TRIDENT DEVICE MANAGERINSTRUCTIONS FOR USERevision 1.0Document No. 20683Page 1
ContentsPurpose . 3Installation . 3Trident Device Manager Overview . 5Device Management Page . 6Settings Editor Page . 9BitRhythm Page . 13Feedback Page . 13Preferences Page . 14Setting Descriptions . 18Troubleshooting . 25Revision 1.0Document No. 20683Page 2
PurposeThis document details the use of the Trident Device Manager (TDM) application. This software facilitates all aspects ofdevice data management for Trident cardiac monitors, including saving device data, updating device settings, andediting settings file.The Trident Devices Manager supports all Trident devices, including the Trident Pro series of devices and the TridentNano series of devices.InstallationThe Trident Device Manager can be downloaded by going to tdm.tzmedical.com and clicking the “Download WindowsInstaller” button.tdm.tzmedical.comClick and run the Trident-DeviceManager-Setup.exe file that wasdownloaded to begin installation.Revision 1.0Document No. 20683Page 3
On the first screen that you see, you will need to click“More info”This allows you to see the “Run anyway” button which youneed to click to continue.You will then see the Trident Device Manager check forupdates before starting.Every time the TDM is restarted, it is automaticallyupdated to the latest version.Revision 1.0Document No. 20683Page 4
Trident Device Manager OverviewThe main functionality of the Trident Device Manager can be accessed with the two buttons in the top left corner of theTDM window.The first window is the Device Management Page,which allows you to save and export data on devicesand save and edit device settings.The second window is the Settings Editor Page. It willdisplay a window that allows you to select ordrag-and-drop *.tzs (settings) files to edit and save.The bottom left corner has preferences and advancedfeatures.Revision 1.0Document No. 20683Page 5
Device Management PageOn the Device Management Page, if one or moredevices are connected correctly, they willautomatically appear in the main devices page.If your devices fail to connect, see theTroubleshooting page at the end of this document.After a device has been selected you will be able toview and edit all of the settings currently loaded ontoit.To see a brief description of each setting, hover overtheicon.An aditional comprehensive list of settings and theirdescriptions can also be found near the end of thisdocument in the “Settings Description” section.Revision 1.0Document No. 20683Page 6
To reset all of the settings on a device to their defaultvalues, you can use the “Set to Defaults” button.In addition to editing settings, if you have a *.tzs filethat contains settings that you want loaded onto adevice, you can simply drag and drop the *.tzs fileover the settings to automatically load those settingsonto the device.By default, whenever a device is plugged in and studydata is present (indicated by a yellow light) it willattempt to export the data to a zip archive on yourworkstation. If it succeeds (indicated by the blue lighton the device and the completed export bar) then thestudy data has been exported and saved.Depending on the study length, the amount of datacould take several minutes to export. The speed ofyour computer also can be a significant factor in theexport speed.Revision 1.0Document No. 20683Page 7
Using the “Save & Eject” button saves all of thesettings changed on the device and, by default,removes all of the patient data on the device.Note that, after you have ejected a device, it needs tobe unplugged, given time to restart, and then pluggedback in to show up again in the Trident DeviceManager.Revision 1.0Document No. 20683Page 8
Settings Editor PageThe Settings Editor page can be used to edit and save*.tzs files on your workstation.Any *.tzs file can be opened by dragging it onto theTrident Device Manager or by using the Select Filebutton which then opens a settings editor window.Multiple files can be selected or dragged anddropped, for each of which a separate settingswindow will be opened.On each settings window, the device type is listedon the main bar. The device type cannot be editedand is specific to each file.This settings file will only work on the type ofdevice listed in this field. This settings file will failto load correctly onto other types of devices.Revision 1.0Document No. 20683Page 9
The firmware version of the settings file can beedited. Note that for a given *.tzs file, you are onlyable to upgrade the firmware version, not downgradeit. As the firmware version increases, the settingsyou are able to add changes to reflect the settingspresent in that firmware versionLike the device type, the firmware version of thesettings file should match the firmware version of thedevice for best results.For each settings file, a serial number is able to beentered into the TZ serial field.If a settings file has a serial number that does notmatch a devices serial number, it will fail to load.If the serial number is left blank, all devices willaccept the settings file regardless of their serialnumber.For each individual setting, you have the ability toremove it, or edit its value. Once a setting isremoved, it can be added back, but it returns to itsdefault value, rather than remembering what it wasset to previously.Revision 1.0Document No. 20683Page 10
To add a setting, you need to scroll to the bottom ofthe settings window and click the “ Add Settings”button.Click on the “Choose a Setting” drop down to view allthe settings that have not yet been added to thedevice, given the firmware version and device type.Scroll to view all the possible settings and select one.Revision 1.0Document No. 20683Page 11
Once a setting has been selected, you can edit itsvalue before you add it.The setting will default to its factory default whichvaries depending on the setting.Use the “Save & Close” button to save the *.tzs fileand close the setting editor window.Revision 1.0Document No. 20683Page 12
BitRhythm PageSome functionality supported by the TDM requires aconnection to the BitRhythm servers. This connectionrequires a one-time login, which can be by clickingthe blank user icon.To find out more information about BitRhythm or toactivate a BitRhythm user account, please contactyour TZ Medical representative.By logging into BitRhythm, all error logs that are ondevices connected to the Trident Device Manager willget uploaded and displayed on BitRhythm Admin.Additional BitRhythm features are currently indevelopment.Feedback PageTo give feedback on the Trident Device Managersoftware, report a bug, or suggest a feature, click onthe feedback icon.Revision 1.0Document No. 20683Page 13
Preferences PageWithin the Preferences Page, there are sections for both the Devices Page and Settings Files.The first setting that can be set for the devices page isthe default export location. This determines wherezip archive files are saved when study data isexported.The default export location is your Desktop, but canbe changed to anywhere on your computer or anyaccessible network drive.The preferences page also has an option to turn offthe auto exporting of data.The default is for exported data to always beexported, but this can be changed to never so thatyou need to manually export study data.The yellow light on a device indicates that there isstudy data on the device that can be exported.This light yellow will appear without the blue lightas long as auto export is set to never.Revision 1.0Document No. 20683Page 14
If auto-export is set to never, then whenever a devicewith data on it is inserted you will need to manuallyuse the Export Device Files button to get the studydata off of the device.Once the settings have been exported successfully, adialog indicating the size of the exported data as wellas a blue light will appear.As with auto exporting, the speed of exportingdepends on the amount of recorded data and thespeed of your computer.“Window Focus on Device Plug in” can be turned tooff and on.When set to “Window Opens and Focuses Device”,whenever a new device is plugged in, the TridentDevice Manager will show the Device ManagementPage with the newly plugged-in device highlighted.If this is set to off, new devices can be plugged inwithout the window changing to view the newlyplugged-in device.Revision 1.0Document No. 20683Page 15
By default, when clicking Save & Eject, the device willautomatically save the settings on a device andremove any recorded data present on it.With “Prompt to Format” selected however, whenyou click Save & Eject on a device, a window askingwhether or not to format the device will appear. Thisallows you to choose whether or not to clear therecorded data off a device when ejecting it.Note that with both “Don’t Format” and “Format”that the device will be ejected. You will need tounplug and reconnect the device in order for it toshow up again in the Trident Device Manager.The default settings files for all 3 Trident device typescan be selected.These are the files that determine the default valuesfor settings when they are added to a new settingsfile or a device, in addition to being what values the“Set to Default” button sets device settings to.Revision 1.0Document No. 20683Page 16
Advanced preferences currently only contain theability to control the release version of the TridentDevice Manager itself. Users should not change thesetting to anything other than “Stable Release”.Additional advanced preferences are currently indevelopment.Revision 1.0Document No. 20683Page 17
Setting DescriptionsBellow are tables containing all the settings, and descriptions of the settings that can be added to the Trident 30, Trident40 and Trident 40L devices.Table 1. Trident 30 SettingsSetting NameSetting DescriptionDetect Pacemaker SpikesWhen this value is set, the device will detect and record the width of pacemakerpulses.Pedometer PeriodWhen this is set to a non-zero value, the device will record the number of detectedsteps every value seconds in the interval files.Store Raw AccelWhen this is enabled, the device will record raw acceleration waveforms in *.tzg files.Study Length is Calendar DaysWhen this value is set, the device will include recording interruptions in the recordinglength calculation, resulting in the recording ending exactly Study Hours after it isstarted, regardless of the amount of data stored.One ECG FileWhen this value is set, the device will store all ECG data in a single binary fileconsisting of concatenated SCP files, instead of using the directory structure forindividual SCP files.Study HoursThis setting defines the number of hours of data that the device will record beforestopping the recording.Sample RateWhen this is set to a non-zero value, the device will apply a 2nd order high pass digitalfilter to the ECG data before being stored to the SD Card. The cutoff frequency in Hzwill be the value of this setting divided by 100, with an effective setting range of 0.01Hz to 1.00 Hz.Digital Low Pass FilterWhen this is set to a non-zero value, the device will apply a 6th order low pass digitalfilter to the ECG data before being passed to the analysis algorithm or being stored tothe SD Card.Digital Notch FilterWhen this is set to a non-zero value, the device will apply a 2nd order notch digitalfilter to the ECG data before being passed to the analysis algorithm or being stored tothe SD Card.Replace Electrode Alert PeriodWhen this is set to a non-zero value, the device will beep every value seconds whenthe patch electrode needs to be replaced. If set to a non-zero value less than 10, thevalue will default to 10.Low Battery Alert PeriodWhen this is set to a non-zero value, the device will beep every value seconds whenthe battery drops below the recharge threshold. If set to a non-zero value less than10, the value will default to 10.Revision 1.0Document No. 20683Page 18
Electrode Max Wear HoursWhen this is set to a non-zero value the device will alert the patient when the weartime for the electrode has been exceeded.Allow Low Battery MonitoringStartWhen this is enabled, the device will allow the user to start a study even if the batteryis insufficiently charged for the duration of the recording.Study Complete Sleep PeriodWhen this is set to a non-zero value the device will wake up every value secondsand notify the patient that the recording is complete. If set to a non-zero value lessthan 10, the value will default to 10.Lead Off Alert PeriodWhen this is set to a non-zero value, the device will beep every value seconds whena lead is disconnected to alert the patient to reconnect the lead. If set to a non-zerovalue less than 10, the value will default to 10.Demonstration ModeWhen set to 0, the device operates normally. When set to 1, the device willautomatically restart a recording on power-up. When set to 2 , it is impossible tostart a recording and the device will blink the Green LED with a period of 2.4 seconds this setting value .Patient IDUp to 39 ASCII characters identifying the patient to the host software system. This IDwill be embedded in each SCP-ECG data file.Error Retry CountThis value defines how many times the device will attempt to automatically recoverfrom an error, within a given time-period, before reporting the error to the user.Error Retry PeriodThis value defines the period within which the Error Retry Count must not beexceeded.Zymed CompatibilityWhen this value is set, the device will store ECG data both in SCP files and in a serialNumber .rf file for import into Zymed software. When set to 1, calibrationsignals will be inserted when leads are disconnected; when set to 2 flatline will beinserted.Revision 1.0Document No. 20683Page 19
Table 2. Trident 40 SettingsDetect Pacemaker SpikesWhen this value is set, the device will detect and record the width of pacemakerpulses.Pedometer PeriodWhen this is set to a non-zero value, the device will record the number of detectedsteps every value seconds in the interval files.Study Length is Calendar DaysWhen this value is set, the device will include recording interruptions in the recordinglength calculation, resulting in the recording ending exactly Study Hours after it isstarted, regardless of the amount of data stored.One ECG FileWhen this value is set, the device will store all ECG data in a single binary fileconsisting of concatenated SCP files, instead of using the directory structure forindividual SCP files.Study HoursThis setting defines the number of hours of data that the device will record beforestopping the recording. This value is also used to update the “time remaining” andprogress bar on the device status screen.Sample RateThe value in this field sets the sampling rate for each ECG channel in samples persecond. Input values will be rounded up based on the capabilities of the device. Checkthe SCP files for actual recording rate. Generally, devices will round up to a multiple ofthe default value.High Pass Digital FilterWhen this is set to a non-zero value, the device will apply a 2nd order high pass digitalfilter to the ECG data before being stored to the SD Card. The cutoff frequency in Hzwill be the value of this setting divided by 100, with an effective setting range of 0.01Hz to 1.00 Hz."Recording Confirmation PinCodeWhen this is set to a non-zero value, the device will wait to start a recording until thisvalue is entered by the patient.Digital Low Pass FilterWhen this is set to a non-zero value, the device will apply a 6th order low pass digitalfilter to the ECG data before being passed to the analysis algorithm or being stored tothe SD Card.Digital Notch FilterWhen this is set to a non-zero value, the device will apply a 2nd order notch digitalfilter to the ECG data before being passed to the analysis algorithm or being stored tothe SD Card.Allow Low Battery MonitoringStartWhen this is enabled, the device will allow the user to start a study even if the batteryis insufficiently charged for the duration of the recording.Study Complete Sleep PeriodWhen this is set to a non-zero value the device will shut off the screen once therecording is complete. If set to a value greater than 1, the device will wake up every Nseconds and notify the patient that the recording is complete.Lead Off Alert PeriodWhen this is set to a non-zero value, the device will vibrate every value secondswhen a lead is disconnected to alert the patient to reconnect the lead.Revision 1.0Document No. 20683Page 20
Screen Sleep DelayThe value in this field sets the number of seconds that the device status screen willdisplay before the device goes back to sleep. This also controls how long each page ofthe Digital Patient Diary is displayed if the user does not interact with it.Demonstration Modehen set to 0, the device operates normally. When set to 1, the device willautomatically restart a recording on power-up. When set to 2, it is impossible to starta recording.Symptom Diary EntriesWhen this value is set to a value greater than 0, the symptom diary will be enabledusing the first value symptom entries settings.Activity Level Diary EntriesWhen this value is set to a value greater than 0, the activity level diary will be enabledusing the first value activity level entries settings.Symptom Entry 1This string is used in the patient symptom diary when the Symptom Diary Entriesvalue is set to at least 1.Symptom Entry 2This string is used in the patient symptom diary when the Symptom Diary Entriesvalue is set to at least 2.Symptom Entry 3This string is used in the patient symptom diary when the Symptom Diary Entriesvalue is set to at least 3.Symptom Entry 4This string is used in the patient symptom diary when the Symptom Diary Entriesvalue is set to at least 4.Symptom Entry 5This string is used in the patient symptom diary when the Symptom Diary Entriesvalue is set to at least 5.Symptom Entry 6This string is used in the patient symptom diary when the Symptom Diary Entriesvalue is set to at least 6.Symptom Entry 7This string is used in the patient symptom diary when the Symptom Diary Entriesvalue is set to at least 7.Symptom Entry 8This string is used in the patient symptom diary when the Symptom Diary Entriesvalue is set to at least 8.Symptom Entry 9This string is used in the patient symptom diary when the Symptom Diary Entriesvalue is set to at least 9.Symptom Entry 10This string is used in the patient symptom diary when the Symptom Diary Entriesvalue is set to at least 10.Activity Level Entry 1This string is used in the patient activity level diary when the Activity Level DiaryEntries value is set to at least 1.Activity Level Entry 2This string is used in the patient activity level diary when the Activity Level DiaryEntries value is set to at least 2.Revision 1.0Document No. 20683Page 21
Activity Level Entry 3Activity Level Entry 4This string is used in the patient activity level diary when the Activity Level DiaryEntries value is set to at least 3.This string is used in the patient activity level diary when the Activity Level DiaryEntries value is set to at least 4.Activity Level Entry 5This string is used in the patient activity level diary when the Activity Level DiaryEntries value is set to at least 5.Activity Level Entry 6This string is used in the patient activity level diary when the Activity Level DiaryEntries value is set to at least 6.Activity Level Entry 7This string is used in the patient activity level diary when the Activity Level DiaryEntries value is set to at least 7.Activity Level Entry 8This string is used in the patient activity level diary when the Activity Level DiaryEntries value is set to at least 8.Activity Level Entry 9This string is used in the patient activity level diary when the Activity Level DiaryEntries value is set to at least 9.Activity Level Entry 10This string is used in the patient activity level diary when the Activity Level DiaryEntries value is set to at least 10.Patient IDUp to 39 ASCII characters identifying the patient to the host software system. This IDwill be embedded in each SCP-ECG data file.Top BannerThis text will be displayed on the top of the display at all times. If left empty, thedevice will display its own serial number here instead.Bottom BannerThis text will be displayed on the bottom of the display at all times. If left empty, thedevice will display the patient ID here instead.Error Retry CountThis value defines how many times the device will attempt to automatically recoverfrom an error, within a given time-period, before reporting the error to the user.Error Retry PeriodThis value defines the period within which the Error Retry Count must not beexceeded.Zymed CompatibilityWhen this value is set, the device will store ECG data both in SCP files and in a serialNumber .rf file for import into Zymed software.Revision 1.0Document No. 20683Page 22
The Trident 40L contains all of the settings of the Trident 40 listed above in addition to the MCT Settings bellow.Table 3: Trident 40L Additional MCT settingsBradycardiaHeart RateWhen the patient’s average heart rate drops BELOW the value set by this field, the device will reportthat the patient has entered Bradycardia.TachycardiaHeart RateWhen the patient’s average heart rate rises ABOVE the value set by this field, the device will reportthat the patient has entered Tachycardia.Pause DurationThresholdWhen the patient’s R-R interval rises ABOVE the value set by this field, the device will report a Pausefor each beat preceding such an interval.Bradycardia RateChangeWhen this is set to a non-zero value, the device will create and upload an event each time the heartrate drops by at least value BPM below the Bradycardia Heart Rate. If it drops again by at least value , another event will be reported. If it drops by twice value , only 1 event will be reported.Tachycardia RateChangeWhen this is set to a non-zero value, the device will create and upload an event each time the heartrate rises by at least value BPM above the Tachycardia Heart Rate. If it rises again by at least value , another event will be reported. If it rises by twice value , only 1 event will be reported.ArrhythmiaDurationThresholdThe value of this field sets the minimum arrhythmia duration that will be reported. In cases whereseveral arrhythmias occur together in short succession, the algorithm will attempt to “combine” theresults into a smaller number of sufficiently long arrhythmias for reporting.Summarize QRSDetectionsWhen the value of this field is set greater than or equal to 10, the device will summarize the QRSdetections as a number of normal QRS beats and a number of PVC beats detected within the last value seconds. This significantly reduces the size of interval files.Report Pre-TimeThe value of this field sets the minimum length of ECG data reported prior to a rhythm changeevent. Patient events are also controlled by this setting prior to v2.0. Setting this and Report PostTime to 0 will disable upload of rhythm change events.Report Post-TimeThe value of this field sets the minimum length of ECG data reported following a rhythm changeevent. Patient events are also controlled by this setting prior to v2.0. Setting this and Report PreTime to 0 will disable upload of rhythm change events.Minimum TimeBetween EventsWhen this is set to a non-zero value, Rhythm events occurring within this number of seconds of aprevious event will only be logged in the interval file and not uploaded as a separate event.Suppress NSREventsWhen this value is set, the device will not upload any Rhythm Change events for Normal SinusRhythm.Suppress RhythmEventsWhen this value is set, the device will not upload any Rhythm Change events that match thecharacters in this setting.Revision 1.0Document No. 20683Page 23
Patient EventPre-TimeThe value of this field sets the minimum length of ECG data reported prior to a manual patientevent. Setting this and Patient Event Post-Time to 0 will disable upload of patient events.Patient EventPost-TimeThe value of this field sets the minimum length of ECG data reported following a manual patientevent. Patient events are also controlled by this setting. Setting this and Patient Event Pre-Time to 0will disable upload of patient events.Bulk UploadWhen this value is set, the device will upload all of the SCP files it has recorded each hour, alongwith the interval file.Transmit IntervalReportsWhen this value is set, the device will transmit interval reports every hour.Server AddressThis string is the address of the web server used for mobile uploading data and downloading actionsfiles. It should omit the preceding 'https://' and may be an IP address or a domain name. A customport may be used at the end of the string. Here are some examples: '8.8.8.8' '8.8.8.8:12345''www.google.com' 'www.google.com:12345' '8.8.8.8/h3r-devices' ' 'google.com:12345/h3r-devices'TLS IdentityWhen this string is not empty (i.e. not ''), the device will use TLS for all connections. If using PSK, thisstring will be transmitted in the clear to the server as psk identity. This should match the server’sconfiguration of key-identity pairs. If using ECDSA, this string should be set to something like“use ecdsa” to force TLS mode.TLS PSKThis string contains an AES-128 initialization vector to be used when operating in TZMRCompatibility mode.AES IVThis string contains an AES-128 initialization vector to be used when operating in TZMRCompatibility mode.AES KeyThis string contains an AES-128 pre-shared key to be used when operating in TZMR Compatibilitymode.APN AddressThis string is the address of the APN server in the carrier network used for wireless connections.APN UsernameThis string is the username used for authentication with the carrier network. It can be left blank (i.e.'') if no APN authentication is required.APN PasswordThis string is the password associated with the APN Username. It can be left blank (i.e. '') if no APNauthentication is required.HTTP BearerTokenIf this string is set, the device will add an authorization line to the HTTP header for each serverconnection according to the format: 'Authorization: Bearer %s'.ConnectionTimeoutThe time to wait for a modem to establish a connection before closing the connection and tryingagain.TZMRCompatibilityRevision 1.0When this value is set, the device will emulate the connections of an Aera CT device."Document No. 20683Page 24
TroubleshootingIf the Trident Device Manager shows that there areno connected devices and you have a device pluggedin, follow the steps bellow to resolve the issue.1. Unplug the device, wait for the device to restart and fully reboot, and then plug the device back in.a. Even when a device has connected previously, if a device has been ejected from the Trident DeviceManager using the Save & Eject button it will need to be unplugged from the computer and pluggedback in to reconnect.2. If the screen on the device is black, attempt to turn it on by pressing the button. If nothing is still displayed, thedevice may be out of battery and need to be charged briefly before it can connect.3. Unplug your device and restart your computer. Attempt to reconnect the device after your computer hasrestarted and the Trident Device Manager has opened.4. If there is an error on the device, it is possible that this needs to be resolved before the device can connect tothe computer. Reference device troubleshooting guide for next steps.5. Ensure that the USB plug is fully connected to the device and to the computer.a. Try connecting the device to a different USB port on your computer.b. Use a different cable to connect the device.Revision 1.0Document No. 20683Page 25
Trident Device Manager Overview The main functionality of the Trident Device Manager can be accessed with the two buttons in the top left corner of the TDM window. The first window is the Device Management Page, which allows you to save and export data on devices and save and edit device settings. The second window is the Settings Editor Page.