![Cisco Jabber CI-SSO For CI-ADFS [CI-ADFS] - Cisco](/img/21/sso-for-ci-adfs.jpg)
Transcription
Enabling Single SignOn for CommonIdentity using ActiveDirectory FederationServices
THE SPECIFICATIONS AND INFORMATION REGARDING THE PRODUCTS IN THIS MANUAL ARESUBJECT TO CHANGE WITHOUT NOTICE. ALL STATEMENTS, INFORMATION, ANDRECOMMENDATIONS IN THIS MANUAL ARE BELIEVED TO BE ACCURATE BUT ARE PRESENTEDWITHOUT WARRANTY OF ANY KIND, EXPRESS OR IMPLIED. USERS MUST TAKE FULLRESPONSIBILITY FOR THEIR APPLICATION OF ANY PRODUCTS.THE SOFTWARE LICENSE AND LIMITED WARRANTY FOR THE ACCOMPANYING PRODUCT ARE SETFORTH IN THE INFORMATION PACKET THAT SHIPPED WITH THE PRODUCT AND AREINCORPORATED HEREIN BY THIS REFERENCE. IF YOU ARE UNABLE TO LOCATE THE SOFTWARELICENSE OR LIMITED WARRANTY, CONTACT YOUR CISCO REPRESENTATIVE FOR A COPY.The Cisco implementation of TCP header compression is an adaptation of a program developed by theUniversity of California, Berkeley (UCB) as part of UCB's public domain version of the UNIX operatingsystem. All rights reserved. Copyright 1981, Regents of the University of California.NOTWITHSTANDING ANY OTHER WARRANTY HEREIN, ALL DOCUMENT FILES AND SOFTWARE OFTHESE SUPPLIERS ARE PROVIDED “AS IS" WITH ALL FAULTS. CISCO AND THE ABOVE-NAMEDSUPPLIERS DISCLAIM ALL WARRANTIES, EXPRESSED OR IMPLIED, INCLUDING, WITHOUTLIMITATION, THOSE OF MERCHANTABILITY, FITNESS FOR A PARTICULAR PURPOSE ANDNONINFRINGEMENT OR ARISING FROM A COURSE OF DEALING, USAGE, OR TRADE PRACTICE.IN NO EVENT SHALL CISCO OR ITS SUPPLIERS BE LIABLE FOR ANY INDIRECT, SPECIAL,CONSEQUENTIAL, OR INCIDENTAL DAMAGES, INCLUDING, WITHOUT LIMITATION, LOST PROFITSOR LOSS OR DAMAGE TO DATA ARISING OUT OF THE USE OR INABILITY TO USE THIS MANUAL,EVEN IF CISCO OR ITS SUPPLIERS HAVE BEEN ADVISED OF THE POSSIBILITY OF SUCH DAMAGES.Any Internet Protocol (IP) addresses and phone numbers used in this document are not intended to be actualaddresses and phone numbers. Any examples, command display output, network topology diagrams, andother figures included in the document are shown for illustrative purposes only. Any use of actual IPaddresses or phone numbers in illustrative content is unintentional and coincidental.Cisco and the Cisco logo are trademarks or registered trademarks of Cisco and/or its affiliates in the U.S. andother countries. To view a list of Cisco trademarks, go to this URL: http:// www.cisco.com/go/trademarks.Third-party trademarks mentioned are the property of their respective owners. The use of the word partnerdoes not imply a partnership relationship between Cisco and any other company. (1110R) 2015 Cisco Systems, Inc. All rights reserved.
Table of ContentsIntroduction. 1Introduction . 1Enabling SSO for WebEx Messenger . 3Configure Federated Web SSO . 3Create a Relying Party Trust . 3Add Claim Rules for Messenger. 4Download the ADFS Metadata . 7Import SAML Metadata in WebEx Messenger . 7Add the Rules for JIT (Just in Time Provision) . 8Enable Auto Account Creation and Auto Account Update in WebEx Messenger. 8Migration from WebEx Messenger to Common Identity SSO Authentication . 11Request to Add Domain to Common Identity . 11Create a Password in CI . 11Configure SSO in Cloud Collaboration Management . 11Create a Relying Party Trust for CI . 12Add Claim Rules for CI . 12Export and Edit the Metadata . 14Complete SSO Configuration in Cloud Collaboration Management . 15i
Troubleshooting . 16Redirect Authentication . 17Verification of Cisco Jabber Authentication in CI . 18ii
1IntroductionChapter 1IntroductionThis document covers the configuration of the required software componentsessential for achieving a Single Sign-on (SSO) solution with WebExMessenger using Active Directory Federation Services (ADFS).1
2Enabling SSO for WebExMessengerChapter 2Configure Federated Web SSO1.Log into http://www.webex.com/go/connectadmin with your administrationcredentials.2.Select the Configuration tab System Settings Security Settings.3.Select Federated Web SSO Configuration.4.In the WebEx SAML Issuer (SP ID) field, enter the name for the SAMLagreement.Note: You can use the fully qualified domain name (FQDN) of your organization.5.Complete all the required fields.6.Select Export to export the metadata to a location on your computer. Youwill import this file later.Create a Relying Party Trust1.Go to your Active Directory Federation Services (ADFS) server.2.In the Actions dialog box, select Add Relying Party Trust.3
Chapter 2: Enabling SSO for WebEx Messenger3.Select Import data about the relying party from a file.4.Select Browse to navigate to and select the metadata file.5.Select Next.6.Enter the display name for the SAML agreement.7.Select Next.8.Select the I do not want to configure multi-factor authenticationsettings for the relying party trust at this time radio button.9.Select Next.10.Select the Open the Edit Claim Rules dialog for the relying party trustwhen the wizard closes check box.11.Select Close.Add Claim Rules for Messenger41.In the Edit Claim Rules for Messenger dialog box, select Add Rule.2.In the Add Transform Claim Rule Wizard from the Claim rule templatedrop-down, select the Send LDAP Attributes as Claims template.
Chapter 2: Enabling SSO for WebEx Messenger3.Select Next.4.Enter the claim name and select the E-Mail-Addresses andIncomingClaim attributes as shown below.5.Select OK.6.Create another new rule as before using the Claim rule templateTransform an Incoming Claim.7.Enter the claim name.8.From the Incoming claim type drop-down, select IncomingClaim.9.From the Outgoing claim type drop-down, select Name ID.10.From the Outgoingname ID format drop-down, select Unspecified.5
Chapter 2: Enabling SSO for WebEx Messenger11.6Select OK.
Chapter 2: Enabling SSO for WebEx MessengerDownload the ADFS Metadata1.Download the ADFS metadata from https:// FQDN of your ADFSserver .2.Select OK.Import SAML Metadata in WebEx Messenger1.Log into http://www.webex.com/go/connectadmin with your administrationcredentials.2.Select the Configuration tab System Settings Security Settings.3.Select Federated Web SSO Configuration.4.Select Import SAML Metadata to import the metadata file youdownloaded.5.In the AuthContextClassRef field, ransport.This string ensures that ADFS can deliver Kerberos and Form basedauthentication.7
Chapter 2: Enabling SSO for WebEx MessengerAdd the Rules for JIT (Just in Time Provision)1.In the Edit Claim Rules for Messenger dialog box, select Add Rule.2.In the Add Transform Claim Rule Wizard from the Claim rule templatedrop-down, select the Send LDAP Attributes as Claims template.3.Select Next.4.Enter the claim name (JIT) and select the attributes as shown below.5.Select OK.Enable Auto Account Creation and Auto AccountUpdate in WebEx Messenger81.Log into http://www.webex.com/go/connectadmin with your administrationcredentials.2.Select the Configuration tab System Settings Security Settings.3.Select Federated Web SSO Configuration.
Chapter 2: Enabling SSO for WebEx Messenger4.Select the Auto Account Creation and Auto Account Update checkboxes.5.Select Save.Important: For Cisco Jabber to work with Cisco WebEx Messenger Instant Messengerand Presence and deliver on-premise Cisco Unified Call Manager (CUCM) and Unityconnection, you must provide the UC details for CUCM and connections in the WebExMessenger administrator portal.To use SSO in Cisco WebEx Messenger and Cisco WebEx Meeting Center, ensureloose integration is enabled for both.See Cisco Unified Communications Integration with Cisco WebEx and ProvisionLoosely Coupled Integration in the Cisco WebEx Messenger Administration Guide.9
Migration from WebExMessenger to CommonIdentity SSO AuthenticationRequest to Add Domain to Common IdentityContact your Customer Success Manager (CSM) or Universal Agent (UA) tosubmit an ops request to add the domain to CI or email: ci-messengersync@cisco.com.Create a Password in CIAs none of the users migrated from Cisco WebEx Messenger have apassword, you must create a password for an existing administrator now.1.Connect to Https://web.ciscospark.com and enter the email address of theadministrator.2.Select Next.3.Select Can’t access your account?.An email is automatically sent to that user asking them to reset theirpassword.Note: Any administrators in Cisco WebEx Messenger that are migrated to CI will remainadministrators in CI.Configure SSO in Cloud CollaborationManagement1.Connect to https://admin.ciscospark.com using the email address andpassword that you previously reset.2.Select Users in the left navigation bar to display all the users from theCisco WebEx Messenger organization.11
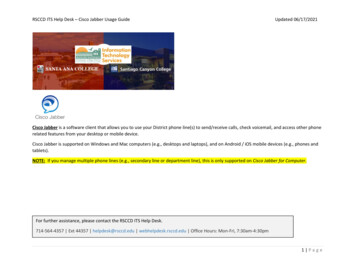
3.From the top navigation bar, select Service Setup Enterprise Settingsto download the CI metadata to configure ADFS.4.In the Enterprise Settings window, select Integrate a 3rd-party identityprovider (Advanced).5.Select Next.6.Select Download Metadata File.Create a Relying Party Trust for CI1.Go to your Active Directory Federation Services (ADFS) server.2.In the Actions dialog box, select Add Relying Party Trust Select Importdata about the relying party from a file.3.Select Browse to navigate to and select the metadata file downloadedfrom CI previously.4.Select Next.5.Enter the display name for the SAML agreement.6.Select Next.7.Select the I do not want to configure multi-factor authenticationsettings for the relying party trust at this time radio button.8.Select Next.9.Select the Open the Edit Claim Rules dialog for the relying party trustwhen the wizard closes check box.10.Select Close.Add Claim Rules for CI121.In the Edit Claim Rules for Messenger dialog box, select Add Rule.2.In the Add Transform Claim Rule Wizard from the Claim rule templatedrop-down, select the Send LDAP Attributes as Claims template.3.Select Next.4.Enter the claim name and select two attributes, mail and uid, to be passedto CI and mapped to the user’s email address.
5.Add a second claim rule using the Send Claim Using a Custom Ruletemplate.6.Add the following test to the custom rule. The yellow highlighted text is theFQDN or your ADFS 3.0 server and the green highlighted text is the CIentityID from the metadata file downloaded from Cloud CollaborationManagement.c:[Type claims/windowsaccountname"] issue(Type aims/nameidentifier",Issuer c.Issuer, OriginalIssuer c.OriginalIssuer, Value c.Value,ValueType /ws/2005/05/identity/claimproperties/format"] /05/identity/claimproperties/namequalifier"] "] 03488bc3eb146");7.The claim should now look like this:13
Export and Edit the Metadata1.Go to https:// FQDN in your Active Directory Federation Services (ADFS)server.2.Download the file .3.Use an XML editor to remove the elements not required in CI.Note: There are several XML editors available online but we recommend Code Beautifyhttp://codebeautify.org/xmlviewer.144.In the XML editor, browse to the metatdata file in ADFS.5.Select Beautify to delete the elements 3,4,5, and 6. Make sure theidpssodescriptor and the contact person tags remain in the file.
6.Select Download to download the edited file.7.The metadata file should look like this:Complete SSO Configuration in CloudCollaboration Management1.Connect to https://admin.ciscospark.com using the email address andpassword that you previously reset.2.From the top navigation bar, select Service Setup Enterprise Settingsto download the CI metadata to configure ADFS.15
3.In the Enterprise Settings window, select Integrate a 3rd-party identityprovider (Advanced).4.Select Next.5.Select Import to browse to and import the edited metatadata file.A success message is displayed when the import of the metadata file iscomplete.6.Select Next.7.Select Test SSO Configuration .8.Sign in with the administrator details.TroubleshootingIf you try to use SSO to login now, it will fail and you will see an errormessage. Using Firefox SAML tracer, you can see that AuthInstant is definedbefore NotBefore timer for that assertion. This makes it invalid.To fix this issue you need to configure the ADFS Identity Provider (IdP)engine to define the AuthInstant assertion later.16
To solve this problem, do the following:1.In the ADFS server, execute the power shell command SetADFSRelyingPartyTrust 9ff-4f12-440a-9880-3488bc3eb146" NotBeforeSkew 5.2.The TargetIdentifier must be the EntityID from metadata file downloadedfrom CI.3.Perform the configuration test in Cloud Collaboration Management againand it should be successful.Redirect Authentication Before you can verify the Jabber authentication in CI, authentication mustbe redirected from the WebEx Messenger platform to the CI platform, Todo this contact the CSM to update the existing ops request or submit anew ops request or email: ci-messenger-sync@cisco.com.17
Verification of Cisco JabberAuthentication in CIChapter 3181.Start Cisco Jabber.2.Verify that all the on-premise are still using SSO.3.Verify that WebEx Meeting Center is enabled for loose Integration.
4.Finally, verify that Cisco Jabber logs contain the stringidbroker.webex.com, indicating that it is connecting to CI.2015-06-05 09:34:31,893 DEBUG [0x000016e4] icsService] - About toexecute access token request: [url] https://idbroker.webex.com/idb/oauth2/v1/access token[method] 1[followRedirects] 1[transferTimeout] 0[connectionTimeout] 0[numRetries] 0[authType] 1[acceptable cryptographic protocols] TLS 1 0 TLS 1 1 TLS 1 2[useSystemProxy] 1[header] User-Agent:[size of body] 642015-06-05 09:34:31,893 DEBUG [0x000016e4] mon.PolicySet] [csf::common::PolicySet::getPolicy] - Successfully found Policy withnature EDGE USAGE [NEVER USE]2015-06-05 09:34:31,893 DEBUG [0x000016e4] pclient] [csf::http::BasicHttpClientImpl::execute] - Edge policy enforced successfully withtransformed Url: https://idbroker.webex.com/idb/oauth2/v1/access token for request #12015-06-05 09:34:31,893 DEBUG [0x000016e4] pclient] tion] - Acquired lock( easyCurlConnectionMutex)2015-06-05 09:34:31,893 DEBUG [0x000016e4] pclient] tion] - Releasing lock( easyCurlConnectionMutex)19
2015-06-05 09:34:31,894 INFO [0x000016e4] pclient] [csf::http::CurlHttpUtils::configureEasyRequest] - *-----* Configuring request#1 POST https://idbroker.webex.com/idb/oauth2/v1/access token20
21
Go to your Active Directory Federation Services (ADFS) server. 2. In the . Actions. dialog box, select . Add Relying Party Trust. Select . Import data about the relying party from a file. 3. Select . Browse. to navigate to and select the metadata file downloaded from CI previously. 4. Select . Next. 5. Enter the display name for the SAML .