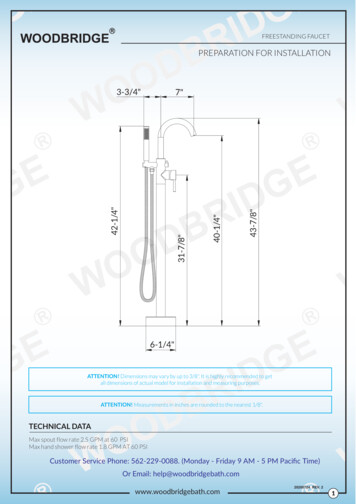
Transcription
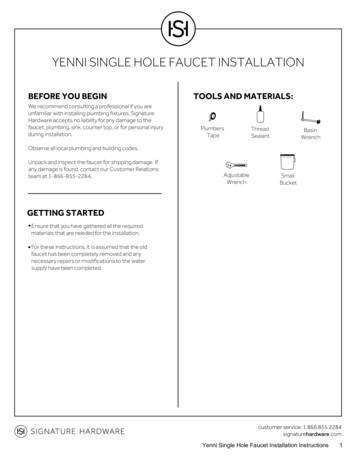
YENNI SINGLE HOLE FAUCET INSTALLATIONBEFORE YOU BEGINWe recommend consulting a professional if you areunfamiliar with installing plumbing fixtures. SignatureHardware accepts no liability for any damage to thefaucet, plumbing, sink, counter top, or for personal injuryduring installation.TOOLS AND rve all local plumbing and building codes.Unpack and inspect the faucet for shipping damage. Ifany damage is found, contact our Customer Relationsteam at 1-866-855-2284.AdjustableWrenchSmallBucketGETTING STARTEDEnsure that you have gathered all the requiredmaterials that are needed for the installation.For these instructions, it is assumed that the oldfaucet has been completely removed and anynecessary repairs or modifications to the watersupply have been completed.Yenni Single Hole Faucet Installation Instructions1
YENNI SINGLE HOLE FAUCET INSTALLATIONINSTALLATION1. Ensure that the water supply below your sink iscompletely shut off by turning the shutoff valves all theway to the right.3. Insert the faucet into its prepared mounting hole.Tip: Place a small bucket below your workspace tocatch any water that may drip during the installationprocess.OFF2. Remove the lock nut and rubber washer from thethreaded shank.4. From beneath the sink, slide the rubber washer backonto the shank. Thread the locknut back onto the shankuntil hand tight. Finish tightening using a basin wrench.Yenni Single Hole Faucet Installation Instructions2
YENNI SINGLE HOLE FAUCET INSTALLATION5. Apply plumber’s tape or thread sealant to thethreading on each of the faucet’s water lines, andconnect the main water hoses to the faucet. Use anadjustable wrench to tighten, but be careful not toovertighten. Ensure that you are connecting the hotand cold lines appropriately.6. Proceed to the drain installation. Once complete,remove the aerator from the spout and turn the fauceton for approximately 60 seconds to remove any dust orloose sediment from the water lines. Ensure that thereare no leaks, and that both hot and cold water arerunning properly. Turn the water off and reattach theaerator.5. Once installation is complete, turn the main watersupply back on from underneath your sink. Check forany leaks underneath.ONYenni Single Hole Faucet Installation Instructions3
YENNI SINGLE HOLE FAUCET INSTALLATIONDRAIN INSTALLATION1. Dissasemble the drain assembly and lay the partsaside, in the same order they were removed. See theillustration below as a reference if needed.2. Apply plumber’s tape to the threading on thetailpiece, then reattach the tail piece to the pop-updrain flange.Pop-Up Drain FlangeFlat Rubber GasketTapered Rubber GasketPlastic Friction WasherLock Nut3. Slide the flat rubber gasket up the tailpiece until itmeets the lip of the pop-up drain flange.TailpieceYenni Single Hole Faucet Installation Instructions4
YENNI SINGLE HOLE FAUCET INSTALLATION4. Insert the drain flange and tailpiece through the topof your sink’s drain hole.6. Thread the lock nut onto the drain flange. Handtighten until secure, then finish tightening with a basinwrench once the drain is properly aligned.Important: Be careful not to overtighten, which couldcrack a porcelain sink or stone P5. From under your counter, slide the tapered rubbergasket followed by the plastic friction washer onto thetailpiece until they meet your sink or countertop. Besure that the tapered side of the rubber washer isfacing up.COUNTERTOPCOUNTERTOPYenni Single Hole Faucet Installation Instructions5
Yenni Single Hole Faucet Installation Instructions 5 YENNI SINGLE HOLE FAUCET INSTALLATION 4. Insert the drain flange and tailpiece through the top of your sink's drain hole. 6. Thread the lock nut onto the drain flange. Hand tighten until secure, then finish tightening with a basin wrench once the drain is properly aligned.