Transcription
IP Dispatch SoftwareUser ManualDocument Version: V1.1Release Date: 12-2014
Copyright InformationHytera is the trademark or registered trademark of Hytera Communications Co., Ltd. (the Company) inPRC and/or other countries or areas. The Company retains the ownership of its trademarks and productnames. All other trademarks and/or product names that may be used in this manual are properties oftheir respective owners.The product describes in this manual may include the Company’s computer programs stored in memoryor other media. Laws in PRC and/or other countries or areas protect the exclusive rights of the Companywith respect to its computer programs. The purchase of this product shall not be deemed to grant, eitherdirectly or by implication, any rights to the purchaser regarding the Company’s computer programs. Anyof the Company’s computer programs may not be copied, modified, distributed, decompiled, orreverse-engineered in any manner without the prior written consent of the Company.DisclaimerAs a leading supplier of professional wireless communications equipment and solutions, Hytera providesa series of software for the worldwide customers to help customers to further understand our DMRproducts. This software is:-Free of charge-Small and simple-Easy to configure and use-For basic use only-Available online for downloadThese softwares are meant for demo purposes and does not contain any time limitation on using it.Hytera currently does not provide any customer support via the Sales, Marketing and Customer Servicedepartments with regards to the use of these softwares. Usage and setup guides are available for eachof the software to assist you in evaluating them. Hytera endeavors to achieve the usability andcompleteness of free software, but no warranty of accuracy or reliability is given. All the specificationsand designs are subject to change without notice due to continuous products developments. We dohowever take in comments about improvements as well as new tool ideas but will not provide anycommitment to its release. We do not guarantee, for any particular purposes, the accuracy, validity,timeliness, legitimacy or completeness of the free software.If you have any suggestions and requirements, it is greatly appreciated to submit up to therecommended email address. Comments on how the tools has helped you would be very much
welcomed. This will encourage us to provide more tools to help your business. Hytera retains the rightsto change the products based on the feedbacks received.Email Address:appmanager@hytera.com.3
ContentsDocumentation Information.11. Brief Introduction .21.1 Typical Application Scenarios .21.1.1 Scenario One (USB) .21.1.2 Scenario Two (UART to IP) .31.1.3 Scenario Three(Repeater) .42. Before Use .52.1 Prerequisite .52.2 Applicable Model .63. Software Installation .73.1 .Net Framework 4.0 Installation .73.2 vcredist 2010 x86 Installation .93.3 IP Dispatch Installation .94. Tools and Radio Setup Configuration .134.1 Dispatch Station - Mobile Configuration .134.2 Dispatch Station - Repeater Configuration .154.3 Terminal Configuration.174.4 UART to IP Module Configuration .184.4.1 Serial Configuration .184.4.2 IP Configuration .195. IP Dispatch Software .205.1 Main Interface of IP Dispatch .205.2 Software Configuration .215.3 Add/Modify Terminal .225.4 Check Status of Dispatch Station .235.5 Voice dispatch .235.5.1 Outgoing call .235.5.2 Incoming call .275.6 Message dispatch .295.6.1 Real time messaging .295.6.2 Schedule message .326. FAQ .336.1 Opening the IP Dispatch failed .336.2 Dispatch Station is connected to PC, but display offline .336.3 Window pop up, display “IP Dispatch is running” .346.4 Log cannot be exported .34
User ManualDocumentation InformationDocumentation InformationThis section describes the conventions and revision history of this document.Documentation ConventionsInstructional IconsIconDescriptionTipIndicates information that can help you make better use of your product.NoteIndicates references that can further describe the related topics.CautionIndicates situations that could cause data loss or equipment damage.WarningIndicates situations that could cause minor personal injury.DangerIndicates situations that could cause major personal injury or even death.Notational ConventionsConventionDescriptionThe quotation marks enclose the name of a software interface element. For example,“”click “OK”.The text in boldface denotes the name of a hardware button. For example, press theBoldPTT key.The symbol directs you to access a multi-level menu. For example, to select “New”- from the “File” menu, we will describe it as follows: File - New.Revision HistoryVersionV1.0V1.1Release Date05-2014DescriptionInitial release1.Dispatch Station connects to PC via UART to IP/USB/IP.2.Connection mode、ADK setting and log path are configurable12-2014in Configuration Window.3.UI update.1
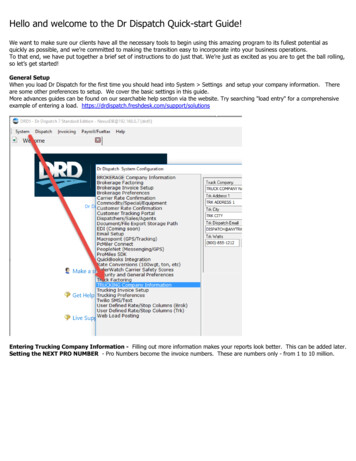
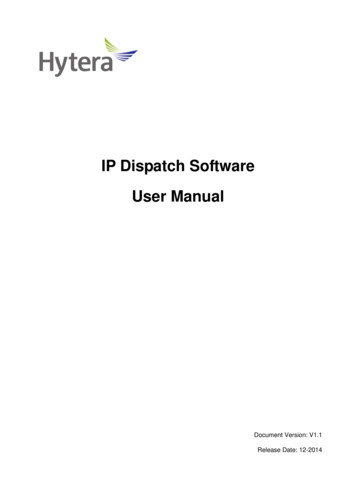
User ManualBrief Introduction1. Brief IntroductionIP Dispatch is an application based on Hytera DMR API, which support text&voice messages withterminals. It mainly faces to customers that take orders as communication manner.This application guarantees time and smooth of working communication, and at the same time, it keepsprofessional and effective working environment.Only one free solution is allowed to connect with a Dispatch Station at the same time.Note: For the IP Dispatch to work correctly, it is recommended to turn off the computer firewall. IPDispatch only support digital channel, not analog channel.1.1 Typical Application ScenariosIP Dispatch supports both text and voice operation. For text, it supports both private and group textmessaging. For voice, it supports private, group and all call. It takes command center as the core,processes work dispatching and reporting through sending and receiving text & voice messages withexecutives.There are message logs for both the text and voice operation for later retrieval. Timing triggeredmessage is also a feature embedded into this tool to enhance the usability.1.1.1 Scenario One (USB)RadioNetworkUSBIP DispatchDispatch Station2
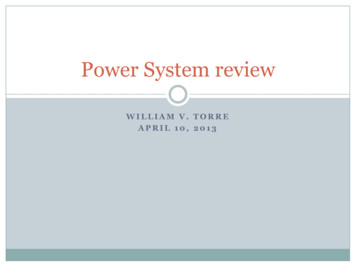
User ManualBrief IntroductionFigures above illustrate one of the use cases for IP Dispatch.IP Dispatch uses portable or mobile as a Dispatch Station via USB. You can send IP Dispatch messagesto target terminals via radio network or UDP/IP network between Dispatch Station and target terminals.In this kind of scenario, you can send both text and voice messages.1.1.2 Scenario Two (UART to IP)Description: Mobile via UART to IP Module connects to PC.3
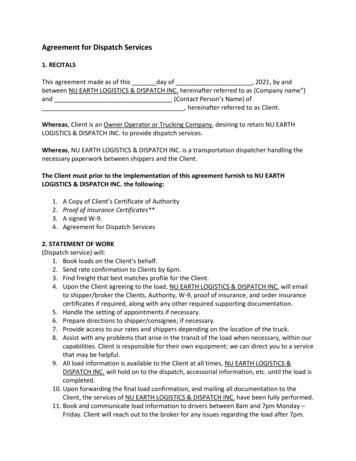
User ManualBrief Introduction1.1.3 Scenario Three(Repeater)Figure above illustrates another use case for IP Dispatch.IP Dispatch uses repeater as a Dispatch Station via IP network. You can send text messages to targetterminals via radio network between Dispatch Station and target terminals.4
User ManualBefore Use2. Before Use2.1 PrerequisitePlease prepare the resources in the following list.ItemDescriptionOperating System:Windows XP/ Windows 7 32/64 bitThis guide takes Windows 7 as the example.PCAs for the USB driver, please refer to the Hytera USB Driver InstallationUser Guide of V5.30.42.0.The IP Dispatch software is included in the program of CPS R5.5 or above.CPSPlease make sure the CPS is installed properly before using this software.In this guide, we take CPS V5.05.xx.xxx as the example.MobileThe IP Dispatch software is applicable to the mobile of R5.5 or above.The IP Dispatch software is applicable to the repeater of R5.5/R6.5Repeater(repeater R6.0 does not support).The programming cable is used to configure the Terminal radio. The detailProgramming Cable forinformation, please refer to the mobile’s user manual. The Third Party canMobileget the manual from Hytera local sales.It is used to connect Dispatch Station and PC that has been installedGateway software. There is audio input, audio output and USB port at theDispatch Cableend that connect to the PC, and the other end is used to connect toDispatch Station through the 26-PIN port.If use UART to IP Module, mobile MD78X has to be converted the USBport to a UART one on the rear connector port (please refer to “MD78X USBto UART” document).PC71(UART to IPThe hardware version of Mobile MD65X must be the newest. If UART to IPModule)function is not work, may be the hardware version is too low. The hardwaremust be modified (please refer to “MD65X USB to UART” document).Both of mobile’s firmware must above R6.0.If you have any question about this, please contact to Hytera.5
User ManualBefore Use2.2 Applicable ModelTerminalP3,P5,PD6XX,PD7XX,MD6XX,MD78X, X1Dispatch StationMD78X, MD65X,RD98X,RD96X,RD62X6
User ManualSoftware Installation3. Software Installation3.1 .Net Framework 4.0 InstallationStep 1. Find dotNetfx40.exe “third party tools” file in the archive directory. Double-click Net Framework.4.0 installation package.Step 2. Click "Install".7
User ManualSoftware InstallationStep 3. Click "Finish" to complete the Net Framework 4.0 installation.8
User ManualSoftware Installation3.2 vcredist 2010 x86 InstallationStep 1. Find the vcredist 2010 x86 file from “third party tools” directory and unzip it.Step 2. Double-click the installation “vcredist 2010 x86.exe”. Install it by default.Note:In Win XP, you need to install vcredist 2008 x86.exe and vcredist 2010 x86.exe. In Win 7,you just need to install vcredist 2010 x86.exe.3.3 IP Dispatch InstallationStep 1. Find Setup.exe in the compressed package, double-click the installation Setup.exe.Step 2. Click "Next".9
User ManualSoftware InstallationStep 3. Choose consent statement, click "Next".Step 4. Enter the User Name and Company Name, click "Next".10
User ManualSoftware InstallationStep 5. Select the installation path, click "Next".Step 6. Click "Install".11
User ManualSoftware InstallationStep 7. Click "Finish" to complete the installation.12
User ManualRadio Setup Configuration4. Radio Setup Configuration4.1 Dispatch Station - Mobile ConfigurationStep 1. Run the CPS and enter its main interface.Step 2. Select “Program - Read From Radio” or click, you will see the pop-up “CommunicationPort” dialogue box.Step 3. Select the corresponding USB port (e.g.: USB1) for the MD78X, and click “OK” to enter the“Read” dialogue box.13
User ManualRadio Setup ConfigurationStep 4. If MD78X connects to PC via USB, Select "Conventional - General Setting - Network", checkthe box "Forward to PC" in the "Network" area, select "NCM" in "Radio's USB Networkcommunication protocol".If MD78X connects to PC via UART to IP, Select "Conventional - General Setting - Network", in the"Network" area check the box "Forward to PC", "Accessory Port Communication" select "UART To IP".Default value is suggested in Radio Control Station IP. It also can be set according to user’sconfiguration, but the last digit must be 1.Step 5. Select "Conventional - DMR Service - Basic", in the "Encode" area check the box "All CallEncode”, “Private Call Encode”, “Group Call Encode”.14
User ManualRadio Setup ConfigurationStep 6. Select “Program - Write To Radio” or click, and the “Communication Port” box will pop up.Step 7. Click “OK” to write the configure information into the MD78X. When the information is written,the MD78X will restart automatically to make the setting effective.4.2 Dispatch Station - Repeater ConfigurationStep 1. Run the CPS and enter its main interface.Step 2. Select “Program - Read From Radio” or clickPort” dialogue box.15, you will see the pop-up “Communication
User ManualRadio Setup ConfigurationStep 3. Select the corresponding USB port (e.g.: USB1) for the RD98X, and click “OK” to enter the“Read” dialogue box.Step 4. Select "Conventional - General Setting - Network", Ethernet IP is the IP address of repeater.Gateway IP should be correct. Following figure shows normal IP settings.Step 5. Select "Conventional - General Setting - Network". In the "Network" area, check the box"Forward to PC". The default value of “RTP Packet Buffer Length” is 1. If it is in Ethernet, youcan set to 3 or above. “Third Party Server IP” is the IP address of PC.16
User ManualRadio Setup ConfigurationStep 6. Select “Program - Write To Radio” or click, and the “Communication Port” box will pop up.Step 7. Click “OK” to write the configure information into the RD98X. When the information is written,the RD98X will restart automatically to make the setting effective.4.3 Terminal ConfigurationStep 1. Run the CPS and enter its main interface.Step 2. Select “Program - Read From Radio” or clickPort” dialogue box.17, you will see the pop-up “Communication
User ManualRadio Setup ConfigurationStep 3. Select the corresponding USB port (e.g.: USB1) for the PD78X, and click “OK” to enter the“Read” dialogue box.Step 4. Select "Conventional - DMR Service - Basic". Check the box "All Call Encode”, “Private CallEncode”, “Group Call Encode” in the "Encode" area.Step 5. Select “Program - Write To Radio” or click, and the “Communication Port” box will pop up.Step 6. Click “OK” to write the configure information into the PD78X. When the information is written,the PD78X will restart automatically to make the setting effective.4.4 UART to IP Module Configuration4.4.1 Serial ConfigurationParameterValueBaud Rate460800Data Bits818
User ManualRadio Setup ConfigurationStop Bits1Port161Dest Port161ParityNoneFlow controlNone4.4.2 IP ConfigurationParameterValueExampleSource IPUART to IP192.168.20.146Module IPTarget IPPC IP192.168.20.145GatewayGateway192.168.20.1All Configurations as follows:Note: The maximum payload length is recommended to be 1024, and the time delay for each UARTinterrupt is recommended to be 2ms, due to the UART feature, if multiple data messages are sent to thismodule through UART in very short time, it will cause different packets will be treated as one packet, sothe console application shall be able to handle this situation according to the length and protocol header.Please refer to UART to IP Module manual for detailed configuration.19
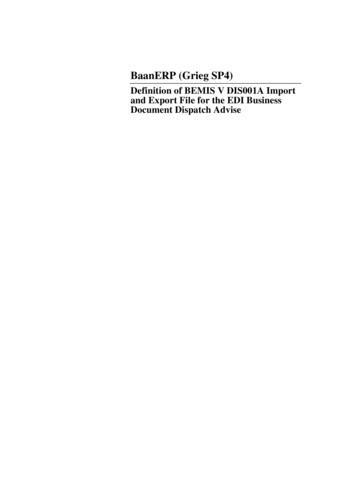
User ManualIP Dispatch Software5. IP Dispatch Software5.1 Main Interface of IP DispatchDefault view layout introduction:Area 1: Title barClickto configure common configuration and alert mail.Clickto display information of software version.Clickto get user manual.Area 2: Terminal List AreaClickto add new terminal.Clickto modify configured terminal.Clickto delete configured terminal.Clickto show all contacts.Clickto show common contacts.20
User ManualIP Dispatch SoftwareSearch terminal by Radio ID or Radio Alias.Area 3: Call AreaClickto delete call log.Clickto export call log.Area 4: Message AreaClickClickto delete message log.to export message log.5.2 Software ConfigurationClick1)to enter the configuration window.Log Setting: Saving path of Log (call log and message log).21
User ManualIP Dispatch Software2)Shortcut key Setting: Set Slot1/Slot2 PTT shortcut key.3)Dispatch Station Setting: Port setting of Dispatch StationDispatch Station connects to PC via USB.Dispatch Station connects to PC via UART to IP.Dispatch Station connects to PC via IP.Note:If the connection setting of Dispatch Station changed, IP Dispatch software must restart.5.3 Add/Modify Terminal Clickzto add new terminal.Type:: Private Call: Group Call: All CallzRadio ID:Range 1-16776415.zRadio Alias:Range 1-16 characters.Click “OK” to save configuration.22
User ManualIP Dispatch Software5.4 Check Status of Dispatch Station“Waiting for device to connect” will be shown when Dispatch Station is offline.When Dispatch Station is online, its ID will be shown in this area.5.5 Voice dispatchNote: Before running this software, Please make sure that microphone is plugged in andwork correctly.5.5.1 Outgoing call1.Select a contact (or select call log in Call List)23
User ManualIP Dispatch SoftwareIf Dispatch Station is repeater, it will show two slot panels.24
User Manual2.IP Dispatch SoftwareClick “PTT” or press shortcut key.25
User Manual3.IP Dispatch SoftwareClick “Hang up” to end the call.: Outgoing call through slot 1.: Outgoing call through slot 2.26
User ManualIP Dispatch Software5.5.2 Incoming callWhen there is an incoming call, “PTT” will be disabled.27
User ManualIP Dispatch SoftwareWhen PTT is released,”PTT” is enabled. Click “PTT” to call back.: Incoming call through slot 1.: Incoming call through slot 2.28
User ManualIP Dispatch Software5.6 Message dispatch5.6.1 Real time messaging1.Select a contact(or press Ctrl to select more contacts) and then edit message.29
User Manual2.IP Dispatch SoftwareClick “Send” to send message immediately.Click “Cancel” to cancel sending message.Message StatusCommentReceived new messageSend message failedSend messagesuccessfullySchedule messageIf send message successfully, it will show “Operation successful”.If send message failed, it will show “Operation failed”. Click “Resend” to send the message again(Only30
User ManualIP Dispatch Softwarethe failed message can be resend).Clickto send the message again.31
User ManualIP Dispatch Software5.6.2 Schedule message1.Select a contact(or press Ctrl to select more contacts) and then edit message. Clickschedule time to send message.Clickto cancel the schedule message.32to set
User ManualFAQ6. FAQ6.1 Opening the IP Dispatch failedPhenomenonAt the left bottom of the PC, select “Start - All Programs - Hytera RCPs - IP Dispatch- IP Dispatch”,but the IP Dispatch cannot be opened.Analysis. Net Framework 4.0, vcredist 2008 x86 or vcredist 2010 x86 not installed correctly.SolutionNeed to be properly installed. Net Framework 4.0, vcredist 2008 x86 or vcredist 2010 x86.Please refer to 3.1 and 3.2.6.2 Dispatch Station is connected to PC, but display offlinePhenomenonDispatch Station is connected to PC, but display offline still (about 1 minute later).AnalysisUSB connection: Dispatch Station connects to PC via USB1.Dispatch Station CPS setting is not correct. Make sure "Network/Forward To PC" is checked.2.USB Driver is not installed correctly.3.Radio’s Virtual IP is not available. The Virtual IP is invalid, such as “169.xxx.xxx.xxx”.Uart to IP connection: Dispatch Station connects to PC via Uart to IP1.The network between PC and Uart to IP module has problem.2.Uart to IP module setting is not correctly.3.PC’s IP is not the same as Uart to IP module IP setting.4.Radio’s hardware or firmware is too low.IP connection: Dispatch Station connects to PC via IP1.The network between PC and repeater has problem.2.PC’s IP is not the same as repeater’s setting.3.The port is not available.33
User ManualFAQSolutionUSB connection: Dispatch Station connects to PC via USB1.Install the USB Driver properly.2.Check "Network/Forward To PC" in CPS. Please refer to 4.1 for detail.3.Plug in the USB again or restart mobile.Uart to IP connection: Dispatch Station connects to PC via Uart to IP1.Change computer firewall setting.2.Check mobile setting is correct. Please refer to 4.1 for detail.3.Check Uart to IP module setting is correct. Please refer 4.4 for detail.4.Check hardware and firmware version is available. Please refer to 2.1 for detail.IP connection: Dispatch Station connects to PC via IP1.Check repeater setting is correct. Please refer to 4.2 for detail.2.Check whether other software conflict with IP Dispatch, such as “Smart Dispatch” software.6.3 Window pop up, display “IP Dispatch is running”PhenomenonWhen open IP Dispatch.exe, there is a window display “IP Dispatch is running”Analysis1.IP Dispatch.exe is still running when close IP Dispatch.Solution1.Open Task Manager. Find IP Dispatch.exe in Process, close it.6.4 Log cannot be exportedPhenomenonLog cannot be exported.AnalysisSoftware does not run as administrator in Win 7 or higher OS. Export directory has not writtenpermission.SolutionSoftware runs as administrator in Win 7 or higher OS. Export directory must have written permission.34
Mobile The IP Dispatch software is applicable to the mobile of R5.5 or above. Repeater The IP Dispatch software is applicable to the repeater of R5.5/R6.5 (repeater R6.0 does not support). Programming Cable for Mobile The programming cable is used to configure the Terminal radio. The detail information, please refer to the mobile's user manual.