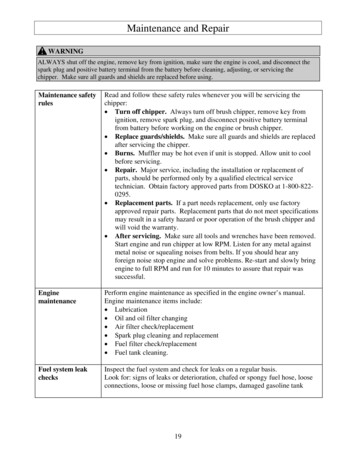
Transcription
Handle Installation GuidePlease do not return product to store.Scan to AccessSupport VideoContact the Storm Door Solution Center at 1-800-933-3626 withany questions regarding installation, lost part replacement, oranything related to your purchase.Thank you for choosing Andersen.PARTS OVERVIEWInstructional images show Traditional Handle Set, follow the same procedure for Modern Handle Set.GDBFHACIGEAExterior Trim PlateBInterior Trim PlateCHandle without SpindleDHandle with SpindleELock Case Trim PlateFDead Bolt Key CylinderAG1 1/2" Pan head Screw x2H1 1/2" Flat head ScrewI5/8" Flat head ScrewYour storm door lock can be re-keyed to match your main door’s handle set if it’s a Kwikset (included) or a Schlage (additional purchase required). Many homeimprovement stores or locksmiths can make duplicate keys. “Kwikset” is a registered trademark of Newfry LLC. “Schlage” is a registered trademark of Schlage Lock Company.SAFETY FIRST: PLEASE READ AND FOLLOW ALL CAUTIONS AND WARNINGS IN THIS GUIDE.Read this entire guide before you begin. If your abilities do not match the requirements of this installation, contact an experienced contractor.CAUTIONWARNINGImproper use of hand or power tools could result in injury and/or productdamage. Follow equipment manufacturer’s instructions for safe operation.Always wear safety glasses.Entry door hardware and handle maybecome hot when exposed to sunlight.RECOMMENDED TOOLSSafety GlassesScrewdriverAndersen Storm Door Division is a wholly owned subsidiary of Andersen Corporation. Andersen Storm Door Division manufacturesand supports the limited warranties for Andersen and EMCO storm doors. “Andersen” and “EMCO” and all other marks wheredenoted are trademarks of Andersen Corporation. 2020 Andersen Corporation. All rights reserved.112-2020 r4 20022 Print in ColorP/N 618803
7/8” Machine Pan Painted1” SMS Pan1” SMS Pan Painted1” SMS Pan1” SMS Pan Painted1” Machine Pan PaintedSTEP 1: HANDLE SET INSTALLATION- RIGHT HANDED DOOR1” SMS Pan Painted 1” Machine Pan PaintedNEEDED1-1/2”TOOLSMachineFlatheadRIGHT1” Machine Pan PaintedFlat head screw5/8”Flat head screw1-1/2” Machine Flathead 1 1/2”HANDED1 1/2”#101-1/2” Machine Flathead#10ExteriorBPan head screw x21-1/2” Machine FlatheadAExterior#101-1/2” Machine Flathead2” SMS Pan Painted1-1/2” Machine Flathead2” SMS Pan Painted2” SMS Pan PaintedInterior#12SliderC12#125/8” SMS Pan Painted#125/8” SMS Pan Painted25/8” SMS Pan PaintedNOTE: Trim plates should not be installedon door while completing below steps.1. Insert handle without spindle intoexterior trim plate (with Andersen logo)in downward position and rotate slightlyto secure it.2. Repeat for other handle and interior trimplate.STOP: Laminated Fixed Glass Doors only.Slider must be replaced. See Interior TrimPlate Kit for further instruction.C2InteriorInterior1. Check orientation of the lock case bylooking into the handle holes.2. If notch is facing away from the glasspanel as seen above, proceed to Step C1.3. If the notch is pointed downwards,proceed to Step C2.DInterior1SliderDeadbolt keycylinderwith thumblatch21. Rotate the handles into a vertical position.2. Install exterior and interior trim platestogether using two 1 1/2" pan headscrews onto the door. Spindle will passthrough the square hole in the lock caseand into the other handle.3. Rotate handle to a horizontal position.1. Install lock case trim plate onto the edgeof the door and fasten with one 5/8” flathead screw. Do not overtighten.2. Insert dead bolt key cylinder into lockcase. Turn thumb latch to ensure properinstallation. Fasten with one 1 1/2” flathead screw. Do not overtighten.NOTE: Slider feature will function only ondoors featuring Quick Change System.21. Rotate the handles into a horizontalposition.2. Install exterior and interior trim platestogether using two 1 1/2" pan headscrews onto the door. Spindle will passthrough the square hole in the lock caseand into the other handle.3. Proceed to Step D.
7/8” Machine Pan Painted1” SMS Pan1” SMS Pan Painted1” SMS Pan1” SMS Pan Painted1” Machine Pan PaintedSTEP 1: HANDLE SET INSTALLATION- LEFT HANDED DOOR1” SMS Pan Painted 1” Machine Pan PaintedNEEDED1-1/2”TOOLSMachineFlatheadLEFT1” Machine Pan Painted1-1/2” Machine FlatheadHANDEDFlat head screw5/8”Flat head screw1 1/2”1 1/2”#101-1/2” MachineFlathead#10B ExteriorPan head screw x21-1/2” Machine FlatheadAExterior#101-1/2” Machine Flathead2” SMS Pan Painted1-1/2” Machine Flathead2” SMS Pan Painted2” SMS Pan PaintedInteriorSliderC1 Interior#122#125/8” SMS Pan Painted#125/8” SMS Pan Painted25/8” SMS Pan PaintedNOTE: Trim plates should not be installedon door while completing below steps.1. Insert handle with spindle into exteriortrim plate (with Andersen logo) indownward position and rotate slightly tosecure it.2. Repeat for other handle and interior trimplate.STOP: Laminated Fixed Glass Doors only.Slider must be replaced. See Interior TrimPlate Kit for further instruction.C2 Interior1. Check orientation of the lock case bylooking into the handle holes.2. If notch is facing away from the glasspanel as seen above, proceed to Step C1.3. If the notch is pointed downwards,proceed to Step C2.DInterior1SliderDeadbolt keycylinderwith thumblatch1. Rotate the handles into a vertical position.2. Install exterior and interior trim platestogether using two 1 1/2" pan headscrews onto the door. Spindle will passthrough the square hole in the lock caseand into the other handle.3. Rotate handle to a horizontal position.21. Install lock case trim plate onto the edgeof the door and fasten with one 5/8” flathead screw. Do not overtighten.2. Insert dead bolt key cylinder into lockcase. Turn thumb latch to engagedeadbolt fully and fasten with one 1 1/2”flat head screw. Do not overtighten.NOTE: Slider feature will function only ondoors featuring Quick Change System.31. Rotate the handles into a horizontalposition.2. Install exterior and interior trim platestogether using two 1 1/2" pan headscrews onto the door. Spindle will passthrough the square hole in the lock caseand into the other handle.3. Proceed to step D.
Guía de Instalación de la ManijaGracias por elegir Andersen.Comunícate con el Centro de Soluciones de Contrapuertas llamando al 1-800-933-3626 si tienesalguna pregunta sobre la instalación, el reemplazo de piezas perdidas, o cualquier otro asuntorelacionado con tu compra.No devuelvas el producto a la tienda.DESCRIPCIÓN GENERAL DE LAS PIEZASAPlaca Decorativa ExteriorDManija con EjeGTornillo núm. 8 x 1 1/2" (2)BPlaca Decorativa InteriorEPlaca de Adorno de CerraduraHTornillo núm. 10 x 1 1/2"CManija sin EjeFCilindro con Llave de CerrojoiTornillo núm. 10 x 5/8"HERRAMIENTAS RECOMENDADASADVERTENCIALos herrajes y la manija de la puerta deentrada pueden recalentarse al exponerse a laluz del sol.Gafas de seguridadDestornilladorNOTA: Las imágenes de instrucciones muestran una manija tradicional, siga el mismoprocedimiento para la manija moderna.ADVERTENCIALa cerradura de la contrapuerta puede cambiarse (o modificarse su combinación) paracoincidir con el juego de manija de la puerta principal si es una Schlage (incluida) o unaKwikset (se requiere una compra adicional). Muchas tiendas de mejoras para el hogar ocerrajeros pueden hacer copias de llaves.!El uso inapropiado de herramientas manualeso eléctricas podría ocasionar lesiones y/odaños al producto. Sigue las instrucciones delfabricante para la operación segura del equipo.Usa siempre gafas de seguridad.!“Kwikset” es una marca registrada de Newfry LLC. “Schlage” es una marca registrada deSchlage Lock Company.12INSTALA EL JUEGO DE MANIJAS (A la derecha yderecha)NOTA: Las placas decorativas no deben estar instaladas en la puerta mientras se realizan los pasos siguientes.1. Inserta la manija con eje en la placa decorativa exterior (con el logotipo de Andersen) en posición hacia abajo y gírala ligeramente paraasegurarla.2. Repite el paso con la otra manija y la placa decorativa interior.ALTO: La barra deslizante debe recolocarse en las puertas de vidrio laminado. Consulta el kit de placa decorativa interior para obtener másinstrucciones.A5/8”1/2”1. Verifica la orientación de la caja de la cerradura mirando en los orificios de la manija.2. Si la muesca no mira hacia el panel de vidrio como se ve arriba, continúa con el paso C1.3. Si la muesca apunta hacia abajo, prosigue con el paso C2.B5/8”C11/2”1. Gira las manijas a la posición horizontal.1/2”exterior e interior usando dos tornillos de cabeza biselada de 1 1/2” en la puerta. El eje pasará por el2. Instala juntas las placas decorativasorificio cuadrado de la cerradura hacia dentro de la otra manija.3. Continúa con el paso D.1. Gira las manijas a la posición vertical.2. Instala juntas las placas decorativas exterior e interior usando dos tornillos de cabeza biselada1” de 1 1/2” en la puerta. El eje pasará por elC21 1/2”orificio cuadrado de la cerradura hacia dentro2”de la otra manija.3. Gira la manija a la posición horizontal.1. Instala la placa decorativa en el borde de la puerta y fíjala con un tornillo de 5/8”.DNo aprietes demasiado.2. Inserta el cilindro para llave del cerrojo dentro de la cerradura. Gira el pestillo de pulgar para enganchar completamente el cerrojo y fíjalo1con un tornillo de cabeza plana de 1 1/2 ”.No aprietes demasiado.NOTA: La función deslizante funcionará solo en puertas con sistema de cambio rápido.1/2”Puedes combinar tu cerradura de contrapuerta Andersen con las cerraduras de puerta de entrada Schlage o Kwikset . Para detalles, consulta las instrucciones del juego demanijas en la caja correspondiente.“Kwikset” es una marca comercial registrada de Newfry LLC. “Schlage” es una marca registrada de Schlage Lock Company.Andersen Storm Door Division is a wholly owned subsidiary of Andersen Corporation. Andersen Storm Door Division manufacturesand supports the limited warranties for Andersen and EMCO storm doors. “Andersen” and “EMCO” and all other marks wheredenoted are trademarks of Andersen Corporation. 2020 Andersen Corporation. All rights reserved.412-2020 r4 20022 Print in ColorP/N 618803
Guide d’installation de la poignéeMerci d’avoir choisi Andersen.Veuillez communiquer avec le Centre des solutions pour les contre-portes en composant le1-800-933-3626, pour toute question relative à l’installation, au remplacement de pièces perduesou tout autre problème relatif à votre achat.Veuillez ne pas retourner le produit au magasin.LISTE DES PIÈCESAPlaque de garniture extérieureDPoignée à tigeGVis no8 x 3,81 cm (1 1/2 po) (2)BPlaque de ganriture intérieureEHVis no10 x 3,81 cm (1 1/2 po)CPoignée sans tigePlaque de garniture pour la boitede verrouillageFCylindre de la cle du pene dormantiVis no10 x 1,59 cm (5/8 po)OUTILS RECOMMANDÉSAVERTISSEMENTLunettes de sécuritéTournevisLa quincaillerie et les poignées des portesd’entrée peuvent devenir très chaudeslorsqu’exposées au soleil.REMARQUE: Les images d'instruction montrent le handle traditionnel, suivez la mêmeprocédure pour le handle moderne.AVERTISSEMENTLe verrou de votre contre-porte peut être changé (recodé) pour s’harmoniser avec lapoignée de votre porte principale s’il est un Schlage (inclus) ou un Kwikset (achatsupplémentaire requis). De nombreux magasins de rénovation résidentielle ou serrurierspeuvent faire des doubles des clés.!Une mauvaise utilisation des outils manuels ouélectriques peut entraîner des blessures et/ouendommager le produit. Suivez les instructionsdu fabricant pour une utilisation sécuritaire.Portez toujours des lunettes de sécurité.!«Kwikset» est une marque déposée de Newfry LLC. «Schlage» est une marque déposéede Schlage Lock Company.12A5/8”REMARQUE : Les plaques de garniture ne doivent pas être installées sur la porte pendant que vous exécutez les étapes suivantes.1. Insérez la poignée sans tige dans la plaque de garniture extérieure (avec le logo Andersen) dans une position orientée vers le bas et tournezla légèrement pour la fixer solidement.2. Répétez pour l’autre poignée et plaque de garniture intérieure.ARRÊTEZ : Le bouton coulissant doit être remplacé sur les portes en verre feuilleté. Voir la trousse de plaque de garniture intérieure pour desinstructions supplémentaires.1/2”B5/8”INSTALLER LES POIGNÉES (À MAIN GAUCHE ET DROITE)C1C21. Vérifiez l’orientation du boîtier de serrure en regardant dans les trous de la poignée.2. Si l’encoche fait face au côté opposé au panneau de verre, tel qu’illustré ci-dessus, passez à l’étape C1.3. Si l’encoche est pointée vers le bas, passez à l’étape C2.1. Tournez les poignées en position horizontale.1/2”2. Fixez les plaques de garniture1/2”extérieure et intérieure ensemble sur la porte, à l’aide de deux vis à tête cylindrique bombée de 3,81 cm. La tige passeraà travers le trou carré du boîtier de serrure et dans l’autre poignée.3. Passez à l’étape D.1. Tournez les poignées en position verticale.2. Fixez les plaques de garniture extérieure et intérieure ensemble sur la porte, à l’aide de deux vis1”à tête cylindrique bombée de 3,81 cm. La tige passera1 1/2” 3.Dà travers le trou carré du boîtier de serrure 2”et dans l’autre poignée.Tournez la poignée en position horizontale.1. Installez la plaque de garniture du boîtier de serrure sur le bord de la porte et fixez fermement avec une vis de 1,58 cm. Ne serrez pas trop.2. Insérez le cylindre à clé du pêne dormant dans le boîtier de serrure. Tournez le loquet poucier pour assurer une installation correcte. Fixez fermementavec une vis à tête plate de 3,81 cm. Ne serrez pas trop.REMARQUE : Le bouton coulissant fonctionnera uniquement sur les portes équipées du système Quick Change.1 1/2”Vouspouvez apparier votre verrou de contre-porte Andersen à une serrure de porte d’entrée Schlage ou Kwikset . Consultez les instructions pour poignées contenues dans latrousse des poignées pour les détails.«Kwikset» est une marque déposée de Newfry LLC. «Schlage» est une marque déposée de Schlage Lock Company.Andersen Storm Door Division is a wholly owned subsidiary of Andersen Corporation. Andersen Storm Door Division manufacturesand supports the limited warranties for Andersen and EMCO storm doors. “Andersen” and “EMCO” and all other marks wheredenoted are trademarks of Andersen Corporation. 2020 Andersen Corporation. All rights reserved.512-2020 r4 20022 Print in ColorP/N 618803
trim plate (with Andersen logo) in downward position and rotate slightly to secure it. 2. and into the other handle.Repeat for other handle and interior trim plate. NOTE: Trim plates should not be installed on door while completing below steps. 1. Install lock case trim plate onto the edge of the door and fasten with one 5/8" flat head screw.