Transcription
Configuration GuidePort ForwardingDoc No. CG01178
CopyrightCopyright 2019 NetComm Wireless Limited. All rights reserved.The information contained herein is proprietary to NetComm Wireless. No part of this document may betranslated, transcribed, reproduced, in any form, or by any means without prior written consent of NetCommWireless.Trademarks and registered trademarks are the property of NetComm Wireless Limited or their respective owners.Specifications are subject to change without notice. Images shown may vary slightly from the actual product.Note – This document is subject to change without notice.Document historyThis document relates to the following product:NetComm Wireless Port Forwarding Configuration GuideVER.DOCUMENT DESCRIPTIONDATEv 1.0Initial Document Release10 July 2015v 1.1Applied new format.2 July 2019Table i. - Document revision historyContentsApplicable devices. 3Introduction . 4Adding a Port Forwarding Rule . 5Verifying the Port Forwarding rule . 7Place device in the Demilitarized Zone (DMZ) . 8Verify the DMZ configuration . 10Port Forwarding – Configuration GuideCG01178 v. 1.1 July 20192 of 10 NetComm Wireless 2019
Applicable devicesThis document is applicable to the following NetComm Wireless -25NWL-22xPort Forwarding – Configuration GuideCG01178 v. 1.1 July 20193 of 10 NetComm Wireless 2019
IntroductionPort forwarding enables programs or devices running on your LAN to communicate with other devices on theinternet as if they were directly connected. Many internet services and applications use designated ports and whenpackets arrive at the router, they will be lost unless they are directed to the appropriate destination. Portforwarding works by forwarding a specific TCP or UDP port or range of ports from the modem/router to thecomputer or device you are using.There might also be times when you wish to place a device connected to your router in the “demilitarized zone” or“DMZ”. A device placed in the DMZ will have all port numbers forwarded to it, giving it unrestricted access to theinternet.Important – Each service or application generally uses different TCP or UDP ports. Refer to the documentation for the service or application to findout which ports need to be forwarded. You can only forward a port or range of ports to a single destination (IP address). In some cases, this may cause issues where multipleLAN devices attempt to use a service simultaneously. Where possible, use an alternate port for any subsequent connections after thefirst device. Please consult your service provider or application developer for assistance with thisNote – Before performing the instructions in this guide, please ensure that you have the latest firmware version on your router. ireless to find your device and download the latest firmware.Port Forwarding – Configuration GuideCG01178 v. 1.1 July 20194 of 10 NetComm Wireless 2019
Adding a Port Forwarding RuleThis guide will take you through the steps required to add a port forwarding rule to your router.1Open a web browser and navigate to the LAN IP address of your router. For the NTC-6000 Series, thedefault is http://192.168.20.1. For NTC-22x series, the default is https://192.168.1.1. For every other product,the default is http://192.168.1.1.Login to the router with the following credentials:Username: rootPassword:Note – Default password is admin which must be changed after first login.Figure 1: Login page2From the menu bar along the top of the screen, select Networking then from the left select the Routingmenu followed by the Port forwarding option.Figure 2: Navigating to the Port forwarding pagePort Forwarding – Configuration GuideCG01178 v. 1.1 July 20195 of 10 NetComm Wireless 2019
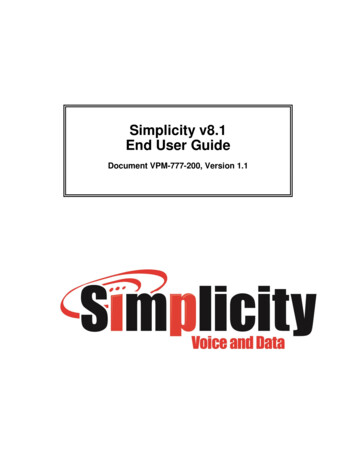
3Click the Add button to add a new rule.Figure 3: Adding a new rule4Using the Protocol drop down list, select the protocol type to use for the rule. You can select TCP, UDP orAll.Figure 4: Entering the port forwarding rule details5In the Source IP address field, enter the address from which the traffic will originate. This is usually a WAN IPaddress originating from the internet. In this example, we are setting the Source IP Address to 0.0.0.0 whichallows connections from anywhere.6In the Source port range (From) and (To) fields, enter the range of ports to forward. For example, entering6881 in the first field and 6999 in the second field will forward the 19 ports between and including 6881 and6999. If you wish to forward a single port, enter the same port number in both the first and the second fields.7In the Destination networking address field, enter the local IP address of the LAN client to which port trafficwill be forwarded.8In the Destination port range (From) and (To) fields, enter the port range for the destination. In many casesthese ports will be the same as the Incoming Port Range. If you wish to specify a single port, enter the sameport number in both the first and the second fields.9Click the Save button. The port forwarding rule is displayed at the bottom of the screen as highlighted inFigure 5 below.Figure 5: A completed port forwarding rulePort Forwarding – Configuration GuideCG01178 v. 1.1 July 20196 of 10 NetComm Wireless 2019
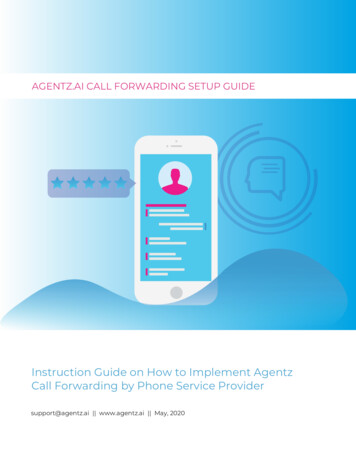
Verifying the Port Forwarding ruleIn the example above, we forwarded port 3389 which is the default port for Microsoft’s Remote Desktop Protocol(RDP). The client machine (192.168.20.10) is accepting Remote Desktop connections on port 3389 so we can verifythe connection by connecting to the client using RDP. We need to connect to the WAN IP address of the routerand our request is forwarded on to the client (192.168.20.10). The WAN IP Address can be found by viewing theStatus page of the NetComm Wireless M2M Series Router as shown below:Figure 6: The Status page showing the WAN IP Address1Click the Windows Start button then type mstsc and press Enter.2Type the WAN IP address of the remote router and click Connect.Figure 7: RDP Connection screen3The remote desktop opens and prompts you to login. If it does not, verify your settings and try again.Port Forwarding – Configuration GuideCG01178 v. 1.1 July 20197 of 10 NetComm Wireless 2019
Place device in the Demilitarized Zone (DMZ)A device connected to the router may be placed in the DMZ which gives it unrestricted access to the internet. Allports are forwarded to the device when it is in the DMZ. Placing a device in the DMZ can be useful for testingcertain scenarios but is also risky since it puts the client device in a vulnerable position.Important – Placing a device in the DMZ puts it in a vulnerable position and is open to potential threats from the internet. It is notrecommended that you leave a device in the DMZ during normal operation.To place a device in the DMZ:1Open a web browser and navigate to the LAN IP address of your router. For the NTC-6000 Series, thedefault is http://192.168.20.1. For NTC-30 and NTC-40 Series, the default is http://192.168.1.1. For NTC-22xseries, the default is https://192.168.1.1.Login to the router with the following credentials:Username: rootPassword:Note – Default password is admin which must be changed after first login.Figure 8: Login page2From the menu bar along the top of the screen, select Networking then from the left select the Routingmenu followed by the DMZ option.Figure 9: Internet Settings - Routing – DMZPort Forwarding – Configuration GuideCG01178 v. 1.1 July 20198 of 10 NetComm Wireless 2019
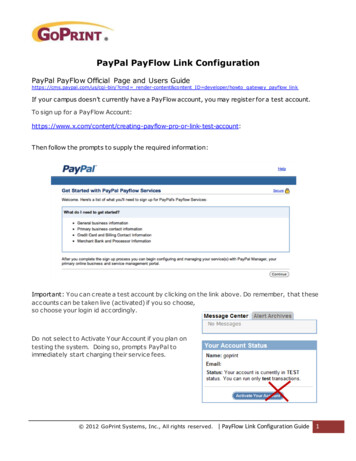
3Set the DMZ option to ON and enter the IP address of the device that you want to place in the DMZ.Figure 10: DMZ Settings4Click the Save button. The IP address you entered will have all ports forwarded to it.Port Forwarding – Configuration GuideCG01178 v. 1.1 July 20199 of 10 NetComm Wireless 2019
Verify the DMZ configurationIn the example above, we placed the client machine on 192.168.20.10 in the demilitarized zone. This means that allports are forwarded directly to it. To test that it is in the DMZ, we can connect to the WAN IP Address using RDP.The WAN IP Address can be found by viewing the Status page of the NetComm Wireless M2M Series Router asshown below:Figure 11: The Status page showing the WAN IP Address1Click the Windows Start button then type mstsc and press Enter.2Type the WAN IP address of the remote router and click Connect.Figure 12: RDP Connection screen3The remote desktop opens and prompts you to login. If it does not, verify your settings and try again.Port Forwarding – Configuration GuideCG01178 v. 1.1 July 201910 of 10 NetComm Wireless 2019
Port forwarding enables programs or devices running on your LAN to communicate with other devices on the internet as if they were directly connected. Many internet services and applications use designated ports and when packets arrive at the router, they will be lost unless they are directed to the appropriate destination. Port forwarding works by forwarding a specific TCP or UDP port or range .