Transcription
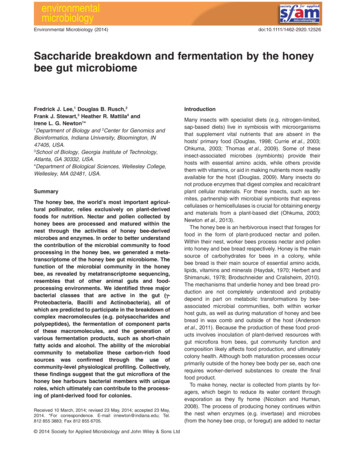
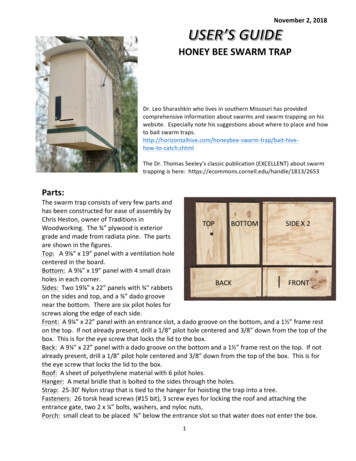
November 2, 2018HONEY BEE SWARM TRAPDr. Leo Sharashkin who lives in southern Missouri has providedcomprehensive information about swarms and swarm trapping on hiswebsite. Especially note his suggestions about where to place and howto bait swarm p/bait-hivehow-to-catch.shtmlThe Dr. Thomas Seeley’s classic publication (EXCELLENT) about swarmtrapping is here: :The swarm trap consists of very few parts andhas been constructed for ease of assembly byChris Heston, owner of Traditions inWoodworking. The ¾” plywood is exteriorgrade and made from radiata pine. The partsare shown in the figures.Top: A 9⅛” x 19” panel with a ventilation holecentered in the board.Bottom: A 9⅛” x 19” panel with 4 small drainholes in each corner.Sides: Two 19⅞” x 22” panels with ¾” rabbetson the sides and top, and a ¾” dado groovenear the bottom. There are six pilot holes forscrews along the edge of each side.Front: A 9¼” x 22” panel with an entrance slot, a dado groove on the bottom, and a 1½” frame reston the top. If not already present, drill a 1/8” pilot hole centered and 3/8” down from the top of thebox. This is for the eye screw that locks the lid to the box.Back: A 9¼" x 22” panel with a dado groove on the bottom and a 1½” frame rest on the top. If notalready present, drill a 1/8” pilot hole centered and 3/8” down from the top of the box. This is forthe eye screw that locks the lid to the box.Roof: A sheet of polyethylene material with 6 pilot holes.Hanger: A metal bridle that is bolted to the sides through the holes.Strap: 25-30’ Nylon strap that is tied to the hanger for hoisting the trap into a tree.Fasteners: 26 torsk head screws (#15 bit), 3 screw eyes for locking the roof and attaching theentrance gate, two 2 x ¼” bolts, washers, and nyloc nuts,Porch: small cleat to be placed ⅜” below the entrance slot so that water does not enter the box.1
Top and Entrance Closure: #8 wire to be stapled over the ventilation hole in the top. A piece ofperforated polycarbonate plastic is included to cover the entrance when a swarm is going to bemoved. The plastic is beveled on one corner so that it will rotate.Enhancements:The inside of the box should not be painted. However, the inside can be treated in three ways tomake it possibly more attractive to bees. 1) The first thing that I recommend is to use a circularrasp in a drill or a disc wheel in an angle grinder to roughen up the panels. Research has shown thatbees will apply propolis to a rough surface making the hive area healthier. I also believe the beescan move around inside the box faster. 2) The second enhancement is to char/burn the inside ofthe panels. Nearly everyone recommends coating the inside of the box with propolis if it isavailable.Assembly:Tools: Electric drill for driving screws, # 15 torsk bit, ¼” hex drive bit, 7/16”socket driver or wrenches, rubber mallet, stapler, optional clamps that open to20”.The Box: Lay one of the side panels on a flat surface with the inside of the boxfacing upward. Place a bead of Tightbond II glue on the two side edges (alongpilot holes) and in the groove. Insert the bottom panel that contains 4 drainholes in the groove on the bottom of the side panel. Press the bottom panelcompletely into the groove with a mallet. Center it so that there is 3/8”overlap along the side rabbets. Next, place the front (with entrance slot) andback panels on the edges of the side panel. Press these panels into the overlapof the bottom panel so that front and back panels are flush with edges of theside panel. Apply a bead of glue to the top edges of the three panels. Nowtake the second side panel and press it into place. Clamp the box if necessary.BottomboardInsert screws into the pilot holes and screw them down. When all screws arein place, gently lift and flip the box so that you can place screws in the otherside panel. Tighten those screws and the box is together forever.The Top and Roof: Staple or nail the piece of #8 screen over the ventilationFront andhole in the top panel and drop it into the box. Place the POLYETHYLENE roofback boardson top of the box and center it side to side. Then position the roof panel sothat there is a ½” overhang on the BACK of the box. [Note: a larger overhandon the back of the box may make it more difficult to hang the box properly in atree.] I suggest depressing the arch in the roof panel so that there is a ½ - ¾” space between the toppanel and the roof. This will allow for adequate ventilation. Drive the hex head screws into the toppanel through the pilot holes. The screws to do not need to be driven down tight.The Hanger: Bolt (¼” x 2”) the metal bracket to the sides using the pilot holes. Use a nyloc nut andflat washer on the inside of the box and outside of the hanger. DO NOT TIGHTEN DOWN THE NUT –YOU NEED THE BOLT LENGTH SO THAT THE HANGER WILL CLEAR THE ROOF. Tie the nylon strap tothe hanger.Painting:2
Prime and paint the outside of the box as you would any other bee hive component. A lighter coloris often recommended so that the box does not get too hot.Baiting:According to Michael Bush, the author of the Practical Beekeeper book, the three most importantthings for a swarm trap are location, location and location. Lemongrass oil mimics the pheromonethat scout bees release when looking for a new home and has been said to double your chances atluring a swarm to a hive or trap. I have had good success with the NOW brand of lemon grass oil.Just put a drop or two (and no more) of the oil inside the entrance of your hive. I also put a drop ona piece of paper towel and place it in a sandwich bag. I put this on top of the frames and perforatethe bag with a knife blade. You can refresh the oil weekly to keep the scent fresh. If you can smellthe oil the bees can!! Old brood frames which contain brood pheromone also are recommendedlures that attracts the swarm. The best bet is to use all of these recommendations at the same time.Deploying:Locate an appropriate tree with a limb or stub sticking out from the trunk. Irecommend getting a piece of lightweight cotton string and attaching aweight to it. Throw the weight over the limb where you want to suspendthe box. Once the string is in the proper place,attach one end of the cotton string to the nylonstrap and pull the strap over the limb. Hoistingthe box is much easier with two persons. Haveone person pull on the strap and the otherperson guide the box upward using a pole orrake. Once the trap is where you want it, use thepole to fine tune the orientation of the box. A slightangle towards the front is desired and it should be plumbfrom side to side. Once the bracket is pulled up tight tothe limb you can use the strap in many ways to securethe trap to the tree so that the trap does not spin orrock. Tie off the strap around the tree or an adjacenttree.It seems that bees have location criteria much like deerhunters when putting up ladder stands. If there are SAFEladder deer stands in your area they might be a perfectplace to mount a swarm trap. Hoist the swarm trap up3
onto the platform of the deer stand and secure it with a ratchet strap or rope. The disadvantage ofdeer stands are that you will need to climb the stand to raise and lower the trap. You must usecaution to make sure the screw eyes are in place to lock the lid onto the box. KEEP THE NYLONSTRAP ON THE HANGER!Success:Check the swarm trap every few days. You may first see scout beesinspecting the box. When a swarm moves in you will see hundreds ofbees per minute going in and out of the box during the middle of theday. A sure sign that a queen is in the box is if the bees are bringing inpollen. Swarms are very proficient in making wax. I attempt totransfer the bees as soon as possible (less that 48 hours) to a hive boxso that they do not build wax underneath the frames where it will bewasted -- BECAUSE THEY ARE ABLE TO VIOLATE BEE SPACE WHENTHEY ARE NOT IN A LANGSTROTH HIVE BOX.Once you are convinced that a swarm has taken residence in the boxyou need to prepare to lower the box. Here is a list of useful items inthat regard:Bee suit and glovesDuct tape to secure the right side of the entrance gateEarly in the morning or late in the evening nearly all of the bees will be inside the box. This is thetime to close the entrance so that you will capture 99.99% of the bees. Pivot the perorated plasticgate down onto the porch to block the entrance. The top is bee proof when securely installed intothe front and back rabbets of the box.Next you need to prepare to move the bees from the swarm trap into a regular hive. Here is a list ofuseful items in that regard:Bee suit and glovesSmokerHive tools and frame lifterHive stand – concrete blocks or wooden standHive bottom boardDeep hive body box with at least 6 frames and foundationFront quart jar feeder, frame feeder, or top feeder (with ventilation box or super box if using topfeeder)Inner coverTop cover4
Position the swarm trap next to the new hive. Start by addinga few puffs of smoke through the entrance of the swarm box.Then remove the top of the swarm box. If you have a large“primary” swarm you should see bees covering all of theframes. Slowly transfer the frames of bees into the centerarea of the hive box in the same order as they were in theswarm trap. It is best to move two or three frames at a timeso that you minimize potential damage to the queen. Addadditional frames until you have a total of ten/eight in the hivebox. Using the hive tool, compress the 10 frames into themiddle of the box.At this point you may still have lots of bees (I had 1000s ormore) in the swarm box. The simple thing to do is turn the boxupside down on top of the hive so that the swarm box overlapsto provide an opening. All of the bees will work their way intothe hive in a couple of hours.Later in the season you may catch “after swarms” that are smaller and cover 3-5 frames. These arestill larger than a commercial package of bees and are very viable. In 2018 I am going to transferthese to nuc boxes. Michael Bush (author of The Practical Beekeeper) suggests installing bees in theminimal amount of space and then transfer them to larger boxes as they fill out the frames – 80%rule.Feeding the swarm the first couple of weeks may substantially increase the bees survival. Whateveryou do you have to watch for robbing!! If you are using a frame feeder you will replace some of theempty side frames and add sugar solution at this point. If youare using a top feeder add the extra box to hold the feeder. Fillthe feeder with sugar solution. If you are using a front feeder you will install it last on thebottom board.Place the inner cover and top cover onto the hive. Check the feederand add sugar solution every couple of days – especially if the weatheris limiting foraging for the bees.5
Here is an easy way to move the swarm trap if yourvehicle is not close by. It can be especially heavy whenyou catch a large swarm that has been in the box severaldays.6
5 Position the swarm trap next to the new hive. Start by adding a few puffs of smoke through the entrance of the swarm box. Then remove the top of the swarm box.