Transcription
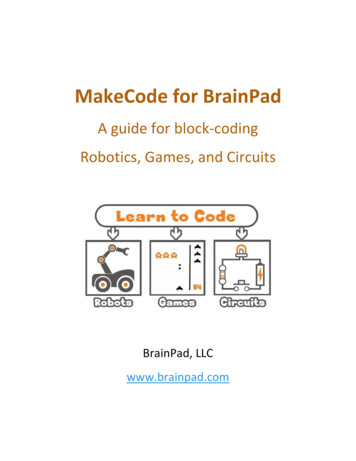
MakeCode for BrainPadA guide for block-codingRobotics, Games, and CircuitsBrainPad, LLCwww.brainpad.com
MAKECODE FOR ROBOTICS, GAMES, AND CIRCUITSWWW.BRAINPAD.COMCONTENTSIntroduction .3BrainPad Pulse.3Global Thinking.4License .4STEM .4The Philosophy .4MakeCode .5Nothing to install .5Works on Everything .5Blocks to Code .6The Simulator .8Getting Started .9Forever Loop .9On Start .11Debugging .11Pause .15Flashing the BrainPad .16Block Basics .23Events with Buttons .23If and Movement .23Variable Sound .27Robotics .30Assembly .30Extensions .32Moving .34Run Off .36Buzzer .36Lights .37Distance Sensor .39Line Follower .40Remote Control .42Games .44Sprites.44PAGE 1 OF 88FEBRUARY 10, 2022
MAKECODE FOR ROBOTICS, GAMES, AND CIRCUITSWWW.BRAINPAD.COMCollision .50Animations .51Scoring & Lives .53BrainGamer .56Circuits .60Digital .61Digital Outputs .61Digital Inputs .64Analog .67Analog Output .67Analog Input .71Smart LEDs .77Distanse Sensor .79Infrared Remote .82Servo Motors .84What’s Next? .88PAGE 2 OF 88FEBRUARY 10, 2022
MAKECODE FOR ROBOTICS, GAMES, AND CIRCUITSWWW.BRAINPAD.COMINTRODUCTIONThis guide provides insight into the unlimited potential of using the BrainPad Pulse for coding robotics, games, andcircuits. BrainPad works for classrooms, after-school clubs, or summer camps. The information contained withinwill help beginners to those already well-versed in MakeCode. It starts with the basics in a user-friendly way,allowing you to progress at your own pace and try new things as you advance your coding knowledge.BRAINPAD PULSEBrainPad Pulse is a Coding Micro-Computer, a powerful educational STEM tool that can be used to teach Robotics,Games, and Circuits. It works with everyone, from kids to college students and even professionals, thanks to itsmultiple coding options.The BrainPad Pulse is the “brains” of your project. It can be used on its own, with its display, accelerometer,buzzer, and buttons.And it can connect to other accessories to give you more options, like the BrainBot.There is a range of available accessories as well, https://www.brainpad.com/accessories/.PAGE 3 OF 88FEBRUARY 10, 2022
MAKECODE FOR ROBOTICS, GAMES, AND CIRCUITSWWW.BRAINPAD.COMGLOBAL THINKINGWe work hard on making the BrainPad available to every culture and language. If you feel up to the challenge andwant to translate this book into your language, please let us know!If you are translating this book, please add a section about you.LICENSEThis book is free and licensed under CC BY-SA 4.0. You are free to edit and print, repurpose, and reuse. Learn moreabout what you can and can’t do here EM“STEM” stands for Science, Technology, Engineering, and Mathematics. The STEM acronym was introduced in 2001by the U.S. National Science Foundation. STEM is now one of the most talked about topics in education. STEMeducation, however, is more than just these four fields of study. The STEM educational approach is aimed atconnecting classroom learning to the real world by emphasizing communication, collaboration, critical thinking,and creativity while teaching the engineering design process. The term “STEAM” is the same as STEM withadditional emphasis on the arts.THE PHILOSOPH YSTEM education requires an evolving platform, not a toy. The BrainPad evolves to match your skill level. Many toysare marketed as STEM tools, but most lack the versatility to keep students engaged for any length of time. TheBrainPad ecosystem consolidates programming (from beginner to professional), electronics, engineering, robotics,and more into an inexpensive platform that can be used from grade school through college. It is backed by our 15years of professional engineering experience. The same tools commercial customers use to program our industrialcontrollers can also be used to program the BrainPad Pulse. No other STEM platform can lead students from dragand drop block programming to professional programming and engineering like the BrainPad Pulse.PAGE 4 OF 88FEBRUARY 10, 2022
MAKECODE FOR ROBOTICS, GAMES, AND CIRCUITSWWW.BRAINPAD.COMMAKECODEThe BrainPad Pulse provides multiple coding options, including Python and .NET C#. It provides Python throughThonny IDE and provides .NET C# through Microsoft Visual Studio. Those coding options are for advanced usersand require a PC Windows machine. This guide will not cover these topics, but there are plenty of lessons availableat https://www.brainpad.com .The focus in this guide will be on MakeCode, an online coding editor.NOTHING TO INSTALLWhen using MakeCode, there is nothing to install -- everything works through an Internet browser. All that isneeded is an Internet connection.WORKS ON EVERYTHINGAny system with a modern browser can use MakeCode. This includes Windows, Mac and Chromebook machines.PAGE 5 OF 88FEBRUARY 10, 2022
MAKECODE FOR ROBOTICS, GAMES, AND CIRCUITSWWW.BRAINPAD.COMMakeCode will even work on phones and tablets, however this is not recommended.BLOCKS TO CODEUsers can code the BrainPad by arranging blocks. This is user friendly and works with younger learners.The Display menu, for example, has a “show string” block.Dragging the “show image” block to the “on start” block creates a program that shows an image on the screen.PAGE 6 OF 88FEBRUARY 10, 2022
MAKECODE FOR ROBOTICS, GAMES, AND CIRCUITSWWW.BRAINPAD.COMCoders have the option to type the code by switching to JavaScript or Python.This changes the coding surface from blocks to typed coding. The earlier blocks that showed the string will look likethis in Python.We can now type a few lines of code and we would be coding in Python!PAGE 7 OF 88FEBRUARY 10, 2022
MAKECODE FOR ROBOTICS, GAMES, AND CIRCUITSWWW.BRAINPAD.COMTHE SIMULATORThe MakeCode simulator is basically a virtual BrainPad Pulse. The simulator allows you to try programs right inyour browser without loading the program onto the BrainPad Pulse. This is also an excellent try-before-you-buyoption if you haven’t received your BrainPad Pulse yet.The simulator is great for getting started and for quick tests of code snippets; however, it does not replace theneed for hardware, especially when starting to connect the BrainPad Pulse to other circuits.PAGE 8 OF 88FEBRUARY 10, 2022
MAKECODE FOR ROBOTICS, GAMES, AND CIRCUITSWWW.BRAINPAD.COMGETTING STARTEDEnough talking – let's start having fun and making some projects! We will be using Microsoft MakeCode, so headon to https://makecode.brainpad.com/. The website includes a lot of material and projects, but we will just digright into starting our own project. Go ahead and click the New Project button.FOREVER LOOPNow, from under the Display option in the menu, drag the block “show image” and place it into the “forever”block. The forever block is used for any code that you want running all the time, forever! The instructions withinthe forever block will always execute while the BrainPad has power. Once all the instructions have executed, theBrainPad runs the code again starting with the first instruction in the forever block. This is known as an infiniteloop and is used often in computer programming.PAGE 9 OF 88FEBRUARY 10, 2022
MAKECODE FOR ROBOTICS, GAMES, AND CIRCUITSWWW.BRAINPAD.COMThe simulator will now show the lightbulb!If you dragged a block that you do not need, you can trash it by dragging it back into the block menu.PAGE 10 OF 88FEBRUARY 10, 2022
MAKECODE FOR ROBOTICS, GAMES, AND CIRCUITSWWW.BRAINPAD.COMRepeat the same step, but in the second block click on the image and change it to something else, like the lightbulb without the lines.Do you see a “flashing” lightbulb on the display?ON STARTThe forever loop keeps on repeating forever, but what if we need something to run one time? This is where the“on start” block comes in handy. Whatever is in it will happen only once. Move the earlier blocks from “forever” to“on start”. By the way if you drag the top block, you will automatically drag all blocks under it.The Lightbulb will now show with lines very quickly and then the lines will go away, but the light bulb will still be onthe display unchanged forever!DEBUGGINGDebugging is the process of looking for a bug in the code. A “bug”? When writing a program that the computerunderstands and runs, the outcome may not be what we expected. This is a called a bug. Debugging is the processof analyzing the code to find and correct the unexpected outcome. For example, computers run fast and a way todebug is in stepping through code to see what is happening. Computers are fast. How fast you ask? A lot fasterthan you think! Let us show you how fast.PAGE 11 OF 88FEBRUARY 10, 2022
MAKECODE FOR ROBOTICS, GAMES, AND CIRCUITSWWW.BRAINPAD.COMFrom under LED, drag “set led to” to the “forever” loop.Click on the “off” switch to change it to “on”.The simulator now shows a lit LED. It is the orange line in the top left corner of BrainPad Pulse.PAGE 12 OF 88FEBRUARY 10, 2022
MAKECODE FOR ROBOTICS, GAMES, AND CIRCUITSWWW.BRAINPAD.COMNow add a second “set led to”, but instead of dragging it in, we will right-click the existing one and then“duplicate”.Keep the second block to “off”.This forever loop will now turn the LED on and off forever, blinking the LED. But the LED on the simulator is notblinking, is it? Well, I promise you it is blinking, but you are just not seeing it. It may flicker but will not blinkproperly. This is because the loop is running just too fast for our eyes to see it. This will be true if we were to runthis loop on the circuit. This is an example of where debugging comes in handy.Click on the little bug in the simulator.PAGE 13 OF 88FEBRUARY 10, 2022
MAKECODE FOR ROBOTICS, GAMES, AND CIRCUITSWWW.BRAINPAD.COMThe block menu will change to the debugging menu.The debugger will now run the first block and a yellow line will highlight the next block to run. At this point, thedisplay will show the lightbulb with lines.Click on the Step button and a yellow line will highlight the next block. The display will now have a lightbulbwithout lines. Keep clicking the step to see the yellow line going back and forth in the forever loop that turns theLED on and off.The LED on the simulator will work just fine, matching the blocks. Have we just found the bug? The problem in thiscase is simply speed. The LED is blinking, but it is too fast for our eyes to see.Click the “bug” icon again to exit the debugger and the LED will not blink, just like before. Don’t you wish there is away to “pause” the program for some time?PAGE 14 OF 88FEBRUARY 10, 2022
MAKECODE FOR ROBOTICS, GAMES, AND CIRCUITSWWW.BRAINPAD.COMPAUSEIn some cases, it is desired to pause the system for some time, just like in the previous blinking LED example. Fromunder loops, drag in the “pause” block. The value given to the block is in milliseconds. In case you did not know,100ms is tenth of a second.Change the delay to 1 second, which is 1000ms.The LED is starting to flicker on the simulator, but it is still not blinking. Let’s analyze the forever loop. An LED isturned on, a pause stops the program for 1sec, so the LED will be lit for a whole second. Then a block turns the LEDoff. But immediately after that, the forever loop will rerun the LED on block. The LED was, in fact, off but for a veryshort time. Let us add a second pause.PAGE 15 OF 88FEBRUARY 10, 2022
MAKECODE FOR ROBOTICS, GAMES, AND CIRCUITSWWW.BRAINPAD.COMThe LED is now coming on for one second and off for one second. Change the delays to different values andobserve the simulator. I will set mine on for 200ms and off for 1sec.FLASHING THE BRAINPADThe process of copying a program onto the BrainPad Pulse is easy but can be tricky the first time you do it. If thissection is still not clear, there is a video on the MakeCode intro lesson to show you how to flash your tro/First, you must connect the BrainPad Pulse to your computer using a Micro-USB cable. By the way, you can useWindows, a Chromebook, a Mac, or almost anything with a modern web browser and a USB port.A Micro-USB cable should have been included with your BrainPad Pulse. You might also have an extra one athome. If you don’t have one, they are readily available. Micro-USB cables are even sold at most gas stations!PAGE 16 OF 88FEBRUARY 10, 2022
MAKECODE FOR ROBOTICS, GAMES, AND CIRCUITSWWW.BRAINPAD.COMTo load a new MakeCode program onto the BrainPad Pulse, it needs to be put in the "MakeCodeREADY!!" mode.To put the BrainPad Pulse in the "MakeCode READY!!" mode, press and hold both A and B buttons forabout 3 seconds, until you see the "MakeCode READY!!" image.If you hold A and B buttons for 5 seconds and screen does not show the “MakeCode READY!!” image, then yourboard is loaded/prepped to do other languages, like Python or .NET C#. Fear not, you can change it back toMakeCode as shown on the MakeCode Setup lesson https://www.brainpad.com/lessons/makecode-setup/ .PAGE 17 OF 88FEBRUARY 10, 2022
MAKECODE FOR ROBOTICS, GAMES, AND CIRCUITSWWW.BRAINPAD.COMWhen the BrainPad is ready to accept MakeCode programs, the connected PC will detect a storage device calledBrainPad, similar to a storage device when you plug in a USB memory stick.Go back to the browser with the program we made earlier. Click the download button and save the file on yourcomputer.If you are using Microsoft Edge, you should see a dialog box like the one shown below:Click the Save button and then the “Open folder” button in the next dialog box to show the downloaded file.PAGE 18 OF 88FEBRUARY 10, 2022
MAKECODE FOR ROBOTICS, GAMES, AND CIRCUITSWWW.BRAINPAD.COMThe file will be highlighted. You can right click on the file to copy it.If you are using the Chrome browser, the file will be shown at the lower left corner of the screen:Click on the small up arrow and then select “Show in folder.”The downloaded file will be highlighted. You can right click on the file to copy it.PAGE 19 OF 88FEBRUARY 10, 2022
MAKECODE FOR ROBOTICS, GAMES, AND CIRCUITSWWW.BRAINPAD.COMNote that browsers will not delete the old files when you download again. Instead, a number will be added to thefilename (for example “brainpad-Untitled (1).uf2”). Make sure you copy the latest file. The latest file will be thehighlighted file.PAGE 20 OF 88FEBRUARY 10, 2022
MAKECODE FOR ROBOTICS, GAMES, AND CIRCUITSWWW.BRAINPAD.COMWe can now paste the file we have downloaded into the BrainPad.You can also drag and drop the downloaded file into the BrainPad window.PAGE 21 OF 88FEBRUARY 10, 2022
MAKECODE FOR ROBOTICS, GAMES, AND CIRCUITSWWW.BRAINPAD.COMOnce the file is done copying to the BrainPad Pulse, it will reset and execute the file you have just loaded. This willbe our program from earlier that shows the light bulb on the screen “on start” and then blinks the LED “forever”.PAGE 22 OF 88FEBRUARY 10, 2022
MAKECODE FOR ROBOTICS, GAMES, AND CIRCUITSWWW.BRAINPAD.COMBLOCK BASICSThis chapter will highlight the BrainPad onboard components and at the same time show different block types toadd variables and control the program’s flow.EVENTS WITH BUTTONSThere are two ways to check if a button is pressed. The first way is to sit in a loop and keep on checking the currentstatus of the button. The second way is done by letting the system internally keep checking for us and let us knowwhen the button is pressed. The system “lets us know” through an event. Think of the “on start” block as an eventblock that gets called when the system starts, meaning the event is triggered on start. Similarly, a block can betriggered “on button”. However, the “on button” block needs to know what button and when to trigger, like whenthe button is clicked. Those blocks that get triggered are referred to as events.From Inputs, add the “on button” block. Duplicate the block and modify one to be button A and one to be buttonB. Then add a “show image” to each block. Use any 2 images you like. We will use the eyes that are looking leftwith the A button and the eyes that are looking right with the B button.At first, nothing will show on the screen as we have not added anything to on start block. Now try the A and Bbuttons. Pressing each one of the buttons will show its image on the screen.IF AND MOVEMENTThis section will cover the if statement to check for a condition. Or to compare values. We will use theaccelerometer to measure tilt, which is measuring the earth’s gravity. If the value is more than a certain number,the screen will show right and if it is less than a value, it will show left. Somewhere in the middle, it will show flat.We are not using an event here like we did with the buttons. We will need to continuously check theaccelerometer value. We will do so using the if statement, found under logic. We then add “show string” from thedisplay section and change the string to say “Right”.PAGE 23 OF 88FEBRUARY 10, 2022
MAKECODE FOR ROBOTICS, GAMES, AND CIRCUITSWWW.BRAINPAD.COMThe display will now show Right, but why? The if statement checks for some condition to be true or false. In thiscase, the if statement is defaulted to true. We will need to change it to a condition that compares two values. Thecomparison blocks are also found under logic. Add the comparison block to replace the default true.This block has the option to compare less than, larger than, equal to and more.Under inputs, we can bring in the acceleration and add to the comparison.PAGE 24 OF 88FEBRUARY 10, 2022
MAKECODE FOR ROBOTICS, GAMES, AND CIRCUITSWWW.BRAINPAD.COMMakeCode will help by showing a line to an appropriate spot for the block. The acceleration outputs a value that ismaxed at 1023 in one direction and -1023 on the other direction. The output will be zero right in the middle. Let’scompare the value to be more than 500.The display should not show anything by default, but then tilting it to the right will show “Right” on the screen.Duplicate the same block and change it to show left when the value is less than -500.That is two completely separate if statements (if blocks). Like this example, it is best to use the else statement thatgoes hand in hand with the if statement. It simply means, if something is true do this, or else do that.PAGE 25 OF 88FEBRUARY 10, 2022
MAKECODE FOR ROBOTICS, GAMES, AND CIRCUITSWWW.BRAINPAD.COMRemove one of the if statements and only keep one of them. Now click the plus sign at the bottom of the ifstatement. We can now add “show string” under “else” to print Left when the value is less than 500 and Rightwhen the value is more than 500. Not exactly what we need just yet, but let’s try it.What we need is to show left when the value is less than -500. And we also want to show “middle” when the valueis between 500 and -500. We can click the plus sign again, the one at the bottom of the block. And now we haveroom for another “else if” option.PAGE 26 OF 88FEBRUARY 10, 2022
MAKECODE FOR ROBOTICS, GAMES, AND CIRCUITSWWW.BRAINPAD.COMWe now can finish the block to do exactly what we have set to accomplish.VARIABLE SOUNDHow high of a frequency can you hear? Do you know the older we get the lower our top hearing frequency will be?We will make a device to check out top hearing frequency. We will use a variable to keep track of the frequency.A variable is used to hold a value that will be used later. We can use the variable in our code. For example, we canprint that variable or use it to set the frequency of the sound. We can also change the value of the variable. Wecan set it to something completely different or increase/decrease the variable.This example will use the “on button” event we have used earlier. Pressing A will decrease the frequency variableand pressing B will increase the frequency variable.First, make a variable called freq. From under the variables group, click Make Variable PAGE 27 OF 88FEBRUARY 10, 2022
MAKECODE FOR ROBOTICS, GAMES, AND CIRCUITSWWW.BRAINPAD.COMName the variable freq, and you will have some new options under variables.We can now set the initial value of the variable to 5000, since we know everyone can hear 5000hz usually. Then weneed to add the “on button” events. Where one will increase the variable by 500 and the other will decrease by500. To decrease the value, we simply use a negative number. Finally, we want to show the value on the screenand so we “show number” and the number is the variable.PAGE 28 OF 88FEBRUARY 10, 2022
MAKECODE FOR ROBOTICS, GAMES, AND CIRCUITSWWW.BRAINPAD.COMPressing the buttons will now change the variable and show it on the screen. Test it out and make sure all isworking as expected. We now can add the “ring tone” block to set the speaker to the desired frequency.So, what frequency can you hear?PAGE 29 OF 88FEBRUARY 10, 2022
MAKECODE FOR ROBOTICS, GAMES, AND CIRCUITSWWW.BRAINPAD.COMROBOTICSThe simulator has served us well so far, but it is time to start controlling a robot. BrainBot pairs up beautifully withBrainPad Pulse. It is plug and play with the provided extension, which we will use now.ASSEMBLYOut of the box, the robot requires minor assembly. We will keep the explanation brief here, but the website hasmore details / .PAGE 30 OF 88FEBRUARY 10, 2022
MAKECODE FOR ROBOTICS, GAMES, AND CIRCUITSWWW.BRAINPAD.COMThe first step is to add the motors, which come with the connectors to plug right in.They are supported by brackets and plastic rivets.PAGE 31 OF 88FEBRUARY 10, 2022
MAKECODE FOR ROBOTICS, GAMES, AND CIRCUITSWWW.BRAINPAD.COMThe front caster wheel also needs to be mounted using the included rivets. And do not forget about the battery!By the way, this is a high-density battery, and some safety precautions are necessary,https://www.brainpad.com/safety/ .EXTENSIONSMakeCode loads many default blocks that are common for all projects. Those blocks can be extended to add newadditional features/blocks to the system.Adding an extension can be done in two different ways. The first way is through using the settings gear in the topright corner of the MakeCode interface.PAGE 32 OF 88FEBRUARY 10, 2022
MAKECODE FOR ROBOTICS, GAMES, AND CIRCUITSWWW.BRAINPAD.COMThe second option is found under the advanced tab at the bottom of the block menu.Extensions is found a
It provides Python through Thonny IDE and provides .NET C# through Microsoft Visual Studio. Those coding options are for advanced users and require a PC Windows machine. This guide will not cover these topics, but there are plenty of lessons available at https://www.brainpad.com . The focus in this guide will be on MakeCode, an online coding .