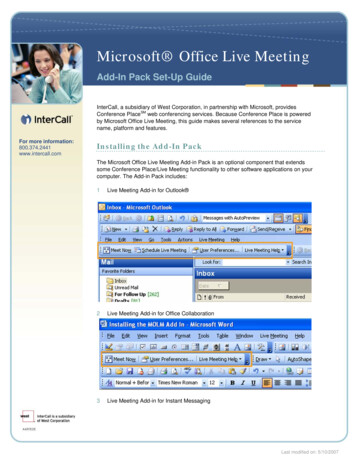
Transcription
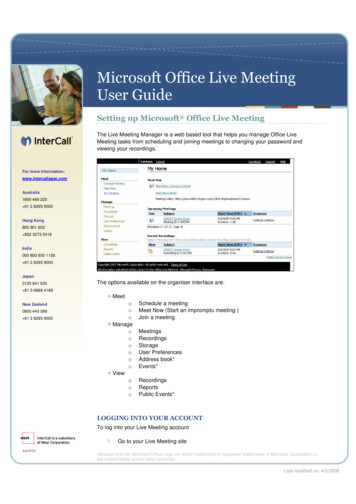
Microsoft Office Live MeetingUser GuideSetting up Microsoft Office Live MeetingThe Live Meeting Manager is a web based tool that helps you manage Office LiveMeeting tasks from scheduling and joining meetings to changing your password andviewing your recordings.For more information:www.intercallapac.comAustralia1800 468 225 61 2 8295 9000Hong Kong800 901 603 852 3073 0418India000 800 650 1158 61 2 8295 9000Japan0120 941 635The options available on the organiser interface are: 81 3 6688 4189MeetNew ZealandoooManageooooooViewooo0800 443 589 61 2 8295 9000Schedule a meetingMeet Now (Start an impromptu meeting )Join a meetingMeetingsRecordingsStorageUser PreferencesAddress book*Events*RecordingsReportsPublic Events*LOGGING INTO YOUR ACCOUNTTo log into your Live Meeting account1Go to your Live Meeting siteMicrosoft and the Microsoft Office Logo are either trademarks or registered trademarks of Microsoft Corporation inthe United States and/or other countries.Last modified on: 4/2/2008
234Enter your user login.Enter your password.Click on the “Login” button. Your home page is displayed.SETTING YOUR USER PREFERENCESUser preferences provide basic information about you to the Live Meeting service,including your name, your e-mail address, your Live Meeting password, and your displayand recording preferences. In your Meeting Manager, you can change the user passwordto one that is easier for you to remember. You can also set other user preferences foryour account.To change your preferencesTo set your user preferences in Live Meeting Manager:1On the My Home page, under Manage, click User Preferences.2On the User Preferences page, enter the following information:- In the Personal Information section, type your first name, last name, and full e-mail address (for example, someone@example.com).- In the Password section, you can change your password. To do so, type your oldpassword in the Old password box. Type your new password in the Newpassword box, and then type the new password once again in the Confirm newpassword box.- In the Display Options section, indicate the number of meetings or recordings youwant Live Meeting Manager to display on a single page, and select your localtime zone.- In the Recording Access section, if you want to require the e-mail address andcompany name of participants who want to access recordings, select the Requireextended registration by asking for email and company name check box. Toallow anybody to download meeting recordings, or to allow only meetingorganisers to download recordings, click the appropriate option.3Click OK to save your user preferences. Live Meeting will use these preferencesfor all the meetings that you attend.*Option available only on branded customer sites. VoIP functionality only available inJapan and India
SETTING YOUR MEETING OPTIONSBefore you start using Meet Now or your Scheduled Meetings, make sure that your MeetNow options and Meeting Options set up.How to set Meeting OptionsYou can customise the Live Meeting experience by setting options for individual meetings.For example, you can control how meeting participants will enter a meeting, or you canenable or disable features such as chatting or recording.Note: Your Live Meeting account administrator may have already configured the meetingoptions for your site. Do not override these settings unless you have a clear understanding ofhow each option should be configured in your environment. For example, if the administratorhas configured your audio settings to work with your InterCall Reservationless-Plus audioaccount, changing those settings could cause an error when you try to connect to audio foryour Live Meeting sessions.Options are set separately for Meet Now meetings and for Scheduled Meetings. To setyour Meet Now options, click Meet Now details and then “Meet Now Options” under theAction Menu. To set up your “Scheduled Meetings” options, click “Meeting Option” buttonon the “Schedule Meeting” page.*Option available only on branded customer sites. VoIP functionality only available inJapan and India
Meeting Options for Meet Now MeetingsMeeting Options for Scheduled Meetings*Option available only on branded customer sites. VoIP functionality only available inJapan and India
The following table shows the options that appear on the Meeting Options page.Meeting DetailsEntry ControlExtended RegistrationMeeting LobbyContent ExpirationAudioMeeting Entry TimeAdditional FeaturesRecordingFor best results, set all of these options before you use Live Meeting for the first time. Ifyour Live Meeting administrator has already configured the options for you, review thesettings and make any required changes.MEETING DETAILSMeeting details control information that Live Meeting uses to generate meeting invitations,to configure the meeting space, and to help you with bookkeeping if your organizationuses billing codes to monitor Live Meeting costs.To set meeting details:In the Meeting Details section of either the Meet Now Options page or the MeetingOptions page, set the following options:(Scheduled Meetings only) In the Meeting ID text box, type the ID for the meeting.In the Language list, click the language that you want to use in the meetinginvitations, as well as the language used for descriptive data for Live Meetingrecordings.(Optional) In the Bill to Code text box, enter the billing code associated with youruse of the Live Meeting service within your organization.In the Meeting Size box, enter the maximum number of people that you expect toattend a meeting.(Meet Now only) In the Meeting Duration list, select the maximum length of themeeting.ENTRY CONTROL OPTIONSYou can set entry controls to:Control who attends a meeting.Make a meeting available for a large general audience.Distinguish between participants who are attendees and those who are presenters.*Option available only on branded customer sites. VoIP functionality only available inJapan and India
MEETING ENTRY TIMEYou can prevent attendees from joining your meeting before you are ready. Presenterscan always join the meeting at any time.EXTENDED REGISTRATIONYou can require participants to supply their e-mail address and company name when theyattempt to join a meeting. This requirement is called extended registration.MEETING LOBBYThe meeting lobby is an area where uninvited people who would like to join your meetingcan request entry. You can set meeting lobby options for your Meet Now meetings or forany scheduled meeting that you organize. You can give users a URL to the meeting lobbywhen it is not appropriate to send a meeting invitation. Presenters can use the meetinglobby to control who enters the meeting, as well as the time that they enter.*Option available only on branded customer sites. VoIP functionality only available inJapan and India
ADDITIONAL FEATURESThe options listed under Additional Features on the Meet Now Options page or theMeeting Options page are useful for enhancing participants' meeting experience, forlimiting what they can do in some circumstances, and for demonstrating features of theLive Meeting console so that attendees become familiar with them.MEETING EXPIRATIONUse this option to set the amount of time to wait before deleting meeting and contentsAll documents uploaded or created in the meeting including Office Files(PPT, Word, etc.),MODI documents, PNG, poll slides, text slides, white boards, application sharing,annotations and unpublished recordings will be deleted along with the meeting. Reportsand log files will not be deleted. Meeting expiration does not happen in real time. Meeting*Option available only on branded customer sites. VoIP functionality only available inJapan and India
along with its content to be deleted is immediately scheduled for deletion after themeetings ends plus wait time specified by the administrator or organizer. Deletion timemay vary and is subject to the length of the deletion requests on the queue and the loadon the server.Setting an expiration time can be important when:You do not want confidential content to persist on the Live Meeting servers.You want to delete information when it is no longer useful.To set expiration options:In the Expiration section of either the Meet Now Options page or the Meeting Optionspage, set the following options:To delete meetings and content after a meeting ends, select set the amount of timeto wait before deleting meeting and contents check box.To specify the amount of time you want Live Meeting to retain meeting and contentbefore deleting it, type a number in the box, and then click a unit of time on theaccompanying list.RECORDING EXPIRATIONRecordings created and published for a meeting will be deleted as per the expiration timementioned. This setting applies to a new recording only. To modify expiration for anexisting recording you can use Edit Recording. Recording expiration does not happen inreal time. Recording to be deleted is immediately scheduled for deletion after creationplus wait time specified by the administrator or organizer. Deletion time may vary and issubject to the length of the deletion requests on the queue and the load on the server.To delete a Recording after a meeting ends, select set the amount of time to wait beforedeleting published recordings check box.To specify the amount of time you want Live Meeting to retain Recordings before deletingit, type a number in the box, and then click a unit of time on the accompanying list.*Option available only on branded customer sites. VoIP functionality only available inJapan and India
Note: Deleted meetings or recordings can still be restored by your Administrator 90 days afterthe expiration time specified here. After that, they are permanently deleted.AUDIOYou set Audio options when you are first configuring your InterCall Reservationless-Plusaccount for use with Live Meeting or you are temporarily changing your audio preferencesfor a meeting.To set audio options:In the Audio section of either the Meet Now Options page or the Meeting Options page,set the following options:1 In the Audio for this meeting list, select the audio configuration you will use withLive Meeting.- LiveMeeting without Audio ( The “Display Toll and Toll Free” options will beavailable)- Telephone Conferencing Service (The “Display Toll and Toll Free” options and“Join Conference” feature will be available)- Computer Audio Conferencing* (The “Display Toll and Toll Free” options and“Enable one-way Internet Audio Broadcasting”* will be available )- Telephone and Computer Audio Conferencing* (All the options will be available)23456If you will use InterCall Reservationless-Plus audio, select InterCall in theConferencing provider list. Otherwise, select Other.If you want Live Meeting to initiate a call to participants, instead of requiringparticipants to dial in to the conference call number, select the Allow meetingparticipants to use "Join Conference" check box.If you will use one-way Internet Audio Broadcasting* to deliver audio to meetingparticipants on their computers, select the Enable Internet Audio Broadcastingcheck box.To display the audio conferencing toll-free and toll numbers to participants, asapplicable:a. Configure the toll-free and toll meeting phone numbers by clicking a countryor region on the Country/region list, and then typing the city or area code andlocal numbers in the text boxes provided. The number that appears abovethe Country/region list is the country code for the selected country or region.b. Type the participant code and leader code in the text boxes provided. Theleader code will never be revealed to the meeting participants, but it isnecessary to connect to your InterCall Reservationless-Plus conference.Type additional dialing keys into the text boxes provided in the Actual dialingkeys section. For use with your InterCall Reservationless-Plus account, thefollowing configuration is recommended:*Option available only on branded customer sites. VoIP functionality only available inJapan and India
Note: Keys entered in the first box will be dialed before the participant code; keys entered inthe second box will be dialed following the participant code.RECORDINGYou can choose to record a meeting or to allow other presenters to record it, and you cancontrol meeting participants' access to the recording.To set recording options:In the Recording section of either the Meet Now Options page or the Meeting Optionspage, set the following options:1 In the Server Recording section, click one of the following options:- To allow only yourself (as organizer) to record the meeting, click Disabled in themeeting, but the organizer can still record when logged into Live Meeting.- To allow presenters to record the meeting, click the Presenter can record themeeting option.2 In the Server Recording Access section, click one of the following options:- To allow only yourself and your Live Meeting account administrator access torecordings, click Only the administrator and organiser can view recordings. Theycan grant access to individual users.- To allow all attendees and presenters at the meeting to view recordings, click Allmeeting participants can view recordings using their meeting entry information.3 In the “Participant Recording to Their Local Computer “ select one of the optionsbelow:- Disable recording to local computer.- Only presenters can record.- Presenters can record and presenters can allow attendees to record.To disable the option for participants to record on their local computer select: “Disablerecording to local computer”.To allow presenters to record the meeting locally, click the Only Presenter can recordoption.To give the presenter permission to allow attendees to initiate a personal recording, clickPresenters can record and also allow attendees to record.Note: The Personal Recording will be saved locally and can always be accessed by theperson who created them.SAVING YOUR OPTIONSWhen you are done setting up your meeting options, you can click “Set as Default” tosave the same settings for all your future meetings or you can click “OK” to save thesettings only for the meeting you are creating now. At this point, you will be back toMeeting Details page where you can obtain detailed information about your meeting, joinyour meeting as a presenter or attendee, import a document in your meeting or startrecording using the Recording Control Panel. All these options are available under the“Actions” menu on Meeting Details page.*Option available only on branded customer sites. VoIP functionality only available inJapan and India
To test Meet Now options:123On the Meet menu, click Meet Now. A separate meeting window will open.In the Voice and Video pane, click Options, then View Call-In Details.Verify that your audio information is correct.To test scheduled meeting options:12345On the Meet menu, click Schedule Meeting.In the To field, type your full e-mail address (for example,somebody@companyabc.com). This will instruct Live Meeting to send you aninvitation to the meeting.In the Subject box, type a subject for the meeting (for example, "Test Meeting").Schedule the meeting for the current time by using the Start time and End timelist boxes.Click Send Invitations.When the meeting invitation arrives, open the invitation, and make sure that it containsthe expected information. If you are using phone conferencing for your meetings, makesure that your invitation has the correct phone conferencing number and participant code.If any information is wrong or missing, repeat the steps to schedule a Live Meeting andclick Meeting Options, correct the settings as necessary, and then click Save As Default.After this has been completed, schedule a new test meeting.To join the meeting that you have scheduled:123Open the e-mail invitation for the meeting.In the meeting invitation, click the Join Meeting link.On the Join Meeting page, enter your name, and then click Join Meeting.*Option available only on branded customer sites. VoIP functionality only available inJapan and India
4Live Meeting starts the Live Meeting Console, and your scheduled meeting isdisplayed.Using Meet Now MeetingsTo meet now, click on the Meet Now: (Your Name) link from the My Home page orchoose Meet Now under the Meet section on the left of your Meeting Manager screen.You are immediately connected to a meeting.To access meet now details, click on the Meet Now Details link. From the “Meet NowDetails” page, you can:Join as a presenterJoin as an attendeeModify meet now optionsUpload filesAccess the support control panelAccess the recording control panelScheduling a MeetingYou can use Live Meeting to schedule meetings and invite participants, just as you wouldfor a meeting in a physical conference room.SCHEDULE A MEETING BY USING THE LIVE MEETING MEETINGMANAGERTo schedule a meeting with the Live Meeting Manager123456On the My Home page, in the Meet area, click Schedule Meeting.Click Attendees to select the attendees you want to invite from the Live Meetingaddress book, and then click Presenters to select the presenters you want toinvite. For participants who do not appear in the address book, you can typeeach user’s full e-mail address (for example, someone@example.com) in theAttendees or Presenters box.Type the subject for the meeting, and location if desired.Select the start and end dates and times, and adjust the time zone if necessary.In the Occurrence box, click One Time (occurs once only), Recurring (occurs ona regular schedule with a specified end date), or Ongoing (no end dateenforced).Select your audio preference for the meeting: Live Meeting without Audio,Telephone Conferencing (using InterCall’s Reservationless-Plus), Computeraudio conferencing*, or Telephone and computer audio conferencing*. You mayalso select the checkbox below to enable Internet Audio Broadcast*.*Option available only on branded customer sites. VoIP functionality only available inJapan and India
789To override the default scheduled meeting options for this meeting only, clickMeeting Options, and then make the necessary changes. For more information,see Setting Your Meeting Options.In the Message text box, type the custom message that you want to appear in theinvitation.Select the option for sending your invitations: Send Invitations using your Emailclient, or Send Invitations using Live Meeting. Click Send Invitations to send theinvitations to the invitees.Note: if you opt to send invitations via your Email client, you will be directed to apage in which you can send invitations via Outlook, or copy and paste theinvitation information into your own calendar invitation to send to invitees. Youare given separate invitations for Presenters and Attendees.Allow several minutes for the meeting invitations to arrive in the Inbox of each invitee. LiveMeeting sends a separate meeting invitation to each of the presenters and attendees youinvited. The invitation contains your personal message if you provided one, the standard*Option available only on branded customer sites. VoIP functionality only available inJapan and India
Live Meeting greeting text set by your Live Meeting account administrator, and themeeting details that each participant will need in order to join the meeting. Invitees alsoreceive a calendar item that they can add to their calendars.UPLOAD FILESYou can use this feature to import documents in your meeting using the Live Meetingmanager. This option will scan your files for viruses and create an optimized version forbetter viewing during your Live Meeting.To use the Upload Files feature:123Click the “Upload Files” link on the Meeting Details pageClick Browse to select your file and then click UploadYour presentation will be scanned and imported to your meeting.*Option available only on branded customer sites. VoIP functionality only available inJapan and India
SUPPORT CONTROL PANELThe support control panel can be used while a meeting is in progress to monitor andmanage the attendees of the meeting. To access the support control panel, click on theSupport Control Panel link on the Meeting Details page.The following table describes the parts and functions of the Support Control Panel.PartUser Name fieldStatus fieldBrowser/OS fieldJava fieldTransport/From fieldShow Details buttonEnd Session buttonDisconnect User buttonFunctionProvides the name entered by theuser.Informs you of the status of theconnection.Provides the web browser, webbrowser version, and operatingsystem of the user.Provides the version number of theJava Virtual Machine in the user’sweb browser.Informs you of the transportmechanism and the address of theuser’s machine.Displays detailed technicalinformation about the selected user’sconnection.Forcibly terminates all connections.Forcibly terminates the selecteduser’s connection.*Option available only on branded customer sites. VoIP functionality only available inJapan and India
RECORDING CONTROL PANELYou can use this feature to select the media you would like to record, configure the phoneconnection and start the recording.To use the “Recording Control Panel” feature:12Click the “Recording Control Panel” link on Meeting Details page.Select the media you would like to record (Data, Voice, Video, Panoramic Video)3Click “Configure Phone” and enter - or verify - the Audio information; includingthe conference call number, participant code and the Dialing Keys.Click “Connect” to connect the console to the audio bridge.45Click the Record button. When you stop the recording, you are presented withthree options:- Save Recording- Discard Recording- Continue Recording6Choose the appropriate option.*Option available only on branded customer sites. VoIP functionality only available inJapan and India
Managing Your AccountIn the Manage section, you can manage your Meetings, Recordings, Storage, UserPreferences, Address Book*, and Events*.MANAGE MEETINGSYou can manage your existing or already scheduled meetings by clicking Meetings underthe Manage section. This page allows you to Join, Edit and Delete your meetings.You can search for a meeting: Within a specific date range; By expiration date; Containingkey word(s); or In Current/Future, Past, All. From the Manage Meetings page you mayalso sort your meetings by clicking on the appropriate column heading for: Subject, Starttime, Organiser, Size, and Expires.MANAGE RECORDINGSSimilar to the Manage Meetings page, the Manage Recordings section allows you tomanage your recorded meetings. From this page, you can View, Edit Recording Details,and Delete Recordings.Through the Search function, you can show: Recordings within a specific date range;Recordings by expiration date; Recordings containing key word(s); or All recordings*Option available only on branded customer sites. VoIP functionality only available inJapan and India
MANAGE STORAGEThis feature will allow you to search for and manage your Meetings and Recordings.Using this feature, you can search for your meetings and recordings using differentcategories:Search for Meetings/Recordings by entering the size in the “Size: Greater than”field: KB, MB, GB.Search for Meetings/Recordings, which have not been viewed within a specifiedamount of time by entering a time in “Not used in” field, and choosingmeasurement: Minutes, Hours, Days, months.Search for Meetings/Recordings by entering the meeting name or ID in theContaining field.To use this feature:12Login to your Live Meeting account as an Organiser.Click Storage on the left hand side of the screen.*Option available only on branded customer sites. VoIP functionality only available inJapan and India
3456Select Meeting or Recording for the Type and click Search. You will get a list ofall your meetings or recordings.You can sort your data by Subject, Date, Expiration date, Last time used andSize.If you are looking for a specific Meeting or Recording, select the category youwant to search with, (Size, Time or the text containing) and click Search.If you want to delete a meeting, check the box next to the meeting subject andthen click Delete.MANAGE USER PREFERENCESBy clicking User Preferences in the Manage menu, you can change your PersonalInformation, Password, Display Options, and Recording Access. Simply select the item inthe top menu you would like to change, make the change on the screen, and then clickthe OK button when you have finished.*Option available only on branded customer sites. VoIP functionality only available inJapan and India
MANAGE ADDRESS BOOK*The Address Book in the Manage section allows you to add contacts to your addressbook or manage those you have already added. You can search your existing contactsby last name, first name, or email address. Click Create New Contact and enter thecontact’s information if you would like to add a new contact to your list. You may also editan existing contact’s information or delete a contact from this page.MANAGE EVENTS *This feature will allow you to search for and view your events, (upcoming, past,unpublished), Create a new event, Run reports on your Events and manage yourOrganiser Libraries which include: Presenters, Tests, Surveys, Registration Questions,Entry page questions, Event branding.*Option available only on branded customer sites. VoIP functionality only available inJapan and India
*Option available only on branded customer sites. VoIP functionality only available inJapan and India
Viewing Recordings, Reports and Public Events*VIEW REPORDINGSTo view your recordings, click on Recordings under the View section. This page will allowyou to search for, sort, and view recordings.Search for Recordings by selecting the date range the recording has beenavailable, and optionally entering the meeting name or ID in the Containing field.You can sort your data by Media Format, Subject, Date, Duration, and Organizer.To view a recording, click the media symbol at the left of the screen next to the recordingyou wish to view.VIEW REPORTSMeeting reports provide both summary and detailed information about Live Meetingmeetings:Meeting List report. Lists the meetings and attendance for a given time period.Meeting Attendance report. Lists users and the role they played (presenter orattendee), the browser used, the time they arrived and the duration of theirattendance for a meeting. It also includes a list of email addresses and companynames if attendees and presenters were required to enter this information.Meeting Poll report. Indicates how each person attending the meeting voted inresponse to each Polling slide that was shown. It also includes a percentagesummary of the votes.*Option available only on branded customer sites. VoIP functionality only available inJapan and India
Recording reports allow you to monitor the number of recordings available and how oftenthey are viewed:Recording List. Shows the recordings available for a given time period and thenumber of times each one was viewed.Recording Details. Lists users who viewed a recording and indicates when the userviewed it, the user IP address, company and browser.To generate a Meeting List or Recording List report, click Reports under the View menu.Then, click Meeting List or Recording List report. You can search by date range, and sortyour meetings and recordings. In addition, clicking on the Meeting ID or Recording IDgenerates attendance reports for those sessions.*Option available only on branded customer sites. VoIP functionality only available inJapan and India
VIEW PUBLIC EVENTS*This Feature will allow you to view a listing of all public events in a conference center.Filter public events by selecting Find, or using the title bar drop down.You will also be able to Create a new event, Run reports on your Events and manageyour Organiser Libraries, which include Presenters, Tests, Surveys, RegistrationQuestions, Entry page questions, Event branding.NOTE: For detailed information on Events, please see the Scheduling Events guideHow to Join a Live Meeting sessionThe e-mail invitation to a Live Meeting session contains all the information you will needto join the meeting and to connect to the audio portion of the meeting.JOIN A MEETING FROM AN E-MAIL INVITATION*Option available only on branded customer sites. VoIP functionality only available inJapan and India
Typically you will join a Live Meeting session from an e-mail invitation that you receive inyour mail client Inbox. The invitation may be for a scheduled meeting or for an informalMeet Now meeting (where a co-worker has just sent you and invitation to meet in theirvirtual workspace). The e-mail invitation contains the information that you need to get intothe meeting and to connect to the audio portion of the meeting.TO JOIN A LIVE MEETING SESSION FROM AN E-MAIL INVITATIONClick Join the meeting in the e-mail invitation.1 If you have not attended a Live Meeting session before, you will be prompted toinstall the console.2 Enter your name in the Name field as you wish it to appear in the Attendee’spanel.3 Live Meeting sessions may be recorded, and you must read and accept therecording agreement before joining the session.4 Click Join.The installed console size is small enough to download and install quickly over a typicalbroadband connection. Estimated download time is based on available bandwidth.It is important to remember that the record meeting function can be activated at any time,and may be activated by other participants if the presenter gives this permission. The firsttime you enter a meeting, take the time to read the text in the windows that appear.*Option available only on branded customer sites. VoIP functionality only available inJapan and India
As the meeting client loads, you will see the message, “You are now connecting to themeeting.”When this message disappears, the meeting client is active and you are ready to beginyour Life Meeting session. The image below is of an empty Live Meeting 2007
Microsoft Office Live Meeting User Guide Setting up Microsoft Office Live Meeting The Live Meeting Manager is a web based tool that helps you manage Office Live Meeting tasks from scheduling and joining meetings to changing your password and viewing your recordings. The options available on the organiser interface are: Meet o Schedule a meeting