Transcription
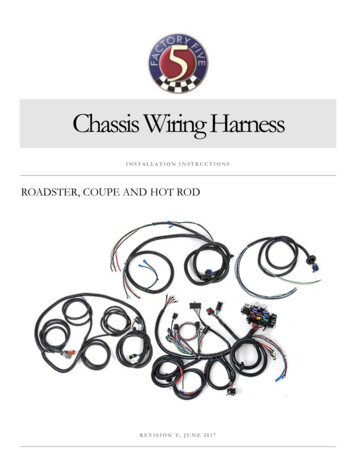
Chassis Wiring HarnessINSTALLATION INSTRUCTIONSROADSTER, COUPE AND HOT RODREVISION T, JUNE 2017
2017 Factory Five Racing Inc.9 Tow RdWareham, MA 02571Phone 508.291.3443 Fax 508.291.3883iwww.factoryfive.com 508-291-3443
Table of ContentsSafety Notice .ivSafety Tips . vHow to use This Book .viWhat You Get .viParts Included . viiTools Needed . xPre-installation Information .xiWiring Harness Layout . xiiChassis prep . 1Installation Instructions . 3Main Harness . 3Steering Column connector . 9Inertia switch . 10Harness Ground. 11Brake switch . 11Clutch safety Switch. 12Carbureted Engine . 12Fuel Injected Engine . 13Starter Solenoid . 13Alternator . 13Ignition Switch . 14Harness diagram . 17Headlight switch . 22Heater . 22Radio . 22Wiper. 23Underdash/Courtesy light . 23Rear harness . 24Fuel connectors . 30License Plate Wiring . 31Taillights . 32Gauge Sending Unit Harness . 32Electric Fan . 35Engine controlled fan . 35Thermostat switch control . 36Front Harness . 38Headlights/Turn signals . 42Electric Fan . 42Dash Harness/Gauges . 42Autometer gauge install . 43iiwww.factoryfive.com 508-291-3443
GPS Vintage gauge install . 52Troubleshooting . 60iiiwww.factoryfive.com 508-291-3443
Safety NoticeWhile there are many things to love and be proud of in our country today there are a few things that we wishwere different. With regret and a small amount of resentment we include the following warning andstatement of non-liability at the advice of men with soft hands and necks the size of pencils.The procedures and recommendations contained in this book are to be used as a guide with the ultimatedetermination of safe construction to be made by you. If you feel uneasy about whether you have the skillsto wire your own vehicle, DO NOT PROCEED. This project involves dealing with electrical connectionsfor a vehicle. It is intended for individuals who have the skills and abilities commensurate with the scope of aproject of this magnitude.This kit is only a collection of parts designed for use primarily as a race car. You are responsible forensuring that the vehicle you build complies with all Federal, State and local laws regarding its use. Exceptas may be specified in writing, Factory Five makes no warranties, expressed or implied, on the products(parts, or kits) offered for sale. All implied warranties of merchantability and fitness for a particular purposeare expressly disclaimed by Factory Five.While Factory Five products are thoroughly tested under actual race conditions, Factory Five cannot controlthe quality of the installation or application of these products. The products offered for sale are true race carcomponents, the installment of which often requires considerable time and fabrication skill. Beforeattempting any installation or assembly, the purchaser should determine the suitability of the product for theintended use, the time, and level of skill necessary for correct installation or assembly.Factory Five does not make any warranty, expressed or implied. Purchaser expressly ASSUMES THE RISKof all personal, property and economic injury, damage or loss, either direct or indirect, arising from the use,misuse, or failure to determine the appropriate use of any Factory Five product.Ford and Chevrolet, GM and Cobra are registered trademarks.Factory Five Racing, Inc. is not connected to the holders of these marks.ivwww.factoryfive.com 508-291-3443
Safety Tips Read the manual. It is a good guide and place to start. Don’t take short cuts. Before starting work, make sure you have the proper tools, the required parts, and sufficient space for thejob. If you damage any parts, it will probably be because they were either not stored properly or, thewrong tool was used to install them. Don’t work when you’re too tired or upset. The car you will be building is capable of supercar levels ofperformance, and your life depends on the quality of your workmanship. Never work under a raised car unless it is well supported by stands intended for that purpose. Never workunder a car supported by a jack. Always observe good safety practices such as the use of eye protection, protective clothing, and gloves. Keep the battery disconnected whenever you work on fuel or electrical systems and always keep a fireextinguisher handy. Don’t allow children in the work area. Partially assembled cars attract a crowd. Keep garage doors closed or mark off work areas. Make sure that all electrical equipment is grounded. If working alone, have someone check on you periodically. Work in a well-ventilated and well-lighted area. Use portable safety lights for under-carriage work. Never use an exposed bulb type light. Clean your build area after each assembly is completed. This will speed your build process as it ensuresthat you know where your tools are and prevents tripping injuries. It is impossible to anticipate all of the possible hazards. Care and Common Sense will prevent mostaccidentsvwww.factoryfive.com 508-291-3443
How to use This BookThis Assembly manual is intended to help you wire your Factory Five Kit. This book will not explain suchthings as radio or power window installations. A secondary purpose of this book is to use it as reference forowners that want to do maintenance work on their cars or for those that purchase finished cars, to understandtheir cars better.This manual was written with the average weekend mechanic in mind. It is best to follow the manual step bystep but if there is a part missing from the kit move to the next section and come back to it late when the partis available.I C O NK E Y Valuable information Tools neededWe have included an Icon key as the beginning of each section that contains usefulinformation for each assembly that details the tools needed for that assembly, whatassembly in the kit parts are packaged in that are needed for that step and any usefulinformation or warnings. Parts NeededWhat You GetThis chassis harness has been especially designed by Factory Five Racing for use in the Roadster, Coupe andHot Rod. Designed to allow easily installation, each end of the loom wrapped harness is labeled with itslocation on the car. Step by step instructions including color wiring diagrams explain how and where toinstall the harness.The fuse panel uses standard ATC blade type fuses and includes 11 fuses, 3 relays and 2 flashers. Wiresrouted to the correct locations have been included for wipers, heater and radio. A fuel inertia switch hasbeen wired into the fuel pump circuit for added safety. A dash wiring harness has been included for wiringAutometer or other Factory Five gauges. The harness also has dedicated power wires if you plan on runningfuel injected.This is the ultimate chassis harness.viwww.factoryfive.com 508-291-3443
Parts IncludedDash HarnessMain fuse panel Harnessviiwww.factoryfive.com 508-291-3443
Front HarnessRear Harnessviiiwww.factoryfive.com 508-291-3443
Sending Unit Harnessixwww.factoryfive.com 508-291-3443
Tools NeededThe following lists of the tools and supplies that are needed to build your kit. The “helpful” items are notcrucial to the assembly but make life easier. Home Depot HUSKY , Sears CRAFTSMAN , and SnapOn tools are all guaranteed for life and we’ve found them to be more reliable over discount tools.DrillDrill bits ( 3/32”, 1/8”, 9/64”, 3/16”, 7/32”, 5/16”)Razor knifeWire stripper/crimping toolWire cuttersElectrical tapeSandpaperFile with round side or round file¼” nut driver7/16” wrench5/32” hex key1¼” Hole saw¼” nut driverTin snipsRivet toolThe thing between your earsxwww.factoryfive.com 508-291-3443
Pre-installation Information Read all of the instructions thoroughly before starting the actual installation. If you have any technicalquestions concerning this installation please call our tech department. For EFI connections please read the EFI section. Some aluminum pieces and other parts should already have been mounted on the frame. Some of thesemounted pieces may not be shown in all of the pictures. Route the harness away from sharp edges, exhaust pipes and moving parts. Have all needed tools and connectors handy. When crimping wires, select the correct size crimper for the wire. The layout in these instructions is specific for the Roadster but the basic layout locations are the same forthe Coupe and Hot Rod. See the Hot Rod assembly manual for more routing instructions.xiwww.factoryfive.com 508-291-3443
Wiring Harness Layoutxiiwww.factoryfive.com 508-291-3443
Chassis prep Marker, tape measure, 1.25” hole saw, drill.From the opening in the firewall, measure over and mark the firewall 14.75”.1
Measure and mark the firewall 1.50” up.Measure left from the first point and mark the firewall at 2.50” and 5.00”.2
Drill the two right points using a 1.25” hole saw.Skip to the sending unit harness section to see if a third hole is required.Installation InstructionsMain Harness /16” wrench, 5/32” hex key, sandpaper.Fuse panel harness, aluminum fuse panel mount, ¼” x 1” flange screws, ¼” locknuts, #14 x ½” screw,#6 self tapping screws from kit.7Locate the main harness which has the fuse panel. Remove the two flashers from the panel.3
Attach the fuse panel mount to the fuse panel using the ¼” screws and locknuts included.For the Coupe and Hot Rod attach the LED flashers provided in the kit. For the Roadster, reattach the flashers.4
If not cut, use a pair of wire cutters to cut the two plastic tubes sticking up from the fuse panel.5
From inside the cockpit, push the fuse panel through the large opening in the firewall into the footbox.Push the fuse panel down between the windshield mounting bracket and the ¾” pedalbox mounting tube.6
Attach the fuse panel mount to the 2”x 2” tube and the ¾” tube as shown below using the #6 self-tapping screwsthat originally attached the aluminum panels to the frame.Pull the front harness plugs and the flat steering column connector (not used in the roadster) into the pedalboxarea and put them on top of the pedal box.7
Pull the ground, brake pedal wires and neutral safety switch wires into the pedalbox area.Run the remaining harness wires along the top of the 2”x 2” tube towards the right side of the frame.Push the alternator and starter wires through the right hole in the firewall into the engine bay.8
Work the grommet into the firewall hole.Steering Column connector This is for use with the Hot Rod steering column only.Refer to Hot Rod assembly manual instructions if connecting otherwise, do not use.9
Zip tie the steering column connector back against the harness so that it will not rattle around.Inertia switch Do not mount the switch over the stamped chassis numbers.Mount the fuel inertia switch to the right of the steering bearing mount using the self-tapping screws providedwith the harness.10
Push the inertia switch down to make sure it is “ON”Harness Ground Make sure that any coating on the frame is removed before attaching grounds so that a good contact ismade.Frame coating ground off.Ground wire attached.Attach the ground wire near the fuse panel to the frame. Either drill a hole, remove any frame coating from thearea and screw the ground in or, place the ground between the frame and the pedalbox and attach the pedalboxbolt.Brake switchPush the orange wire onto one of the spades on the brake pedal switch. Push the purple wire onto one of thespades on the brake pedal switch.11
Clutch safety Switch A clutch safety switch is used to prevent starting the car while in gear. It requires pushing the clutch pedalin while starting the car. Another option is to use a momentary dash switch that must be used at the same time as the key.If a switch is not going to be used, connect the two wires together by either soldering the wires or using a buttconnector from the “misc. electrical components” assembly in the Factory Five main kit pack.Carbureted EngineRun the coil wires with the alternator wires and gauge sender wires for use with the coil.12
Fuel Injected Engine If running a Coyote Engine, refer to the Coyote Fitment instructions for Roadster or Hot Rod.Leave the coil and crank wires in the footbox and connect them to the power wires for the EFI harnessaccording to the EFI harness instructions.The COIL/EFI wire is a KEY ON - RUN POWER wire.The EFI CRANK POWER wire is the START POWER wireConnect the Speed sensor wires to the EFI wiring harness. The engine controlled fuel pump power can be used to control the relay in the chassis harness whichwould leave the fuse and relay easily accessible if necessary.If the EFI harness uses its own wires for the fuel pump, cut the small tan jumper wire close to connector that itjumpers from and connect the fuel pump wire from the EFI harness onto the chassis harness wire. This will usethe EFI computer to turn the relay on/off.Starter SolenoidRun the starter solenoid wires to the starter solenoid on the starter.Connect the wires to the starter solenoid according to the wiring diagram.AlternatorRun the alternator wires along the top of the engine to the alternator. If you are using a one-wire Alternator, attach the red wire ring to the post on the alternator. The brownwire is not used.13
If you are using a pushrod 5.0L EFI harness with the chassis harness, hooking up the Alternator ignitionpower (#22) is not necessary.Ignition Switch Needle nose pliers, round file, tin snipsDash, ignition switchDash prepDecide where on the dash the ignition switch will go, the Factory Five Roadster and Coupe cut dashes have alocation set-up already with the cut shape if desired.In order to install the ignition switch to fit the Factory Five laser cut hole correctly it is necessary to put one cutin the middle of each of the dashed cut sections.14
Use a pair of needle nose pliers to bend the metal back and forth until it breaks.Use a file to remove the burr left from the aluminum.15
Test fit the switch in the hole.Wiring Philips head screwdriver, electrical tapeAttach the ignition wires to the ignition switch using the wiring diagram as a guide for the correct posts for eachwire.16
Connect the red wires to the “B” screwConnect the brown wires to the “ACC” screw. If running a 1-wire alternator, do not attach the brown“Alternator ign” wire, it is not used, zip tie or electrical tape the “Alternator ign” wire back against the harness.Harness diagram17
18
19www.factoryfive.com 508-291-3443
20www.factoryfive.com 508-291-3443
Connect the orange wire to the “IG” screw.Connect the blue wires to the “ST” screw.21www.factoryfive.com 508-291-3443
Wrap the screw end of the switch with electrical tape to avoid any accidental grounding.Headlight switchAttach the headlight switch to the main wiring harness plug.HeaterIf used, connect the A/C or heater power wires that are run across the 2”x 2” tube to the A/C or heater.Radio This harness does not have any speaker wires or amplifier power wires in it.22www.factoryfive.com 508-291-3443
If used, connect the correct power wires that are run across the 2”x 2” tube to the correct wires on aradio/amp.Wiper The Factory Five wiper kits come with a switch and additional wires for the high, low, switched12v and park functions of the wiper motorIf used, connect the power wires that are run across the 2”x 2” tube to the correct wires on the wipermotor.Underdash/Courtesy light The under dash/courtesy light provided in the complete kits and the Hot Rod can be cut intomultiple pieces if lighting is desired in each footbox and under the dash.How to cut the LED light strip If you choose to cut and spread the lights around, wires will need to be soldered to each piece toconnect them in series.23www.factoryfive.com 508-291-3443
WiringConnect the red LED strip wire to the red courtesy light wire that is run across the 2”x 2” tube with theradio wires.Attach the black ground LED strip wire to the gray headlight switch courtesy light ground wire.When you twist the headlight switch knob counterclockwise all the way the light should turn on.Attach the LED strip to the bottom of the dash or to the frame tube going across the cockpit.Rear harnessLocate the rear harness.24www.factoryfive.com 508-291-3443
From the engine bay side, push the two connectors through the hole in the firewall into the cockpit.Work the grommet into the firewall hole.25www.factoryfive.com 508-291-3443
Connect the rear harness connectors to the connectors on the main harness.Using zip ties included with the kit to hold the harness in place, run the harness along the driver toptransmission tunnel tube and up to the 2”x 3” tube at the back of the cockpit.26www.factoryfive.com 508-291-3443
If your speedometer or engine computer requires a speed signal, connect the speedometer sender plug tothe sender in the transmission. If it is not required the pigtail can be zip tied to the harness to preventcatching on anything or rattles.27www.factoryfive.com 508-291-3443
Run rear harness down the center of the rear frame ¾” tubes to the back of the frame. Make sure toleave enough harness at the back of the 2”x 3” tube (arrow below) so that the aluminum for the trunkcan fit properly28www.factoryfive.com 508-291-3443
The harness “Y” should be at the back of the frame. If it is not, you may have too much harness in thefootbox or it may be too loose in the transmission tunnel.At the back of the frame, run the harness to the correct side of the frame as marked.29www.factoryfive.com 508-291-3443
Fuel connectorsAttach the gray fuel level sender plug to the sender in the fuel tank.If running an in-tank pump, connect the fuel pump plug to the higher connector on the fuel tank. Ifrunning an inline pump, cut the red connector off and connect it to the fuel pump using connectors fromthe fuel pump.30www.factoryfive.com 508-291-3443
License Plate WiringRoadsterRun the license plate light wires from the passenger rear corner up the outside of the trunk to the archedtrunk tube.Run the wires along the back of the arched tube to the center of the trunk for now.31www.factoryfive.com 508-291-3443
CoupeLeave the license plate wires at the passenger side rear for now.If not already done, mount the trunk side aluminum pieces.Permanently attach the harness to the frame using the insulated clips and 3/16” rivets supplied with the kit.Hot RodSee assembly manual.TaillightsRoadsterBlack – GroundRed – running lightsGreen – stop/turn signal The tail lights can be set up so that one light does the brake, the other does the turn signal andthey both do the running lights.Twist the running lights for the lights together and solder to the brown wireTwist the grounds for the lights together and solder to the correct wireCoupeWhite – GroundBlack – running lightsRed – stop/turn signalHot RodWhite – GroundBlack – running lightsRed – stop/turn signalGauge Sending Unit Harness There are a couple of ways to run the sending unit harness into the engine bay depending onnumber of additional wires that will need to go into the engine bay possibly from an EFI harnessif one is being used for the engine.32www.factoryfive.com 508-291-3443
The grommet hole on the sending unit harness is too large. If an EFI harness is being used, thenit can be run through the same grommet as the sending unit harness which would require drillingthe third mark on the firewall and install the sending unit harness.The instructions below show a carbureted engine type of install.If not installed, install the sending units for the gauges in the engine as described in the gaugeinstallation instructions.Remove the grommet from the sending unit harness.33www.factoryfive.com 508-291-3443
From inside the cockpit, push the sending unit harness through the rear harness grommet into the enginebay.Connect the sending unit harness connector to the main harness connector.34www.factoryfive.com 508-291-3443
If using the Factory Five Vintage gauges, cut the sending unit plugs off the water temp and oil pressuresending unit wires leaving 1”-2” of wire on the plug.Run the harness wires down the center of the engine to the gauge sending units.Attach the plugs to the sending unit harness, black is ground and the white plug wire goes to the coloredsending unit wire.Electric Fan The harness is designed to use a thermostat switch to control the fan.A thermostatic switch will turn the fan on at 185 and off at around 150 .The thermostat switch is included with complete kits and the Hot Rod kit.If the engine being used is fuel injected and the computer has the ability to control the fan this isthe best option.Engine controlled fan The engine controlled fan power can be used to control the relay in the chassis harness whichwould leave the fuse and relay easily accessible if necessary.35www.factoryfive.com 508-291-3443
Using the chassis harness relay/fuseCut the short red looped wire that goes between the fan relay pins close to the left red wire connector itjumps from and connect the computer fan power wire to the red relay wire going to the bottom pin. Thiswill make the computer control the relay.Ground one of the thermostat switch green wires.Thermostat switch controlThere are two locations in the harness available to run the electric fan using a thermostat switch; eitherin the engine in an engine coolant passage or in the radiator or radiator hose. The thermostatic switch works best installed in the engine. If this is not an option then it can beinstalled in the radiator.36www.factoryfive.com 508-291-3443
Engine locationIn your engine block or cylinder head locate a coolant access point to install the thermostat switch andthread it in.Attach the “Fan Thermo switch” wire to the thermostat switch.Follow the remaining fan wiring in the front harness.37www.factoryfive.com 508-291-3443
Radiator locationInsert the electric fan thermostat switch in a threaded bung on the radiator.If installed, connect the green thermo switch wire located with the fan wires to the thermostatic switch.Front Harness38www.factoryfive.com 508-291-3443
Drill a 1.25” hole in the block off plate for the front of the footbox that is included with the kit.Find the front harness in the box.Pull the front harness all the way through the panel hole and work the grommet into the hole.39www.factoryfive.com 508-291-3443
Pass the entire front harness connector through the block off plate and insert the grommet into the holein the plate. The hole is too small for the two large connectors at the end close to the grommet.Attach the two harness plugs to the correct plugs on the main harness.Attach the block off plate to the front of the footbox using silicone and rivets.Using zip ties to hold the harness in place, run the front harness along the top ¾” tube to the front of theframe. Make a notch in the top of the “F” panel for the harness to pass through.40www.factoryfive.com 508-291-3443
Front harness going down to the front of the frame.Attach the harness to the channel along the bottom of the radiator.Attach the harness to the front of the frame on the passenger side.41www.factoryfive.com 508-291-3443
Permanently attach the harness to the frame using the insulated clips and 3/16” rivets in the kit.Headlights/Turn signalsTwist the running lights for the lights together and solder to the brown wireTwist the grounds for the lights together and solder to the correct wireElectric FanConnect the fan to the wires in the harness.Dash Harness/Gauges Additional holes will need to be drilled in order to install the high/low beam switch and turnsignal switch in the dash. Keep in mind when locating the switches, how hard it is to reach themand if they will interfere with your hands when they are on the steering wheel. It is easier to drillthese holes before covering the dash or at least before installing the gauges.Factory Five has a padded vinyl dash with glovebox available as an option for use with theVintage gauges.This harness is set-up to use the turn and high beam indicator lights when positioned above thesteering column if not using the Factory Five Vintage gauges with built in indicators.The ignition switch and headlight switch have longer wires and can be located in other positionsthat the ones used in this layout. The headlight switch can go on the other side of thespeedometer if desired.The dash harness has the connections for the Vintage gauges, If using the Autometer gauges cutthe connectors off and use the connectors provided with the gauges. Use the instructionsprovided with them, the installation is much easier.Standard Roadster laser cut gauge layout.42www.factoryfive.com 508-291-3443
Possible switch/key layout.Write the names of the gauges next to their holes on the backside of the dash for easier and correctinstallationAutometer gauge install Autometer gauges, gauge install components, kit cable tiesWire strippers, Wire crimpers43www.factoryfive.com 508-291-3443
Install the gauges in the dash using the gauge instructions and the standard layout.Lay the gauge harness around the gauges as shown.44www.factoryfive.com 508-291-3443
Twist the gauge light power wire from the Oil Temp gauge with one of the small white jumper wires.Connect the twisted wire to the white gauge light power wire.45www.factoryfive.com 508-291-3443
Connect the remaining small gauges in series using wire included with the gauges. Solder the wireconnections or use butt connectors. If necessary, use the butt connectors from the misc. electricalcomponents assembly in the Factory Five main kit pack. If using Butt connectors, twist the smalljumper wire from the oil temp/clock with the light wire from the volt gauge and insert into one side ofthe butt connector and twist the gauge light wire from the water temp gauge and another jumper togetherand insert into the other side of the butt connector then repeat for the other small gauges.Cut the ground wire from each of the sending unit connectors.For each gauge, twist the sending unit ground and the light ground wires together and attach with ¼”female connectors and put each of them on the “GND” (ground) stud of each gauge.Cut the red wire that comes with the gauges into (4) 7” pieces and (2) 12” pieces.46www.factoryfive.com 508-291-3443
Connect the wires together as shown using ¼” female connectors.Cut the connector off the brown gauge feed connector near the volt gauge.Twist this wire together with the end of the red jumper wire and connect with a ¼” female connector.Connect the red wires to the “I” (ignition) terminals star
i www.factoryfive.com 508-291-3443 2017 Factory Five Racing Inc. 9 Tow Rd Wareham, MA 02571 Phone 508.291.3443 Fax 508.291.3883

