Transcription
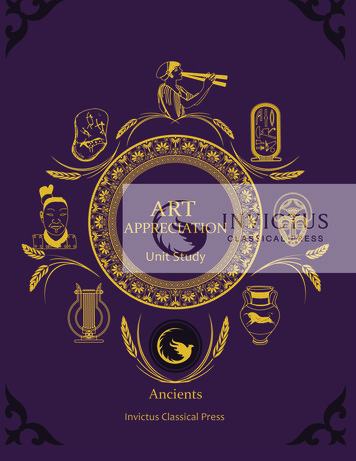
ARTAPPRECIATIONUnit StudyAncientsInvictus Classical Press
Art Appreciation: Ancients 2020 Invictus Classical PressAUTHOR: K. Nicole Henry - All rights reserved.No part of this curriculum may be reproduced or transmitted in any form by any means electronic, mechanical, photocopying, recording without written permission from InvictusClassical classicalpress.comCREATIVE DIRECTOR: Myriam GrimardGRAPHIC DESIGNER: Laury GrimardPrinted in Toronto, Ontario, Canada and Houston, Texas, United States.
Welcome to the Invictus Classical Press (ICP) Ancient Art Appreciation!We at ICP believe that there is truth, goodness, and beauty to be found in the Classicalmethod and Charlotte Mason pedagogy. This curriculum seeks to bring what people lovebest of each, together into one comprehensive resource.A Classical Charlotte Mason education is motivated by God’s glory and utilizes beautiful andtrue material within the Trivium-based method. Its goal is the formation and equipping ofthe whole person made in God’s image, who can learn, reason, and persuade people to theenduring truths of God and act virtuously toward their neighbor.
Table of ContentsAncientsArt AppreciationIntroduction . 9Lesson 1: Cave Art . 19Lesson 2: Tomb Wall Painting . 29Lesson 3: Minoan Griffin .43Lesson 4: Terracotta Soldier.53Lesson 5: Nok Portrait .63Lesson 6: Ashurbanipal with Bow.734
Lesson 1Ancient Cave Art(Correlates with ICP MW: week 1, 2)Children should learn pictures, line by line, group by group, reading, not books, butpictures themselves After a short story of the artist’s life the pictures are studied one at atime. Children learn not merely to see a picture but to look at it, taking in every detail. Charlotte MasonDescription:Students will learn about Mona Brooke’s five elements that can make up a shape (OiLS), and then focus onLINE, the first element of art, as they study, discuss, and then imitate cave art.MATERIALS: One large color copy the piece of the week:Aboriginal rock art depicting fish Smaller copies for each student Copies of Cave Painting at Serra da Capivara Art books with cave paintings White paper Pencils Natural color oil pastels (black, red, white,brown, terracotta, orange) Painters tape5
DIRECTIONSART THEORY: OiLSAccording to Mona Brookes in her book Drawing With Children, “The contour edges of the objects you wishto draw and the spaces between them are represented by continual patterns of the same five elements. Theelements give you the information you need to re-create any shape, whether simple or complex, on a pieceof paper.” Brookes, an acclaimed art educator, made up the elements of shape to break down observationaldrawing for students. In terms of the widely recognized “Elements of Art,” her elements of shape would fallunder the umbrella of Line and Space. She divides the five shapes into the Dot and Circle Family and the LineFamily and uses the acronym OiLS to help remember them. Take a look at the image:6
warm up:Take a few minutes to introduce OiLS to the students. Write “OiLS” in big letters at the top of the whiteboard and explain what each means. Take a minute and have them look around the room and identify thefive elements that can create a shape. Bring their attention to the corners of walls, lightbulbs, books, desks,tables, piano keys, etc. The goal is to have them see the elements everywhere they look. Hand out somescrap paper and instruct them to quickly draw some of the elements as you call them out. Then, have themturn over the warm-up piece, “Serra da Capivara,” and identify the OiLS in it.Instruct:Now, put aside the scrap paper and warmup piece and explain to them that today they will be learningabout rock art, the oldest art found on the planet! Rock art can be divided into two groups: Petroglyphs,from the Greek word πέτρα “petra” (stone), and να χαράξει “glyphein” (to carve), and Pictographs, from theLatin “pingere” (painted), and the Greek Γραφή “graphe” (writing).Petroglyphs are usually made by carving,scratching, or drilling into the surface ofrock. The marks left behind are then dyedor painted using mediums like dirt, berries, charcoal, ochre, blood, crushed animalbone, and gypsum. Animal fat was mixed into create thicker, stickier, and longer lastingcolors. Petroglyphs have been discoveredall over the world except for Antarctica (soMcKee Springs Petroglyph,Dinosaur National Monument, Utah,USAfar!). They are carefully protected by thepeople and governments of each nation.Pictographs are usually mono-chrome (one color) or polychrome (many colors) images that have beeneither finger-painted (the earliest found) or brush-painted (with animal hair or vegetable fiber) on thesurface of rock walls using pigments like carbon, manganese, and different oxides, as well as the samemediums found in petroglyphs. Advanced pictograph techniques included spray painting using hollow reeds7
or bones. Because they are less weather resistant thanpetroglyphs, pictographs are normally found in caveswith little exposure to the elements. Those that areoutside are found in dry, arid locations under overhanging rock. Pictograph artists drew different kindsof images including familiar land animals and fish,as well as birds and reptiles. There are also manygeometric symbols to be found, including lines, dots,spirals, and angles. Surprisingly, painters did notseem at all interested in depicting vegetation, andanimal imagery vastly out numbers human imagery.Hands, at the Cuevas de las Manos,near Santa Cruz Province, Argentina.It is important to remember that both petroglyphsand pictographs formed the foundation for the earliest writing systems.Appreciate:After you have discussed petroglyphs and pictographs with the students, and hopefully shown them somefamous examples of each, hand out a copy of “Aboriginal rock art depicting fish” to each student, or post alarge copy on the whiteboard and have them focus on it. Give them a couple of minutes to quietly observeit without saying anything. Then ask them to identify the elements of shape they can see. If they have theirown copies, have them trace the elements with their fingers. If not, have them come up to the board andtrace different elements on the large one. Ask them the three VTS questions to get a conversation going.As the students examine the painting, explain to them that they will now focus on the first element of art:LINE. LINE can be described as the path of a point moving through space. This ancient painting has straight,curved, and angled lines in it. Lines can be further classified in terms of active and passive, thick and thin,implied and actual, perpendicular and parallel, long and short, and vertical and horizontal, as well as others.As they look at the painting;8
Ask: How do the lines move our eyes around this piece? How do the lines in this piece create connections? Are there repeating patterns of lines? Do the lines draw our eyes to a particular point?Drawing Time:1. After observation and discussion time, hand out paper, pencils, and oil pastels to the students. Explainto them that they are going to imitate this rock painting on their own paper. Tell them that they can havefun with the images and symbols, and even incorporate animals that are common to them in everydaylife, like dogs and cats.2. Have them start to sketch with their pencils. Some students may need guidance as to how to start, andsome will dive right in. If your students are struggling or overwhelmed by the amount of stuff going onin the painting, fold their copy in half or in quarters and have them focus on a smaller section. Remember that the goal is not to copy the piece, but to imitate it, so it doesn’t have to look exactly the same atthe end. Aim for the spirit of the piece, not the letter. Maybe a student is fascinated by the animals andwants to draw them – whatever goes! Encourage them to find what they like and go from there.3. As they are drawing, remind them to see the elementsof shape in the original. Using the whiteboard, or yourown paper taped to the board, draw your own imitation of the painting. When drawing living beings, it’salways a good idea to start with the eyes and moveout from there, that way things tend to stay in proportion.9
4. When they are satisfied with their drawing, havethem tape the sides or corners of the cardstock toavoid movement as they work with pastels and startto go over the pencil marks with the pastels.5. When using pastels, advise the students that it is agood idea to start at the top of the page and maketheir way down. Another tip to keep in mind is thatthe color black should be used moderately but whitesand lighter tones can always be applied on top of darkif they find it too dark.6. Show them how they can smudge the pastels, eitherwith their fingers, paper towel or Q-tips, to make itlook more like paint.7. Once they are finished tracing, have them use thepastels to color the rock background. Use differentyellows at the top to give a light effect, then moveto orange tones for the middle and reds for the bottom.8. Lastly, for an “ombre” effect, give the background agood smudge with a paper towel to blend all the colors together.10
Aboriginal rock art depicting fish, Kimberley region, Australia
Serra da Capivara, Brazil
13
Children should learn pictures, line by line, group by group, reading, not books, but pictures themselves After a short story of the artist's life the pictures are studied one at a . Art books with cave paintings White paper Pencils Natural color oil pastels (black, red, white, brown, terracotta, orange) Painters .