Transcription
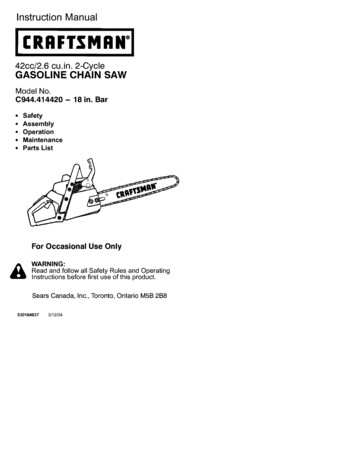
Instruction Manual42cc/2.6 cu.in. 2-CycleGASOLINECHAIN SAWModel No.C944.414420 - 18 in. BarSafety Assembly OperationMaintenance Parts ListFor Occasional&Use OnlyWARNING:Read and follow all Safety Rules and OperatingInstructions before first use of this product.Sears Canada,5301649373/12/04Inc., Toronto,OntarioM5B 2B8
Warranty StatementIdentification of SymbolsSafety RulesAssemblyOperationMaintenance2237814Service and ons Statement22Parts ListCenter SectionParts & OrderingBack CoverLIMITED ONE (1) YEAR WARRANTY FOR CRAFTSMAN ')GAS CHAIN SAWFor one (1) year from the date of purchase Sears Canada, Inc., will repair orreplace free of charge at Sears option parts which are defective as a result ofmaterials or workmanship.COMMERCIAL OR RENTAL USE:If this Gas Chain Saw is used for commercial application the warranty is void.This warranty does NOT cover:1. Expendable items which become worn during normal use, such as chain,chain bar, starter rope, spark plugs, and filter.2. Pre-delivery setup, installation of guide bar and chain.3. Customer neglect; operating Chain Saw without proper fuel mixture or operating Chain Saw without lubrication.Warranty service is available by returning the Gas Chain Saw to the nearestSears Service Centre/Departmentin Canada. This warranty applies only whilethis product is in use in Canada.This warranty is in addition to any statutory warranty and does not exclude or limitlegal rights you may have but shall run concurrently with applicable provinciallegislation. Furthermore, some provinces do NOT allow limitation on how long animplied warranty will last so the above limitations may not apply to you.Sears Canada, Inc., Toronto, Ontario M5B 2B8tronq.onneusepout 6tre dangereuse! Uemploi n6gligeant ou im*AVERTISSEMENT:proprepout causer des blessuresCetteIgraves ou m mes fatales.I4 1--de I'ou[e appropri6e,laprotectiondes layeuxet laortez toujoursprotectionprotection de t te.II .ItI Lisez et comprenez e.La valour mesureederecul,sansfreindechaTne, pour la combi*naison de barre et dechaine sur out contact de la pointe de la barre avec n'importe quel objet; ce contact pout faire que la barre saute soudainementversle haut et vers I'arriere,II ceque eviterpourraitentrainer desAVERTISSEMENT!faudrasoigneusementblessures graves.
work, check with doctor before operating. Do not start cutting until you have aclear work area, secure footing, andespecially if you are felling a tree, aretreat path.I.WARNING:Always disconnectspark plug wire when making repairs except for carburetor adjustments. Because a chain saw is a high-speedwoodcutting tool, special safety precautions must be observed to reduce risk ofaccidents. Careless or impreper use ofthis tool can cause serious injury.PLAN AHEAD Restdct the use of your saw to adultusers who understand and can followOPERATE YOUR SAW SAFELY Do not operate with one hand. Serious injury to the operator, helpers, orbystanders may result from onehanded operation. A chain saw is intended for two-handed use. Operate the chain saw only in a wellventilated outdoor area. Do not operate saw from a ladder orin a tree. Make sure the chain will not makecontact with any object while startingthe engine. Never try to start the sawwhen the guide bar is in a cut. Do not put pressure on the saw, especially at the end of the cut. Doingso can cause you to lose controlwhen the cut is completed. Stop engine before setting saw down. Hand carry saw only when engine isstopped. Carry with muffler awayfrom body; guide bar & chain projecting behind you; guide bar preferablycovered with a scabbard. Do not operate a chain saw that isdamaged, improperly adjusted, or notcompletely and securely assembled.Always replace bar, chain, handguard, chain brake, or other parts immediately if they become damaged,broken, or are otherwise removed.the safety rules, precautions, and opereting instructions found in thismanual. Wear protective gear. Always usesteel-toed safety footwear with nonslip soles; snug-fitting clothing;heavy-duty, non-slip gloves; eye protection such as non-fogging, ventedgoggles or face screen; an approvedsafety hard hat; and sound barriers(ear plugs or mufflers) to protect yourhearing. Regular users should havehearing checked regularly as chainsaw noise can damage hearing.HearingProtection .Snugii l. -ClothingFitting-Safety HatEyeProtectionGlovesI P'Th" lkHeavy Duty114 Illi Secure hair above shoulder length.Do not wear loose clothing or jewelry; they can get caught in movingpads. Keep all parts of your body awayfrom the chain when the engine isrunning. Keep children, bystanders, and animals at least 30 feet (10 meters)away from the work area when starting and using the saw. Do not handle or operate a chainsaw when you are fatigued, i11,or upset, or if you have taken alcohol,drugs, or medication. You must be ingood physical condition and mentallyalert. If you have any condition thatmight be aggravated by strenuousMAINTAINYOURSAW IN GOODWORKING ORDER Have all chain saw service performed by a qualified service dealerexcept the items listed in the MAINTENANCE section of this manual. Make certain the saw chain stopsmoving when the throttle trigger isreleased. For correction, refer toCARBURETOR ADJUSTMENTS. Keep the handles dry, clean, andfree from oil or fuel mixture. Keep caps and fasteners securelytightened. Nonconforming replacement components or the removal of safety devicesmay cause damage to the unit andpossible injury to the operator or by3
partsasrec ,.Avoid , uctionsommended.Nevermodifyyoursaw. Maintainchainsawwithcare. Keepunitsharpandcleanforbetterandsaferperformance. FollowinstructionsforlubricatingandClear The Working Areachangingaccessories. Checkfordamagedparts.Beforefur- 41 WARNING: Avoid kickback whichtheruseofthechainsaw,aguardorresult in serious injury. Kickbackotherpartthatisdamagedshouldbe canis the backward, upward or sudden forcarefullycheckedtodeterminethatitward motion of the guide bar occurringwilloperatepreperiyandperfomqitsthe saw chain near the upper tipintendedfunction.Checkforalignmentwhenbar contacts any objectofmovingparts,bindingofmoving ofsuchthe asguidea log or branch, or when theparts,breakageofparts,mountingand wood closes in and pinches the sawanyotherconditionsthatmayaffectitsin the cut. Contacting a foreignoperation.Aguardorotherpartthatis chainin the wood can also result indamagedshouldbeproperlyrepaired objectof chain saw control.orreplacedbyaSearsServiceCentre lossKickback can occurunlessotherwiseindicatedelsewhere Rotationalwhenthemovingchain contacts anintheinstructionmanual.at the upper tip of the guide Whennotinuse,chainsawsshould objectThis contact can cause thebestoredinadry,highorlocked-up bar.chain to dig into the object, whichplaceoutofthereachofchildren.the chain for an instant. The Whenstoringsaw,useascabbardor stopsresult is a lightning fast, reversecarryingcase.reaction which kicks the guide bar upHANDLE FUEL WITH CAUTION Do not smoke while handling fuel orwhile operating the saw. Eliminate all sources of sparks orflame in areas where fuel is mixed orpoured. Mix and pour fuel in an outdoor areaand use an approved, marked container for all fuel purposes. Wipe upall fuel spills before starting saw. Move at least 10 feet (3 meters) fromfueling site before starting. Turn the engine off and let saw coolin a non-combustiblearea, not ondry leaves, straw, paper, etc. Slowlyremove fuel cap and refuel unit. Store the unit and fuel in a cool, drywell ventilated space where fuel vapors cannot reach sparks or openflames from water heaters, electricmotors or switches, furnaces, etc.GUARD AGAINST KICKBACKFollow all safety rules to help avoidkickback and other forces which canresult in serious injury.Kickback Pathand back toward the operator. Pinch-Kickbackcan occur when thethe wood closes in and pinches themoving saw chain in the cut alongthe top of the guide bar and the sawchain is suddenly stopped. This sudden stopping of the chain results in areversal of the chain force used tocut wood and causes the saw tomove in the opposite direction of thechain rotation. The saw is drivenstraight back toward the operator. Pull-In can occur when the movingchain contacts a foreign object in thewood in the cut along the bottom ofthe guide bar and the saw chain issuddenly stopped. This sudden stopping pulls the saw forward and awayfrom the operator and could easilycause the operator to lose control ofthe saw.REDUCE THE CHANCE OFKICKBACK Recognize that kickback can happen.With a basic understanding of kickback, you can reduce the element ofsurprise which contributes to accidents. Never let the moving chain contactany object at the tip of the guide bar.
Keepworkingareafreefromobstruc- control, Don't let go, Grip the reartionssuchasothertrees,branches, handle with your right hand whetherrocks,fences,stumps,etc.Eliminate you are right or left handed, Wrap theoravoidanyobstructionthatyourfingers of your left hand over andsawchaincouldhitwhilecutting.around the front handlebar, and your Whencuttinga branch,donotletthe left thumb under the front handlebar,guidebarcontactanotherbranchorKeep your left arm straight with theelbow locked.otherobjectsaroundit. Keepsawchainsharpandproperly Position your left hand on the fronttensioned.Alooseordullchaincanhandlebar so it is in a straight lineincreasethechanceofkickback.with your right hand on the rear hanFollowmanufacturer'schainsharp- dle when making bucking cuts.eningandmaintenanceinstructions. Stand slightly to the left side of theChecktensionatregularintervals, saw to keep your body from being inbutneverwithenginerunning.Make a direct line with the cutting chain.surechainbrakenutsaresecurely Stand with your weight evenly balanced on both feet.tightened. Do not overreach. You could be Beginandcontinuecuttingatfulldrawn or thrown off balance and ,thereisgreaterchanceofkickbackoccurring. Do not cut above shoulder height. It Useextremecautionwhenreenter- is difficult to maintain control of sawingacut.above shoulder height. Donotattemptcutsstartingwiththe KICKBACK SAFETY FEATUREStipofthebar(plungecuts). Watchforshiftinglogsorotherforces WARNING:The following feathatcouldcloseacutandpinchortures are included on your saw to helpfallintochain.reduce hazard of kickback; however, UsethespecifiedReduced-Kickbackfeatures will not totally eliminateGuideBarandLow-KickbackChain. suchthis danger. Do not rely only on safetyAvoid Pinch-Kickback: Be extremely aware of situations orobstructions that can cause materialto pinch the top of or otherwise stopthe chain. Do not cut more than one log at atime. Do not twist saw as bar is withdrawnfrom an undercut when bucking.Avoid Pull-In: Always begin cutting with the engineat full speed and the saw housingagainst wood. Use wedges made of plastic orwood. Never use metal to hold thecut open,MAINTAIN CONTROLStand to the left of the sawundersidedevices. Follow all safety rules to helpavoid kickback and other forces whichcan result in serious injury. Front Hand Guard: designed to reduce the chance of your left handcontacting the chain if your handslips off the front handlebar. Position of front and rear handlebars:designed with distance between handles and "in-line" with each other. Thespread and "in-line" position of thehands provided by this design worktogether to give balance and resistance in controlling the pivot of thesaw back toward the operator if kickback occurs, Reduced-KickbackGuide Bar: designed with a small radius tip whichreduces the size of the kickbackdanger zone, This type bar has beendemonstrated to significantlyreducethe number and seriousnessof kickbacks.Tip Guide Bar- - tElbowedSmall RadiusNever reverse hand positions A good, firm grip on the saw withboth hands will help you maintainLarge Radius ETip Guide Bar'
ments whenCHAIN BRAKE & CKA ANGLE Chain Brake: designed to stop thechain in the event of kickback,Centre. Take your unit to the place of purchase or to your nearest Sears ServiceCentre. Tip contact in some cases may causea lightning fast reverse REACTION,kicking guide bar up and back towardoperator. Pinching the saw chain along the topof the guide bar may push the guidebar rapidly back toward the operator. Either of these reactions may causeyou to lose control of the saw whichcould result in serious injury. Do notrely exclusivelyupon safety devicesbuilt into your saw.WARNING:WE DO NOT REP*RESENT AND YOU SHOULD NOT ASSUME THAT THE CHAIN BRAKE WILLPROTECT YOU IN THE EVENT OF A KICK*BACK. Kickback is a lightning fast actionwhich throws the bar and rotating chainbackand uptoward the operator. Kickback can be caused by allowing contactof the bar tip in the danger zone with anyhard object.Kickbackcan also becaused by pinching the saw chain alongthe top of the guide bar, This action maypush the guide bar rapidly back towardtheoperator,Either of these events maycause you to lose control of the sawwhich could result in serious injury oreven death, DO NOT RELY UPON ANYOFTHE DEVICES BUILT INTO YOUR SAW.YOU SHOULD USE THE SAW PROPERLYAND CAREFULLY TO AVOID KICKBACK.Reduced-kickbackguide bars and lowkickback saw chains reduce the chanceand magnitude of kickback and are recommended,Your saw has a low kickback chain and bar as original equipment. Repairs on a chain brake shouldbe made by an authodzed Sears ServiceWARNING:Computed kickbackangle (CKA) listed on your saw andlisted in the CKA table below representsangle of kickback your bar and chaincombinations will have when tested inaccordance with CSA (Canadian Standards Association) standards. Whenpurchasing replacement bar and chain,considerations should be given to thelower CKA values. Lower CKA valuesrepresent safer angles to the user, higher values indicate more angle and higher kick energies. Computed angle represented indicates total energy and angleassociated without activation of thechain brake dudng kickback. In all caseslower CKA values represent a safer operating environment for the user.The following guide bar and chain combinations meet kickback requirementsof CSA 2162.1 & Z62.3 when used onsaws listed in this manual. Use of barand chain combinationsother thanthose listed is not recommendedandmay not meet the CKA requirements perstandard.tested on a representative sample ofchain saws below 3,8 cubic inch displacement.Low-Kickback ChainContoured Depth Gaugedeflects kickbackforce and allowslongatedGuard Linkwoodto graduallyride into Cutter,ComputedkickbackMODELC944.414420an lle (CKA) TableBARCHAIN P/NP/NLen th71-361971-36598IAFETY NOTICE: Exposure to vibrations through prolonged use of gasolinepowered hand tools could cause bloodvessel or nerve damage in the fingers,hands, and joints of people prone tocirculation disorders or abnormal swelling. prolonged use in cold weafl er hasbeen linked to blood vessel damage inotherwise healthy people. If symptomsoccur such as numbness, pain, loss ofchain brakeCKA without14 Jstrength, change in skin color or texture,or loss of feeling in the fingers, hands, orjoints, discontinue the use of this tooland seek medical attention. An anti-vibration system does not guarantee theavoidance of these problems. Userswho operate power tools on a continualand regular basis must closely monitortheir physical condition and the conditionof this tool.
SPARK ARRESTINGSCREEN: Yoursaw is equipped with a temperaturelimiting muffler and spark arrestingscreen which meets the requirementsof California Codes 4442 and 4443. AllU.S. forest land and the states of California, Idaho, Maine, Minnesota, NewJersey, Oregon, and Washington require by law that many internal combustion engines be equipped with aspark arresting screen. If you operatea chain saw in a state or locale wheresuch regulations exist, you are legallyresponsible for maintaining the operating condition of these parts. Failure todo so is a violation of the law. Refer toCUSTOMER RESPONSIBILITIES TABLEin the MAINTENANCE section.CARTON CONTENTSCheck carton contents against the following list.Model C944,414420 Chain Saw (fully assembled) Bar tool 2-cycle engine oil (bar oil not included)NOTE:Examine parts for damage. Do not usedamaged parts.If you need assistance or find that partsare missing or damaged, contact yourSears Service Centre.STANDARDSCSA Z62A-03"Chain Saws - Occupational Health and Safety"CSA Z62.3-96 "Chain Saw KickbackOccupationalHealth and Safety"It is normal to hear the fuel filterrattle in an empty fuel tank.Your unit has been factory tested andthe carburetor precisely adjusted. As aresult you may smell gasoline or find adrop of oil/fuel residue on the mufflerwhen you unpack the unit.ASSEMBLYYour saw is fully assembled; noassembly is necessary.
KNOW YOUR SAWREAD THIS INSTRUCTION MANUAL AND SAFETY RULES BEFORE OPERATING YOURCHAIN SAW. Compare the illustrations with your unit to familiarize yourself with thelocation of the various controls and adjustments. Save this manual for future reference.ChainFront HandleAdjustment TcolHand Guard "",,- r., /Starter Rope;r:;erChainBar Oil Fill CapThr( totletCylindir Cc- ---' *ThrottleTriggerChokeKnobHousingFuel Mix Fill CapCha nBrake/Chain'NutsBrake Chain CatcherON/STOP SWITCHThe ON/STOP SWITCH is used to stopthe engine.THROTTLE TRIGGERThe THROTTLE TRIGGER controls engine speed.THROTTLELOCK-OUTThe THROTTLE LOCK-OUT must bepressed before you can squeeze thethrottle trigger. This feature preventsyou from accidentally squeezing thetrigger.CHOKE/FASTIDLE LEVERThe choke and fast idle are set by pulling the CHOKE/FAST IDLE LEVER outfully for cold or after refueling. Thechoke provides additional fuel to theengine during cold starting.PRIMER BULBThe PRIMER BULB circulates fuel to thecarburetor to provide quicker starting.D\ sarocket41PGuide Bar rHPoleCHAIN BRAKEThe CHAIN BRAKE is a device designed to stop the chain if kickback occurs. The chain brake activates automatically in the event of kickback. Thechain brake activates manually if thefront hand guard is pushed forward.The chain brake is disengaged by pulling the front hand guard back towardthe front handle as far as possible.CHAIN TENSIONIt is normal for a new chain to stretchdudng first 30 minutes of operation. Youshould check your chain tension frequently. See CHAIN TENSION under theSERVICE AND ADJUSTMENTS section.WARNING:Muffler is very hotduring and after use. Do not touch themuffler or allow combustible materialsuch as dry grass or fuel to do so.
BEFORESTARTINGWARNING:ENGINEgas can damage the fuel system of anengine while in storage,To avoid engine problems, the fuelsystem should be emptied before storage for 30 days or longer, Drain thegas tank, start the engine and let it rununtil the fuel lines and carburetor areempty. Use fresh fuel next season.See STORAGE instructions for additional information.Never use engine or carburetor cleaner products in the fuel tank or permanent damage may occur.See the STORAGE section for additional information.CHAIN BRAKEEnsure chain brake is disengaged bypulling the front hand guard back toward the front handle as far as possible. The chain brake must be disengaged before cutting with the saw.Be sure to read thefuel handling information in the safetyrules section of this manual before youbegin. If you do not understand thefuel handling information do not attempt to fuel your unit. Seek help fromsomeone that does understand the information or contact your Sears Service Centre.GUIDE BAR AND CHAIN OILThe chain oiler provides continuouslubrication to the chain and guide bar.Be sure to fill the bar oil tank when youfill the fuel tank (Capacity 6.8 fl. oz.),For maximum guide bar and chain life,we recommend you use Craftsmanchain saw bar oil, If Craftsman bar oilis not available, you may use a goodgrade SAE 30 oil until you are able toobtain Craftsman brand. The oil outputis automaticallymetered during operation. Your saw will use approximatelyone tank of bar oil for every tank of fuelmix. Always fill the bar oil tank whenyou fill the fuel tank.FUELING ENGINEWARNING:The chain must notmove when the engine runs at idlespeed, If the chain moves at idlespeed refer to CARBURETOR ADJUST*MENT within this manual, Avoid contact with the muffler. A hot muffler cancause serious burns.WARNING:Remove fuel capslowly when refueling,This engine is certified to operate on unleaded gasoline, Before operation, gasoline must be mixed with a good qualitysynthetic 2-cycle air-cooled engine oil.We recommend CraBsman brand synthetic oil. Mix gasoline and oil at a ratioof 40:1. A 40:1 ratio is obtained by mixing 3,2 ounces (95 ml) ofoil with 1 gallon (4 litres) of unleaded gasoline. Included with this saw is a 3,2 ounce (95ml) container of Craftsman brand oil.Pour the entire contents of this containerinto 1 gallon (4 litres) of gasoline toachieve the proper fuel mixture. DO NOTUSE automotive oil or boat oil, These oilswill cause engine damage, When mixingfuel follow the instructions printed on thecontainer. Once oil is added to the gasoline, shake container momentarily to assure that the fuel is thoroughly mixed.Always read and follow the safety rulesrelating to fuel before fueling your unit,IMPORTANTExperience indicates that alcoholblended fuels (called gasohol or usingethanol or methanol) can attract moisture which leads to separation andformation of acids durthg storage. AcidicSTOPPING YOUR ENGINE Move ON/STOP switch to the STOPposition.STARTING YOUR ENGINE To start the engine, hold the sawfirmly on the ground as illustrated.Make sure the chain is free to turnwithout contacting any object,Starter Rope HandleRear HandleRigl Foot ThrouImportant points to rememberWhen pulling the starter rope, do notuse the full extent of the rope as thiscan cause the rope to break. Do not letstarter rope snap back. Hold the handle and let the rope rewind slowly,For cold weather starting, start the unitat FULL CHOKE; allow the engine towarm up before squeezing the throttletrigger.9
heFULLCHOKEposition.STARTINGACOLDENGINE(orawarm engine after running out offuel)NOTE: In the following steps, whenthe choke/fast idle lever is pulled out tothe full extent, the correct throttle setting for starting is set automatically.ON/STOP SWITCH,ONSTOP1.Move ON/STOP switch to the ONposition.2. Pull out choke/fast idle to the fullextent (to the FULL CHOKE position).3. Slowly press primer bulb 6 times.4. Pull the starter rope sharply 5 timeswith your right hand. Then, proceed to the next step.NOTE: If the engine sounds as if it istrying to start before the 5th pull, stoppulling and immediatelyproceed to thenext step.5. Push the choke/fast idle lever in tothe HALF CHOKE position.CHOKE/FAST IDLE LEVERo lEW)%-%, ,. , Chfast idle lever OFF HALF FULL6. Pull the starter rope sharply withyour dght hand until the enginestarts.7. Allow the engine to run for approximately 5 seconds. Then, squeezeand release throttle trigger to allowengine to return to idle speed.STARTING A WARM ENGINE1. Move ON/STOP switch to the ONposition.2. Pull the choke/fast idle lever out tothe HALF CHOKE position.3. Slowly press the primer bulb 6times.4. Pull the starter rope sharply withyour dght hand until the enginestarts.5. Squeeze and release throttle trigger to allow engine to return to idlespeed.DIFFICULT STARTING (or starting aflooded engine)The engine may be flooded with toomuch fuel if it has not started after 10pulls. Flooded engines can be clearedof excess fuel by pushing the choke/fast idle lever in completely (to the OFFCHOKE position) and then following thewarm engine starting procedure listedabove. Ensure the ON/STOP switch isin the ON position. Starting could require pulling the starter rope handlemany times depending on how badlythe unit is flooded. If engine fails tostart, refer to the TROUBLESHOOTINGTABLE or contact your Sears ServiceCentre.CHAINBRAKE AI WARNING:If the brakeband isworn too thin it may break when the chainbrake is triggered. With a broken brakeband, the chain brake will not stop thechain. The chain brake must be replacedif any part is worn to less than 0.020 inch(0.5 mm) thick. Repairs on a chain brakeshould be made by your Sears ServiceCentre. Take your unit to the place of purchase or to the nearest Sears ServiceCentre. This saw is equipped with a chainbrake. The brake is designed to stopthe chain if kickback occurs. The inertia-activatedchain brake is ac vated if the front hand guard is pushedforward, either manually (by hand) orautoma%ally (by sudden movement). If the brake is already activated, it isdisengaged by pulling the front handguard back toward the front handle asfar as possible. When cutting with the saw, the chainbrake must be disengaged.DisengagedBraking function controlCAUTION:The chain brake must bechecked several times daily. The enginemust be running when performing thisprocedure. This is the only instancewhen the saw should be placed on theground with the engine running.10
Place the saw on firm ground. Grip theroar handle with your right hand and thefront handle with your left hand. Apply fullthrottle by fully depressing the throttle trigger. Activate the chain brake by turningyour left wrist against the hand guardwithout releasing your grip around thefront handle. The chain should stop immediately.Inertia activating function controlWARNING:When performing thefollowing procedure, the engine mustbe turned off.Grip the rear handle with your right handand the front handle with your left hand.Hold the chain saw approximately14inches (35 cm) above a stump or otherwooden surface. Release your grip onthe front handle and use the weight ofthe saw to let the tip of the guide barfall forward and contact the stump.When the tip of the bar hits the stump,the brake should activate.OPERATING TIPS Check chain tension before first useand after 1 minute of operation. SeeCHAIN TENSION in the MAINTENANCEsection. Cut wood only. Do not cut metal,plastics, masonry, non-wood buildingmaterials, etc. Stop the saw if the chain strikes aforeign object. Inspect the saw andrepair parts as necessary. Keep the chain out of dirt and sand.Even a small amount of dirt willquickly dull a chain and increase thepossibility of kickback. Practice cutting a few small logs using the following steps. This will helpyou get the "feel" of using your sawbefore you begin a major sawing operation. Squeeze the throttle trigger and allow the engine to reach full speedbefore cutting. Begin cutting with the saw frameagainst the log. Keep the engine at full speed theentire time you are cutting. Allow the chain to cut for you. Exertonly light downward pressure. Release the throttle trigger as soonas the cut is completed, allowingthe engine to idle. If you run thesaw at full throttle without a cuttingload, unnecessary wear can occur. To avoid losing control when cut iscomplete, do not put pressure onsaw at end of cut. Stop engine before setting saw down.TREE FELLING TECHNIQUESWARNING:Check for broken ordead branches which can fall whilecutting causing serious injury. Do notcut near buildings or electrical wires ifyou do not know the direction of treefall, nor cut at night since you will notbe able to see well, nor during badweather such as rain, snow, or strongwinds, etc. Carefully plan your sawing operationin advance. Clear the work area. You need aclear area all around the tree so youcan have secure footing. The chain saw operator should keepon the uphill side of the terrain as thetree is likely to roll or slide downhillafter it is felled. Study the natural conditions that cancause the tree to fall in a particulardirection. These conditions include: The wind direction and speed. The lean of the tree. The lean of atree might not be apparent due touneven or sloping terrain. Use aplumb or level to determine the direction of tree lean. Weight and branches on one side. Surrounding trees and obstacles. Look for decay and rot. If the trunk isrotted, it can snap and fall toward theoperator. Make sure there is enough room forthe tree to fall. Maintain a distance of24/2 tree lengths from the nearestperson or other objects. Enginenoise can drown out a warning call. Remove dirt, stones, loose bark,nails, staples, and wire from the treewhere cuts are to be made.Plan a clear retreat pathK11--(o-- -Direction of Fall
FELLING LARGE TREES(6 inches in diameter or larger)The notch method is used to fell largetrees. A notch is cut on the side of thetree in the desired direction of fall. Aftera felling cut is made on the oppositeside of tree, the tree will tend to fall inthe direction of the notch.NOTE: If tree has large buttress roots,remove them before making the notch.If using saw to remove buttress roots,keep saw chain from contactingground to prevent dulling of the chain.NOTCH CUT AND FELLING TREE Make notch cut by cutting the top ofthe notch first. Cut through 1/3 of thediameter of the tree. Next completethe notch by cutting the bottom. Seeillustration. Once the notch is cut, remove the wedge of wood from tree.Fellingcut hereFirst cut 'i After removing the wood, make thefelling cut on the opposite side of thenotch. This is done by making a cutabout two inches higher than thecenter of the notch. This will leaveenough uncut wood between the felling cut and the notch to form a hinge.This hinge will help prevent the treefrom falling in the wrong direction.Hinge holds tree onstump and helpsOpening offelling cutClosingof notchNOTE: Before felling cut is complete,use wedges to open the cut whennecessary to control the direction offall. To avoid kickback and chaindamage, use wood or plastic wedges,but never steel or iron wedges. Be alert to signs tha
the engine. Never try to start the saw when the guide bar is in a cut. Do not put pressure on the saw, es-pecially at the end of the cut. Doing so can cause you to lose control when the cut is completed. Stop engine before setting saw down. Hand carry saw only when engine is stopped. Carry with muffler away from body; guide bar .
