Transcription
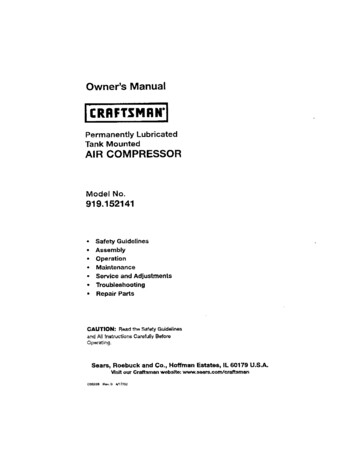
Owner'sManualPermanentlyLubricatedTank MountedAIR COMPRESSORModel No.919.152141 Safety Guidelines Assembly Operation Maintenance Service Troubleshooting RepairCAUTION:and AdjustmentsPartsRead the Saf y Guidelinesand All InstructionsOpsr ing.Sears,026336R .Carefully BeforeRoebuck and Co., Hoffman Estates, IL 60179 U.S.A.Visit our Cre tsmanwebslte: www.sears.com/craftsmanO4/17/Q2
h Tml [ [ o ui --WARRANTY.SPECIFICATION CHART .SAFETY GUIDELINES .GLOSSARY.ACCESSORIES.DUTY CYCLE .INSTALLATION .OPERATION.MAINTENANCE .SERVICE AND ADJUSTMENTS .STORAGE .TROUBLESHOOTINGGUIDE .REPAIR PARTS .ESPANOL .NOTESINOTAS.HOW TO ORDER REPAIR PAP I'S .IIIII233-899910 1112-141516-17q819-2122-2526-4847back cover,,,I. ! ',.,. i, "FULL ONE YEAR WARRANTYAIR COMPRESSORIf this air compressor fails due to a defect in material or workmanship withinone year from the date of purchase, RETURN IT TO THE NEAREST SEARSREPAIR CENTER THROUGHOUT THE UNITED STATES AND SEARS WILLREPAIR IT, FREE OF CHARGE. If purchased from Orchard Supply Hardware,return to the nearest Orchard Stone and Orchard will repair it, free of charge.]f this air compressor is used for commercial or rental purposes, the warrantywi lapply for ninety days from the date of purchase,This warranfy glve you specific legat rights and you may ha'Je other rightswhich vary from state to state.Sears, Roebuck and Co,, Dept, 817WA, Hoffman Estates, II 60179D263362-ENG
Model No.Max. Developed HPBoreStroke919-162141247-62531.7SVoltage-Single PhaseMinimum Br nch Circuit RequirementFuse Type120V10 ampsTime DelayAir Tal k CapacityAppro CutqnApprox Cut-outSCFM @ 40 psigSCFM @ 90 pgi941201503.72.6[ -Y I.1:t[ lJl.J l l lm.] laLl li[.]O -']Thls manuaL contains information that is important for you to know and understand This nformationrel Ie t protecting YOUR .&&FET'f and PREVENTING EQUIPMENT PROBLI .IvIs. To h lp youroco 'l;Zl! thi : iritOrmLLtiorl. WC Ur ethe ymbol berow Please fe ld he m nu l rlcl p3y lention tht h 'sesectionsF , 1 l lndicatessituationresultwhich,inif notavoided,I ' lIUsedwithout thesafety alert symbolindicates a potentially hazardoussituation which, if not avoided, mayresult in Droner damaae.lndlcatesa potentiallyf azardous situationwhich, if not avoided,result indeath oJ' s rlous iniurv.THESEa potentiallysituationwhich, if not avoided,result inminor or modera'ie iniurv,will. h ojr . . .SAVEhazardousNS FJUCTONSlIMPROPER OPERATION OR MAINTENANCE OF THIS PRODUCT COULD RESULT INSERIOUS INJURY AND PROPERTY DAMAGE,READ AND UNDERSTANDALLWARNINGS AND OPERATING iNSTRUCTIONS BEFORE USING THIS EQUIPMEN' ,Some dust created by power sanding, awing, grinding, drilling, and otherconstruction nctivitJB contains chemic l known (to he Slale o California) ocause c r i birth dB e or other I produc tlv hsrrtl. Sore@ (ampIe of the e chemical sn9:i ad from ead-base l paintsc /st ll)ne iLica [tom bricke snd cement and other rnasol ry ptoducrsenic and chromium from chemically-treatedlumberYour dsk Irem thesa expoaures vari , d pendii g on how often you do this type of work "re raduceyoer e posum o these chomical : w r in a well v ntilated area, nd work with approved safetye qulprnor t, lWi ys wear M, I'M /NIO H eppr ved, properly fitting face mask or respirator when uainsUCh tool&When using air tools, basic smf y preaautionp rson l injury.hould alw y be followed to reduce the tisl of of3-ENGD26 6
Save these instructionsImproperoporatlonor maintenanceof this productptop ydamage,Read nd understandusing thig equipment.IIWARNING:couldal warningsresuEt in serlouaand operationinjuryinstructionssndbefore1 2%IiDRisk of explosionor fireWhat Could HappenHow To Prevent itIt is normal for electrlcal contacts withinth motor nd pressure wlfch to spark,Always operate the compressor n a w llventilated area free of combustlblernaterlals, gasoline, or solvent vapors.If electrical sparks from compressorcome Into onfect with fl mrnablevapors, they may ignite, causing fir orexplosion,It spraying flammable materi ls, locate ompreesorat least 20 feet away fromspray area. An additional length of hosemay be required.Store flammable materials in a se;urelocation away from compressor.RestrictingventilationoverhearingNever place objects against or on topof ompressor. Operate compressor itan open area at least 1: Inches awayfrom any wall or obstruction that wouldrestrict the flow of fre h air to theventilation openings,Operate compressor in o clean, dry waifventilated ar a Do not operalle unitindoors or in Bny confined area.any o the compreE; oropeningsw ll cause seriousand cou)d cause fire.Unattended operation ofthia productcould result in persona] injury orproperty damage. To reduce he rlak offire, do not allow th compressor tooperate unattended.D?6336Alwaye)mductremain in attendancewhen it is operating,with theAlwayadla oi nectelectricalpowur bymoving pressureswitch I ver to the off)ositionand drain tank daily or aftereach Use.4- LeNG
iri "i iffWARNING: Risk of Burstingin a violent1.2.3.The followingconditionscould lead to a weakeningtank explosionand could cause propertydamageof the tank, and resultor seriousinjury.What Could HappenFailure to properly draincondensedwater from tank.Hqw To, Pr.even iDraln tank daily or a ler each use, Iflank deve]aps leak, replace itcausingrust and thinning teel tank.immediatelywith a new tank nr replacethe entire compressor.of theModificationsto the tank.or attemptedUnauthorizedmodificationsrepairsto theNever drillmodificationsinto,weld, orto themake anytank or itsattachments.unloadervalve, safety va]ve, or anyother componentswhich controltank4.pressure.Excessivevibrationthe air tankexplosionATTACHMENTSandcancauseThe lank ] desigrled lo wi[hstand specificoperating pressures, Never makeadjustments or parts substitutionstoalter the fButow sat operatingpressures.weakenruptureor& " CCESSORI S;Exceedingthe pressurerating of airtools, 3pr y gun , llr operated ceseories,tires and other inflatablescan cause them to ezplodeor fly apart,and couldresult in serious]nJuiFor essential control of air pressure, youmust install a pressure regulator andpressure gauge to the air outlet (if notequipped) of your compressor. Follow theequipment manufacturersrecommendation and never exceed themaximum allowable pressure rating ofat' achments. Never use ompressor toinflate small low pressure objects suchas children's toys, footballs,basketballs, etc.II:FzY,#-,1;]. IWARNING: Risk from Flying ObjectsWHAT CAN HAPPENThe Gompressad air stream can aueesoft tissue damage to exposed skin andcan propel dirt, chips, loose particles,and smell objeGts at high speed,resultlng in property damage or personalIniu .HOW To pREVENT ITAlway8 Wear ANSI Z87.1 approvedsafetyglaegeawith side shields when using theGotripf ssor,NevertowardpeoplepoJiltany no/JEIo or sprayerany part of the body or at otheror enirl ale.Always turn the compressor off endbleed pressure from the air hose and tankbefore attempting maintenance, attachingtools or eocesaoriee.5- ENGD2633e
WARNING;Risk of BurnsHOWWHAT CAN HAPPENTouching e poEed mats{ such as hccompressor head or outlettube ,manresult in serious burn .TO PREVENTITNovcr touch any exposed metal par son compressorduring ar immediatelyafter operation. Compressorwill remainhot for saveral mlnute after operation,Do not reach around proteotlve shroudsor attemptmalntenanceuntil unit hasbeen allowed to o01.IIir:% iPWARNING:RiskfromMovingPartsWHAT CAN HAPPENHOW TO PREVENT ITMoving parts such es the pulley, flu/wheel,and belt can cause serious injury if theycorn into contact with you or yourlothlng,Never operate the ompr msor withguardo or covers which are damaged orremoved.At(eruptingto operatecompressorwiLhdamagedor rniaslng parts or attemptingto repair compressorwith protectiveshroudsremovedoan e pose you Iomoving parts and can result in seriousinjuw.Any repairs rOClLJiredon this productshould be portormedby il'Risk or Serious Injury or Property DamageWhen TransPorting Compressor(Ftre, Inhatae n,Damage to Vehicle surfaces)WHAT CAN HAPPENOil can leak or spill and could result infire or breathing hazard: sedous injury ordeath can result. Oil leaks will damagecarpet, paint or other surfaces in vehiclesor trailersHOWTO PREVFNTITAlways place comprQ soron aprotecl ivmat when transportingtoprotect against d mage to vehicle fromleaks. Remove compressorfrom vehicleimmediatelyupon arrival at yourdestination,7- ENGD28336
if2" i il'l""' ' '111IIWARNING: Risk Unsafe OperationWHATUNsafeoperationCANHAPPENinjuryor death[HOWOf your air compressorcould Igad to seriousyou or others,to TO PR VF-NTTTRcviewand understandall Jnstruc{iansand warningsin this manual.Becomefamiliar with the operationandcontrolsof hc air compre, ,,r,Keep opera in@ are alger of el! persons.pets, and ot stacles.Keep children away from the a rcompressorat all times.Do not operatethe product whenfatiguedor under the influenceotalcoholor drugs,Stay atert at alt times.Never defeat the safety featuresof thisproduct.Equip area of operationwith a flrcxtinguisherOo not oper,ltem, chinc with mi ing,broken,or unauthorizedparts.DZ638- ENG
Become familiarbefore operatingCFM:Cubicwith these termsthe unit.feet per minute,SCFM:Standardcubic feet perminute: a unit of measure of airdelivery.PSIG'. Pounds per square inchgauge; a unit of measure of pressure.Code Certification:Productsthatbear one or more of the followingmarks; LIL, GUL, ETL, CETL, havebeen evaluatedby OSHA certifiedindependentsafety laboratoriesandmeet the applicableUnderwritersLaboratoriesStandardsfor Safety.Cut-in Pressure:While the motor isoff, sir tank pressuredrops as youcont[nu@ to use your accQssory.This unit is capableavailable3rUleSthroughof poweringWhen the tank pressure drops to acertain low level the motor will restartautomatically.The low pressure atwhich the motor automaticai)yrestarts is called "cut-in" pressure.Cut*Out Pressure:When an aircompressoris turned on and beginsto run, air pressure in the air t nkbegins to build.It builds to a certainhigh pressure before the motorautomaticallyshuts off, protectingyour air tank from pressure higherthan its capacity.The high pressureat which the motor shuts off is called"cut-out"pressure.BranchCircuit:Circuit carryingelectricityfrom electricalpanel toou[leLthe followingthe current PowerAccessories Tire Air Chuck(variousConnectorThe accessoriesor full-lineareSears Air Pressure Regulators Oil Fag Lubricators Air Hose:l/4", 3/8" OR 1/2" I,D, invarious lengths, in Line Filter QuickAccessories.and Hand Toot CatalogSetssizes)Refer to the selection chart locatedon the unit to select the tools this unitis capable of powering.I;lUil'iAir compressorsshould be operatedon not more than a 50% duty cycle.This means an air compressorthatpumps air more than 50% of onehour is consideredmisuse, because[ 'I:- I 1the air compressor is undersized forthe required air demand. Maximumcompressor pumping time per hour is30 minutes,S-ENGD26336
IMPORTANT.' The outlet being usedmust be installed and grounded inaccordance with all local codes andordinances.HOW TO SET UP YOURUNITLocationof theAir Compressor2.Loce e the air compressorin a clean,dry and well ventilatedarea, The aircompressorshould be located atleast 12' away from the wall or otherobstructionsthat will interfere withMake sure the outlet being usedhas the same configurationasthe groundedplug DO NOTUSE AN ADAPTER.Seeillustration,the flow of air. The air compressorpump and shroud are designedtoallow far proper cooling, TheOutl tventilationopeningson thecompressorare necessarytomaintain proper operatingtemperature,Do not place r&gs orother COl]t&ipers on or near theseGroundod/G re tllldlrlg31openingsGROUNDINGINSTRUCTIONS41RISK OFSHOCK.circuit,ELECTRICALIn the event of a shortgroundingreducesthe rlskof shock by providing an escapewire for the electriccurrent. Thisair compressorgrounded.Inspect the plug and cord beforeeach Use, Do not use if there ereaigns of damage.groundinginstructionsare riot completely undcrstood,or if in doubt 4 sto whether thecompressor is properlygrounded, have the installationchecked by a qualifiedelectrician.If theseIMPROPERGROUNDINGmust be properlyRESULT IN ELECTRICALThe portable air compressor isequipped with a cord having agrounding wire with an appropriategrounding plug (see followingillustrations). The plug must be usedwith an outlet that has been installedand grounded in accordance with alllocal codes and ordinances,CANSHOCK.Do not modify the plug provided, Ifit does not fit the available outlet, acorrect outlet should be installedby e qualified electrician.Repairs to the cord set or plugMUST be made by a qualifiedelectrician.The cord set and plug with thisunit containa a grounding pin.This plug MUST be used with agrounded outlet.D26336PIll10- ENG
E: te lsionCordsUsing extensionrecommended.cordsVoltagewill causevoltageProtectionRefer to the Specification Chart forthe voltage and minimum branchcircuit requirements.cords is notThe use of extensionresulting in powerang overheating.a[ d Circuii;to droploss to the motorCertainAttacn extra air hoses at tt/e air outletinstead of us)rig extensioncords.operatedfollowingairoompressorcan beon a 15 amp circuitconditionsare met.if the1.Voltage supply through branchcircuit is 15 crops.2.a 3-blade groundingplug, and a3-stot receptaclethat will acceptthe plug on the productCircuit is not used to supply anyother electrical needs (lights,appliances, etc.).3.E".xtertsion cords comply withspeciticatlons.In good4.Circuit is equipped with a 15amp circuit breaker or 15 amptinle delay ruse. NOTE: tfcompressor is connected to acircuit protected by fuses, u eonly time delay fuses. Time delayfuses should be marked "D" inCanada and "T" in the USIf ar extensionsure it is;a 3-wireno longercordmustextensionbe used,cordbethat hasconditionthan50 feet12 gauge (AWG) or Jarger. (WJrlze Jncrsases as gauge numberdecreases.10 AWG and 8 AWGmay also be used,14 OR 16AWG)DO NOT USEIf any of the above conditions cannotbe met, or if operation of thecompressor repeatedly causesinterruption of the power, it may benecessary to operate it from a 20amp circuit. It is not necessary tochange the cord set.1t - ENGD26336
Know Your Air CompressorREAD THiS OWNER'S MANUAL AND SAFETY RULES BEFORE OPERATINGYOUR UNIT. Compare the illustrations with your unit to familiarize yourself withthe location of various controls and adjustments. Save this manual for futurereference.' Regulator8 e tDescriptionof OperationBecome familiar wlth these controlsbefore operating th uniLOn/Auto/offSwitch; Turn this switchON to provide automatic power tothe pressure switch and OFF toremove power at the end of eachuse.Pressure Switch: The pressureswitch automatically starts the motorwhen the air tank pressure dropsbelow the factory set "cutqn"pressure. It stops the motor when theair tank pressure reaches the factoryset "cut-out" pressure,Safety Valve: If the pressure switchdoes not shut off the air compressorat its "out-out" pressure setting, thesafety vane will protect aga}nst highpressure by "popping out" at itsfactory set pressure (slightly higherthan the pressure switch "eut-o,,t*setting).Outlet Pressure Gauge; The outletpressure gauge indicates the air essureavaUable at the outlet sideof the regulator. This pressure iscontrolled by the regulator and isalways less than or equal to the tankpressureD20336ValveTank PressureGauge:The tankpressure gauge indicates the reserveair pressure in the tank.Regulator:Controlsthe ir 13rossurQshown on the outlet pressure gauge,Pull the knob out and turn clockwiseto increase pressure andcounterclockwiseto decreasepressure. When the desired pressureIs reached push knob in to lock inplace.Drain Valve.' The drain valve islocated at the base of the air tankand is u ed to drain condensationatthe end of each use,Cooling System (net shown): Thiscompressor contains an advanceddesign cooling system. At the heartof this cooling system is anengineered fan. It is perfectly normalfor this fan to blew air through thevent holes in large amounts. Youknow that the cooling system isworking when air Is being expelled.12- ENG
Air CompressorPump (not shown);Compressesair into the air tank.Working air Je not avaiJable until thecompressorhas raised the air tankpressure above that required at theair outlet.CheckValve:Whenthe aircomDressoris operating,valve is "open", allowingair to enter the sir tankthe cheekcompressedWhen the aircompressorreaches "cut-out"pressure, the check valve "closes",allowing air pressure re remain insidethe sir tank.On/Au[o/Off Leve2,Plug the power cord into thecorrect branch cimuit receptacle.(Refer to Voltage and CircuitProtectlon paragraph intheInstallation section of thismanual.)3,Open file drann v lvo iully(counterclockwise) to permit airtoescape and prevent airpressure build up in the air tankduring the break-in period.4.MoveHow to Use Your UnitHow to Stop:1.Set the On/Auto/Off"OFF".BeforeFirstBreak-in]ever to1Makesure the On/Aut0!OffNOTE:Pull couplerto prevent air fromthe quick connect.compressorwill start.lever toTheRun the compressor for 15minutes. Make sure the drainvalve is open a,nd there isminima] air pressure build-up intank,6,After 15 minutes, close the drainvalve (clockwise). The air receiverwill fill to "cut-out" pressure andthe motor will stop,Procedureis in the "OFF"posi[iorl5,Start-upSerious damagemay result if thefollowing break-in instructionsarenot closely followed,Thisprocedure is required before theair compressor Is put into service andwhen the check valve or a completecompressor pump has beenreplacedthe OnlALrto/Ofl"ONIAUTO"The compressor is now ready for use.leverposition.backuntiP it c icksescapingthrough13-ENQD28336
Befo]eEach}-low to Start:Start-Up:I.Place On/Auto/Off lever to"OFF" end close air regulator.2.Pull regulator knob out, turncounterclockwiseuntil it stops.3Attach hose and accessories.NOTE: The hose or accessorywill reuu re e quick connect plugif the air outlet is equipped with aquick connect socket.Push1.knob in to lock in place.2,Turn the On/Auto/Off lever to"AUTO" and allow tank pressureto build, Motor will stop whentank pressure reaches "cut-out"pressure.Pull the regulator knob out andturn clockwiseto increasepressure.Whet the desiredpressure is reached push knob into lock in place, The compressoris ready for use.I 1Too much airpressure causes ahazardous risk of bursting. Checkthe manufacturer'smaximumpressure rating for air tools andaccessories, The regulator outletpressure must never exceed themaximum pressure rating.D 6336NOTE; Always operate the aircompressor in well-ventilated areasfree of gasoline or olher combustiblevapors, If the compressor isbeingused to op rate a sprayer DO NQTplace near the sprayarea.14- ENG
CustomerResponsibilitieseforoachJ@@Daily oraftereachU O]hack Safety Valve 3rain TankUnit cyclesautomaticallywhenpower is on. When performingmaintenance,you may be exposedto voltage sources, compressedair, or movingparts. Personalinjuriescan occur. Beforeperformingany maintenanceorrepair, disconnectpowersourcefrom the 6ompr ssorand bleed offall air pressure.To DrainSet the On/Auto/Off"OFF".2.Putt the regulator knob out andturn clockwise to set the outletpressure to zero.3.Remove the air tool orSafety ValveIf the safety valvedoes not workproperly, over-pressurization mayoccur, causing air tank rupture oran explosion,1. Before starting compressor, pu]!the ring on the safety valve tomake sure that the safety valveoperates freely If the valve isstuck or does not operatesmoothly, it must be replacedwith the same type of valve.lever toaccessory.4Pull ring on safety valve allowingair to bleed from the tank untiltank pressure is approximately20 psi. Release safety valve dng.5.Drain water tro133 air tank byopening drain valve (caunter-NOTE: See "Operation" section forthe location of controls.To CheckTank1.clockwise)on bottomof tank.Water willcondensein the airtank. If not drained, water willcorrode and weaken the air tankcausing6.a risk of air tankrupture,After the water has been drained,close the drain valve (clockwise),The air compressor can now bestored.NOTE: If drain valve is plugged,release all air pressure, The valvecan then be removed, cleaned, thereinstalled15- ENG026336
powerUnit cyclesnutomatjcallyIs on, When doingMaintenance,3.whenyou may be exposedto voltage sources, compreasedairor moving parts, Personal injuriescan occur. Before peHorminganyMaintenanceor repair, unplug thecompressorand bleed off all airNOTE; The hose clamp is notreusable. You must purchase a newhose clamp, see the Parts ListManual or purchase a standard hoseclamp at a Iota[ hardware store,4,pressure.ALL MAINTENANCE AND REPAIROPERATIONS NOT LISTED MUSTBE PERFORMED BY A TRAINEDSERVICE[ TECHNICIAN.BeforeBleedtankAllowcoolthe air compressorTo ReplaceValve1.2.6.ot pressureor CleanApply seelsnt to the check valvethreads,Reinstall the check valve/turn clockwTse).to7.Replace hose and new hoseclamp.8.Perform th Breakqn Procedure,See "Break-lnProcedure" In theCheckRelease all air pressure from airtank. S e "To Drain Tank" in theMaintenance section.Unpiug unit.D2533SUnscrew the check vatve (turncounter-clockwise) using asocket wrench.Make sure the valve disc movesfreely inside the check valve andthe spring holds the disc in theupper, closed position Thecheck valve may be cleaned witha solvent, such as paint andvarnish removsLservicing:Unplug or disconnectelectricalsupplyto the air compressor.Remove the hose by removingthe hose clamp.rS- ENGOperat{onsection.
To Replace Regulator1. Release all air pressure from airtank. See "To Drain Tank' intheMaintenance section.2Unplug3,Using an adjustablewrenchremove the outlet pressuregauge and quick connect fromthe regulator6, Assemble the regulator andorient as shown.unit.NOTE:ArrowindicatesMake sure it is pointingdirection of air flow.4.Remove the regulator.5.App{y pipe sealant tape to thenipple on the standpipe.flow of air,in the7.Reapply pipe sealant to outletpressure geuge and quickconnect.8.Reassembleoutletpressuregauge and quick connect. Orientoutlet pressure gauge to readcorrectly, Tighten connect withwrench,17- ENGD2633S
Beforemake1.you store the air compressor,Reviewtank.If not drained,corrode and weakenthe "Maintenance"section on the precedingand performscheduledma}ntenence2Water willcondensein the airsure you do the following:pagescausing7.as necessary,Bet the On/Auto/Offlever to"OFF".3Turn the regulatorcounterolockwiae and set theoutlet pressure to zero.4.Removethe air toolor8.Pull ring on safety valve allowingair to bleed from the tank untiltank pressure is approximately20 psi. Release safety valve ring.Drain water from air tank byopening drain valve on bottomtank.D2633Sa risk of air tankrupture.After the water has been drained,close the drain or drain valve.NOTE: If drain valve is plugged,release all air pressure. The valvecan then be removed, cleaned, thenreinstalled.accesso .6water willthe air tankof18-ENGProtect t e electrical cord and airhose from damage (such asbeing stepped on or run over).Wind them loosely around tilecompressor handle. (if soequipped)Store the air compressor in a cleanand dry location.
IIPerforming repairs may expose voltage sources, movingparts or compressed air sources, moving parts orcompressed air sources. Personal inju W may occur. Prior to attemptingany repairs, unplug the air compressor and bleed off all air tank airpressure.PROBLEMCAUSEExcessive t }lkPressurepressbre safetvalve pops offshut of1 motorcompressor"cut-out"Air leaksatfittin@s,switchCORRECTIONOoes notwhenreachespressure.Move On/Auto/Offlevor tothe "OFF" position,if theoutfit does not shut offcontact s Trained ServiceTechnician.Pressure switch "cut-out"too high.Contact a Trained ServiceTechniciamTube fittings are not tightenough.Tighten fittings where air senbe heard escaping, Checkfittings with soapy watersolution. Do NotOverti@hten,A defective check valveresults in a constant air leakst the pressure release valvewhen there is pressure in thetank and the compressor isshut off, Replace checkvalve. Refer to the "ToReplace or Clean CheckValve" in the "Service andAdjustment" section.Air leaks at orinsicte checkva!veCheek valve seat damaged.Air leaksDefective pressure switchrelease valve.Contact a Trained ServiceTechnician.Defective air tank.Air tank must be replaced,Do not repair the leak.atpressure switchrelease valveAir leaks in airtank or at airtank welds,Do not drill into, weld orotherwise modify air tankor it will weaken, "fhe tankcan rupture or explode.Air leaksbetween headand valve plate.Leaking seal.Contact a Trained SerViceTechnician.1 @- ENGD28336
CORRECTIONCAUSEPROBLEMRegulatorwillnot shut off airDamaged regulator.Replace.Motor overload protectionswitch has tripped.Let motor cool off andoverload switch willautomatically reset.Tank pressure exceedsressure switch "cut-in"Motor wilr start automaticallywhen tank pressure dropsbelow "cut-in"pressure of)ressure switch.outlet.Motorrun,will notpressure.Extension cord le wronglength or gauge.CheekCt eck vane stuck open.Removefor properand cordgaugewirelength.and ectiveunloadedCheck wiring connectioninside pressure switch andterminal box area,motorHave checkedby a "ira nedService Technician.orcapacitor.Paint sprayarte.Pressure)resaurecennectionon internalmotorrelease valve onswitch has nothead pressure.Fuse blown, circuit breakertripped.21-ENGHave checked by a TrainedSe ice Technician, Oonotoperate the compressor inthe paint spray area. Seeflammable vapor warning.Bleed the line by pushing thelever on the pressure switchto the "off" position; if thevalve does not open, replaceswitch.1. Cheek fuse box for blownfuse end replace asnecessary. Reset circuitbreaker. Do not use a fuseor circuit breaker withhigher rating than thatspecified for your particularbranch circuit.2. Check for proper'fuse. Youshould use a time delayfuse.3. Check for low voltageconditions and/or properextension con:[.4. Disconnect the otherelectrical appliancea fromoimult Or operate thecompressor on its ownbranch circuit.D 6336
Air CompressorD2@336ModelNumber919.15214122-SP
Air CompressorModel Number 919.152141KEYNO1PART 0AC-0430SS 5314-18D201149D2064310D206751112Z-D2185 8-207113SSW-736714SSP-60211517Z-D25879 P-53718D288781920CAC 1254 0434D21921 order Indivicluafparts, see pumpD.ESCRIPTIONTankRecess Rubber Bumper (3 used)Screw (3 used)Screw (2 used)Nipple, 1/4-18 NPT X 2.50Strain Relief BushingDrain ValveSafety ValveRegulatorQuick Connect 1/4 NPTGauge 2" (2 used)Nipple, 1/4-18 NPTX 1.5Strain Relief BushingBushing Reducer 1/8-1/4NPTPressure SwitchFitting, 90 Elbow HoseCheck ValvePump Isolator (4 used)Pump AssemblyHose ClampLabel, Drain Tank Eng/SpaCord AssemblyLabel, Hot SurfaceLabel, Sears PerformanceLabel, Star Rating #3diagram23- ENGD26338
.JilivjI:JlD]V T : ,I,Air Comprassor Model Number 919.152141202633624-ENG
Air CompressorModelNumber919,152141KEYN %,234567891011121314151718192021Ng& RLEUmgT x CAC-1320D25735D25877CAC -1212D22253CAC-J 199Z CAC-4323SSG-8169.SSF-3147Shroud (felt)Shroud (right)HeadTube SealOuttet TubeHead GasketValve Plate AssemblyO-Ring 2.132/2,0961D ,073/.067WCylinder seveScrew, 3/8-16UNC Socket HeadRod AssemblyEndbelf AssemblyScrew, 8-32X.375/.344Pump Isolator (5 used)Washer Screws 10-24 x 7/8 (4 used)Motor CorfiHess ClampHose, I/4"ID X lO"LengthScrew, lo-9X.50 P(astite (5 used)Motor Brush C-1206-1H-7051xSSF-3156.xx NotIllu s ratedLA-3270D26335Label, Warning Eng/SpanOperators ManualK-0387KK-4929KK-4964Isolator KitFastener KitGonnecting Rod KitMotor number Is stamped on motor suck, sos forcorrect 8252S-ENGD26336
REPAIR CENTER THROUGHOUT THE UNITED STATESAND SEARS WILL REPAIR IT, FREE OF CHARGE. If purchased from Orchard Supply Hardware, return to the nearest Orchard Stone and Orchard will repair it, free of charge.]f this air compressor is used for commercial or rental purposes, the warranty wi_lapply for ninety days from the date of purchase,
