Transcription
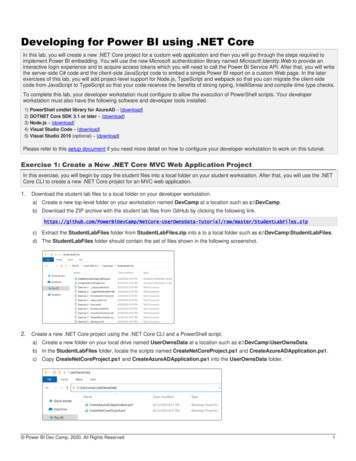
Developing for Power BI using .NET CoreIn this lab, you will create a new .NET Core project for a custom web application and then you will go through the steps required toimplement Power BI embedding. You will use the new Microsoft authentication library named Microsoft.Identity.Web to provide aninteractive login experience and to acquire access tokens which you will need to call the Power BI Service API. After that, you will writethe server-side C# code and the client-side JavaScript code to embed a simple Power BI report on a custom Web page. In the laterexercises of this lab, you will add project-level support for Node.js, TypeScript and webpack so that you can migrate the client-sidecode from JavaScript to TypeScript so that your code receives the benefits of strong typing, IntelliSense and compile-time type checks.To complete this lab, your developer workstation must configure to allow the execution of PowerShell scripts. Your developerworkstation must also have the following software and developer tools installed.1) PowerShell cmdlet library for AzureAD – [download]2) DOTNET Core SDK 3.1 or later – [download]3) Node.js – [download]4) Visual Studio Code – [download]5) Visual Studio 2019 (optional) – [download]Please refer to this setup document if you need more detail on how to configure your developer workstation to work on this tutorial.Exercise 1: Create a New .NET Core MVC Web Application ProjectIn this exercise, you will begin by copy the student files into a local folder on your student workstation. After that, you will use the .NETCore CLI to create a new .NET Core project for an MVC web application.1. Download the student lab files to a local folder on your developer workstation.a) Create a new top-level folder on your workstation named DevCamp at a location such as c:\DevCamp.b) Download the ZIP archive with the student lab files from GitHub by clicking the following ) Extract the StudentLabFiles folder from StudentLabFiles.zip into a to a local folder such as c:\DevCamp\StudentLabFiles.d) The StudentLabFiles folder should contain the set of files shown in the following screenshot.2. Create a new .NET Core project using the .NET Core CLI and a PowerShell script.a) Create a new folder on your local drive named UserOwnsData at a location such as c:\DevCamp\UserOwnsData.b) In the StudentLabFiles folder, locate the scripts named CreateNetCoreProject.ps1 and CreateAzureADApplication.ps1.c) Copy CreateNetCoreProject.ps1 and CreateAzureADApplication.ps1 into the UserOwnsData folder. Power BI Dev Camp. 2020. All Rights Reserved1
Power BI Dev Camp Tutorial: Developing for Power BI using .NET CoreVersion: Aug 26, 20203. Review the PowerShell code in CreateNetCoreProject.ps1.a) Open CreateNetCoreProject.ps1 in a text editor such as Notepad or the PowerShell Integrated Scripting Environment (ISE).b) Review the code in CreateNetCoreProject.ps1 which creates a new .NET Core project and adds a few .NuGet packages.dotnet new mvc --auth SingleOrg --framework netcoreapp3.1dotnet remove package Microsoft.AspNetCore.Authentication.AzureAD.UI# update to latestdotnet add packagedotnet add packagedotnet add packageavailable version of Microsoft.Identity.WebMicrosoft.Identity.Web -v 0.3.0-previewMicrosoft.Identity.Web.UI -v 0.3.0-previewMicrosoft.PowerBi.Apic) Open up a PowerShell console and set the location of the command prompt to the UserOwnsData folder.d) Execute the script CreateNetCoreProject.ps1 by invoking the command .\CreateNetCoreProject.ps1.e) Once the script has completed, you should see that the UserOwnsData folder has been populated with project files.4. Open the UserOwnsData folder with Visual Studio Codea) Launch Visual Studio Code.b) Use the Open Folder command in Visual Studio Code to open the UserOwnsData folder.You will not be able to build the project yet. That is because the PowerShell script removed the .NuGet package for an olderauthentication library named Microsoft.AspNetCore.Authentication.AzureAD.UI and added new packages for the new Microsoftauthentication library Microsoft.Identity.Web. You'll be required to modify some code in this project before it will build. But before that,you will install the Microsoft C# extension in Visual Studio Code to ensure you have full support for working with .NET Core projects. Power BI Dev Camp. 2020. All Rights Reserved2
Power BI Dev Camp Tutorial: Developing for Power BI using .NET CoreVersion: Aug 26, 20205. Configure Visual Studio Code with the extensions needed for .NET Core development.a) Click on the button at the bottom of the left navigation menu to display the EXTENSION pane.b) You should be able to see what extensions are currently installed.c) You should also be able to search to find new extensions you'd like to install.d) Find and install the C# extension from Microsoft if it is not already installed.e) Find and install the Debugger for Chrome extension from Microsoft if it is not already installed.f)You should be able to confirm that the C# extension and the Debugger for Chrome extensions are now installed.It is OK if you have other Visual Studio Code extensions installed as well. It's just important that you install these two extensions inaddition to whatever other extensions you may have installed. Power BI Dev Camp. 2020. All Rights Reserved3
Power BI Dev Camp Tutorial: Developing for Power BI using .NET CoreVersion: Aug 26, 2020Exercise 2: Implement User Login using Microsoft.Identity.WebIn this exercise, you start by running a PowerShell script to create a new confidential client application in Azure AD. After that, you willconfigure your project to implement an interactive user login experience with Azure AD by using the Microsoft.Identity.Web library.1. Create a new Azure AD application by running the PowerShell script named CreateAzureADApplication.ps1.a) Open the PowerShell script named CreateAzureADApplication.ps1 in a text editor such as Notepad or the PowerShell ISE.b) The script begins by calling Connect-AzureAD to establish a connection with Azure AD. authResult Connect-AzureADc) The script contains two variables to set the application name and a reply URL of https://localhost:5001/signin-oidc. appDisplayName "User-Owns-Data Sample App" replyUrl "https://localhost:5001/signin-oidc"When you register a reply URL with localhost with a port number such as 5001, Azure AD will allow you to perform testing with replyURLs that use localhost and any other port number. For example, you can use a reply URL of https://localhost:44300/signin-oidc.d) The script also contains the code below which creates a new PasswordCredential object for an app secret.# create app secret newGuid New-Guid appSecret oding]::UTF8.GetBytes(( newGuid)))) " " startDate Get-Date passwordCredential New-Object -TypeName Microsoft.Open.AzureAD.Model.PasswordCredential passwordCredential.StartDate startDate passwordCredential.EndDate startDate.AddYears(1) passwordCredential.KeyId newGuid passwordCredential.Value appSecrete) Down below, you can see the call to the New-AzureADApplication cmdlet which creates a new Azure AD application.# create Azure AD Application aadApplication New-AzureADApplication -DisplayName appDisplayName -PublicClient false -AvailableToOtherTenants false -ReplyUrls @( replyUrl) -Homepage replyUrl -PasswordCredentials passwordCredentialf)Execute the PowerShell script named CreateAzureADApplication.ps1.g) When prompted for credentials, log in with an Azure AD user account in the same tenant where you are using Power BI.h) When the PowerShell script runs successfully, it will create and open a text file named UserOwnsDataSampleApp.txt. Power BI Dev Camp. 2020. All Rights Reserved4
Power BI Dev Camp Tutorial: Developing for Power BI using .NET CoreVersion: Aug 26, 2020The text file UserOwnsDataSampleApp.txt contains JSON configuration data that you will copy and paste into appsettings.json.2. Copy the JSON in UserOwnsDataSampleApp.txt into the appsettings.json file in your project.a) Return to the UserOwnsData project in Visual Studio Code and open the appsettings.json file.b) The appsettings.json file should initially appear like the screenshot below.c) Delete the contents of appsettings.json and replace it by copying and pasting the contents of UserOwnsDataSampleApp.txtNote the PowerBi:ServiceRootUrl parameter has been added as a custom configuration value to track the base URL to the Power BIService. When you are programming against the Power BI Service in Microsoft public cloud, the URL is https://api.powerbi.com/.However, the root URL for the Power BI Service will be different in other clouds such as the government cloud. Therefore, this valuewill be stored as a project configuration value so it is easy to change whenever required. Power BI Dev Camp. 2020. All Rights Reserved5
Power BI Dev Camp Tutorial: Developing for Power BI using .NET CoreVersion: Aug 26, 20203. Modify the code in Startup.cs to properly initialize the authentication service provided by Microsoft.Identity.Web.a) Open the Startup.cs file in an editor window.b) Remove line that imports Microsoft.AspnetCore.Authentication.AzureAD.UI which is causing a build error.c) Place your cursor below the existing using statements and add the following using nCacheProviders.InMemory;d) Move down into the ConfigureServices method. Locate and delete the code which calls services.AddAuthentication.e) Replace the call you removed with a call to services.AddMicrosoftWebAppAuthentication.as shown in the following listing.// This method gets called by the runtime. Use this method to add services to the container.public void ConfigureServices(IServiceCollection services) (Configuration);f)Move down in the ConfigureServices method and locate the code which calls ollersWithViews(options {var policy new ser().Build();options.Filters.Add(new AuthorizeFilter(policy));});g) Replace this code with the code shown in the following listing.var mvcBuilder services.AddControllersWithViews(options {var policy new ser().Build();options.Filters.Add(new tIdentityUI(); Power BI Dev Camp. 2020. All Rights Reserved6
Power BI Dev Camp Tutorial: Developing for Power BI using .NET CoreVersion: Aug 26, 2020h) At this point, the ConfigureServices method in your project should match what is shown in the following code listing.public void ConfigureServices(IServiceCollection services) (Configuration);var mvcBuilder services.AddControllersWithViews(options {var policy new ser().Build();options.Filters.Add(new tIdentityUI();services.AddRazorPages();}i)Save your changes and close Startup.cs.4. Copy a pre-written set of CSS styles into the UserOwnsData project's site.css file.a) Expand the wwwroot folder and then expand the css folder inside to examine the contents of the wwwroot/css folder.b) Open the CSS file named site.css and delete any existing content inside.c) Using the Windows Explorer, look inside the StudentLabFiles folder and locate the file named Exercise 2 - site.css.txt.d) Open Exercise 2 - site.css.txt up in a text editor and copy all of its contents into the Windows clipboard.e) Return to Visual Studio Code and paste the contents of Exercise 2 - site.css.txt into sites.css.f)Save your changes and close site.css. Power BI Dev Camp. 2020. All Rights Reserved7
Power BI Dev Camp Tutorial: Developing for Power BI using .NET CoreVersion: Aug 26, 20205. Copy a custom favicon.ico file to the wwwroot folder.a) Using the Windows Explorer, look inside the StudentLabFiles folder and locate the file named favicon.ico.b) Copy the favicon.ico file into the wwwroot folder of your project.Any file you add the wwwroot folder will appear at the root folder of the website created by the UserOwnsData project. By adding thefavicon.ico file, this web application will now display a custom favicon.ico in the browser page tab.6. Modify the partial razor view file named LoginPartial.cshtml to integrate with the Microsoft.Identity.Web authentication library.a) Expand the Views Shared folder and locate the partial view named LoginPartial.cshtml.b) Open LoginPartial.cshtml in an editor window.c) In the existing code, you can see that there are two links which have an asp-area tag with a value of AzureAD.The asp-area value of AzureAD is used by the older library named Microsoft.AspNetCore.Authentication.AzureAD.UI. Since weare moving to the Microsoft.Identity.Web authentication library, the value must be changed from AzureAD to MicrosoftIdentity.d) Delete all the code LoginPartial.cshtml and replace it with the code shown in the following code listing.@using System.Security.Principal ul class "navbar-nav" @if (User.Identity.IsAuthenticated) { li class "nav-item" span class "navbar-text text-dark" Hello @User.FindFirst("name").Value /span /li li class "nav-item" a class "nav-link text-dark" asp-area "MicrosoftIdentity" asp-controller "Account" asp-action "SignOut" Sign out /a /li }else { li class "nav-item" a class "nav-link text-dark" asp-area "MicrosoftIdentity" asp-controller "Account" asp-action "SignIn" Sign in /a /li } /ul If it's easier, you can copy and paste this code from file named Exercise 2 - LoginPartial.cshtml.txt in the StudentLabFiles folder.e) Save your changes and close LoginPartial.cshtml. Power BI Dev Camp. 2020. All Rights Reserved8
Power BI Dev Camp Tutorial: Developing for Power BI using .NET CoreVersion: Aug 26, 20207. Modify the HTML in Index.cshtml to display differently depending on whether the user has logged in or not.a) Expand the Views Home folder and locate the view file named Index.cshtml.b) Open Index.cshtml in an editor window.c) Delete the contents of Index.cshtml and replace it with the code shown in the following code listing.@using System.Security.Principal@if (User.Identity.IsAuthenticated) { div class "jumbotron" h2 Welcome @User.FindFirst("name").Value /h2 p You have now logged into this application. /p /div }else { div class "jumbotron" h2 Welcome to the User-Owns-Data Tutorial /h2 p Click the strong sign in /strong link in the upper right to get started /p /div }d) Once you have copied the code from above, save your changes and close Index.cshtml.When you create a new .NET Core project which supports authentication, the underlying project template creates a home page thatrequires authentication. To support a more natural log in experience, it often makes sense to configure your web application so that ananonymous user access the home page. In the next step you will modify the Home controller so the home page is accessible to theanonymous user.8. Modify the Index action method in HomeController.cs to support anonymous access.a) Inside the Controllers folder, locate HomeControllers.cs and open this file in an editor window.b) Locate the Index method inside the HomeController class. Power BI Dev Camp. 2020. All Rights Reserved9
Power BI Dev Camp Tutorial: Developing for Power BI using .NET CoreVersion: Aug 26, 2020c) Add the [AllowAnonymous] attribute to the Index method as shown in the following code listing.[AllowAnonymous]public IActionResult Index(){return View();}d) Save your changes and close HomeController.cs.You have now modified the project to the point where you can run the web application in the .NET Core debugger. In the next step,you will start the debugger so you can test your web application as it runs in the browser.9. Test the UserOwnsData project by running it in the .NET Core debugging environment.a) Start the Visual Studio Code debugger by selecting Run Start Debugging or by pressing the {F5} keyboard shortcut.This will be the first time that you run this project in the Visual Studio Code debugger. However, running your project in the VisualStudio Code debugger requires a special file named launch.json. When you start the debugger in a project that currently has nolaunch.json file, Visual Studio Code will prompt you to select a debugging environment. When you select a debugging environmentbased on .NET Core, Visual Studio Code will then automatically create the launch.json file for you behind the scenes and use it tostart a debugging session.b) When prompted to Select Environment, select .NET Core.c) Behind the scenes, Visual Studio Code has created a folder named .vscode with two files launch.json and tasks.json.d) Once the debugging session has initialized, the browser should display the home page using anonymous access.e) Click the Sign in link to test put the user experience when authenticating with Azure AD.f)When prompted to Sign in, enter your user account and password to authenticate. Power BI Dev Camp. 2020. All Rights Reserved10
Power BI Dev Camp Tutorial: Developing for Power BI using .NET CoreVersion: Aug 26, 2020You should now be prompted by the Permissions requested dialog. Azure AD wants you to consent to the delegated permissionsthat have been requested by the User-Owns-Data Sample App.g) Click the Accept button to grant the User-Owns-Data Sample App the required permissions it has requested.h) After clicking the Accept button, you should be redirected back to the home page of the web application.At this point, the user should be authenticated. For example, you should see the logged in user name to the left of the Sign out link inthe top right corner. You should also see that the home page displays text that welcomes the user by name.10. Test the user experience for logging out.a) Click the Sign out link to begin the logout experience.b) After logging out, you'll be directed to the Microsoft.Identity.Web logout page at /MicrosoftIdentity/Account/SignedOut.c) You're done testing. Close the browser, return to Visual Studio Code and stop the debug session using the debug toolbar. Power BI Dev Camp. 2020. All Rights Reserved11
Power BI Dev Camp Tutorial: Developing for Power BI using .NET CoreVersion: Aug 26, 2020In the next step, you will add a new controller action and view named Embed. However, instead of creating a new controller action andview, you will simply the rename the controller action and view named Privacy that were automatically added by the project template.11. Create a new controller action named Embed.a) Locate the HomeController.cs file in the Controllers folder and open it in an editor window.b) Look inside the HomeController class and locate the method named Privacy.[AllowAnonymous]public IActionResult Index() {return View();}public IActionResult Privacy() {return View();}c) Rename of the Privacy method to Embed. No changes to the method body are required.[AllowAnonymous]public IActionResult Index() {return View();}public IActionResult Embed() {return View();}Note that, unlike the Index method, the Embed method does not have the AllowAnonymous attribute. That means onlyauthenticated users will be able to navigate to this page. One really nice aspect of the MVC architecture is that it will automaticallytrigger an interactive login whenever an anonymous user attempts to navigate to a secured page such as Embed.12. Create a new MVC view for the Home controller named Embed.cshtml.a) Look inside the Views Home folder and locate the razor view file named Privacy.cshtml.b) Rename the Privacy.cshtml razor file to Embed.cshtml.c) Open Embed.cshtml in a code editor.d) Delete the existing contents of Embed.cshtml and replace it with the follow line of HTML code. h2 TODO: Embed Report Here /h2 e) Save your changes and close Embed.cshtml.In a standard .NET Core web application that uses MVC, there is a shared page layout defined in a file named Layouts.cshtmlwhich is located in the Views Shared folder. In the next step you will modify the shared layout in the Layouts.cshtml file so thatyou can add a link to the Embed page into the top navigation menu. Power BI Dev Camp. 2020. All Rights Reserved12
Power BI Dev Camp Tutorial: Developing for Power BI using .NET CoreVersion: Aug 26, 202013. Modify the shared layout in Layout.cshtml to include a link to the Embed page.a) Inside the Views Shared folder, locate Layouts.cshtml and open this shared view file in an editor window.b) Using Windows Explorer, look inside the StudentLabFiles folder and locate the file named Layout.cshtml.c) Open Exercise 2 - Layout.cshtml.txt in the StudentLabFiles folder copy its contents to the Windows clipboard.d) Return to Visual Studio Code and paste the contents of the Windows clipboard into the Layouts.cshtml file.e) Save your changes and close Layouts.cshtml14. Run the web application in the Visual Studio Code debugger to test the new Embed page.a) Start the Visual Studio Code debugger by selecting Run Start Debugging or by pressing the {F5} keyboard shortcut.b) The UserOwnsData web application should display the home page as shown to an anonymous user.c) Click on the Embed link in the top nav menu to navigate to the Embed page.d) When you attempt to navigate to the Embed page as an anonymous user, you'll be prompted to pick an account and log in.e) Log in using your user name and password.f)Once you have logged in, you should be automatically redirected to the Embed page.g) You're done testing. Close the browser, return to Visual Studio Code and stop the debug session using the debug toolbar. Power BI Dev Camp. 2020. All Rights Reserved13
Power BI Dev Camp Tutorial: Developing for Power BI using .NET CoreVersion: Aug 26, 2020The next step is an optional step for those campers that prefer developing with Visual Studio 2019 instead of Visual Studio Code.If you are happy developing with Visual Studio Code and are not interested in developing.NET Core projects using Visual Studio 2019,you can skip the next step and move ahead to Exercise 3: Call the Power BI Service API.15. Open and test the UserOwnsData project using Visual Studio 2019.a) Launch Visual Studio 2019 – You can use any edition including the Enterprise edition, Pro edition or Community edition.b) From the File menu, select the Open Project/Solution command.c) In the Open Project/Solution dialog, select the UserOwnsData.csproj file in the UserOwnsData folder and click Open.d) The UserOwnsData project should now be open in Visual Studio 2019 as shown in the following screenshot.There is one big difference between developing with Visual Studio Code and Visual Studio 2019. Visual Studio Code only requiresproject files (*.csproj). However, Visual Studio 2019 requires that you work with both project files and solution files (*.sln). In the nextstep you will save a new project file for the UserOwnsData solution to make it easier to develop this project with Visual Studio 2019.e) In the Solution Explorer on the right, select the top node in the tree with the caption Solution "UserOwnsData".f)From the File menu, select the Save UserOwnsData.sln menu command.g) Save the solution file UserOwnsData.sln in the UserOwnsData project folderRemember that the UserOwnsData.sln file is only used by Visual Studio 2019 and it not used at all in Visual Studio Code. Power BI Dev Camp. 2020. All Rights Reserved14
Power BI Dev Camp Tutorial: Developing for Power BI using .NET CoreVersion: Aug 26, 202016. Test the UserOwnsData web application in Visual Studio 2019.a) On the Visual Studio 2019 toolbar, locate the Start button with the green arrow.b) If you drop down the Start button menu, you should see the project configuration of IIS Express and UserOwnsData.c) Leave the Start button menu set for IIS Express and click the Start button to start run the project in the debugger.d) The UserOwnsData application should run and serve up the home page using localhost and a port number around 44300.You should be able to test the UserOwnsData application by logging in and navigating to the embed page.e) After you are done testing the application, close the browser, return to Visual Studio and stop the current debugging session.f)Drop down the Start button menu and switch the debug profile to UserOwnsData.By switching the debug configuration from IIS Express to UserOwnsData, you are effectively changing the environment where youwill debug your application. When you switch the configuration to UserOwnsData, Visual Studio 2019 will use the .NET Core webserver process named Kestrel for debugging sessions. The base URL of the web site will change to https://localhost:5001/.a) With the Start button menu set for UserOwnsData, click the Start button to start run the project in the debugger.b) Note when you are debugging with Kestrel, you will see more activity output in the console window.c) The application should run and behave just as it has before.At this point, the lab instructions and screenshots will return to using Visual Studio Code. However, if you’d like to continue usingVisual Studio 2019, you should be able to complete all the steps in the following exercises. Power BI Dev Camp. 2020. All Rights Reserved15
Power BI Dev Camp Tutorial: Developing for Power BI using .NET CoreVersion: Aug 26, 2020Exercise 3: Call the Power BI Service APIIn this exercise, you will begin by ensuring you have a Power BI app workspace and a report for testing. After that, you will add supportto the UserOwnsData web application to acquire access tokens from Azure AD and to call the Power BI Service API. By the end ofthis exercise, your code will be able to call to the Power BI Service API to retrieve data about a report required for embedding.1. Using the browser, log into the Power BI Service with the same user account you used to create the Azure AD application earlier.a) Navigate the Power BI portal at https://app.powerbi.com and if prompted, log in using your credentials.2. Create a new app workspace named Dev Camp Demos.a) Click the Workspace flyout menu in the left navigation.b) Click the Create app workspace button to display the Create an app workspace dialog.c) In the Create an app workspace pane, enter a workspace name such as Dev Camp Demos.d) Click the Save button to create the new app workspace. Power BI Dev Camp. 2020. All Rights Reserved16
Power BI Dev Camp Tutorial: Developing for Power BI using .NET CoreVersion: Aug 26, 2020e) When you click Save, the Power BI service should create the new app workspace and then switch your current Power BIsession to be running within the context of the new Dev Camp Demos workspace.Now that you have created the new app workspace, the next step is to upload a PBIX project file created with Power BI Desktop. Youare free to use you own PBIX file as long as the PBIX file does not have row-level security (RLS) enabled. If you don't have your ownPBIX file, you can download the sample PBIX project named COVID-19 US.pbix and use that instead.3. Upload a PBIX file to create a new report and dataset.a) Click Add content to navigate to the Get Data page.b) Click the Get button in the Files section.c) Click on Local File in order to select a PBIX file that you have on your local hard drive.d) Select the PBIX file and click the Open button to upload it to the Power BI Service. Power BI Dev Camp. 2020. All Rights Reserved17
Power BI Dev Camp Tutorial: Developing for Power BI using .NET CoreVersion: Aug 26, 2020e) The Power BI Service should have created a report and a dashboard from the PBIX file you uploaded.f)If the Power BI Service created a dashboard as well, delete this dashboard as you will not need it.4. Open the report to see what it looks like when displayed in the Power BI Service.a) Click on the report to open it.b) You should now be able to see the report.In the next step, you will find and record the GUID-based IDs for the report and its hosting workspace. You will then use these IDs laterin this exercises when you first write the code to embed a report in the UserOwnsData web application.5. Get the Workspace ID and the Report ID from the report URL.a) Locate and copy the app workspace ID from the report URL by copying the GUID that comes after /groups/. Power BI Dev Camp. 2020. All Rights Reserved18
Power BI Dev Camp Tutorial: Developing for Power BI using .NET CoreVersion: Aug 26, 2020b) Open up a new text file in a program such as Notepad and paste in the value of the workspace ID.c) Locate and copy the report ID from the URL by copying the GUID that comes after /reports/.d) Copy the report ID into the text file Notepad.Leave the text file open for now. In a step later in this exercise, you will copy and paste these IDs into your C# code.6. Create a new C# class named PowerBiServiceApi in which you will add code for calling the Power BI Service API.a) Return to the UserOwnsData project in Visual Studio Code.b) Create a new top-level folder in the UserOwnsData project named Services.c) Inside the Services folder, create a new C# source file named PowerBiServiceApi.cs. Power BI Dev Camp. 2020. All Rights Reserved19
Power BI Dev Camp Tutorial: Developing for Power BI using .NET CoreVersion: Aug 26, 2020d) Copy and paste the following code into PowerBiServiceApi.cs to provide a starting amespace UserOwnsData.Services {public class EmbeddedRep
c) Using the Windows Explorer, look inside the StudentLabFiles folder and locate the file named Exercise 2 - site.css.txt. d) Open Exercise 2 - site.css.txt up in a text editor and copy all of its contents into the Windows clipboard. e) Return to Visual Studio Code and paste the contents of Exercise 2 - site.css.txt into sites.css.