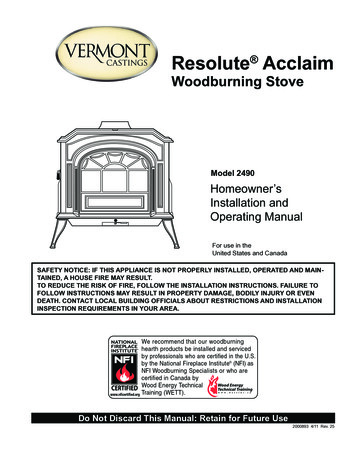
Transcription
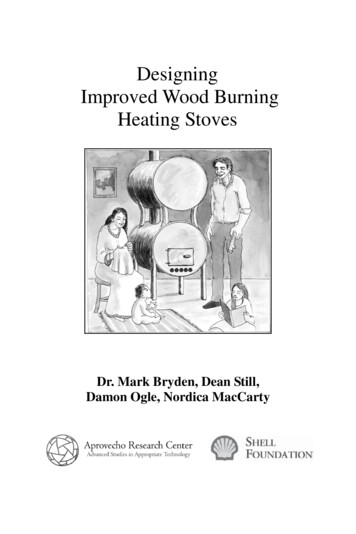
Resolute AcclaimWoodburning StoveModel 2490Homeowner’sInstallation andOperating ManualFor use in theUnited States and CanadaSafety Notice: If this appliance is not properly installed, operated and maintained, a house fire may result.To reduce the risk of fire, follow the installation instructions. Failure tofollow instructionsmay result in property damage, bodily injury or even0893death. Contact local building officials about restrictions and installationResolute Acclaiminspection requirements in your area.CoverDo Not Discard This Manual: Retain for Future Use2000893 4/11 Rev. 25
Resolute Acclaim Woodburning StoveIntroductionThank you for choosing a Vermont Castings Resolute Acclaim.Your stove is one of the finest available. It features high efficiency, non-catalytic performance, using space-agerefractory material and the precisely calibrated delivery of air to a concentrated charcoal bed to promote secondarycombustion in a controlled environment.If treated properly and operated according to the guidelines in this manual it will provide years of safe, dependable,and economical heating.The Resolute Acclaim is listed by OMNI-Test Laboratories of Portland, Oregon. The test standards are ANSI/UL-1482and 737 for the United States and ULC S627 for Canada.The Resolute Acclaim is listed for burning wood. Do not burn other fuels.The Resolute Acclaim is listed and approved for installation in mobile homes only in the United States and only withuse of Vermont Castings Mobile Home Installation Kit #3249.The Vermont Castings Resolute Acclaim is in compliance with the standards set forth by the Federal EnvironmentalProtection Agency, 40 CFR Part 60.532(b)(2), as stated on the permanent label attached to each stove.In addition to directions on installation and operation, this manual includes directions on maintenance and assembly.We recommend that you hire a professional solid fuel stove installer to install your stove, or to advise you on theinstallation should you attempt to install it yourself.Save These Instructions.Table of Maintenance.24Replacement Parts.29Proposition 65 Warning: Fuels used in gas, woodburning or oil fired appliances, and the products ofcombustion of such fuels, contain chemicals known tothe State of California to cause cancer, birth defectsand other reproductive harm.California Health & Safety Code Sec. 25249.6 AccessoriesWarming Shelf#0064 Classic Black#1357 Suede Brown#1351 Sand#1385 Biscuit#1354 Ebony#1387 Chestnut Brown#1355 Bordeaux#1390 Vt. Classic Green#1356 Midnight Blue#1395 Brown Majolica#0184 Rear Heat Shield#0246 Bottom Heat Shield#0133 Sparkscreen#3255 Outside Air Adapter (for 3” ducting)#3249 Mobile Home Kit - includes: Rear and BottomHeat Shields, Outside Air Adapter, Ducting and LegClips#0574 Stove Surface Thermometer#3421 Gasket Kit#4360 Griddle Handle KitShort Legs#0565 Classic Black#0298 Vt. Classic Green#0293 Brown Majolica#2915 Bordeaux#0295 Biscuit#2916 Midnight Blue#0296 Chestnut Brown#0297 Ebony2000893
Resolute Acclaim Woodburning StoveSpecificationsResolute Acclaim Model 2490Range of heat output.9,500-33,900 BTU/hr.*EPA Emissions Rating.3.4g/hr*Maximum heat output. 40,000 BTU/hr.**Area heated***.Up to 1600 sq. ft. (148 sq m)Fuel size/type. 16” (410 mm) wood splitsFuel capacity.30 lbs. (13.6 kg)Loading.Front or topChimney connector.6” (152 mm) diameterChimney flue size. Min. 6” (152 mm) or 8” (203 mm)Flue exit position.Reversible, top or rearPrimary air.ManualSecondary air. PresetAsh handling system. Removable ash panGlass panel.High-temperature ceramicWeight.425 lbs. (192 kg)Width (leg-to-leg).26” (660 mm)Depth (leg-to-leg) .19” (480 mm)Height to top of flue collar:w/Regular legs. 27¹ ₂" (699 mm) top exit.25" (635 mm) rear exitw/Short legs. 25¹ ₂" (648 mm) top exit.23" (584 mm) rear exit*Under specific conditions used during EPA emissionstesting.**This value can vary depending on how the unit isoperated, and the type and moisture content of the fuelused. Figure shown is based on maximum fuel consumption obtained under laboratory conditions and onaverage efficiencies.***These values are based on operation in buildingcode-conforming homes under typical winter climateconditions in New England. If your home is of nonstandard construction (e.g., unusually well-insulated,not insulated, built underground, etc.) or if you live in amore severe or more temperate climate, these figuresmay not apply. Since so many variables affect performance, consult your Vermont Castings' AuthorizedDealer to determine realistic expectations for yourhome.12 6M"(324 mm)DRAWINGS NOT TO SCALE1956O"(495 mm)23"(584 mm)25"(635 mm)2156O"(546 mm)2556O"(648 mm)RESOLUTEAcclaim2756O"(699 mm)25"(635 mm)2156O"(546 mm)(Reg. Legs)1956O"(495 mm)(Short Legs)6"(152 mm)19"(483 mm)26"(660 mm)Fig. 1 Resolute Acclaim dimensions.20008930893Resolute Acclaimspecifications1/01
Resolute Acclaim Woodburning StoveInstallationsafety NOTICE: IF YOUR RESOLUTE ACCLAIMIS NOT PROPERLY INSTALLED, OPERATED ANDMAINTAINED, A HOUSE FIRE MAY RESULT. FORSAFETY, FOLLOW ALL INSTALLATION, OPERATION AND MAINTENANCE DIRECTIONS. CONTACTLOCAL BUILDING OFFICIALS ABOUT RESTRICTIONS AND INSTALLATION INSPECTION REQUIREMENTS IN YOUR AREA.Before you begin an installation, review your plans tosee that: Your stove and chimney connector will be far enough from combustible material to meet allclearance requirements.The floor protector is large enough and is constructed properly to meet all requirements.You have all necessary permits from local authorities.What Kind of Chimney to UseYour Resolute Acclaim may be connected either to asound masonry chimney that meets local codes, to arelined masonry chimney that meets local codes, or toan approved prefabricated metal chimney. Whateverkind you use, the chimney and chimney connector mustbe in good condition and kept clean.If you use an existing masonry chimney, it must be inspected to ensure safe condition before the stove is installed. Your local professional chimney sweep, buildinginspector, or fire department official will be able to makethe inspection or to direct you to someone who can.The chimney should extend at least 3’ (914 mm) abovethe highest point where it passes through a roof, and atleast 2’ (610 mm) higher than any portion of a buildingwithin 10’ (3m). (Fig. 2)0 To 10'Your local building official is the final authority for approving your installation as safe and determining that itmeets local and state codes.The metal label permanently attached to the back ofevery Vermont Castings stove indicates that it has beentested to current UL and ULC standards, and gives thename of the testing laboratory. Clearance and installation information is also printed on the label. Local authorities generally will accept the label as evidence that,when the stove is installed according to the informationon the label and in this manual, the installation meetscodes and can be approved.Codes vary in different areas, however. Before startingthe installation, review your plans with the local buildingauthority. Your local dealer can provide any additionalinformation needed.For any unresolved questions about installation, referto the National Fire Protection Association’s publicationANSI/NFPA 211–1988 Standard for Chimneys, Fireplaces, Vents and Solid Fuel Burning Appliances. InCanada, the equivalent publication is CSA CAN-B365,Installation Code for Solid Fuel Burning Appliances andEquipment. These standards are the basis for manynational codes. They are nationally recognized and areaccepted by most local authorities. Your local dealeror your local building official may have a copy of theseregulations.Important: Failure to follow these installation instructions may result in adangerous situation, including a chimneyor house fire. Follow all instructionsexactly and do not allow makeshift compromises to endanger property and personal safety. 2' Min.3'Min.0 To 10'2' Min.3'Min.Reference PointAC617Fig. 2 The 2’-3’-10’ rule for chimneys.For proper draft and goodperformance, any chimneyAC617RLTSKC8 should extend at least 16’used with a Resolute Acclaim2/11/98(5m) above the flue collar of the stove.Masonry ChimneysAn inspection of the chimney must confirm that it hasa lining. Do not use an unlined chimney. The chimneyalso should be examined for cracks, loose mortar,other signs of deterioration, and blockage. Repair anydefects before the chimney is used with your stove.A prefabricated doube-wallinsulated chimneyA tile-linedmasonrychimneyST241Fig. 3 Standard chimney types.ST241chimney types12/13/99 djt2000893
Resolute Acclaim Woodburning StoveUnused openings in an existing masonry chimney mustbe sealed with masonry to the thickness of the chimneywall, and the chimney liner should be repaired. Openings sealed with pie plates or wallpaper are a hazardand should be sealed with mortar or refractory cement.In the event of a chimney fire, flames and smoke maybe forced out of these unused thimbles.The chimney should be thoroughly cleaned before use.A newly-built masonry chimney must conform to thestandards of your local building code or, in the absenceof a local code, to a recognized national code. Masonrychimneys must be lined, either with code-approved masonry or precast refractory tiles, stainless steel pipe, ora code-approved, “poured-in-place” liner. The chimney’s clean-out door must seal tightly to help ensure agood draft.Prefabricated ChimneysA prefabricated metal chimney must be one tested andlisted for use with solid-fuel burning appliances to theHigh-Temperature (H.T.) Chimney Standard UL-1031985 (2100 F.) for the United States, and High Temperature (650 C) Standard ULC S-629 for Canada.DO NOT CONNECT THIS UNIT TO A CHIMNEY FLUESERVING ANOTHER APPLIANCE.Chimney SizeA Resolute Acclaim is approved for venting into amasonry chimney with a flue size of 8” x 8” (203 x 203mm), and into a round flue size of 8” (203 mm) or 6”(152 mm).It may be vented into larger chimneys as well. However, chimneys with liners larger than 8” x 12” (203 x305 mm) may experience rapid cooling of smoke andreduction in draft, especially if they are located outside the home. These large chimneys may need to beinsulated or to have their flues relined for proper stoveperformance.Accessories to help make the connection betweenstainless steel chimney liners and your Resolute Acclaim are available through your local dealer.Chimney Connector Guidelinesgalvanized chimney connector; it cannot withstand thehigh temperatures that can be reached by smoke andexhaust gases, and may release toxic fumes under highheat.If possible, do not pass the chimney connector througha combustible wall or ceiling. If passage through a combustible wall is unavoidable, refer to the recommendations in the section following on Wall Pass-Throughs.Do not pass the connector through an attic, a closet orany similar concealed space. The whole chimney connector should be exposed and accessible for inspectionand cleaning.Install the chimney connector not less than 23” (584mm) from the ceiling. Keep it as short and direct aspossible, with no more than two (2) 90 turns. If possible, use 45 elbows. Slope horizontal runs of connectors upward 1/4” per foot (20 mm per meter) goingfrom the stove toward the chimney. The recommendedmaximum length of a horizontal run is 3’ (914 mm),and the total length of chimney connector should be nolonger than 8’ (2.5 m).In cathedral ceiling installations, extend the prefabricated chimney downward to within 8’ (2.5 m) of the stove.SAFETY NOTE: Always wear gloves and protective eyewear when drilling, cutting orjoining sections of chimney connector.Double-wall Chimney ConnectorsThe listing for the Resolute Acclaim in the U.S. andCanada includes use of double-wall chimney connectors that have been tested and listed for use withsolid-fuel burning appliances by a recognized testinglaboratory.Information on assembling and installing double-wallconnectors is provided by the manufacturer of thedouble-wall pipe. Follow the manufacturer’s instructionsexactly as you assemble the connector and attach it tothe stove and chimney. Using chimneys and connectorsfrom the same manufacturer helps make the assemblyand installation straightforward.NOTE: For installations using double-wall connectors, minimum clearances must conform to thelisted clearances in the clearance chart on Page 12.A chimney connector is the double-wall or single-wallpipe that connects the stove to the chimney. The chimney itself is a masonry or prefabricated structure thatencloses the flue. Chimney connectors are used onlyto make the connection from the stove to the chimney.They are for interior use only.Double-wall connectors must be tested and listed foruse with solid-fuel burning appliances. Single-wall connectors should be made of 24 gauge or heavier steel,and should be 6” (152 mm) in diameter. Do not use2000893
Resolute Acclaim Woodburning StoveSingle-wall Chimney Connectors Beginning at the flue collar of the stove, assemble thechimney connector. Insert the first crimped end into thestove’s flue collar, and keep each crimped end pointingtoward the stove. Usingthe holes in the flue collaras guides, drill 1/8” (3mm)holes in the bottom of thefirst section of chimneyconnector and secure it tothe flue collar with three(3) #10 x 1/2” sheet metalscrews. Secure each jointbetween sections of chimney connector, including telescoping joints,Fig. 4 The crimped end ofwith at least three (3)the connector points towardthe stove.ST242sheet metal screws. TheChimney connector12/13/99 djtpredrilled holes in the topof each section of chimney connector serve as guideswhen you drill 1/8” (3mm) holes in the bottom of thenext section. Secure the chimney connector to the chimney. Instructions for various installations follow. Be sure the installed stove and chimney connectorare correct distances from nearby combustible material.Note: Special slip pipes and thimble sleeves that formtelescoping joints between sections of chimney connector are available to simplify installations. They ofteneliminate the need to cut individual connector sections.Consult your local dealer about these special pieces.Securing the Single-wall Connectorto a Prefabricated ChimneyFollow the installation instructions of the chimneymanufacturer exactly as you install the chimney. Themanufacturer of the chimney will supply the accessories to support the chimney, either from the roof ofthe house, at the ceiling of the room where the stove isinstalled, or from an exterior wall.Special adapters are available from your local dealerto make the connection between the prefabricatedchimney and the chimney connector. The top of suchadapters attach directly to the chimney or to the chimney’s ceiling support package, while the bottom of theadapter is screwed to the chimney connector.These adapters are designed so the top end will fitoutside the inner wall of the chimney, and the bottomend will fit inside the first section of chimney connector.When assembled in this way, any soot or creosote falling from the inner walls of the chimney will stay insidethe chimney connector. Securing the Single-wall Connectorto a Masonry ChimneyBoth freestanding masonry chimneys and fireplacemasonry chimneys may be used for installation of yourResolute Acclaim.Thimble SleeveFlueChimneyConnectorKeepsleeve endflush withflue tileST243Fig. 5 The thimble, made of either cermaic or metal, must becemented securely in place.Freestanding InstallationsIf the chimney connectormust pass through a comST243thinble theconnectionbustible wall to reachchimney, follow the recomdjtmendations in the 12/13/99Wall Pass-Throughsection thatfollows. The opening through the chimney wall to theflue (the “breech”) must be lined with either a ceramicor metal cylinder, called the “thimble”, which is securelycemented in place. Most chimney breeches incorporatethimbles, but the fit must be snug and the joint betweenthe thimble and the chimney wall must be cementedfirmly. (Fig. 6)ChimneyFlue LinerElbowFlue LinerSlip PipeThimbleStandardConnectorFlue CollarST492Fig. 6 Chimney connection is a freestanding installation.ST492Resolute Acclaimfreestandinginstallation1/012000893
Resolute Acclaim Woodburning StoveA special piece called the “thimble sleeve,” slightlysmaller in diameter than standard connector and mostthimbles, will facilitate the removal of the chimneyconnector system for inspection and cleaning. Thimblesleeves should be available from your local dealer.To install a thimble sleeve, slide it into the breech untilit is flush with the inner flue wall. Do not extend it intothe actual flue passage, as this could interfere with thedraft.The thimble sleeve should protrude 1-2” (25-50mm) intothe room. Use furnace cement and thin gasketing toseal the sleeve in place in the thimble. Secure the chimney connector to the outer end of the sleeve with sheetmetal screws.Above A FireplaceIn this installation, the chimney connector rises fromthe stove, turns ninety degrees, and goes back intothe fireplace chimney. (Fig. 7) The liner of the fireplacechimney should extend at least to the point at which thechimney connector enters the chimney. Follow all theguidelines for installing a chimney connector into a freestanding masonry chimney, and pay special attention tothese additional points:Through A FireplaceIf your fireplace opening height is at least 23” (584 mm)*,you may install a Resolute Acclaim through the opening using a “positive connection” kit available from yourlocal dealer. These kits provide a secure connectionbetween the stove flue collar and the chimney flue. (Fig.8) If it is necessary to reverse the flue collar from thetop exit to the rear exit position, follow the directions onPage 10.Fireplace installations, whether connected to the flueabove or through the fireplace opening, have specialclearance requirements to adjacent trim and the mantel.You’ll find the required safe clearances for Resolute Acclaim fireplace installations on Page 11.Floor protection requirements also apply to fireplaceinstallations. Floor protection is discussed on Page 9. If there is a combustible mantel or trim, check the stove and chimney connector clearances. Use thenecessary combination of mantel, trim, and connector heat shields to provide the required clearances.Double-check connector clearance from the ceiling.The fireplace damper must be closed and sealedto prevent room air from being drawn up the flue,reducing the draft. However, it must be possible toreopen the damper to inspect or clean the chimney.Flexible ConnectorMantel ShieldFireplaceAdpator KitRESOLUTEAcclaimChimney Connector Shields* Check these*ST245*clearancesFig. 8 Chimney connector enters chimney through the fireplace sSeal theDamperST244Whenever possible,fireplacedesign your installation so the conconnectornector does not passflexthrougha combustible wall. If you12/99are considering a wall pass-through in your installation,check with your building inspector before you begin.Also check with the chimney connector manufacturerfor any specific requirements.Fig. 7 Chimney connector enters chimney above the fireplace.2000893ST244Plymouthfplc over mantel12/99
Resolute Acclaim Woodburning StoveAccessories are available for use as wall passthroughs. If using one of these, make sure it has beentested and listed for use as a wall pass-through.U.S.: In the United States, the National Fire Protection Association (NFPA) has established guidelinesfor passing chimney connectors through combustible walls. Many building code inspectors followthese guidelines when approving installations.The following illustration shows one NFPA-recommended method. All combustible material in the wall is cutaway a sufficient distance from the single-wall connector to provide the required 12” (305 mm) clearance forthe connector. Any material used to close up the opening must be noncombustible.Three other methods are also approved by the NFPA.These are: Using a section of double-wall chimney with a 9”(229 mm) clearance to combustibles. Placing a chimney connector pipe inside a ventilated thimble, which is then separated from combustibles by 6” (152 mm) of fiberglass insulating material. Placing a chimney connector pipe inside a section of 9” (229 mm) diameter, solid-insulated, factorybuilt chimney, with 2” (51 mm) of air space between thechimney section and combustibles.Wall StudCanada: The Canadian Standards Association hasestablished different guidelines. The illustrationbelow shows one method, in which all combustible material in the wall is cut away to provide therequired 18” (457 mm) clearance for the connector.The resulting space must remain empty. A flushmounted sheet metal cover may be used on oneside only. If covers must be used on both sides,each cover must be mounted on noncombustiblespacers at least 1” (25 mm) clear of the wall. Yourlocal dealer or your local building inspector canprovide details of other approved methods of passing a chimney connector through a combustiblewall.In Canada, this type of installation must conform toCAN/CSA-B365, Installation Code for Solid Fuel Burning Appliances and Equipment.Note: Do not vent your Resolute Acclaim into afactory-built (zero-clearance) fireplace under anycircumstances. The Resolute Acclaim has not beenspecifically tested and listed for this type of installation. These appliances and their chimneys arespecifically designed as a unit for use as fireplaces. Itmay void the listing or be hazardous to adapt them forany other use.do not connect the RESOLUTE ACCLAIM toany air distribution duct or system.18” (457 mm) clearance all around thepipeChimney ConnectorTT12” (305mm) ofNoncombustibleMaterialFloor ProtectionFlushMountedST494aST493aFig. 9 An approved wall pass-through for the United States.ST493aBrick pass thru11/00 TFig. 10 An approved wall pass-through for Canada.ST494steelwall pass thru11/002000893
Resolute Acclaim Woodburning StoveFloor ProtectionA tremendous amount of heat radiates from the bottomplate of your Resolute Acclaim. The floor area directlyunder and around the stove will require protection fromradiant heat as well as from stray sparks or embers thatmay escape the firebox.Top ExitEEBHeat protection is provided through the use of a Vermont Castings Bottom Heat Shield #0246. Spark andember protection must be provided by a floor protectorconstructed with noncombustible material as specified.Most installations will require that the bottom heatshield be attached. Only when the stove is placed on acompletely noncombustible surface such as unpaintedconcrete over earth may it be used without the heatshield.Even when the bottom heat shield is installed, you mustprovide special protection to the floor beneath. Forinstallations with the heat shield attached, use a noncombustible floor protector such as 1/4” non-asbestosmineral board or equivalent, or 24 gauge sheet metal.The floor protector may be covered with a noncombustible decorative material if desired. Do not obstruct thespace under the heater.FRear ExitDCAA:B:C:D:E:F:CDAU.S. Canada38”42” (1067 mm)42”46” (1168 mm)16”18” (457 mm)6”8”(203 mm)ST5006”8” (203 mm)intrepid10”10”(254 mm)floorprotection11/10/00ST500Fig. 11 Required floor protector dimensions.RESOLUTEAcclaimProtection requirements vary somewhat between theUnited States and Canada as follows:U.S. installations the floor protector is required underthe stove and must extend at least 16” from the front ofthe stove (“C”, Fig. 11), and at least 6” from the sidesand rear (“D” and “E”,Fig. 11). It must also extend under the chimney connector and 2” to either side (“F”,Fig.11).To meet these requirements, a floor protector must beat least 38” wide and 42” deep.In Canada, a noncombustible floor protector is requiredunder the heater also. The floor protector must extend18” (457 mm) to the front (“C”, Fig. 11), and 8” (203mm) from the sides and rear (“D” and “E”, Fig. 11).To meet these requirements, a floor protector must beat least 42” (1067 mm) wide and 46” (1168 mm) deep.Floor Protection for Fireplace InstallationDo not assume that your fireplace hearth is completelynoncombustibleMany fireplace hearths do not satisfy the “completelynoncombustible” requirement because the brick orconcrete in front of the fireplace opening is supportedby heavy wood framing as in Figure 12. Because heatpasses readily through brick or concrete, it can easilypass through to the wood. As a result, such fireplacehearths can be a fire hazard and are considered a combustible floor.2000893Wood framingrequires protectionfrom radiant heatST247aFig. 12 Supporting timbers under fireplace hearth are considered to be combustibleFor all fireplace installations, follow the floor protectionguidelines described above.Keep in mind that many raisedhearths will extendST247less than the required clearance from the front of theRear exit floor dgrmheater when it is installed. In such cases, sufficient12/14/99djt be added infloor protection as describedabove mustfront of the hearth to satisfy the minimum floor protectorrequirement from the front of the stove: 16” (410 mm)from the front in the United States and 18” (457 mm)from the front in Canada.Hearth rugs do not satisfy the requirements for floorprotection as they are not fire proof.Fireplace installations also have special clearancerequirements to the side walls, side decorative trim, andfireplace mantel. Refer to the information on fireplaceand mantel trim shields in this section.
Resolute Acclaim Woodburning StoveKeep the Stove a Safe Distance FromSurrounding MaterialsBoth a stove and its chimney connector radiate heat inall directions when operating. A safe installation requires that adequate clearance be maintained betweenthe stove and nearby combustible materials to ensurethat such materials do not overheat.Clearance is the distance between either your stove orchimney connector, and nearby walls, floors, the ceiling,and any other fixed combustible surface. Keep furnishings and other combustible materials away from thestove as well. In general, a distance of 48” (1220 mm)must be maintained between the stove and moveablecombustible items such as drying clothes, furniture,newspapers, firewood, etc. Keeping those clearanceareas empty assures that nearby surfaces and objectswill not overheat.Safe Ways to Reduce ClearancesYour stove has special clearance requirements thathave been established after careful research, and testing to UL and ULC standards.Clearance requirements have been established to meetmost installation possibilities, and they involve the combination of four basic variables: When the stove has no listed heat shield mountedon it. When the stove has a listed heat shield mounted onit. When the wall has no listed heat shield mounted onit. When the wall has a listed heat shield mounted on it.In general, the greatest clearance is required when youare placing a stove with no heat shield near a wall withno heat shield. The least clearance is required whenboth the stove and the wall have heat shields. Reducinga stove clearance may require a listed heat shield onthe chimney connector as well.Clearances may be reduced only by means approvedby the regulatory authority, or in accordance with theclearances listed in this manual.Wall ShieldsWall shields should be constructed of 24 gauge orheavier sheet metal, or another noncombustible material such as 1/2” (13 mm) insulation board or commonbrick “laid on flat,” with the 3¹ ₂" (89 mm) side down.(Fig. 13)Shields must be spaced out from the combustiblesurface 1" (25 mm) on noncombustible spacers. Thespacers should not be directly behind the stove or chimney connector.10Air must be able to flow between the wall and theshield. At least 50% of the bottom 1” (25 mm) of theshield should be open and the shield must be open atthe top.When calculating clearance, always measure from thetop plate of the stove, or, from the chimney connectoritself, to the adjacent combustible surface. Do not measure from the heat shields of the stove or connector tothe combustible surface.Air FlowScreenWall ShieldStud WallFramingNoncombustiblespacers andfastenersDrywallShieldMetalSpacerAir FlowST248Fig. 13 Approved wall shield construction.ST248Reversingthe Flue Collarwall shield constructionYour Resolute12/14/99Acclaim isdjtshipped with the flue collar inthe top exit position. Depending on your requirements,you may wish to reverse the flue collar and extensionplate to the rear exit position. The only tool necessary isa 7/16” wrench.To reverse the flue collar position:1. Remove the four (4) fasteners that hold the collarand extension plate. The fasteners are accessibleby reaching through the flue collar of the stove.2. Remove the flue collar and extension plate.3. Examine the exposed gasket; contact your VermontCastings Authorized Dealer if the gasket needs to bereplaced.4. Position the extension plate and flue collar in theappropriate orientation, making sure the gasketremains in place. The notched edge of the extensionplate should be next
Operating Manual For use in the United States and Canada Do Not Discard This Manual: Retain for Future Use 2000893 4/11 Rev. 25 Resolute Acclaim Woodburning Stove Model 2490 SAFeTy NoTice: iF ThiS AppliANce iS NoT pRopeRly iNSTAlleD, opeRATeD AND MAiN-TAiNeD, A hoUSe FiRe MAy ReSUlT. To ReDUce The RiSk oF FiRe, FolloW The iNSTAllATioN .