Transcription
Bedmaster High Availability Using Mirth Channels
NoticeCopyright 2002-2018 Vocera Communications, Inc. All rights reserved. Vocera is a registered trademark of Vocera Communications, Inc.This software is licensed, not sold, by Vocera Communications, Inc. (“Vocera”). The reference text of the license governing this software can befound at http://www.vocera.com/legal/. The version legally binding on you (which includes limitations of warranty, limitations of remedy andliability, and other provisions) is as agreed between Vocera and the reseller from whom your system was acquired and is available from thatreseller.Certain portions of Vocera’s product are derived from software licensed by the third parties as described at http://www.vocera.com/legal/. Microsoft , Windows , Windows Server , Internet Explorer , Excel , and Active Directory are registered trademarks of Microsoft Corporation inthe United States and other countries. Java is a registered trademark of Oracle Corporation and/or its affiliates.All other trademarks, service marks, registered trademarks, or registered service marks are the property of their respective owner/s. All otherbrands and/or product names are the trademarks (or registered trademarks) and property of their respective owner/s.Vocera Communications, Inc.www.vocera.comtel :: 1 408 882 5100fax :: 1 408 882 5101Last modified: 2018-11-27 07:54VAM-225-Docs build 26iiBEDMASTER HIGH AVAILABILITY USING MIRTH CHANNELS
ContentsUsing Bedmaster in a High Availability Environment. 4Architecture Diagram.4Mirth Channels. 5The BMHL7Receiver Channel. 5The BMJSONCreator Channel. 6The BMJSONReceiver Channel.7The BMMonitor Channel. 8Deploying a Channel. 9Changing the Load Balancer IP Address. 10Changing the Connector Type to File Writer. 10Specifying the Sending Application Name.11Default Ports. 11Using the Load Balancer. 12iiiBEDMASTER HIGH AVAILABILITY USING MIRTH CHANNELS
Using Bedmaster in a High AvailabilityEnvironmentThese sections describe how to deploy Bedmaster in a high-availability environment using Mirthchannels and data deduplication logic.In a high-availability environment, each deployed Bedmaster runs in active-active mode. Thismeans that all alarms or vitals messages that are generated are duplicated. To handle theseduplicated alarms, deduplication logic is added in the BMH7Receiver Mirth channel, which is oneof the four Mirth channels needed in a high-availability environment.Architecture DiagramThis diagram shows the typical layout in a Bedmaster high-availability environment. This showsthe Mirth channels that are required.The connection between the Bedmaster and the BMHL7Receiver channel is persistent. Thismeans that HL7 messages are sent to VAM in the order specified in the load balancer.The connection between the BMJSONCreator channel and the load balancer can be persistentor non-persistent. If the connection is persistent, the JSON messages are sent to only the VAMserver to which it is connected, or in the order specified in the load balancer. If the connection isnon-persistent, JSON messages are sent to any of the VAM servers.Note: If the HL7 service is stopped on a Bedmaster server and then restarted, you mayreceive duplicate alarms.4BEDMASTER HIGH AVAILABILITY USING MIRTH CHANNELS
USING BEDMASTER IN A HIGH AVAILABILITY ENVIRONMENTMirth ChannelsIn a VAM load balancer environment, four channels are required to receive and process patientmonitor HL7 data from Bedmaster. BMHL7Receiver BMJSONCreator BMJSONReceiver BMMonitorIn a load balancer environment, all four channels must be deployed on each VAM server.This diagram shows the relationship between the Mirth channels, the load balancer, and theBedmaster:Details on how these channels are configured can be found in the following sections. Forinformation on how to deploy these channels after they have been created, see Deploying aChannel on page 9.The BMHL7Receiver ChannelFor the BMHL7Receiver channel, you must make these modifications.Update the Source tab as shown:5BEDMASTER HIGH AVAILABILITY USING MIRTH CHANNELS
USING BEDMASTER IN A HIGH AVAILABILITY ENVIRONMENTUpdate the Destination tab as shown:The BMJSONCreator ChannelFor the BMJSONCreator channel, you must make these modifications.Update the Source tab as shown:6BEDMASTER HIGH AVAILABILITY USING MIRTH CHANNELS
USING BEDMASTER IN A HIGH AVAILABILITY ENVIRONMENTUpdate the Destination tab as shown:The BMJSONReceiver ChannelFor the BMJSONReceiver channel, you must make these modifications.Update the Source tab as shown:7BEDMASTER HIGH AVAILABILITY USING MIRTH CHANNELS
USING BEDMASTER IN A HIGH AVAILABILITY ENVIRONMENTUpdate the Destination tab as shown:The BMMonitor ChannelFor the BMMonitor channel, you must make these modifications.Update the Source tab as shown:8BEDMASTER HIGH AVAILABILITY USING MIRTH CHANNELS
USING BEDMASTER IN A HIGH AVAILABILITY ENVIRONMENTUpdate the Destination tab as shown:Deploying a ChannelAfter you have created a channel, you must deploy it.1. In the Mirth Connect Administrator, in the Mirth Connect pane at the top left of the screen,select Channels. A list of configured channels appears.2. Right-click on the channel that you want to deploy. From the popup menu that appears,select Deploy Channel.The Dashboard now displays the deployed channel.9BEDMASTER HIGH AVAILABILITY USING MIRTH CHANNELS
USING BEDMASTER IN A HIGH AVAILABILITY ENVIRONMENTChanging the Load Balancer IP AddressIn the BMJSONCreator channel, the load balancer IP address is set to a default value. Followthese steps to change the load balancer IP address.1. In the Mirth Connect Administrator, in the Morth Connect pane, select Channels. The list ofchannels is displayed.2. Right-click BMJSONCreator and select Edit Channel.3. In the Edit Channel screen, click the Destinations tab.4. In the Host Address field, type the IP address of your load balancer.5. Click Save Changes to save the changes.6. Right-click on the channel and select Deploy Channel to redeploy the changed channel.Changing the Connector Type to File WriterIf a File Writer connection is needed instead of an LLP Sender connection, you can update theBMJSONCreator channel to reflect this.1. In the Mirth Connect Administrator, in the Morth Connect pane, select Channels. The list ofchannels is displayed.2. Right-click BMJSONCreator and select Edit Channel.3. In the Edit Channel screen, click the Destinations tab.4. In the Connector Type dropdown list, select File Writer.5. In the Directory field, type Vocera \mVisumAlerts\MVisum Message Generator\HL7,where Vocera is the folder in which VAM is installed. This is where the message generatorobtains the JSON files.6. In the File Name field, type {UUID}.json. This generates a unique ID for each file name, andensures that the file extension is .json.7. From the Append to file radio buttons, select Yes.8. In the Template field, add the following:{10"VitalData": {"SendingApplication": " {SendingApplication}","SendingFacility": " {SendingFacility}","DateTimeOfMessage": " {DateTimeOfMessage}","MessageControlID": " {MessageControlID}","ProcessingID": " {ProcessingID}","PatientIDExternalID": " {PatientIDExternalID}","PatientInternalId": " {PatientInternalId}","PatientGivenName": " {PatientGivenName}","FamilyName": " {FamilyName}","PatientClass": " {PatientClass}","PointOfCare": " {PointOfCare}","Bed": " {Bed}","AdmissionType": " {AdmissionType}"BEDMASTER HIGH AVAILABILITY USING MIRTH CHANNELS
USING BEDMASTER IN A HIGH AVAILABILITY ENVIRONMENT}{,"UniversalServiceIdentifier": " ": " {ObservationDateTime}","ObservationEndDateTime": " tion": " ectionID": " {DiagnosticServiceSectionID}","ParentResult": " {ParentResult}","AdmitDateTime": " {AdmitDateTime}","Vitals": {Vitals}}"AlarmInfo": {"SendingApplication": " {SendingApplication}","SendingFacility": " {SendingFacility}","DateTimeOfMessage": " {DateTimeOfMessage}","MessageControlID": " {MessageControlID}","ProcessingID": " {ProcessingID}","PatientInternalID": " {PatientInternalId}","PatientGivenName": " {PatientGivenName}","FamilyName": " {FamilyName}","DateOfBirth": " {DateOfBirth}","PatientClass": " {PatientClass}","PointOfCare": " {PointOfCare}","Bed": " {Bed}","AdmissionType": " {AdmissionType}","UniversalServiceIdentifier": " ": " {ObservationDateTime}","ObservationEndDateTime": " tion": " ectionID": " {DiagnosticServiceSectionID}","ParentResult": " {ParentResult}","QuantityTiming": " {QuantityTiming}","AlarmLevel": " {AlarmLevel}","AlarmReason": " {AlarmReason}","ObservResultStatus": " {ObservResultStatus}","userDefinedAccessChecks": " {AttachmentDate}","AttachmentType": " {AttachmentType}","ControlId": " {ControlId}","MessageType": " {MessageType}","VersionId": " {VersionId}","Waveform": " {Waveform}","Vitals": {Vitals}}}9. Click Save Changes to save the changes.10. Right-click on the channel and select Deploy Channel to redeploy the changed channel.Specifying the Sending Application NameIn the HL7 file, use the sending application name as shown in this table.Bedmaster Server NameSending application name in HL7Bedmaster 1 (active)BedMasterEx1ABedmaster 2 (active)BedMasterEx1PBedmaster 3 (active)BedMasterEx2ABedmaster 4 (active)BedMasterEx2PNote: The sending application names must be configured in Bedmaster.Default PortsThe following default ports are configured in the Mirth channels.11BEDMASTER HIGH AVAILABILITY USING MIRTH CHANNELS
USING BEDMASTER IN A HIGH AVAILABILITY ENVIRONMENTChannelPortCommentBMHL7Receiver5001To receive HL7 data from BedmasterBMJSONCreator6666To send data to BMJSONReceiver via the loadbalancerBMJSONReceiver6666To receive data from the BMJSONCreator channelBMMonitor5000The load balancer sends pings to this port.Using the Load BalancerIn the load balancer, these steps must be followed to achieve high availability.1. Create a monitor with TCP and port 5000. One monitor must be created for each VAM server.2. Create services for port 5001 (Bedmaster to load balancer) and the IP address of the VAMserver. Create one service for each monitor.3. Create a primary load balancer virtual service with port 5001. Add the primary VAM servicesto it. This sends all traffic to the primary server.4. Set up a secondary load alancer virtual service that sends traffic to the secondary VAM server.This virtual server can be created without an IP address.5. On the primary load balancer virtual service, under Protection Features, set the secondaryload balancer service to be the backup virtual server.As long as the primary backend server is up, the primary load balancer virtual service sendstraffic to it. If this server fails, traffic is passed to the secondary load balancer virtual service,and then to the secondary backend server.6. Create services for port 6666 (BMJSONCreator to load balancer) and the IP address of theVAM server. Create one service for each monitor.7. Create a virtual service with port 6666, and add both of the services that you have justcreated. Verify that the service order is correct (VAM 1, VAM 2).8. Create a service with port 80 for HTTP or port 443 for HTTPS with the IP address of the VAMserver. Bind the HTTP or HTTPS monitor (this monitor is present by default in NetScaler) toaccess the VAM Console. One service needs to be created for each node.9. Create a virtual service with port 80 or 443 and bind the services that you have just created.The total required is four monitors, six services, and three virtual servers.For more details, consult the configuration document for your load balancer.12BEDMASTER HIGH AVAILABILITY USING MIRTH CHANNELS
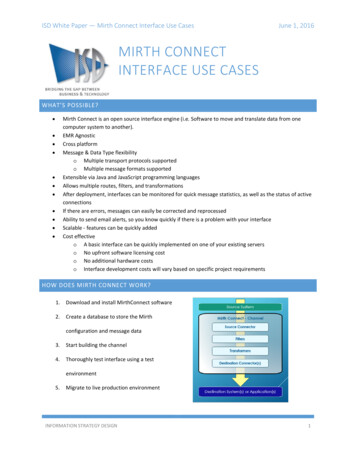
27.11.2018 · 1. In the Mirth Connect Administrator, in the Morth Connect pane, select Channels. The list of channels is displayed. 2. Right-click BMJSONCreator and select Edit Channel. 3. In the Edit Channel screen, click the Destinations tab. 4. In the Connector Type dropdown list, select File Writer. 5. In the Directory field, type Vocera \mVisumAlerts\MVisum Message Generator\HL7,

