Transcription
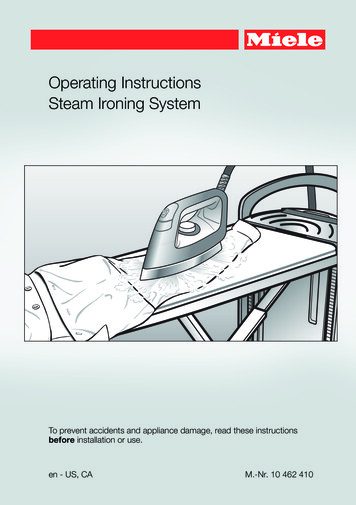
Operating InstructionsSteam Ironing SystemTo prevent accidents and appliance damage, read these instructionsbefore installation or use.en - US, CAM.-Nr. 10 462 410
Caring for the environmentDisposal of the packing materialThe cardboard box and packing materials protect the appliance during shipping. They have been designed to bebiodegradable and recyclable.Ensure that any plastic wrappings,bags, etc. are disposed of safely andkept out of the reach of children. Danger of suffocation!Disposal of your old applianceElectrical and electronic appliancescontain valuable materials. They alsocontain certain substances, compoundsand components which were essentialfor the proper functioning and safe useof the equipment. Handling these materials improperly by disposing of them inyour household waste can be harmful toyour health and the environment. Therefore, please do not dispose of your oldappliance with regular household wasteand follow local regulations on properdisposal.Consult with local authorities, dealers orMiele in order to dispose of and recycleelectrical and electronic appliances.Miele assumes no responsibility fordeleting any personal data left on theappliance being disposed. Please ensure that your old appliance is keptaway from children until removal. Observe safety requirements for appliances that may tip over or pose an entrapment hazard.2
ContentsCaring for the environment . 2IMPORTANT SAFETY INSTRUCTIONS . 6Product description. 13Transport . 16Assembly. 17Adjusting the height . 18Connection.Plug in the power cord .Removing the iron and the steam hose holder .Connecting the steam hose .20202121Before first use .Determining the water hardness .Using the test strips to determine the water hardness .Before using for the first time .Switch on the steam ironing system .Language setting.Setting the water hardness level .The steam ironing system is now set up for use .2323232424242526Switching on the appliance .Switch on the steam ironing system .Filling the water container .Removing the water container .Filling the water container .Steam operation .Water quality .Selecting the ironing temperature .CoolDown Function.Auto Off function .27272828282929303232Ironing .Iron .Ironing with steam .Ironing without steam.Ironing with the non-stick soleplate .Attaching the non-stick soleplate.Removing the non-stick soleplate.333334353535363
ContentsActive iron board .Suction function .Inflation function.Automatic switch on/off .Memory function .Heated ironing surface .363636363737Steamer .Connecting the steamer .Using the steamer .Brush attachment.Connecting the brush attachment.Removing the brush attachment .383840414141Switching off . 42Dismantling .Set the ironing board at its lowest working height .Folding the ironing board .Disconnecting the steam hose.Storing the iron .Storing the steamer .Emptying the water container .Storing the steam ironing system.4343444545454646Cleaning and care .Automatic rinsing .Preparing for the rinsing process .Draining the residual water container.Descaling.Descaling warning .Starting the descaling process early .Descaling process .Cleaning the housing.Cleaning the soleplate of the iron.Cleaning or replacing the ironing board cover .47474747484950505656574
ContentsCleaning the water filter.Disconnect the power supply.Removing the water container .Removing the water filter cover.Removing the sealing ring.Pull out water filter.Cleaning the water filter.Inserting the water filter.Inserting the water container.585858585959596060Optional accessories .Accessories .Non-stick soleplate .Ironing board cover .Steamer .Care products.Descaling tablets for the steam ironing system .61616161626262Frequently asked questions . 63Problem solving guide. 64Display messages . 69Technical service . 73Warranty conditions . 73Electrical connection . 74Technical data. 755
IMPORTANT SAFETY INSTRUCTIONSREAD ALL INSTRUCTIONS BEFORE USEThis steam ironing system complies with all specified safety requirements. Inappropriate use can however lead to personal injuryand damage to property.To avoid the risk of accidents and damage to the steam ironingsystem, please read these instructions carefully before using it forthe first time. They contain important information on its safety, installation, use and maintenance.Keep these operating instructions in a safe place and pass themon to any future owner.Intended use This steam ironing system is intended for use in domestic households and similar residential environments. The steam ironing system must be used only for ironing textileswhich are suitable for ironing according to the care label. The steam ironing system is intended for domestic use only as described in these operating instructions.Any other use is not permitted. Miele cannot be held liable for damage resulting from incorrect or improper use or operation. Persons which lack physical, sensory or mental abilities or experience with the machine should not use it without supervision or instruction by a responsible person. The steam ironing system is not intended for outdoor use. To avoid the risk of electric shock, do not submerge the iron inwater or other liquids.6
IMPORTANT SAFETY INSTRUCTIONSSafety with children Children must be kept away from the appliance unless they aresupervised. Children must be supervised in the vicinity of the steam ironingsystem. Do not allow children to play with it. Make sure that children cannot access the steam hose or thepower cable, either during use or while the steam ironing system iscooling down. Danger of suffocation!Keep children away from any packing material.7
IMPORTANT SAFETY INSTRUCTIONSTechnical safety Before setting up the steam ironing system, inspect it visually forany external damage. Do not use a damaged appliance. A damagedsteam ironing system can be dangerous! Check the iron of the steam ironing system for damage. Do notuse the iron if it has been dropped, if there is any visible damage or ifit is leaking. Before connecting the power cable to the outlet, make sure thatthe connection data on the data plate (voltage and frequency) of thesteam ironing system match the local power supply.If in doubt about your local power supply contact a qualified electrician. If it is connected to a supply that deviates from the data plate,this may lead to malfunctions or failure of the steam ironing system. Always remove and unwind the power cord of the steam ironingsystem completely from its (lower) storage compartment. If the power cord is damaged, it must be replaced by Miele Technical Service. For safety reasons this must only be fitted by a Mieleauthorized service technician or the Miele service department. Do not use the steam ironing system if the ironing board cover isdamaged.A damaged ironing board cover could be dangerous!Do not use the steam ironing system without an ironing boardcover.The ironing board cover must be replaced with an original Mielecover.8
IMPORTANT SAFETY INSTRUCTIONS The electrical safety of this steam ironing system can only beguaranteed if it is grounded properly. It is essential that this standardsafety requirement is met. If in any doubt, please have building'swiring system inspected by a qualified electrician. Miele cannot beheld liable for the consequences of an inadequate grounding system(e.g. electric shock). Do not use a power bar or an extension cord to connect the steamironing system to the power supply. These devices do not guaranteethe required safety of the appliance (e.g. danger of overheating). This steam ironing system complies with all relevant safety requirements. Unauthorized repairs could result in unforeseen dangersfor the user, for which Miele cannot accept liability. Repairs shouldonly be performed by a Miele authorized service technician, otherwise any subsequent damage will not be covered by the warranty. Faulty components must only be replaced by genuine Miele parts.Only when these parts are fitted can Miele guarantee the safety standards of the appliance. To avoid a circuit overload, do not operate an iron on the samecircuit with another high wattage appliance. During repairs, installation and maintenance tasks, the steam ironing system must be disconnected from the power supply. The steamironing system is only considered disconnected from the power supply if:– the power plug of the steam ironing system is unplugged or– the fuse is removed from the building wiring or– the circuit breaker has been tripped. Do not damage, remove or bypass the safety features and controlelements of the steam ironing system.9
IMPORTANT SAFETY INSTRUCTIONS Only use the steam ironing system when all removable outer panels are installed so that it is not possible to touch live components ormoving parts. The steam ironing system must not be used in a non-stationary location (e.g. on a ship).Correct use Emitted steam, the iron soleplate and the areas surrounding iton the iron and the steamer jets are very hot.Danger of injury by burning!Avoid direct contact with it. The steam ironing system is intended for domestic use only and isnot designed for commercial purposes. Do not use a power washer or water hose when cleaning thesteam ironing system. Clean the appliance only after it has cooled down. Danger of injury by crushing! Do not reach between moving partswhen assembling, dismantling or adjusting the height of the appliance. The steam ironing system must be set up on a level surface having the appropriate load-bearing capacity. The appliance must onlybe used in a horizontal position. The steam ironing system must be assembled when ironing. However, the steamer can be used when the ironing board is in the upright position. Ensure that the power cord does not present a trip hazard whenunwound.10
IMPORTANT SAFETY INSTRUCTIONS Use caution when the appliance is heated, if you come in contactwith the soleplate of the iron or the steamer jets you could beburned. The warning symbol "Hot surface" ( ) on the iron indicatesthat it is hot. Do not use solely demineralized water (e.g. distilled, battery water) to fill the water container. This could cause the steam ironingsystem to malfunction. Always place the iron with its soleplate horizontally on the restingsurface of the steam ironing system. Ensure the steam function isswitched off and the soleplate does not protrude over the edges. Donot place the iron anywhere else as this presents a fire hazard! Risk of burning! If the iron remains on the resting surface forlonger period of time, the surface will become hot. Avoid direct contact with the resting surface. Danger of burning! Never direct the steam or the steam jets or thesteam nozzles of the iron or steamer at people, animals or electricalappliances of any kind. Risk of burning! Never point the steam jet at clothing while theclothes are being worn! The clothing will intensify burning of skin. Switch off the steam ironing system before disconnecting thepower cable. Do not pull on the cord to withdraw the plug. Pull on the plug towithdraw the plug from the socket. Do not leave the appliance unattended when it is ready for use.Before you leave it, ensure you switch the steam ironing system offand then disconnect it from the power supply. Do not touch the power cord or the steam hose with the soleplateof the heated iron as this could result in damage.11
IMPORTANT SAFETY INSTRUCTIONS While descaling the system, the iron or the steamer must not beconnected to the steam ironing system. The appliance can be leftunattended during this process. The iron must not be stowed in its storage compartment when it isconnected. This could result in damage to the steam ironing system. Do not use the residual water container to store accessories orsimilar items. The residual water container should be used only tocollect residual water. Do not plug any objects into the apertures on the steam ironingsystem. If an aperture is blocked, do not use the system. Do not hang items of laundry on the folded steam iron system.This may cause the steam ironing system to tip over. Avoid ironing across hard or sharp-edged items. These can leavemarks on the soleplate. Do not store the steam ironing system near gasoline, kerosene orother highly flammable substances. Risk of fire and explosion! Only use the appliance inside buildings where the ambient temperature is between 50 F and 104 F.Freezing temperatures, excessive heat and humidity will adverselyaffect the functionality of the steam ironing system. Do not store the appliance in a room where there is a risk of frostoccurring. Frozen water in the water container, steam generator andsteam hose will cause damage to the appliance.Using accessories Accessory parts may only be fitted when expressly approved byMiele. If other parts are used or fitted, any claims from the warranty,warranty and/or product liability will be invalidated.SAVE THESE INSTRUCTIONS12
Product descriptiona Ironing boardi X-frame for the ironing boardb Iron with steam hosej Iron resting surfacec Steam hose holderk Power cordd Handlef Towerl Storage compartment (lower)For the power cord, the steamer*, thenon-stick soleplate, and the holderfor the power cord.g Residual water containerm Wheelsh Storage compartment (upper)For the iron and the steam hoseholder.n Release handleTo setup the steam ironing system.e Water container* Standard equipment for steam ironing system B 3847. Available as optional accessory for steam ironing system B 3312.13
Product descriptionTowera Rotary dial for height adjustmentand dismantling the applianceTower (top view) with open storage compartment (top)d Steam hose holdersb Iron resting surfacee Control panelc Steam connectionf Steam hose holderg Iron with steam hose14
Product descriptionSome of the messages in the displayare more than one line long. Touch the or button to read them in full.Control panel on towerh On/Off button Switches the steam ironing systemon or off.i DisplayDisplays messages and instructionsfor the user.j Arrow button The key is illuminated if additionaloptions are provided, or the displaytext exceeds the specified length ofa line. Scrolls the selection down orreduces values.k Arrow button Is illuminated if additional optionsare provided or the display text exceeds the specified length of a line.Scrolls the selection up or increasesvalues.l OK buttonAcknowledges the selection or theinformation in the display.m buttonThis button opens the settingsmenu. While in the settings menu,the language and the level of thewater hardness can be adjusted orthe descaling process can bestarted.15
TransportThe steam ironing system is fitted withtwo wheels. This allows the applianceto be pulled across an even surfacewhen folded up. When transporting the appliance, useboth handles on the underside of theappliance. The steam ironing system must Hold the steam iron system by itshandle and tip it gently towards youuntil the wheels are free to roll.This allows you to navigate easilyacross obstacles such as carpet edges,door sills or single steps. Two people are required to carry thesteam ironing system up or downstairs. When doing so, ensure theironing board is at the bottom.16only be transported or lifted whenfolded down!The locking mechanism of the ironing board could release and causeinjury or damage.
Assembly Take the steam ironing system to itsset up location. Use one hand to pull the releasemechanism upwards.This releases the locking mechanism ofthe ironing board and the X-frame foldsdown. Use both hands to pull the ironingboard upwards into a horizontal position until this audibly clicks into placeon both sides of the tower.click!click! Ensure the ironing board has lockedinto place on both sides of the tower. Hold onto the release mechanismand guide the ironing board into a position of approx. 45 .The height adjustment only works ifboth sides of the appliance have lockedinto place.The ironing board remains in this position by itself.17
AssemblyAdjusting the heightThe steam ironing system can be adjusted to suit your personal preference.The maximum working height is40¼" (102 cm).When adjusting the height, ensurethe power cord does not becometrapped in the mechanism.The steam ironing system is now assembled. This is its lowest working position of approx. 32¾" (83 cm) high. Use one of the rotary dials located onthe side of the tower handle. Turn thedial in the direction and hold thedial in position.18
Assembly At the same time, pull the handle onthe tower upwards with the otherhand up or press the handle down.Do not push down on the ironingboard while adjusting the height!Always use the handle on the towerto do this. When you have reached your desiredworking height, release the rotarydial.The rotary dial will spring back into thecenter position. The ironing board willremain at the adjusted height.For additional stability, the ironingboard locks into place under extrapressure with an audible click. Nowthe working height you selected istwice as secure.Tip: Adjust your working position to approx. hip height for optimum comfort.19
ConnectionPlug in the power cordThe steam ironing system is designedfor the connection to a properly installed grounded socket for AC 120 V,15 A, 60 Hz. Guide the power cord through thegroove in the cover. Close the (lower) storage compartment. Open the (lower) storage compartment by swinging the lid downwards. Remove the power cord from the(lower) compartment. Insert the power plug into a suitablegrounded outlet (see chapter "Electrical connection").20When closing the compartment, ensure the power cord does not become trapped between the lid andthe casing or between the wheelsand the tower.
ConnectionRemoving the iron and thesteam hose holderThe steam ironing system is suitablefor right- or left-handed people. Theoperation is optimized for both sides.Connecting the steam hose Lift the lid of the steam connection. Open the lid of the storage compartment (upper) on the tower. Take out the iron and the steam hoseholder. Close the storage compartment lid. Pull back the slider on the steamhose plug. Insert the plug into the steam connection. Release slider on the plug when it islocked into the steam connection.The iron is now connected to the steamconnection. Plug the steam hose holder into oneof the sockets provided.Tip: Use the socket on the side onwhich you are ironing.21
Connection Do not place the iron in its upright position!It can easily tip over or fall to thefloor.Always place the iron onto the resting surface with its soleplate down. If the iron remains on the resting Guide the steam hose on the rubberring into the steam hose holder.Ensure the steam hose fits tightlyand is not twisted.surface for any length of time, thesurface will become hot.Avoid direct contact with the restingsurface.Only touch the handle.Before turning off the iron, and before placing the iron down, makesure you switch off the continuoussteam function.If the continuous steam function isnot switched off, the following message will appear in the display Release stm. button.To do this, unlock the button bypushing the slider on the iron forward(see "Ironing").Condensation can form on the restingsurface. However, this does not affectthe functioning of the steam ironingsystem. Always place the iron on the restingsurface before you start ironing andwhen you take a break from ironing.This prevents damaging or discoloration of the ironing board cover.22
Before first use Before using the steam ironing system for the first time, remove allpackaging (e.g., the protective foilfrom the tower).Using the test strips to determine thewater hardnessDetermining the water hardnessTo ensure the steam ironing system willfunction properly and the descaling reminder appears at the appropriate time,the appliance must be set to the waterhardness level of your local water supply.The water hardness level indicateshow much calcium is dissolved in thewater. The higher the calcium content,the harder the water. The harder thewater, the more often the appliancemust be descaled.Your local water supplier can inform youof the water hardness level in your area.This information can also be found onthe internet and the home page of therelevant utility company.As an alternative, you may also determine the approximate water hardnessby using the test strips included in thedelivery. Dip the test strip for approx. 1 secondinto the water. Remove the test strip from the waterand shake the water off the test strip.After approx. 1 minute, and based onthe coloration, you will be able to readthe water hardness from the table below:Test stripWater hardness4 green areas 3 gpg (3 dH)1 red area 4 gpg (4 dH)2 red areas 7 gpg (7 dH)3 red areas 15 gpg (14 dH)4 red areas 22 gpg (21 dH)Tip: It is useful to know your waterhardness so that you can provide theservice technician with this informationin the event of any service calls. Pleasenote your water hardness level here:. gpg ( . dH)23
Before first useBefore using for the first time The following steps must be carriedout before using the appliance for thefirst time:Language settingenglish (GB)Switch on the steam ironing system Use the arrow buttons or to selectyour preferred language setting. Press the button on the controlpanel on the tower. WillkommenThe Welcome screen appears for a fewseconds in the display. The display willthen guide you through the followingsettings:24english (US) To confirm your selection, press theOK button.The language settings can bechanged anytime by choosing the following setting menu ( button, menuitem Language ).
Before first useSetting the water hardness levelLevel 7 Set waterhardness.Before the water hardness can be set,the display message Set water hardness. must be acknowledged by pressing the OK button.The steam ironing system gives youthe option to set the water hardnesslevel from 1-10.Use the following table to determine thewater hardness level that must be setfor your steam ironing system: dHgpgSetting1-41-4Level 15-75-7Level 28 - 118 - 11Level 312 - 1513 - 16Level 416 - 2017 - 21Level 521 - 2522 - 26Level 626 - 3027 - 31Level 731 - 3632 - 38Level 837 - 4539 - 47Level 946 - 7048 - 73
Operating Instructions Steam Ironing System To prevent accidents and appliance damage, read these instructions before installation or use. en - US, CA M.-Nr. 10 462 410