Transcription
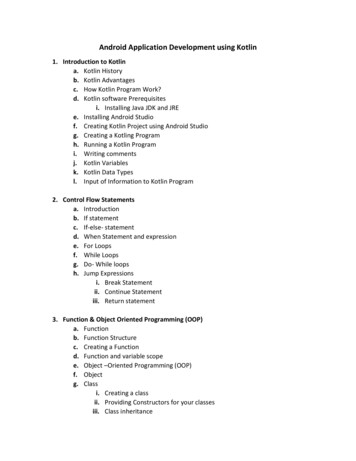
Tufts GIS CenterCreating a Shapefile Using the DrawToolbarWritten by Hans Ege Wenger, 02/24/2012This tutorial will teach you to create a basic polygon shapefile using the Draw Toolbar.This is useful for research or mapping in which there is a specific Study Area you wish tosymbolize that doesn’t match up to political or geographic boundaries.For further information on converting drawn features to Shapefiles, see the ESRI ArcGIS 10Online Resource CenterDrawing the Polygon:1. For this tutorial, we will use data for the city of Boston from the M: Drive. To access thisdata, click on Folder Connections in Arc Catalog, and then drill down from M:\ to City toBoston to BRA and then add the Neigh Stat Ars and Water Shapefiles to your map.Also, for reference, go to Add Data-Add Basemap in ArcMap and Add the Light GreyCanvas Basemap. Now, we’re ready to create our Study Area!2. Let’s say I want to create a Study Area that includes all of East Boston, as well as thetown of Winthrop1
Tufts GIS Center3. You will now add the Draw Toolbar. In the top left of your screen, click on CustomizeToolbars and then click on Draw so that the toolbar appears.4. On the Draw Toolbar, click the Rectangle symbol and change it to Polygon. You willnotice that your cursor will change into a cross shape-every time you click, you’ll place avertex of the polygon you will create.Note: To create another type of shapefile, simply change the tool to the shape youwant to draw (i.e. Line for a road, or Marker for a point)2
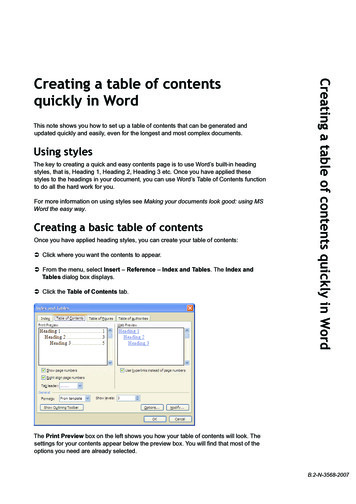
Tufts GIS Center5. Now, begin to carefully click around your sample area-with each click, you will see thelines of the Polygon begin to form.6. In the end, you will have something that looks like the image below. Press the Enterbutton to finish Drawing and create the Polygon, turning it into a Solid, Colored image.Note: This works in the same fashion for drawing Lines, and after you click to place aMarker, ArcMap will automatically create it.3
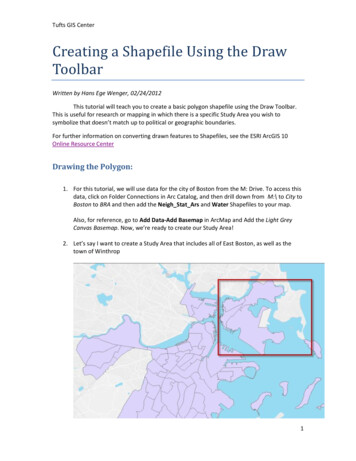
Tufts GIS Center7. You are ready to convert your image into a shapefile. Click on the Drawing button in theDraw toolbar, and select Convert Graphics to Features8. Fill out the box as shown, give it a descriptive name, and set the Output to your H: Drive.Note: If you have drawn a Line or Marker, or multiple different shapes, be sure to selectthe ones you want to convert in the Convert box4
Tufts GIS Center9. Click OK when ArcMap asks you whether you want to add the resulting shapefile to yourmap, and your new Zone will appear. Be sure to delete the old graphic it was convertedfrom.10. You can now symbolize your new shapefile according to your needs.5
3. You will now add the Draw Toolbar. In the top left of your screen, click on Customize-Toolbars and then click on Draw so that the toolbar appears. 4. On the Draw Toolbar, click the Rectangle symbol and change it to Polygon. You will notice that your cursor will change into a cross shape-every time you click, you'll place a