Transcription
EASTERN UNIVERSITYQualtrics User ManualCompiled by Andrew Wakiro, Research Assistant1/3/2013The contents of this user manual are extracted from the “Get Help” menu of the Qualtrics softwareprogram
ContentsTo Create a Survey: . 3Quick Survey Builder . 3Copy an existing survey . 4Use the Survey Library . 5Create a Question . 7To apply a question type: . 8To Format Questions: . 10Change Item Type . 11Choices. 12Question-Type Specific Options . 13Display Logic on questions . 14Display Logic on answer choices. 17Edit Display Logic . 19Validation Options . 21Validation Types . 21To Add a Page Break between questions: . 21To set up Skip Logic: . 24Edit Survey . 26In the Look and Feel you can:. 26Survey Options. 26Print Survey . 27Spell Check . 27Preview Survey . 27Distribute Survey. 27Activate your survey . 27Send a survey through Email Survey . 28Create a new Panel . 31View Results . 37To access and create Reports: . 371
To View Responses: . 38Download Data . 39Create a new Cross Tabulation . 41Library . 43Saving a Survey to the Library . 43Using a Survey from the Library . 43Using a Question from the Library . 43The Qualtrics Library . 43Group Library . 432
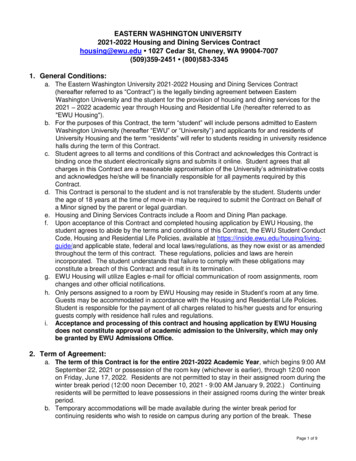
To Create a Survey:1. Click on the Create Survey tab. Alternatively, click the Create Survey button in the MySurveys tab if you are accessing your account for the first time.2. On the next screen, select one of the following options: Quick Survey Builder, Createfrom Copy, or Survey Library.Quick Survey BuilderThe Quick Survey Builder is the fastest way to start editing your survey.1. Select Quick Survey Builder.2. In the box that appears, name your survey and select a folder to save itin. If you don’t have a folder you would like to save it in, leave this part3
blank. You can assign a folder later, if needed.3. Finish by clicking Create Survey.Copy an existing surveyThe Create From Copy option allows you to create a new survey based upon an existing surveywithin your personal account.4
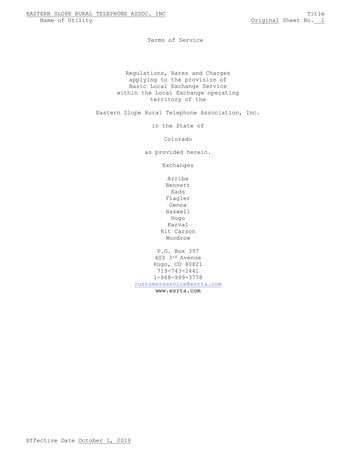
1. Select Create From Copy and choose the survey you’d like to copy.2. Specify a new name, and the folder it belongs in, if desired.3. Finish by clicking the Create From Copy button.Use the Survey LibraryThe Survey Libraryoption allows you to copy a survey from a library and use it as a templatefor your new survey. The Qualtrics Library contains hundreds of ready-to-use surveys.5
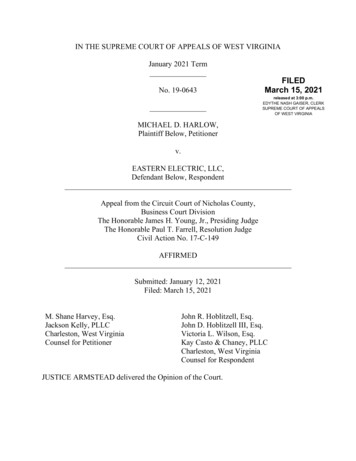
1. Select the Survey Library option.2. Choose the library from which you would like to pull the survey. Select My Library ifyou would like to choose one of your own surveys, or select the Global Library if youwould like to select a Qualtrics survey.3. Specify the category, if applicable, then the specific survey you would like to copy.6
4. Specify a new name, the folder the survey belongs in and the account the survey will becopied to.5. Finish up by clicking Create Survey.Create a Question1. Click on the Create a New Item buttonat the bottom of a question block. A multiplechoice question will be inserted into your survey.7
Alternatively, hover over any question and click one of the green plus buttonsthatappear to the right to add a question directly above or below the existing question.2. Use the question pane to the right to change the question type or change the questionsettings.To apply a question type:1. Click on the question you would like to change.2. Click on the the green Change Item Type box in the question menu bar to the right ofthe selected question.8
3. A list of question types will be shown to you in the Change Item Types drop-down.Select a question type or click on Show All Question Types to see all of the questiontype variations.4. After selecting the question type, use the question options bar to the right to customizethe question.9
Warning: If you’ve already begun collecting responses, changing your question type couldresult in the loss of collected data.More InformationTips The Show All Question Types option is available at the bottom of the Question Typesmenu and will display the variations of each question type available.If you’ve already begun collecting responses, changing your question type could result inthe loss of collected data.To Format Questions:1. Select the question you would like to format and the blue Question Pane will come upautomatically on the right-hand side.10
2. Format your question using the following Question Pane options:Change Item TypeThe green Change Item Type button allows you to change the type of question beingused. Click it to see the different options available. Visit the Question Types Guide formore details about each question type.11
ChoicesIn the Choices section, you have the option to add or remove answer choices by clickingon the plus or minus buttons beneath the green bar.oEdit Multiple allows you to paste a list of answer choices or statements into thequestion. This is very useful if you have a question with a large list of choices orstatements.oAutomatic Choices will recognize what you’ve entered into your question textand populate the choices with a scale that can be formatted as needed. Click theplus or minus buttons to change your automatic scale to something different, likea 7-point scale to a 5-point scale, and vice versa.12
Question-Type Specific OptionsWhen formatting you will observe that each question type has different formattingoptions in the Question Pane. Visit the Question Types Guide for more details.oAnswer Options allows you to choose between Single Answer, Multiple Answer,Drop-down List, Select Box, or Multiple Select Box.oAnswer Position allows you to choose between a Vertical, Horizontal, or Columnlayout.13
oSet Validation Options allows you to enable Force Response, which requiresparticipant to respond to a question before moving to the next page, and RequestResponse, which notifies participant when they do not answer a question, lettingthem choose to move on or to respond.Display Logic on questions1. Select the question that you would like to display conditionally.14
2. Click the purple gear box to the left and select Add Display Logic.3. Set the condition that must be met for the question to display. You can set the conditionbased on an answer to a previous question, or based on an embedded data field, quota orpanel field.o Previous Question: From the first drop-down, select Question. From the seconddrop-down, select a specific question, and from the third drop-down, select ananswer choice. From the fourth drop-down, choose selected, not selected, etc.o Embedded data: In the first drop-down, select Embedded Data. In the green textbox, enter an embedded data field, such as Age. In the third drop-down, selectequal to. Finally, enter a value, such as 27. The question will only be displayed torespondents in your panel that have Age equal to 27.o Quota: In the first drop-down, select Quota. From the second drop-down, selectwhich quota, and from the third drop-down, decide if you want to display if quota“has been met” or “not met.” Please note that you must create a quota beforereferencing it here.15
oPanel Field: From the first drop-down, select Panel. From the second drop-down,select a panel field. From the third drop-down, select equal to, not equal to, etc.Finally, enter the panel value.4. Add and subtract conditions by hitting the blue and - buttons on the right of thecondition. You can use and if or or if to define multiple conditions.5. Click Save to apply the logic.16
Tip If you want your question to automatically display on the same page without having tofirst click the Next (or “ ”) button to move to the next page, click the In Page checkbox.In-Page Display Logic won’t work in every situation. Qualtrics will display a message ifit won’t work for you.If respondent doesn’t have JavaScript enabled, then In-Page Display Logic will justfunction as regular Display Logic.Display Logic on answer choices1. Click on the answer choice you would like to display conditionally.17
2. Click on the blue advanced options drop-down menu.3. Select Add Display Logic.4. Set the condition for displaying the answer choice as you would with regular displaylogic.18
More InformationEdit Display Logic Display Logic on Questions: After applying Display Logic, a blue bar will appear on thequestion. You can still edit it by clicking the Edit Logic option in the blue bar andchanging the condition. Display Logic on Answer Choices: After setting up Display Logic on an answer choice, ablue arrow will appear to the left of the answer choice. To edit Display Logic, select theanswer choice, select the blue drop-down menu, then select Edit Display Logic.19
Tips If you have a large amount of questions to which you will be applying the same DisplayLogic, you will want to use Branch Logic instead of Display Logic. Put all the questionsyou will be displaying conditionally into the same block and use Branch Logic in theSurvey Flow to display those questions. For more information, review the tutorials onselecting multiple questions and using branches.You can use Display Logic to hide questions in your survey when needed. To do this, putDisplay Logic on the question with a condition that will never be met. So if you know thefirst question in the survey is always going to displayed, you can put a condition intoyour Display Logic that will only be met if the first question is not displayed. Thecondition will never be met and the question will never be displayed.To Enable Validation:Validation is great to use if you want to ensure that respondents cannot skip a question in yoursurvey. Without validation, a respondent can pick and choose which questions to answer andsubmit a half finished survey.It is also helpful when you want to ensure the data you collect is legitimate. An example of this iswhen you are collecting email addresses and you want to make sure the answers typed in byrespondents are in a proper email format.You must manually enable validation on each question you would like to validate.1. Click on the question you would like to validate.2. In the question options pane to the right, under Validation options, select Force Responseor Request Response.3. Select Validation Type if necessary.4. A red box will appear next to your question indicating you have enabled validation.20
Validation OptionsForce ResponseIf force response is enabled, respondents will be forced to answer the question before they canprogress to the next page of the survey. If a respondent does not answer and tries to advance, anotification will appear that indicates the question must be answered.Request ResponseIf request response is enabled and a respondent does not answer the question, an alert will informthe respondent the question was not answered. The respondent will have the option to return orcontinue the survey. This is also called soft validation.Validation TypesValidation types vary from question to question and can be viewed in the question options panewhen a question is selected.Custom ValidationAvailable with all question types. Custom Validation allows you to further customize theconditions that must be met for the validation to pass and allows you to set a custom errormessage to appear when the respondent does not meet the conditions.To Add a Page Break between questions:1. Click on the question after which you would like to add a page break.21
2. In the question menu bar to the right, click the Add Page Break option. A page breakwill be added in between questions in your survey. The questions before the page breakwill be on one page and the questions after the page break will be on the next page of thesurvey.3. Continue to add page breaks where you would like a new page created.22
4. If you want to put an equal amount of questions on each page of the survey but do notwant to put page breaks in manually, you can click Look and Feel and, under the GeneralTab, specify how many questions you would like per page.More InformationTips If you hover over the page break element, a red minus button will appear. Clicking thiswill delete the page break. Clicking one of the green plus buttons will add a questionabove or below the break.A page break is required for certain features to work in your survey. One of these is thePiped Text function. If the piped text refers to an answer in a previous question, then apage break will need to be placed between the question from which you are piping andthe question to which the text is piped.23
Page breaks automatically occur between blocks and when Skip Logic or Display Logicare used.The timing question type times how long participants spend on a page and therefore hasto be on the same page as the questions it is timing. If you are using timing questions, donot set automatic page breaks in Survey Options. Also, do not put a page break betweenthe timing question and the questions you are wanting to time. For more information,view Timing in the question type guide.To set up Skip Logic:1. Select the question you will be skipping from.2. Click on the purple gear box to the left of the question and select Add Skip Logic.24
3. Using the drop-downs, set up the condition that will trigger the Skip Logic and specifywhere you would like the respondent to be sent. This could be to another question withinthe block or directly to the end of the block or survey.4. When setting the condition, you can choose to skip respondents based on whether aspecific answer choice is Selected, Not Selected, Displayed, or Not Displayed.5. When finished, click Done.25
More InformationTips To edit existing logic, click the text in your Skip Logic.You can add as many Skip Logic conditions to a question as you’d like. The differentskips will be color coordinated.Remember to test out your logic.Edit SurveyIn the Look and Feel you can: Change the Skin (template) of your surveyAdd a progress bar and other general toolsCustomize the font styleCustomize the color schemeAdd a Header or FooterAlter how questions are displayedEdit CSSSurvey OptionsThe Survey Options icon is found in the navigation bar in the Edit Survey tab. Click on SurveyOptions to edit your survey settings. The most common settings are in place by default. Be sureto double check the options to make sure they fit your needs.The Survey Options menu is divided into six areas:Survey ExperienceSurvey Protection26
Survey TerminationInactive SurveysPartial CompletionResponse SetPrint SurveyA Print Survey button is available in the navigation bar under the Edit Survey tab. Use thisbutton to create a physical copy of your survey or to print to pdf. Clicking Print Survey will opena new window of a printable version of the survey, as well as the print survey dialog. You canalso download a document of your survey in the Microsoft Word .docx format (see below) andprint from Word.Spell CheckQualtrics provides simple and accurate spell check in the Edit Surveys tab. The Spell Check islocated on the gray toolbar in the Edit Surveys tab.Preview SurveyThe “Preview Survey” option on the Edit Survey page will allow you to see and take the surveyas if you were a respondent. You can also use the Test Survey option (found under AdvancedOptions) to generate test results. The Test Survey option will also alert you if there are anyproblems with the logic in your survey.Distribute SurveyActivate your surveyActivating your survey allows you to begin collecting survey responses. By default, any surveyyou create is inactive. This keeps respondents from taking the survey before it is finished andensures you won’t collect any invalid data or release an unfinished survey.Do not activate your survey until you are ready to collect responses.27
1. On the My Surveys page, click the check box on the left side of the survey name. Thebox will turn green.2. On the Distribute Survey page, click the link that says Activate your survey to collectresponses. The anonymous survey link will then be available to you.It’s the easiest way to distribute a survey: a simple, anonymous link that can be taken by anyone.You can: Send it out with your personal email.Post it on a web page.Use social media to distribute it.Send a survey through Email Survey1. Go to the Distribute Survey tab.28
2. Click on the Email Survey icon.3. Click on the “To:” drop-down menu to select who should receive the survey.4. Choose to Enter Email Addresses manually, or select a panel from your library.5. If using a panel, select My Library or Group Library.6. Choose to create a New Panel or select an existing panel. Visit the Build a Panel page tolearn more about Panels.29
7. If using an existing panel, choose whether to Select the Entire Panel, Select a PanelSample, or Select an Individual from the panel.8. Next, choose When to send your survey. By default, it will be sent 1 hour from when youschedule the mailing.9. In the Message section, enter a From Name, Reply-To Email Address, and Subject foryour email.10. You will see that the survey link is automatically inserted into the message box. Do notdelete it. Type an email message into the Rich Text Editor incorporating the link, or click30
to Load a Saved Message.11. If you’ve created a new email message, click the green Save button.12. Once the mailing is ready to be sent, click Send Now or Schedule Mailing.Create a new Panel1. Go to the Panels tab and click the green Create New Panel button.2. Give your panel a Panel Name.3. If desired, give your panel a Destination Category.31
4. Click Create.5. Choose how you would like to import panel members: Add Panel Members using aweb-based form, Import From a File to upload a spreadsheet of members, or ImportFrom a Survey to use previous survey responses to build your panel.Manually add members to your Panel1. Follow the steps for Create New Panel, and select to Add Panel Members manually.32
2. In the form that appears, fill in the Email, First Name, and Last Name for your panelmembers. Make sure that you don’t have white space before or after the inserted text.3. If needed, click the gray Plus Sign to add additional fields to your panel, including anExternal Data Reference, the participant’s Language, or any other Embedded Datafield. Customize the names of your Embedded Data fields by clicking on the field name.4. Click Save.Import panel members from a file1. Follow the steps for Create New Panel and select to Import From a File section.2. Create a spreadsheet in Excel or any other database program. Download the ExampleDocument to learn how to format the file. The File must contain one column with the33
header FirstName, one column with the header LastName, one column with the headerEmail, and if needed, additional columns for any other data (embedded data) you wouldlike to have saved in the panel. Click here to jump down to QTips for information onimporting the panel members’ Language codes.WARNING: When you add embedded data to your panel, this extra information will beattached to the responses of your panelists. Note that to see this embedded data in yourreports you must go into the Survey Flow of your survey and add in embedded dataelements for the embedded data columns. Also, be aware that if you delete your panelafter collecting responses, the embedded data will also be deleted and will no longer beattached to the responses from the panel.3. Build your file. Add panel members to your spreadsheet, with one row for each panelmember.4. In the File menu, select Save As.5. Give your file a name, and set the File Type to CSV or Comma Separated Values.34
6. In the Import From a File pop-up box, select Choose File.7. Select your file and click Open. The file must be closed on your computer for it to importsuccessfully into Qualtrics.8. Check the Verify Fields preview of your panel to ensure that Qualtrics is recognizing itproperly.9. If the fields are not showing up as a table in the Verify Fields preview, select ImportOptions and change the Delimiter and Enclosure until the Verify Fields previewdisplays properly.10. Select Import.35
Import panel members from existing survey data1. Follow the steps for Create New Panel, and select to Import From a Survey.2. Select whether you want to Update Recipients (if some of your survey participants arealready in the panel) or Create New Recipients (if you are building a new panel oradding to an existing one).3. Select a survey you wish to use for your panel information and choose a Response DateRange if desired.4. If creating new participants, choose which Question and which Question Field willrepresent the First Name, Last Name, and Email in the panel.36
5. If updating existing panel members, also specify which fields the Question and QuestionField should be saved as in the panel. Note that if you are updating panel members, youhave to distribute the survey to the panel you are wanting to update.If you want to know anything about mailings through Qualtrics, this is the page for you. You cantrack previous mailings, see who took the survey, and send a reminder or thank you message.View ResultsTo access and create Reports:1. Go to the View Results tab and open the View Reports page.2. If prompted, select which survey you would like to work with.37
3. Select a Report to view.oooTo open the default report for your survey, click Initial Report.To create a new report, click Create a New Report.To delete a report, click Delete next to your report name.The Responses page has all of the raw responses to your survey. From here you can: View individual responses.Create a PDF of each.Close responses in progress.Create retake links.Delete responses.To View Responses:Select one of the following tabs in the Responses section to view responses:1. Recorded Responses: Responses that are closed and saved to your data set will beavailable here. These include all complete responses, and any incomplete responses thatare no longer available for the participant to finish. Visit the Recorded Responses pagefor more information.38
2. Responses in Progress: Responses that are still active. Participants are either currentlytaking the survey, or they have received a link that is still open, but their response is notyet finished. Visit the Responses In Progress page for more information.Download DataDownload your raw data by going to the Download Data page (View Results tab) and selectingthe file type you would like to download. The available file types are .CSV, SPSS, Fixed FieldText, XML, and HTML. You can save and open the file on your computer, except HTML,which will just open a table in your browser.Internet Explorer may prevent the download, displaying a yellow bar at the top of the page.Click on this bar to give the browser permission to download the file. The page may reload, inwhich case you will need to re-click the download option.39
.CSV (Comma Separated Values) A text file type that can be opened in Microsoft Excel. Excel is a convenient program forviewing data. From an Excel file, a .CSV file can be converted and viewed in otherstatistical modeling software.Excel 2003 has a column limit of 256 columns. Some surveys may have more variablesthan this. The data will be stored in the csv file, but cannot be displayed in Excel 2003. Ifthis is the case, you will need to find another program to view the data (SPSS, SAS,STATA, Excel 2007).SPSS To download an SPSS file, navigate to the SPSS section and click Download SPSS .savFile.If desired, you can specify the String Width or Download the SPSS Syntax file.Fixed Field TextFixed Field Text format is designed to work with many external cross tabulation tools. It is a flatfile format and is the one most often used for these tools. This was designed to better meet thespecial needs of our market research clients.XMLXML is used for putting your data into a database. This is the Extensible Markup Language(XML) format of the raw data, which is a general purpose markup language for easyinterpretation.HTML40
This is a HyperText Markup Language format of the raw data. This format shows the data in onelarge table when opened by a web browser.Uploaded FilesIf you used the File Upload question type in your survey, use this option to download allrespondent-uploaded files at once in a .zip file.Create a new Cross Tabulation1. Open the Cross Tabulation page in the View Results tab.2. Click the Create a new Cross Tabulation icon.3. Check the appropriate boxes in the Banner and Stub columns to choose which questionswill be the columns and rows in your Cross Tabulation.41
4. If necessary, select Use Embedded Data to include Embedded Data fields as rows orcolumns in your tabulations.5. If you are using Embedded Data fields, check the appropriate boxes in the Banner andStub columns, and either enter the field values to be included in the tabulation in theEmbedded Data Field text box, or click Autofill to bring in all values.6. Select Create Cross Tabulation.42
LibraryIf you use similar surveys or questions repeatedly, Qualtrics can store templates of entire surveysor questions in the library making them accessible at anytime in any survey.Saving a Survey to the Librar
3 To Create a Survey: 1. Click on the Create Survey tab. Alternatively, click the Create Survey button in the My Surveys tab if you are accessing your account for the first time. 2. On the next screen, select one of the following options: Quick Survey Builder, Create from Copy, or Survey Library. Quick Survey Builder