Transcription
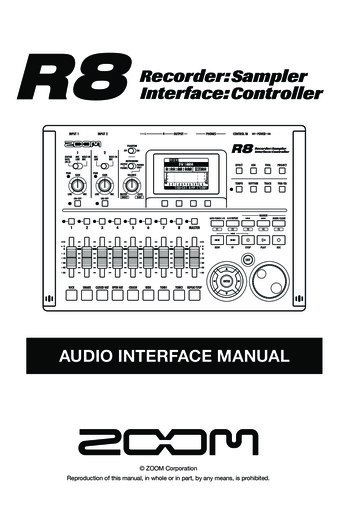
AUDIO INTERFACE MANUAL ZOOM CorporationReproduction of this manual, in whole or in part, by any means, is prohibited.
ContentsAudio interface manualContents . . . . . . . . . . . . . . . . . . . . . . . . . . . . . . . . . . . 2Audio interface and control surface . . . . . . . . . . . . . . . . . . . . 4Cubase LE Installation overview . . . . . . . . . . . . . . . . . . . . . . 6Audio interface . . . . . . . . . . . . . . . . . . . . . . . . . . . . . . . . . . . . . . . . 6Control surface . . . . . . . . . . . . . . . . . . . . . . . . . . . . . . . . . . . . . . . . 6R8 audio interface system requirements . . . . . . . . . . . . . . . . . . 7Cubase LE Startup Guide . . . . . . . . . . . . . . . . . . . . . . . . . . . . . . . . . . . 7Connecting and disconnecting in audio interface mode . . . . . . . . . . 8Connecting the R8 to a computer for the first time . . . . . . . . . . . . . . . . . . . . . . . 8R8 setup and connection . . . . . . . . . . . . . . . . . . . . . . . . . . . . . . . . . . . 8Disconnecting . . . . . . . . . . . . . . . . . . . . . . . . . . . . . . . . . . . . . . . . . 9Using control surface functions . . . . . . . . . . . . . . . . . . . . . . 10About the control surface . . . . . . . . . . . . . . . . . . . . . . . . . . . . . . . . . . 10Control surface setup . . . . . . . . . . . . . . . . . . . . . . . . . . . . . . . . . . . . 10Transport section . . . . . . . . . . . . . . . . . . . . . . . . . . . . . . . . . . . . . . 11Fader section operation . . . . . . . . . . . . . . . . . . . . . . . . . . 12About banks . . . . . . . . . . . . . . . . . . . . . . . . . . . . . . . . . . . . . . . . . 12Operating the fader section . . . . . . . . . . . . . . . . . . . . . . . . . . . . . . . . . . 12R8 level meters (Audio interface use) . . . . . . . . . . . . . . . . . . . . . . . . . . . . . 13Setting the function keys . . . . . . . . . . . . . . . . . . . . . . . . . . 14Function key setup . . . . . . . . . . . . . . . . . . . . . . . . . . . . . . . . . . . . . . 14Control surface functions quick reference guide . . . . . . . . . . . . . . 15Recording with Cubase LE . . . . . . . . . . . . . . . . . . . . . . . . . 16Create a new project . . . . . . . . . . . . . . . . . . . . . . . . . . . . . . . . . . . . . 16Create a new audio track . . . . . . . . . . . . . . . . . . . . . . . . . . . . . . . . . . . 17Connect an instrument . . . . . . . . . . . . . . . . . . . . . . . . . . . . . . . . . . . . 18Adjust the recording level . . . . . . . . . . . . . . . . . . . . . . . . . . . . . . . . . . . 19Recording . . . . . . . . . . . . . . . . . . . . . . . . . . . . . . . . . . . . . . . . . . 20Check the recording (playback) . . . . . . . . . . . . . . . . . . . . . . . . . . . . . . . . 20Importing audio into Cubase LE . . . . . . . . . . . . . . . . . . . . . . 22Importing by drag & drop . . . . . . . . . . . . . . . . . . . . . . . . . . . . . . . . . . . 22Using the “Import” command . . . . . . . . . . . . . . . . . . . . . . . . . . . . . . . . . 242
Audio interface manualMixer in audio interface mode . . . . . . . . . . . . . . . . . . . . . . . 26Volume, reverb send, pan . . . . . . . . . . . . . . . . . . . . . . . . . . . . . . . . . . 26Stereo link . . . . . . . . . . . . . . . . . . . . . . . . . . . . . . . . . . . . . . . . . . 26Balance . . . . . . . . . . . . . . . . . . . . . . . . . . . . . . . . . . . . . . . . . . . 26Tuner . . . . . . . . . . . . . . . . . . . . . . . . . . . . . . . . . . . . 27Chromatic tuner . . . . . . . . . . . . . . . . . . . . . . . . . . . . . . . . . . . . . . . 27Effects in audio interface mode . . . . . . . . . . . . . . . . . . . . . . 28INSERT effect . . . . . . . . . . . . . . . . . . . . . . . . . . . . . . . . . . . . . . . . 28SEND return effect . . . . . . . . . . . . . . . . . . . . . . . . . . . . . . . . . . . . . . 28Working with patches . . . . . . . . . . . . . . . . . . . . . . . . . . . . 29Patch operations . . . . . . . . . . . . . . . . . . . . . . . . . . . . . . . . . . . . . . . 29Patch initialization (factory reset) . . . . . . . . . . . . . . . . . . . . . . . . . . . . . . . 29Control surface setup for other DAWs . . . . . . . . . . . . . . . . . . . 30Logic . . . . . . . . . . . . . . . . . . . . . . . . . . . . . . . . . . . . . . . . . . . . . 30SONAR . . . . . . . . . . . . . . . . . . . . . . . . . . . . . . . . . . . . . . . . . . . 31Ableton Live . . . . . . . . . . . . . . . . . . . . . . . . . . . . . . . . . . . . . . . . . 32Digital Performer . . . . . . . . . . . . . . . . . . . . . . . . . . . . . . . . . . . . . . . 333
Audio interface and control surfaceAudio interface manualThis section explains how to connect the unit with a computer and how to set up andwith a DAW and otheruse the audio interface and control surface functions of thesoftware.Functions of the audio interface and control surfaceINPUT jacksGuitars and othermusical instruments,built-in stereo micPHONES jackPlayback device likeheadphones or anaudio systemOUTPUT jacksStereo system,speakers with built-inamplifiers, etc.Windows/MacDAW softwareCubase LE, etc.USB CableAudio driverAudio interfaceTheinputs and outputs can be usedas a Hi-Speed USB 2.0 audio interfacewith 2 inputs and 2 outputs at qualityup to 24-bit/96kHz. Effects can be usedwhen the sampling rate is 44.1 kHz, andthe unit can be powered by a computer’sUSB bus.Control surface functionsControl surface functions can be usedto control DAW software on a computervia USB. Transport operations, includingplayback, recording and stopping, andphysical control of the DAW faders arepossible. Furthermore, various other DAWsoftware functions can be mapped to theF1 F5 keys (assignable functions dependon the DAW �ージ4を操作
The two onboard jacks include one highimpedance input. Both accept XLR andstandard phone plugs and can providephantom power (24 or 48V).Many sources are supported from highimpedance guitars and basses to dynamicand condenser microphones and linelevel devices like synthesizers. In addition,the built-in high-performance condensermicrophones are convenient for recordingacoustic guitars and vocals.Audio interface manualSupports input from a variety ofsources, including guitars, mics andline level instrumentsVersatile effect functionsBuilt-in insert effects can be applied tospecific channel paths, and two-typesof send/return effects work via the mixersend/return. These effects can be appliedwhen recording, of course, but they canalso be applied to only the monitor output.For example, when recording vocals, youcan apply reverb only to the monitor signalto make singing easier.Comprehensive built-in mixerUsing themixer, you can make amix for monitoring. When simultaneouslyrecording guitar and vocals, for example,you can adjust volume balance, panningand reverb levels.Moreover, you can also adjust the balancebetween the built-in mixer and the soundsent from a computer.Multifunction tunerIn addition to standard chromatic tuning,the on-board multifunction tuner also supports 7-string guitar, 5-string bass andvarious drop tunings.5
Cubase LE installation overviewAudio interface manualTo use thewith DAW software, after installing that software, an audio driver mustbe installed and set to recognize it.* We explain how to do this with Cubase LE.❷ Control surface❶ Audio interfaceBy using thebetween a computer andexternal audio devices and instruments, theirsignals can be recorded using a DAW or othersoftware. Instruments and mics that requirehigh impedance or phantom power can alsobe connected., youUsing the faders and keys on thecan control transport operation and mixing indigital audio workstation (DAW) software onyour computer.❶❷Install DAW softwareReference: "Cubase LE Startup Guide"Cubase LEInstall driverReference: "Cubase LE Startup Guide"ZOOM R8 audio driver*Connect R8 to computerP.8Audio interface setupDAW software setupDevice setupReference: "Cubase LE Startup Guide"ZOOM R8 audio driverControl surface setupP.10, 30 Mackie ControlRecordingP.16*No driver is necessary for use with Macintosh computers.6
audio interface system requirementsWindowsWindows XP SP3 or later (32-bit)Windows Vista SP1 or later (32-bit, 64-bit)Windows 7 (32-bit, 64-bit)32-bit: Intel Pentium 4 1.8 GHz or faster64-bit: Intel Pentium Dual Core 2.7 GHz or faster32-bit: RAM 1 GB or faster64-bit: RAM 2 GB or fasterAudio interface manualaudio interfacesystem requirementsCubase LE Startup guidePlease refer to the Cubase LE Startup Guidefor detailed instructions on installing the ZOOMaudio driver and Cubase LE.Intel MacOS X 10.5.8 or later/10.6.5 or laterIntel Core Duo 1.83 GHz or fasterRAM 1 GB or fasterBothUSB 2.0 compatible port USB hubs are not supported. Intel chipsets recommended.Note about descriptions and imagesThis manual was prepared based on use withWindows systems. Special functions related to MacOS X are indicated separately.The screen images are of the Windows version ofCubase LE.About trademarks The SDandSDHC logos are trademarks. Windows , Windows XP, Windows Vista and Windows 7 are registered trademarks of Microsoft in the USA. Macintosh and Mac OS are trademarks of Apple Inc. Steinberg and Cubase are registered trademarks of Steinberg Media Technologies GmbH. Intel and Pentium are trademarks of Intel Corporation. Mackie Control is a registered trademark of LOUD Technologies. Logic is a trademark of Apple Inc. SONAR is a trademark of Cakewalk, Inc. Ableton Live is a trademark of Ableton AG. Digital Performer is a registered trademark of Mark of the Unicorn. All other product names, registered trademarks, and company names mentioned in this documentationare the property of their respective owners.In order to improve the product, specifications might be changed without advance notice.7
Connecting and disconnecting in audio interface modeAudio interface manualThis is an overview of connecting and disconnecting theto a computer with a USBcable. For details, see the included Cubase LE Startup Guide guide.Connecting thefor the first time12 34 to a computer1Install the Cubase LE DAWsoftware on the computer.Install the ZOOMaudio driveron the computer from the includedSD card. (No driver is necessary foruse with Macintosh computers.)Reference: "Cubase LE Startup Guide"Connect thesetup and connection23Connect theto the computerusing a USB capable.Press USB.Select AUDIO I/F.Changemenuto the computer.setup and connectionPress ENTER.Setup the DAW software.Device setupReference: "Cubase LE Startup Guide"Control surface setup4Select EXECUTE.ChangemenuP.10Mackie ControlPress ENTER.NOTE The ZOOMaudio driver is essential forusing theas an audio interface with DAWsoftware such as Cubase LE. (No driver is necessary for use with Macintosh computers.) Download the latestaudio driver from theZoom Corporation website.http://www.zoom.co.jp/8
Audio interface manualDisconnecting1Press theor press2below.Select YES.ChangemenuPress ENTER.NOTESelect CONTINUE to use the same settings as last time. INSERT EFFECT settings SEND RETURN EFFECT settings Mixer settings TUNER settingsSelect RESET to restore default settings for each item. The audio interface and control surface funccan be used by drawing powertions of thethrough a USB cable from the USB bus. We recommend always using the latestsystem software.9
Using control surface functionsAudio interface manualWhen using theconnected by USB as an audio interface, thecan be used to control Cubase LE’s transport and mixer.About the control surfacekeys and fadersControl surface setupIn control surface mode, the keys and knobscan be assigned to particularon theCubase LE functions.See56Transport sectionP.11About banksP.12Fader sectionP.12setup and connection on P.8-9Then, launch Cubase LE.From the Cubase LE “Devices”menu, select “Device setup ”Open the “Device Setup ” window.7At the top left of the Device setupwindow [ ], [ ] and [ ] buttonsappear. Click the [ ] and select“Mackie Control”HINTAssigning keysFor a list of functions that can be assigned to the, as well as other transknobs and keys of theport/function keys that are supported by CubaseLE, please consult the “Control surface functionsquick reference guide” in this manual.Reference: Control surface functions quick reference guide10P.158Set the MIDI input and outputMIDI input:MIDI output:ZOOM R8ZOOM R8
Audio interface manualTransport sectionBy setting up the control surface, thetransport section keys can be assigned to individual functions in Cubase LE.F1 keyF2 keyF3 keyREW keyFF keySTOP keyRewindFastforwardStopF4 keyF5 keyPLAY keyREC keyPlayback RecordHINTYou can connect a footswitch to the CONTROL INjack to start and stop playback, and change effectpatches, for example, with your foot when using theas an audio interface. Reference:Operation ManualUsing a footswitchP.11311
Fader section operationAudio interface manualUsing the faders and status keys of the fader section, you can adjust the volume ofcorresponding Cubase LE tracks, mute and solo them, and arm them for recording.About banksOperating the fader sectionAfter setting up control surface operation, themain parameters of Cubase LE can be operfader and status keys.ated using theA group of tracks operated by the fadersand status keys is called a “bank.” With the, one bank of 8 adjacent tracks can becontrolled.For example, if fader 1 is assigned to CubaseLE track 1, tracks 1-8 can be controlled asshown in the following diagram.Status keys .812Assign the Cubase LE tracks(channels) that you want to controlto the fader section.Use the faders to control thevolumes of the correspondingtracks.The faders control the volumes of their respective tracks. Change the master volumeby moving the Master Fader.As the diagram shows, when tracks 1 8 arebeneathonceselected, pressingswitches the assignments as shown below.Status keys &Faders1TrackTr.9Push2345678Tr.10 Tr.11 Tr.12 Tr.13 Tr.14 Tr.15 Tr.16beneathThe next lower bank of eight tracks (channels) is assigned to the fader section.PushbeneathThe next higher bank of eight tracks (channels) isassigned to the fader section.3To change the function of thestatus keys for all the tracks,press the soft key for the desiredfunction.Use these keys to set thefunctions of the status keys12
Audio interface manuallevel meters(Audio interface use)Signal just before beingsent to computer shownSignal returning fromthe computer shown.Checking DAW recording levelsSet “REC SIGNAL” (in the INSERTEFFECT menu) to set whether signals aresent to the computer “WET” (with effect)or “DRY” (without effect).Adjust so that thelevel meters do notclip (reach 0 dB).0 dB(clipping)13
Setting the function keysAudio interface manualThe five keys above the transport keys can be used as function keys (F1 F5) andassigned as desired.Function key setup12Open the “Device setup ” dialogin Cubase LE.5Select “Mackie Control”.Commands can be assigned using the threecolumns displayed on the right side of thewindow.63414Choose the type of Cubase LEfunction from the Category pop-upmenu.The items in this pop-up menu will differdepending on the category chosen.From the “Button” column choosethe function key (F1 F5) to beassigned a Cubase LE function.Click on the “Category” column forthat control.Click on the “Command” columnand select the desired Cubase LEfunction from the pop-up menu.7Press the “Apply” button.
Control surface functions quick reference guideControlFader sectionDisplay sectionAudio interface manualThese functions work with Cubase LE, Cubase, Logic Pro, SONAR, Ableton Live andDigital Performer.ExplanationStatus keysTurns mute, solo or record arming on/off for tracks1–8 fadersControls the volume of the corresponding tracksMASTER faderMaster volume operationSoft keysChange functions of status keys, change banks and endconnection (EXIT)Cursor keysPerforms the same functions as the computer arrow keys1DIALMoves the project cursor position2REW keyRewindFF keyFast forwardSTOP keyStopPLAY keyPlayREC keyRecordAUTO PUNCH I/O keyDepends on the F1 key settingA-B REPEAT keyDepends on the F2 key settingTransport section(marker) keyDepends on the F3 key setting(marker) keyDepends on the F4 key settingMARK/CLEAR keyDepends on the F5 key setting12Scrolls window in Digital PerformerNo function in Digital Performer15
Recording with Cubase LEIn this chapter, we explain how to record into Cubase LE using theAudio interface manual3Create a new projectCopy the ZOOMto the computer.project templatesFrom the CubaseLE template folder on the SD, copy the templatescard included with theto the location where Cubase LE is installed.Create a new projectIf you have copied theproject templates to the designated folder, these projecttemplates will be displayed when creating anew project. By choosing these templatesyou will be able to easily create projects withaudio track input and output settings alreadymade for the.For Cubase LE 5, copy them as followsWindowsC:\Program Files\Steinberg\Cubase Contents/templates/1Launch Cubase LE.Template names and detailsZOOM R8 Mono RecordingProject with Cubase LE mono tracks 1–2 assignedINPUTS 1–2toZOOM R8 Stereo RecordingProject with a Cubase LE stereo track assigned toINPUTS 1–22Choose “New Project” from the Filemenu.The New Project Window where you can choosea new project template opens.16
Set the save location and click the“OK” button (“Choose” button onMac OS X).The project file save location window is displayed.Audio interface manual4Create a new audio track5Set-up the audio tracks that weremade as follows.To add a new audio track, select “Add Track” fromthe “Project” menu and then choose “Audio” fromthe sub-menu that appears.Inspector area allows detailed track settingsIf the inspector is not shown, clickhere to show it (click again to hide it)This will create a new project and the projectwindow where most Cubase LE operations areconducted will open.Select the track input/output bus.busses assigned inThe names of thethe VST Connections (Devices menu) will bedisplayed.Click here to choose a different bus from a menuthat will appear.NOTEThe inspector displays information about the trackcurrently selected. If it does not display anythingclick on a track to see that track’s status.17
Recording With Cubase LEAudio interface manual8Connect an instrumentEnable track monitoring andrecording.Channel correspondingto an audio track6Master ChannelConnect an instrument such asa guitar to anINPUT jack andchoose an effect patch.The chosen effect patch will be applied to the signaland can be recorded on the computer via the USBport.See the following for information about how toinput signal.set the Reference:Operation ManualConnectionsSelecting effect patches7P.12P.83Click the Monitorbutton until it appearsorange.Click the record enablebutton. It will appearred when recording isenabled.Select “Mixer” from the Cubase LE“Devices” menu.The mixer window opens, showing the channelscorresponding to the created tracks and themaster channel.HINTWhen the Monitor button is orange, the audio trackinput level is displayed in the level meter next tothe fader. When the Monitor button is off, the audiotrack output level is displayed.18
910Audio interface manualAdjust the recording levelAfter adjusting the recording level,click the Monitor button so that itbecomes grey.While playing the instrument,adjust theinput level and setthe Cubase LE recording level.MonitorbuttonLevel MeterThis turns off display of the input level, and mutes.the signal from the computer to theWhen the Monitor button is off, the signal justbefore it is sent to the computer can be monitoredPHONES and OUTPUT jacks.from the11Check the recording level for Cubase LE byviewing the level meter of the channel thatcorresponds to the recording-enabled track. Setit as high as possible without making the meterpeak.When adjusting the level, do not move the CubaseLE fader, but instead adjust thegain.Confirm that the Transport Panel isdisplayed.If the Transport Panel is not displayed, select“Transport Panel” from the “Transport” menu.NOTE If the Monitor button is on, theinput signaland the signal returning to thevia thecomputer will both be output from theatthe same time, creating a flanger-like sound.To monitor accurately while adjusting therecording level, turn the BALANCE knob to DIRECT. The meter above shows the signal level after ithas been processed internally by Cubase LE.For this reason, a slight delay might occur fromthe time a string is plucked until the level metermoves. This is not a defect.19
Recording with Cubase LEAudio interface manualRecording12Check the recording (playback)Click the Record button on theTransport Panel to start recording.Stop button1Lower the master channel fader.Record buttonAs you play the instrument, a recorded waveformis drawn in real time in the project window.To stop recording, click the Stop button in theTransport Panel.2Click the Go to Zero ( ) button inthe Transport Panel to return to thebeginning of the project.Return to the beginning of the project3Click the Play button in theTransport Panel to begin playback.Play button20
Audio interface manualTips to improve performance4Raise the master channel fader to asuitable playback level.When using Cubase LE, application performance could become extremely delayed orerror messages such as “cannot synchronizewith USB audio interface” might be displayed. Should such things happen often,the following measures might improve thesituation.➊Quit other running programs.➋Reduce the use of plug-ins(effects, virtual instruments)In particular, confirm that many backgroundapplications are not running.in Cubase LEIf a large number of plug-ins are running, thecomputer processing capacity might not beable to keep up. In addition, reducing thenumber of simultaneous playback tracksmight be effective.If the sound breaks up, please increase theaudio Buffer Size (Devices Device Setup R8 driver Control panel).For details, see Step 5 of the Cubase LEStartup Guide.Moreover, if the application performanceis extremely slow and regular computeroperation is affected, we recommend quitting Cubase LE and disconnecting theUSB port from the computer once, and thenreconnecting the USB port and relaunchingCubase LE.HINTIf no sound comes out after clicking the Play buttonfollowing recording, recheck the VST Connections(step 6 in the Cubase LE Startup Guide).In addition, confirm that theBALANCE control isset to the center.21
Importing audio into Cubase LEAudio interface manualBy connecting a computer and thewith a USB cable and setting thetofunction as a card reader, you can import audio data as WAV files into Cubase LE audiotracks.Importing by drag & drop123Connect the computer and thewith a USB cable.5Press USB.Launch Cubase LE.Open the Cubase LE project intowhich you want to import audiodata.Select READER.ChangemenuPress Enter.Accessthefrom the 46Open theSD card from thecomputer and open the “AUDIO”folder of the project from which youwant to import audio data.
Select the file (or files) that youwish to import from the “AUDIO”folder and drag and drop theminto the Cubase LE projectwindow.9Audio interface manual7In the “Import Options” windowclick the “Copy Files to WorkingDirectory” check box, and clickthe OK button.The audio files are loaded intoCubase LE tracks.When a file is dragged and dropped,a window will open asking howCubase LE should place the file.8When dragging multiple files atone time, select either “DifferentTracks” or “One Track” as theimport method.Generally, select “Different Tracks” to automaticallycreate one track for each file. The files will be arranged vertically in the project window.Select “One track” to create one track with theaudio files arranged horizontally.This window where you can select the importmethod appears.HINT Project data is stored in folders for each projectin the PROJECT folder in the ZOOM R8 folder.Audio recordings are stored as WAV files inthe “AUDIO” subfolders of each project folder.Each AUDIO folder also contains a file called“PRJINFO.TXT” that lists the names of filesassigned to tracks. Master tracks and stereo tracks are stereoWAV files. To copy a WAV file from a computer, copy it tothe AUDIO subfolder of the desired project folderUse theto assign the files to tracks.23
Importing audio into Cubase LEAudio interface manualUsing the “Import” command123Connect the computer and thewith a USB cable.Select READER.ChangemenuAccess thefrom the Open the Cubase LE project intowhich you want to import audiodata.Press USB.Press ENTER.45Launch Cubase LE.6From the Cubase LE “File” menuselect “Import” and “Audio File ”The “Import Audio” window opens.
Select the desired audio file (orfiles) from the “AUDIO” folder ofthe project from which you wishto import. Click “Open.”9Audio interface manual7When importing multiple files atone time, select either “DifferentTracks” or “One Track” as theimport method.The audio data is assigned to one or moreCubase LE tracks.8Importing files will cause the “Import Options”window to appear.In the “Import Options” windowclick the “Copy File(s) to WorkingDirectory” check box, and clickthe OK button.When a file is imported, awindow will open asking howCubase LE should place the file.Generally, select “Different Tracks”to automatically create one track foreach file. The files will be arrangedvertically in the project window.Select “One track” to create onetrack with the audio files arrangedhorizontally.HINT Project data is stored in folders for each projectin the PROJECT folder in the ZOOM R8 folder.Audio recordings are stored as WAV files inthe “AUDIO” subfolders of each project folder.Each AUDIO folder also contains a file called“PRJINFO.TXT” that lists the names of filesassigned to tracks. Master tracks and stereo tracks are stereoWAV files. To copy a WAV file from a computer, copy it tothe AUDIO subfolder of the desired project folderUse theto assign the files to tracks.25
Mixer in audio interface modeAudio interface manualIn audio interface mode you can make a mix for monitoring using theinternalmixer. In addition, you can adjust the balance of the sound from the internal mixer andfrom the computer.Volume, reverb send, panYou can be adjust the reverb send, pan,volume and stereo link settings in the sameway as in recorder mode.Stereo linkLink INPUT 1 and 2 to handle them as stereopairs.Operation is the same as in recorder mode.(Reference: Operation Manual P.42)PAN/EQ menuVOLUMEAdjust the volumes of INPUTS 1–2.0–127 (increments of 1)Default value: 100On/OffDefault setting: OffBy setting up a stereo link, volume, reverb send and pantrack parameters can be shared by INPUT 1 and 2.(Reference: Operation Manual P.29)BalanceREV SENDAdjust the reverb send levels of INPUTS 1–2.In audio interface mode, the balance of theinput monitoring signal and the signal fromDAW software (the computer) can be adjustedwith the BALANCE knob.0 100 (increments of 1)Default value: 0Reverb only affects themonitored signal (as inrecording mode).LeftOnly the INPUT1–2 signalsRightOnly the DAWstereo signalPAN (BALANCE)Adjust the pan for INPUTS 1–2.NOTEL100 R100(increments of 2)Default value: Center(as in recording mode)26The reverb send, pan, volume and stereo links e t t i n g s a r e a l l s ave d w h e n yo u e n d ( EXIT)audio interface mode and can be used again thenext time.
TunerChromatic tunerHINTTOOL TUNER12 The default value of the standard pitch is 440 Hz. Tuners other than the chromatic tuner can alsobe used.Press TOOL. Reference: Operation ManualSelect TUNER.ChangemenuPressENTER.345TunerTo change the standard pitch,beneath.press theSelect the standard pitch.P.108NOTETuner settings are saved when you end (EXIT) audio interface mode and can be used again the nexttime. Reference: Operation ManualTune the instrument.45TunerP.108To change the tuner type, pressbeneath.theChange the tuner type.Change thetuner typeChange thestandard pitchPress ENTER.Audio interface manualThetuner can be used as when in audio interface mode. For details, see theOperation Manual (P.108).Press ENTER.27
Effects in audio interface modeAudio interface manualTheinsert and send-return effects can both be used when the sampl
9 1 Audio interface manual The audio interface and control surface func-tions of the can be used by drawing power through a USB cable from the USB bus. We recommend always using the latest system software. Press the below Press ENTER. 2 Select YES. NOTE Disconnecting Select CONTINUE to use the same settings as last time.