Transcription
Table of contentsWelcome to EboSuiteInstalling EboSuiteBasic conceptsThe EboSuite application and the Output WindowVideo codecsEboSuite lendeCrossfadeeFeedbackeOutputeFXeFX-ISF33 basic opStutter!1
Record the video outputeDecollect (Collect All and Save)Important linksError and warning messages33 Basic doWaveKaputtWaveGlassLevels!2
Welcome to EboSuiteWith EboSuite you can treat video like audio in Ableton Live. EboSuite is a growing set of Max for Live plug-insthat enable you to sample, manipulate, mix and edit video on up to 64 tracks simultaneously. Opening anEboSuite plug-in automatically opens the EboSuite application. Since the EboSuite application runs outside ofAbleton Live, in a separate instance, Live’s performance is not affected while using EboSuite. Most video codecsare supported (a.o Hap, H264, ProRes, Photo-JPEG etc.). The Hap codec is recommended since that codec isoptimised for live video triggering, mixing and manipulation (EboSuite comes with an easy to use plug-in toconvert video to Hap within Ableton Live). Video files with alpha channel and of any resolution are supported.EboSuite is extremely easy to install; you can start sampling and mixing within a few clicks.About this manualEboSuite is under constant development and therefore the manual is updated on a regular basis. Download thelatest version on the support page on the EboSuite website. This manual describes EboSuite version 1.8 and is lastedited on 16 June 2021.If you have any more questions or comments please visit the forum. There you’ll find more information aboutEboSuite and we will reply as soon as possible when you post a question or comment there.Tutorial videos are available about the use of EboSuite and some specific features.If you have questions about the concepts and use of Ableton Live please refer to the Ableton Live manual.!3
Installing EboSuiteInstallation requirements- Mac OS 10.13 - Ableton Live 9.5 (64 bit only)- Max for Live 7.3 InstallingAfter ordering a full or trial license of EboSuite on the EboSuite website you will receive an email with a downloadlink for the EboSuite installer and a license code. The installer is packed in a .zip file together with the QuickstartGuide. After unpacking the .zip file the installer is located in a folder called ‘EboSuite Installer’. The installer isan .als file (an Ableton Live set) called ‘Open this Live set to install EboSuite.als’.EboSuite will be installed in the User Library of the Ableton Live application that you use to open this .als file. Forthis, the installer reads the preference file of the Ableton Live application, so make sure a valid and available UserLibrary is selected in the preferences.When you open the Live set you will notice that Ableton Live will be closed immediately by the installer. This isthe beginning of the installation process, hereafter the installer will take you through seven simple steps. You willbe asked to agree with the end-user licensing agreement (EULA) and during the installation proces the installerwill show you the file path of the User Library EboSuite will be installed in.The EboSuite installer will create a folder named EboSuite in the User Library. In this folder the installer willinstall the EboSuite plug-ins and the main EboSuite application. The EboSuite application is a hidden file, so youwill not be able to see it in this folder. Please do not move this folder or the files in this folder to another location.If you want to move EboSuite to another User Library, select this User Library in Ableton Live and run the!4
EboSuite installer again (open the .als file). If you want to install EboSuite in the User Library of another versionof Ableton Live, just open the ‘Open this Live set to install EboSuite.als’ file with that version of Ableton live.Registering EboSuiteAfter the installation is completed, copy the license code from the email to the clipboard (select the text andpress CMD-c) and open Ableton Live. You will find the EboSuite plug-ins in the User Library within Ableton Live.Drag the eClips plug-in on an audio track. This will launch the EboSuite application in the background and openthe video output window. When the EboSuite application is launched for the first time, it will look for the licensecode in the clipboard and it will register automatically. When registration is completed a pop window will appearto confirm this and the name of the license owner will be shown in the top bar of the video output window. Whenthe license code is not available in the clipboard, registration will fail and a pop up window will warn about this. Inthis case the EboSuite application will not launch and the video output window will not appear. To fix this delete allEboSuite plug-ins from your Live set, copy the license code from the email and return to Ableton Live and add aneClips plug-in again.!5
Registering EboSuite while in demo modeWhen EboSuite is running in demo mode it will not ask for a license key on start up anymore. To register while indemo mode, copy the license key from the email and select ‘Enter License Code’ from the EboSuite menu.Settings in Ableton LiveWe tried to make the installation and licensing proces as easy as possible. Once EboSuite is installed andregistered you can start video sampling, mixing and editing right away. Nevertheless there are a few settings inAbleton Live that can influence EboSuite’s performance. Therefore, please check the following settings inAbleton Live:- make sure the User Library selected in the Ableton Live preferences is available. The EboSuite installer willautomatically read the preference file of Ableton Live and install EboSuite in the User Library that is selectedthere. If this User Library is unavailable when you start using Live (e.g. when it is located on an external drivethat is disconnected) you will not be able to launch EboSuite and the plug-ins will show an error message.- select the appropriate audio buffer size (Preferences/Audio/Latency/Buffer Size). A smaller buffer size willimprove the audiovisual sync and performance of EboSuite, but will have a heavier load on the CPU. We adviceyou to try different settings and look for a setting that works best with your set-up. A buffer size of 128 or 256samples will work fine in most cases.- (Ableton Live 9 only:) make sure that the latest version of Max is installed and selected in Live’s preferences(Live/Preferences/File Folder).!6
Basic conceptsContentsCurrently EboSuite consists of 51 plug-ins and the main EboSuite application.- eClips - adds video playback to Session View- eArrangement - use videos on audio tracks in Arrangement View- eSampler - trigger, pitch and scratch video- eSimpler - turn Ableton Live’s Simpler into a video sampler- eISF - use ISF shaders to generate visuals- eVideoIn - use the video stream of a webcam, iPhone or iPad in EboSuite- eText2Syphon - send the name of a clip over Syphon to eSyphonIn or to other video applications- eTrackTransform - position, scale, rotate individual tracks- eBlend - use blending modes to mix video tracks- eCrossfade - use visual crossfade effects to mix videos- eFeedback - create a video feedback loop on the master track with different feedback modes-eOutput - control the output window from within LiveeFX-ISF - use ISF shaders to generate and/or manipulate visualseFX - 33 modular, stackable visual effect plug-ins for realtime image manipulation and processingeConvert - convert video to Hap codeceSyphonOut - send the video output of single tracks and/or the master track to other video applicationseSyphonIn - use the video stream of other video applications in EboSuiteePoly - create polyphonic and polyscopic compositionseComper - consolidate a MIDI clip to a video fileeLoopStutter - bring dynamic ‘beat repeat’-like effects to eClips.Video tracksCurrently up to 64 video tracks can be used simultaneously with EboSuite. 512 video files can be used in a singleLive Set. In Live 10 maximum 512 videos can be loaded on an audio track in Session View, 256 in Live 9. Thespecifications of your hardware (CPU, GPU) might limit the amount of tracks that you can use simultaneously.Mixing videosTo mix videos you first have to create at least two video tracks by adding at least two eClips, eVideoIn,eSyphonIn and/or eSampler plug-ins to your Live set. By default the opacity of the video tracks is linked to thevolume sliders in Live’s audio mixer. The order of the tracks determines which track is on top and therefore willbe visible when its volume/opacity is set to maximum. The right most track (Session View) or bottom mosttrack (Arrangement View) will be on top. Changing the position order of the tracks in Live’s Arrangement orSession View will also change the order in the video mix. Use the eBlend plug-in to blend video tracks. Assignthe tracks to AB crossfade sources and use the eCrossfade plug-in to add video mix effects.Using Warped clipsWhen you use Live 9 or 10 you need to save the Warp markers when you enable or change the Warp markers.Otherwise eClips, the eSampler and the eSimpler will not be able to use the Warp markers, which leads tounexpected results, like freezing video, out-of-sync video and black output. Click the ‘save’ button in the Samplesection of the audio clip playback properties. Each time you make changes to the Warp markers you need to savethem to see the effect of your changes. Note: When you use Live 11 you will not have to save warp markers.!7
The reason for this limitation is that Ableton does not give acces to the Warp markers in Live 9 and 10. We canonly use one set of Warp markers that is stored in the .asd file after pressing save. When you change the Warpmarkers and press save, the video playback is automatically updated (this takes more or less one second).A video clip can only have one set of Warp markers. So if you load multiple instances of a video clip in your Liveset, editing the Warp markers from one video clip (and thus saving them) will change the Warp markers for allinstances (since you need to save them to enable eClips to use them). Note: When you use Live 11 you will nothave to deal with these issues.Video codecs and image filesEboSuite is compatible with many video codecs, like Hap, H264, ProRes, MPEG-4, DV and Photo-JPEG. Werecommend you to try out different codecs, compression settings and image sizes to find out what works best inyour situation and with your hardware configuration.Important note: Choosing the right codec and compression settings is crucial for optimal performance andreliability of EboSuite. Only the Hap codec is optimised for live video applications, so we recommend you to useHap encoded videos. You’ll need an SSD drive to playback Hap properly. Read more about video codecs in theVideo codecs section of this manual.EboSuite’s eSampler and eSimpler handle image files as well, like .jpg, .png etc.Unfortunately the eClips plug-in doesn’t handle image files anymore, because Ableton Live doesn’t acceptimage files on audio tracks anymore (since Live 10.10 ).Error en warning messagesEboSuite will warn you when an unsupported or unexpected situation is detected by showing an error or warningmessage. You can open and close the error and warning message section of the plug-in interface with the smallarrow in the right-bottom of the interface. When there is an error or warning message the arrow wil turn yellow(warning) or red (error) and the error/warning section will unfold to show the message. When the unsupported orunexpected situation is resolved the error/warning message will disappear automatically. Refer to the ‘Error andwarning messages’ section of this manual to see a list of the error and warning messages.!8
Dials/SlidersGeneral information about dials and sliders:- The value is visible when you move the mouse pointer over the dial/slider or the label.- You can change the value with the mouse, but also by entering the value with keys and pressing enter(for some parameters which use a custom or changing value range this can react a bit unexpected).- You can have fine control with the mouse when you hold the shift button.- If a dial has an triangle at the top you can also click on the triangle to apply that ‘center’ value.Info ViewUse Ableton Live’s Info View to learn more about EboSuite’s interface elements and functions. Most interfaceelements will show an Info View description when the mouse pointer hoovers over the element. The Info Viewsection needs to be revealed to show this. To reveal it, click on the triangle in the lower left corner of Live’sinterface. You can find more information about Info View in the Ableton Live manual.!9
The EboSuite application and the Output WindowThe EboSuite application will automatically be launched when you add an eClips or eSampler plug-in to yourAbleton Live set. The application runs in the background in a separate instance., so all video processing is doneoutside Ableton Live to maximise performance and reliability. When the EboSuite application is launched thevideo output window will appear.When the application is active in the foreground (click inside the output window to bring the application to theforeground) the application’s menu bar will appear at the top of the desktop.The EboSuite application can only be controlled from the menu bar and from the EboSuite plug-ins in AbletonLive. The menu bar contains the following items:- EboSuite- About EboSuite - information about EboSuite- Licensed to - name and email address of licensee- Services - no services apply- Hide EboSuite- Hide Others- Show All- Quit EboSuite- File- Close - this will close the output window and quit the EboSuite application!10
- View- View Statusbar - this will add the statusbar to the output window showing the current window size andthe amount of free VRam- Always on top - this will force the output window to always stay on top of other windows, even whenanother application is active in the foreground.- Enter Full Screen - this will make the output window fill the whole screen- Window- Minimise - this will minimise the output window and move it to the dock- Output sizes - a selection of default output window sizes- Bring All to FrontThe output window can also be controlled using the eOutput plug-in. You can also set the output window to fullscreen mode by right-clicking (or ctrl-click) the EboSuite icon in the Dock in the Finder.!11
Video codecsEboSuite can handle many video codecs, like Hap, H264, ProRes, MPEG-4, DV and Photo-JPEG. Werecommend you to try out different codecs, compression settings and image sizes to find out what works best inyour situation and with your hardware configuration.Important note: Choosing the right codec and compression settings is crucial for optimal performance andreliability of EboSuite. Only the Hap codec is optimised for live video applications, so we recommend you to useHap encoded videos. You’ll need an SSD drive to playback Hap properly.Hap is a video codec that is optimised for live video mixing, triggering and manipulation. This codec offers you thebest performance and reliability in EboSuite. There are four variations of the Hap codec: Hap, Hap Q, Hap Alphaand Hap Q Alpha. Hap Alpha and Hap Q Alpha support an alpha channel (transparency), Hap and Hap Q do not.The file size of a Hap compressed video is typically large. Since video decompression is handled by the GPU, a fastGPU (graphics card) is needed for good performance. Since data streams are large, a fast harddisk (SSD driverecommended) as well.Use EboSuite’s eConvert plug-in to convert your video files to the Hap or Hap Alpha codec within Ableton Liveand load them directly in the eSampler or on an audio track in Session View. You can read more about theeConvert plug-in here. You can convert multiple videos at once with the AVF Batch Converter.Hap is not supported by Mac OS by default. You don’t have to install the Hap codec to work with EboSuite, butwe recommend that you install the HAP codec anyway to be able to playback Hap encoded videos in AbletonLive’s Arrangement View and with QuickTime player 7 (unfortunately not in the latest version of QuickTimeplayer). You can read more about the Hap codec here.Apple ProRes is used by many professional video editors and motion graphic designers, but is not optimised forlive video mixing, triggering and manipulation. There are five variations of the ProRes codec: ProRes 422, ProRes422 LT, ProRes 422 HQ, ProRes 422 Proxy and ProRes 4444. ProRes 4444 supports an alpha channel(transparency), the ProRes 422 variations do not. When you don’t need an alpha channel we advice you to useProRes 422 LT. The file size of a ProRes compressed video is typically medium to large. A fast CPU and harddisk(SSD drive recommended) are needed for good performance when playing/mixing multiple videos at the sametime.H264 is a very popular codec, but is not optimised for live video mixing, triggering and manipulation. H264 doesnot support an alpha channel (transparency). The file size of a H264 compressed video is typically small. Thecompression settings (quality/data rate/image size) have a big impact on the performance of H264 videos inEboSuite. We recommend you to try out different compression settings and image sizes to see what works best inyour situation and on your system. A fast CPU is needed for good performance when playing/mixing multiplevideos at the same time. Because the data streams are small H264 works pretty good on HDD drives, but a SSDdrive is recommended.MP4 is a container, not a codec. A MP4 file can contain different video codecs, but H264 is very common. UseOSX Finder’s ‘Get Info’ option (CMD-i) to determine a video file’s codec.!12
EboSuite plug-inseClipsUse the eClips plug-in to add video playback functionality to Ableton Live’s Session View. Drag video files intoSession View clip slots and play and treat them like audio clips (edit Warp markers, loop points, start/end pointetc.).Adding an eClips plug-in to your Live setTo add an eClips plug-in to your Live set just drag the plug-in from the EboSuite folder in the User Library withinAbleton Live to an audio track. An eClips plug-in can only be used on an audio track in Session View.Note: The eClips plug-in only works with clips on audio tracks in Session View. Use the eArrangement plug-into use movie clips on audio tracks in Arrangement View.Using eClips for the first timeWhen you use the eClips plug-in for the first time, Ableton Live will show an error message warning you thatSession View does not support video playback. But that is exactly what the eClips plug-in will add! To avoid thisinterruption in the future please select ‘Don’t show again’ and press ‘OK’. Now you won’t see this warning everagain and rightfully so, because thanks to EboSuite Session View supports video playback now.!13
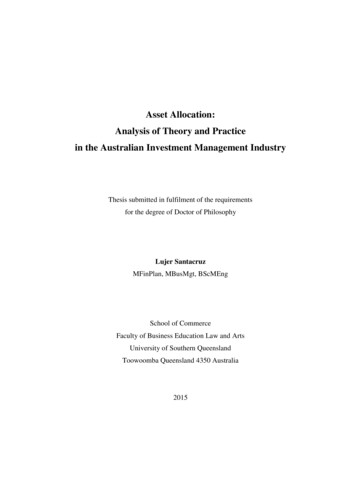
Loading a videoSimply drag a movie file into a Session View clip slot to play it in Session View. The audio track will be played byAbleton Live, the video track by the EboSuite application. Many video codecs are supported, but the Hap videocodec is preferred, since this video codec is optimised for live video playback (see the section about videocodecs).Warping, looping, editingUsing the eClips plug-in enables you to treat video files like audio clips and edit their Warp markers, loop points,start/end points etc.Note: When you use Live 9 or 10 you’ll need to press the ‘save’ button in the Sample section of the audio clipplayback properties each time you edit/change the Warp markers. See the ‘Using Warped clips’ section of thismanual for more information.Opacity ModeThe opacity of the video is automatically linked to the volume slider of Ableton Live’s audio mixer. A lower volumewill result in a more transparant video (fade out). You can control the video opacity manually by setting it toManual in the eClips interface.!14
eArrangementUse the eArrangement plug-in to use videos on audio tracks in Ableton Live’s Arrangement View and manipulatethem with visual effects and mix them with other video tracks.Important note: the eArrangement plug-in only works in Live 11!Adding the eArrangement plug-in to your Live setTo add an eArrangement plug-in to your Live set just drag the eArrangement plug-in from the EboSuite folder inthe User Library within Ableton Live to an audio track in Arrangement View.Note: The eArrangement plug-in only works with clips on audio tracks in Arrangement View. Use the eClipsplug-in to use movie clips on audio tracks in Session View.Loading a videoSimply drag a movie file on the audio track in Arrangement View. The audio will be played by Ableton Live, thevideo track by the EboSuite application. Many video codecs are supported, but the Hap video codec is preferred,since this video codec is optimised for live video playback (see the section about video codecs). When you load amovie file on an audio track in Arrangement View for the first time, Ableton Live’s Video Window will openautomatically. You can close this window, since video playback will no be handled by the EboSuite application andwill be visible in the EboSuite output window.Warping, looping, editingUsing the eArrangement plug-in enables you to treat video files like audio clips and edit their Warp markers, looppoints, start/end points etc.Opacity ModeThe opacity of the video is automatically linked to the volume slider of Ableton Live’s audio mixer. A lower volumewill result in a more transparant video (fade out). You can control the video opacity manually by setting it toManual in the eArrangement plug-in’s interface.!15
eSamplerThe eSampler is a fully functional video sampler. Drag audiovisual clips into the sampler and produce video beatsand melodies, trigger videos live, simulate video scratching or use it in ‘Video only’ mode to visualise your ownsounds.Adding the eSampler to your Live setTo add an eSampler to your Live set just drag the eSampler plug-in from the EboSuite folder in the User Librarywithin Ableton Live to a MIDI track. An eSampler can only be used on a MIDI track. You can use up to 127eSamplers on one track using a Drum Rack. The eSampler can be used in both Arrangement View and SessionView.Loading a sampleThe eSampler accepts many video codecs, like H264 and ProRes, but the Hap video codec is preferred, since theeSampler is typically used for advanced video triggering and the Hap video codec is optimised for that. You canconvert the loaded video sample (region of the clip) into the Hap codec within the eSampler using the File RegionEditor.Video/audio files of any duration can be loaded in the eSampler, but the audio track will be ignored of sampleslonger than two minutes (and an error message will be shown). Samples longer than one minute will trigger awarning message. We recommend to edit long files to short samples to save memory space. You can do that withan external video editor (like Quicktime Player 7 Pro) or by loading a video on an audio track in ArrangementView or in a clip slot in Session View and set the start and end marker before dragging it into the eSampler (readthe section below for more detailed information about this) or you can use the File Region Editor to shorten (orlengthen) the loaded sample.There are four ways to load a video/audio file into the eSampler:- drag a Hap encoded video file directly from the Finder into the eSampler. Make sure to drag the video in thedropzone of the eSampler’s interface. If you drop the video file outside of the eSampler (e.g. in a cell of aDrum Rack), Ableton Live will automatically replace the eSampler for a Simpler and load the audio track of thevideo file in the Simpler (in this case select ‘undo’ to go back). Make sure the video file is not too long.!16
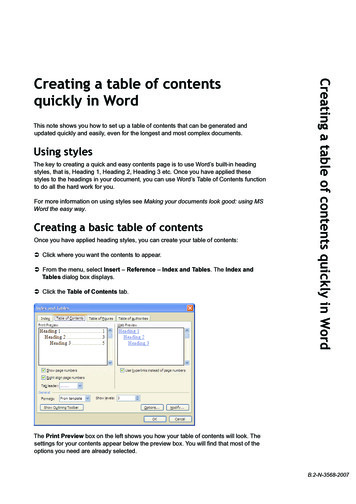
- convert a video file with EboSuite’s eConvert plug-in to the Hap of Hap Alpha codec and then drag it fromeConvert’s interface into the dropzone of the eSampler. Read more about the eConvert plug-in and exportingto the eSampler and eClips plug-ins here.- load a Hap or Hap Alpha encoded video file into an audio track in Arrangement View (Hap codec needs to beinstalled to view Hap encoded videos in Live’s standard video window). Edit the start and end point to selectwhich part you want to load in the eSampler. Simply drag the video clip into the eSampler’s dropzone. This is agreat way to cut a video file into shorter video samples to save memory.- load a Hap encoded video file in a clip slot of an audio track with an eClips plug-in loaded in Ableton Live’sSession View. Edit the start and end point to select which part you want to load in the eSampler. Simply dragthe video clip into the eSampler’s dropzone. This is a great way to cut a video file into shorter video samples tosave memory.Video files without an audio trackWhen you load a video without an audio track in the eSampler (or a video longer than 2 minutes, so the audio track will beignored) a warning will be shown in the interface. Plus, a grid will be shown in the audio waveform display to give feedbackabout the zoom level and postion of the start cursor.!17
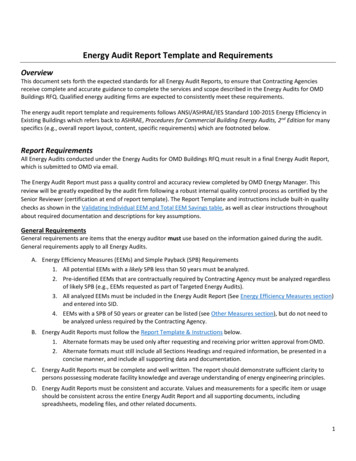
Go back to the original source video file of a cropped video clipYou can easily go back to the original video file that the cropped video sample is part of. Just drag the file namefrom the eSampler’s interface (in the audio waveform section) to a clip slot in Session View or on an audio trackin Arrangement View. This will load the original longer video file with the start and end markers set to thebeginning en end points of the sample. This way you can easily adjust the start and end point of the cropped videosample or cut another video sample out of the longer video file.Trigger video samplesAfter loading a video file in the eSampler you can trigger this video sample with MIDI notes from a MIDI clip onthe MIDI track that the eSampler is loaded on (or a track that is routed to this track (see the Ableton Live’smanual for more information about MIDI routings)) or with an MIDI keyboard, drumkit, Push or any other MIDIcontroller that sends out MIDI notes.When only one eSampler is loaded on a MIDI track, the eSampler will be mapped to the entire keyboard of yourMIDI controller. Use Ableton Live’s MIDI effects to change this mapping. Using a Drum Rack you can assignmultiple eSamplers to different keys and key ranges.Zoom in/outThere are two ways to zoom in and out on the audio waveform display:1. Use the and - icons in the audio waveform display.2. Command-click in the audio waveform display and move the mouse up/down. To move the zoom area movethe mouse to left and right.The zoom level will be shown next to the - and buttons in the display. When the mouse pointer is positioned onthe audio waveform display, the time (in ms) of the beginning and end of the zoomed area will be shown in theupper corners of the display. Click the - - button in between the -/ buttons to reset the zoom level back to 0.Editing Start pointThere are two ways to change the start position of a sample:1. drag the 'Start' dial (hold CMD for finetune)2. click in the waveformPitching and tuningTurn on tuning to be able to play a melody or to (fine)tune your sample’s pitch. When changing the sample’s pitchthe playback speed will not be affected. The eSampler is equipped with various playback options to manage pitchsound quality and CPU usage. The different modes are:!18
Pitch modes:- Tuning off- Basic- Monophonic- Rhythmic- General- Efficient- GranularQuality modes:- Basic- Good- Better- Basic Formant- Good Formant- Better FormantThe ‘Formant’ Quality modes will result in a more natural sound when pitching voices, but are more CPU intensive. The‘Efficient’ Pitch mode will is the least CPU intensive mode, but introduces a slight latency in the audio.Note: when Basic, Monophonic, Rhythmic, General or Efficient mode is selected Loop Start can’t be changed (andtherefore will be the same as Start).Granular modeWhen Granular mode is selected the audio of the movie file will be split into grains, opening up new ways to creativelymanipulate the video sample. Control playback speed in real time and control the grains of the audio file separately.The interface of the eSampler will unfold, revealing the grain controls, when Granular mode is selected. The graincontrols are:- Grain size - control the size of the grains in real time. This will have great effect on the sound of thesample. A small size will result in a harsher, glitchy sound.- Grain Overlap - this will make the sound smoother- Stereo Spread - grains will be spread out of the stereo spectrum, creating a rich, full sound.- Position Randomness - this will have great effect on the sound of the sample. Large numbers willresult in a noisy, but rich and full sound. Small numbers will result in a smooth sound in combinationwith a large grain size. In combination with a small grain size a small position randomness will result in avery noisy sound.- Maximum number of grains - more grains will make the sound smoother, but CPU usage heavier.- Number of grains used - more grains will make the sound smoother, but CPU usage heavier.Note: when Granular mode is selected Loop is disabled.!19
Watch the tutorial video about the Granular Playback Mode hereSpeedUse the Speed dial to control the video sample’s playback speed in real time. When tuning is disabled, changing thespeed will also affect the pitch, similar to pitch bending. When tuning is enabled, changing the speed will not affect thepitch, similar to time stretching. When tuning is enabled the minimum playback speed is 0.1x the orig
an .als file (an Ableton Live set) called 'Open this Live set to install EboSuite.als'. EboSuite will be installed in the User Library of the Ableton Live application that you use to open this .als file. For this, the installer reads the preference file of the Ableton Live application, so make sure a valid and available User