Transcription
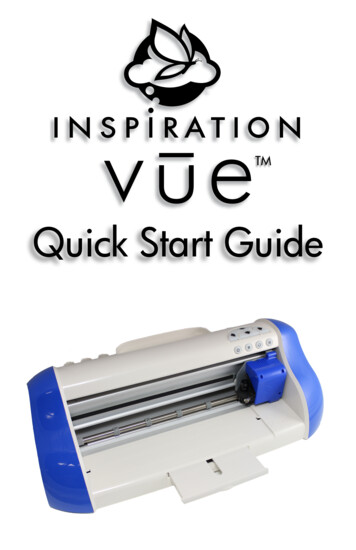
TMQuick Start Guide
Contacting Pazzles By PhoneIn the US:866-729-9537International: 1-208-922-3558Phone Hours: Mon - Fri, 9am - 5pm Mountain TimeBy EmailCustomer Service:customerservice@pazzles.comTechnical Support:support@pazzles.comSales: sales@pazzles.comAll Other Inquiries:pazzles@pazzles.comOn the WebVisit us on the web for online chat support, forums FAQs, videos m.comInspiration Vūe Quick Start Guide Version 1.0.0This Quick Start Guide is Copyright 2014 by Pazzles , Inc. All RightsReserved.2
ContentsWhat’s in the Box 4Setting up the Inspiration Vūe 5 Selecting a Location 5Clearance 5Lighting 5Proximity 5Setting up the Software 6InVūe 6Windows 7 6Mac OSX 10.9 7Connecting the Inspiration Vūe 8Getting to know the Inspiration Vūe 10Parts of the Inspiration Vūe 10Inspiration Vūe Carriage 11Instructions for Inserting and Removing the Blade Holder 11Inspiration Vūe Blade Holder 12Adjusting Blade Depth 12Inspiration Vūe Print & Cut Mat 13Mat Preparation 14 Caring for the Inspiration Vūe 15 Cutting for the First Time 16Use InVūe to Create 16Preparing to Cut 21 Cutting 22Print & Cut 23Calibrating the Inspiration Vūe 23 Printing the Calibration Sheet 23Calibrating the Inspiration Vūe 24Your First Print & Cut Project 26Tips for Designing Print & Cut Images 333
What’s in the Box152341. Inspiration Vūe2. Power Adapter3. USB Cable4. Blade Holder675. Print & Cut Mat6. Warranty, TechnicalSupport & End UserLicense Booklet7. InVūe SoftwareQuick Start Guide (NotPictured)4TMTechnical Support,End User License,& WarrantyInformation
Setting up the Inspiration Vūe Selecting a LocationClearanceEnsure that there will be at least 9” (23cm) behind and 12” (31cm) infront of the Inspiration Vūe clear of any obstructions.9”12”LightingDirect sunlight can cause fadingand interfere with the operation ofthe sensor on the Inspiration Vūe .Select a location where naturallighting will not shine in on the frontof the Inspiration Vūe ProximityYour Inspiration Vūe connects to your computer via a USB cable.Ensure that your cable will easily reach an available USB port on yourcomputer.5
Setting up the SoftwareInVūe Windows 7 1.Insert the InVūe CD into your computer.2.If an Autoplay windowpops up select “RunInVue Installer.exe”.3.From the InVūe SoftwareInstallation Window, clickon the InVūe icon.4.Follow the onscreen installationprocess tocomplete theinstallation ofInVūe .5.When you havecompleted theInVūe installation,return to the CDmenu and selectInstall Images.6.Follow the on screen instructions to complete the installation ofthe included images and projects.7.Installation Complete!You can now connect the USB cable from your Inspiration Vūe toyour computer and turn it on. The drivers will install automatically.6
Mac OSX 10.9 1.Insert the InVūe CD into your computer.A Finder window similarto the one pictured hereshould pop up.2.Double-click on InVue Installer.3.From the InVūe Software Installation Window, clickon the InVūe icon.A dialog box will notifyyou when the installationis complete.4.Select the InstallImages icon toinstall the includedprojects andimages.5.Installation Complete!You can now connect the USB cable from your Inspiration Vūe toyour computer.7
Connecting the Inspiration Vūe Connect the Power Adapter to the Inspiration Vūe .Plug the power adapter intoan available power source.Tip: Pazzles strongly recommends using a surge protected powersource to prevent accidental damage to the Inspiration Vūe 8
Connect the USB cable to the Inspiration Vūe .Important! Do not connect your Inspiration Vūe to yourcomputer until you have completed the software installation!9
Getting to know the Inspiration Vūe Parts of the Inspiration Vūe 101.Tool holders: Use to store additional tools (ex. Pen Tool).2.Accessory tray.3.Position adjustment buttons: Use the up and down arrows toadjust the position of your mat. Use the left and right arrows toadjust the position of your blade carriage.4.Power button: Use to turn on and off the Inspiration Vūe .5.Pause button: Use to pause the Inspiration Vūe while it is cuttinga project.6.Repeat button: Use to repeat the last project cut on theInspiration Vūe .7.Load/Unload button: Use to load and unload your cutting matfrom the Inspiration Vūe .
8.Roller Bar: This bar moves your mat through the Inspiration asit is cutting.9.Mat loading area: This is the proper area to load your mat intobefore pressing the Load button (see #7).10.Slide out tray: This helps support your mat as it travels in and outof the machine.11.Blade holder: This is what the Inspiration Vūe blade is held in.12.Thumbscrew: Loosen to remove the blade holder and tighten tosecure the blade holder back in place.13.Blade carriage: This carriage moves left and right to move theblade holder while the Inspiration Vūe is cutting.Inspiration Vūe CarriageBlade HolderCarriageCradleThumb ScrewInstructions for Inserting and Removing the Blade Holder1.Before inserting the Blade Holder, make sure that the black arrow on the blade holder points to the number 1.2.Check to make sure that the blade is inserted into the bladeholder with the sharp end of the blade slightly exposed out of11
the bottom of the blade holder.3.Loosen the Thumbscrew on the Cradle enough for the thumbscrew to swing to the right. Be careful not to loosen the Thumbscrew too much or it will fall out!4.The Cradle should easily swing open to the left.5.Insert the Blade Holder so that the middle section of the BladeHolder is resting in the Cradle.6.Close the Cradle, swing the Thumbscrew to the left and tighten it.7.Check to make sure the Blade Holder is resting securely in theCradle. The Blade Holder should not be able to move withinthe Cradle.8.To remove the Blade Holder again, simply repeat steps 3 and 4.Inspiration Vūe Blade HolderAdjusting Blade DepthThe Inspiration Vūe is designed to cut a variety of different materials. This is acheived by adjusting the blade depth and the force applied when cutting. The force appliedPush Button(pressure) is set in your software. Thedepth that the blade will cut to is adjusted by twisting the top of the bladeholder. As you twist the top of theTwist Topblade holder, an arrow on the sideof your blade holder will point to theBlade Lengthlength you have set your blade. TheIndicatorlarger the number, the more of theblade that is exposed, and the thicker the material you can cut through.Tip: If you are working with a new material, start with a lowblade length. If it doesn’t cut through, increase the pressure in thesoftware and the blade length and perform the cut again. Multipass cutting is often the best way to cut thick or dense materials12
Changing BladesThe blade is the part that does all the cutting and will need toperiodically be replaced. To replace the blade:1.Remove the blade holder from your Inspiration Vūe .2.Grasp the blade holder with thumb and middle finger whiledepressing the push button on the top of the blade holder withyour index finger.3.With your other hand grasp the blade that is now protrudingfrom the base of the blade holder.4.Insert the new blade into the hole from which you removed theold blade. A magnet inside the blade holder will pull it in andhold it in place.Inspiration Vūe Print & Cut MatThe Inspiration Vūe Print & Cut Mat is a critical component in workingwith the Inspiration Vūe . The mat is designed to hold a wide varietyof materials for cutting. The mat is also specifically designed to workAdhesive Cutting AreaPaperCornerIndicatorMatRegistrationMark13
with the print & cut process of the Inspiration Vūe . Each mat hasa cutting area covered with a temporary adhesive. When placingmaterials on the mat to be cut, the upper right hand corner of thematerial should completely cover the paper corner indicator in theupper right hand corner of the mat.Mat PreparationNew Mats are sticky! This allows for the widest variety of materialsto be used on the machine and, when properly prepared, the longestlife. In order to ensure the best possible experience when using themat, Pazzles strongly recommends preparing your mat prior to firstuse. Mat preparation is recommended in order to maximize the lifeof your mat. To prepare the mat:1.Remove the clear plastic protective sheet and set it aside. Notewhich side was in contact with the the mat adhesive.2.Choose a piece of cardstock that you no longer want.3.Place it on the mat just as if you were going to cut something.4.Pat the cardstock down into place, then peel it off the mat.5.Repeat this process 6-10 times until the cardstock lifts easilyfrom the mat.6.Discard the cardstock once you have used it to prepare yourmat.Tip: Replace the clear protective covering back on the matwhen the mat is not in use to protect the mat from dust.14
Caring for the Inspiration Vūe 1.Keep the Inspiration clean and free of dust.2.Periodically clean the Inspiration Vūe ’s roller bar and thegrips attached to the roller bar with a damp cloth.3.Store in a dry, clean, temperate environment.4.Do not operate or store the Inspiration Vūe outside.5.Do not expose the Inspiration Vūe to water.6.Do not expose the Inspiration Vūe to surges in electricalpower – you can protect the Inspiration Vūe from these surgesby connecting the Inspiration Vūe to power through a surgeprotector.7.Do not disassemble the Inspiration Vūe .8.If you are having trouble with the Inspiration Vūe , pleasecontact technical support. Do not attempt to fix the InspirationVūe yourself. Doing so will void your warranty.15
Cutting for the First TimeUse InVūe to CreateInVūe Open the InVūe software. If this is the first time you have startedInVūe , you will be prompted to enter a registration number. Thisnumber can be found in the CD case for your software.After entering your registration number, you will see the Create NewPage dialog. Select your page size. For this tutorial we will be workingwith a 12x12 mat and one of the exclusive InVue software images.Select “12x12 in”16
Click on the image gallery icon in the top left corner. This icon lookslike a set of pictures.The Image Gallery window will pop up. Double click on Local, PazzlesMedia, and then InVue Exclusive Images. Select a category andchoose a simple image you would like to cut.17
To place the selected image into your document click on the importicon beside your selected image. After clicking the import button youmay notice your selected image appearing on your document. Closeout of the Image Gallery by selecting the close button.At this time you can move, rotate, or resize your selected shape asdesired. To do this, click on the image you inserted into the document.Notice that a bounding box will appear around the image.You can use your mouse to resize the image by clicking and draggingon the arrows. The bottom left hand arrow is special as this allowsrotating of the image.18
To move an image, click on the image and drag it to the desiredlocation. You can also use the arrow keys to move an image once it isselected.Move your image to the upper right hand corner of the document.Select the Cut Control Panel Button from the top menu. The Cut ControlPanel Button looks like a mini Inspiration Vue.19
The Cut Control Panel will open and you will see your image as a wireframe (without the fill color).On the right side of the screen is a list of cutting options. Beginning atthe top, make your selections. For your first cut leave your selections inthe default mode:Action: CutMaterial: Cardstock (Smooth)Pressure: 18Speed: 420
Note the recommended blade length. If you do not remember how toset the blade length, see “Inspiration Vūe Blade Holder” on page12.In the filters section, select which color you are cutting first. For theimage we have selected we are going to cut the outside wrapper. Clickon the light teal box and only the items with that color pen lines willappear on your screen.Preparing to CutImportant! If you have not read through the “Mat Preparation”section on page ”Mat Preparation” on page 14, please take amoment to do so.Before we send the cut job to the Inspiration Vūe , we need to get it setup. Start by selecting a piece of cardstock. Place the selected cardstock on the mat so that the top right corner of your paper is alignedwith the top right hand corner of the grid on the mat.If your Inspiration Vūe is off, turn it on by pressing the power button.21
Slide your mat under the tabs on either side of the mat loading areaand gently push the mat up against the rollers.Push the load/unload button and the Inspiration Vūe will automatically feed your mat into the proper position. You are now ready to cut!CuttingWith the mat loaded and an image prepared you are now ready to cutyour first image. Now is a good time to double check the blade lengthsetting on your blade holder.Once everything is in order, select “Send”. Your Inspiration Vūe willbegin cutting.When your image has finished cutting, press the load/unload buttonand your mat will unload from the machine. Peel your cut image offthe cutting mat. Congratulations. You’ve made your first cut.22
Print & CutPrint & Cut is an advanced technique that allows you to print a designand then cut around it. Print & Cut is recommended for those whohave mastered the basics and are ready to explore the more advancedcapabilities of the Inspiration Vūe .Calibrating the Inspiration Vūe Before using the print & cut feature for the first time, you will needto calibrate the Inspiration Vūe to work with your printer. Calibrating the Inspiration Vūe will improve the accuracy of your print & cutprojects and is recommended any time you have significant changes inenvironment, printer, or material to be cut.Printing the Calibration SheetIn InVūe , select Tools from the top menu bar and then Calibrate Cutter. A pop up window will appear. Select “Print Calibration Page”.Important! The calibration sheet must be at least 8.25”x11”.When printed, the black dashed lines on the top and right handside of the page should be approximately 1/2” away from theedge of the paper.23
Calibrating the Inspiration Vūe Place the calibration paper that you printed on your print & cut mat sothat the upper right hand corner of the sheet is in the upper right handcorner of the black side of the mat.Set the blade length on the blade holder. Typically a blade length of 1is sufficient for calibration.Press the “Calibrate” button.24
The load/unload button should be flashing. Insert your mat with thecalibration sheet on it into the mat loading area, being careful to slidethe mat under the mat securing tabs.While gently holding the mat against the rollers, press the load/unloadbutton.The calibration process will start. After performing a series of measurements, the Inspiration Vūe will attempt to cut a line directly on topof the vertical line in the upper right hand corner.Examine the cut line. If it does not line up with the printed line, press thearrow button on the Inspiration Vūe which cooresponds with the direction that the cut line needs to move in order to be centered in the printedline. Repeat this step until the cut line is centered in the printed line.When the cut line is centered in the printed line, press thebutton.repeatThis process will be repeated for the vertical lines on the left hand sideof the page and the horizontal lines at the top and bottom of the page.When calibration is complete, the mat will be ejected. Turn off theInspiration Vūe .Repeat the process as necessary in order to ensure the best print & cutresults.Tip: Printing the calibration sheet on the same material you will becutting will enhance accuracy.25
Your First Print & Cut ProjectCreate a new document. When selecting the document size, select thesize that corresponds to the paper size that you will be printing on. Inthis example we will be using a letter sized sheet of paper and so willselect 8.5”x 11”Once you have a new document open in the software, select an imagefrom the image gallery and insert it into your document. For instructions on this, please see “Cutting for the First Time” on page 16.26
To view the printer margins, click on the View menu and select “DisplayPrinter Margins”. This will show you which parts of your document willprint on your home printer.Click on your image to select it once again and drag it on the screenso it fits within the printer margins which begin at the top right point ofyour mat.With your imagestill selected, clickon the drop downunder Line Typeand select “PrintOnly”.27
Now we are going to setup an outline around our image so that wecan cut around it.Start by selecting the outline tool.Select the image and then check the “Contour” checkbox.You should see an outline around your image. To approve this outline,click on the green checkmark below the image.With your select tool, selectthe outline that you just cre-28
ated.Click on the dropdown menu underLine Type and select“Cut”.In the Line Type area,uncheck the printable check box. Thiswill ensure that wedo not print the cutline we just created.Deselect your newly created cut line. From the topmenu bar, select the registration mark button. This willplace a registration mark on your document.The registration markcan be selected andmoved. Move theregistration markso that it does notoverlap your image.Important! Don’tmove anything onyour document afteryou have printed it!29
Tip: Place the registration mark close to the image you are cuttingto improve accuracy. If you are having difficulties getting anaccurate cut, try moving the registration mark to a different location.From the “File” menu select “Print Preview”. If everything looks right,select the printer icon to print the document.InVūe will by default print multiple pages in order to print anythingthat may be in the margins. In order to avoid printing several blankpages, change the pages to 1.30
Place the printed page on your print & cut mat so that the upper righthand corner of the page covers the small gray triangle in the upperright hand corner of the black side of the mat.Tip: Don’t worry about getting the paper on the mat exactlystraight and right at the edge of the grid. Just make sure that thegray corner is covered and that the edges of the paper are firmlyadhered to the mat. The Inspiration Vūe will compensate for theangle and offset of the paper.Open the cut control panel by clicking on the Inspiration icon.31
In the cut control panel, verify that only the cut line for your image aredisplayed.Select the appropriate settings for the material you are cutting.Check the “Print/Cut” checkbox.Click “Send” to start the cut!After the Inspiration Vūe has completed cutting outyour image, eject the matand remove the cut outimage.Congratulations on your first print & cut!32
Tips for Designing Print & Cut ImagesNo Print Zones½”The Inspiration Vūe print & cut system worksby sensing the edge and angle of the paperon the mat. To do this there are two areaon the paper that need to be free of print.These areas are approximately ½” squares atthe top and bottom right hand corner of theprinted paper.½”½”½”Registration Mark PlacementThe registration mark helps the Inspiration Vūe understand where theprint is on the paper. You can place the registration mark anywhereon the page in order to help the Inspiration Vūe determine how to cut.No Registration Mark Print & CutThe Inspiration Vūe is capable of performing print & cut operationswithout the registration mark. While this this can reduce the accuracyof the print & cut process it may be useful when there isn’t room on thepage for the registration mark, or for projects where accuracy is lesscritical.BleedBleed is the concept of providing aoverprinted area so that the printreaches the edge of the cut area.Below are brief descriptions of acouple common bleed methods.Stroke BleedStroke BleedPathLine (Stroke) WidthThe stroke bleed method is performed by changing the line width.Using this method you can use the same path to print, and cut as theprinted path will be wider than the cut path. The recommended linewidth when using this method is typically 5-10 pts.Inline BleedInstead of using contour or outline tool as in the print & cut tutorial,select the inline tool for the shape you wish to cut. Be sure to set theinline size to a sufficent inner path to account for any cut inaccuracies.33
InVue_Installer.exe”. 4. Follow the on screen installation process to complete the installation of InVūe . 5. When you have completed the InVūe installation, return to the CD menu and select Install Images. 6. Follow the on screen instructions to complete the installation of th
