Transcription
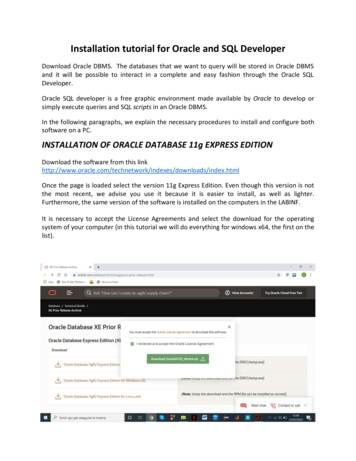
Oracle Installation GuideVersion 35For Oracle12cApril 2016Copyright 2005 – 2015 Robert Schudy and Warren MansurPermission granted for any use of Boston UniversityWith contributions from Adam Arakelian, Dhananjay Kulkarni, Jack Polnar, Beth Haines, and Pamela Farr
Table of ContentsIntroduction .3Oracle Overview.3Downloading and Installing Oracle.6Step 1: Creating an OTN Account .6Step 2: Downloading Oracle 12c Release 1 .10Step 3: Unzipping Oracle .11Step 4: Installing Oracle 12c .14Step 5: Verifying a Successful Install .28Installing the Oracle SQL Developer Client .30Step 1: Downloading Oracle SQL Developer .30Step 2: Launching Oracle SQL Developer.32Step 3: Connecting to Your Database .33Creating a Database User to Complete Your Assignments .38Step 1: Creating Your Own User .38Step 2: Connecting with Your New User .41Appendix A: Troubleshooting Common Installation and Usage Issues .43Appendix B: Configuring Oracle Startup Options .46Appendix C: Installing and Enabling the Microsoft Loopback Adapter.48Appendix D: How to reset your SYSTEM password on Windows .54Appendix E: How to reduce the length of your PATH on Windows .55Appendix F: Additional Steps to Install Oracle on a Mac .58Using a Virtual Machine .58Dual Booting .59Using Virtual Machine Versus Dual Booting .59Appendix G: Correcting Oracle Listener Issues.61Cause 1: Oracle Services not started .62Cause 2: Incorrect Listener Configuration .62Appendix H: Caring for Your Oracle Installation .66Process 1 – Getting Started .66Process 2 – Verifying .69Process 3 – Stopping Your Database .70Process 4 – Stopping Your Database .72Process 5 – Putting it into a Batch File .72
IntroductionThese Oracle installation instructions are used by students enrolled in the Master ofScience in Computer Information Systems and other Computer Science Departmentprograms in both on‐campus and online programs. The document begins with adiscussion of Oracle, connecting to the Oracle web site, creating an Oracle TechnologyNetwork (OTN) account, then downloading and installing Oracle, then setting up aclient to connect to your database. The examples in the main document are for theMicrosoft Windows family, including Windows Windows 7, Windows 8, and Windows10. If you would like to install Oracle on a Mac (OS X), please first follow theinstructions in Appendix F, then continue with the rest of this installation guide. If youare installing on an operating system other than the Windows family or OS X, such asLinux or Solaris, then follow the instructions in this installation guide to join OTN, anddownload the version of Oracle for your platform rather than the Windows version.The Quick Installation Guide and the full Installation Guide for your operating systemcan be found in the Install directory created when you unzip the file you willdownload as part of these instructions.These setup instructions are for Oracle 12c. Oracle has maintained upwardcompatibility for SQL between Oracle versions for many years, so if you cannot installOracle 12c on your own machine, and you have ready access to installation for anolder version of Oracle, you may be able to use it. The Oracle Express InstallationGuide includes instructions for setting up Oracle Express Edition, a smaller edition ofthe full product. Although it has limitations with regard to the amount of memory,size, and number of tables allowed, it is quite usable for most of our classes, and itintroduces a much lighter load on your computer. If you run into difficulties installingOracle 12c and your class supports Oracle 11g Express, you should be able tosuccessfully install 11g Express. Oracle is continually updating Oracle.com, so thescreens that you see on Oracle.com will probably be a little different than what isshown in this document. If you can’t determine how to proceed because what you seeis too different, or if something goes wrong ask your facilitator or instructor for help.Good luck, and have fun!Oracle OverviewAbout OracleOracle has most of the advanced features in any relational or object‐relational databasemanagement system. Because of this, many of the new ANSI/ISO SQL standards arebased on Oracle, so when you learn Oracle you are mainly close to the portablestandards. Oracle runs on all common platforms from huge symmetric multiprocessorsto ordinary PCs. Oracle is scalable, and supports both clustering and grid computing tosurpass the performance and reliability of any single platform. Oracle is broadlyconsidered as the standard by which other database management systems aremeasured, and when you learn to use Oracle your skills will transition well to otherdatabase management systems.Page 3 of 75
Oracle runs on ordinary machines. Oracle runs on the largest multiprocessors, butOracle also runs very well on ordinary PCs and recent Macintoshes. PCs are a commonOracle hardware platform, and there are Oracle versions for many PC operatingsystems, including the Windows family and Linux.The following instructions are for the default configuration, the easiest of the Oracleinstallations. Oracle is very flexible and can be configured to use less or more in the wayof machine resources.HardwareRequirementsThe following information is based on best practices and the hardware requirementsspecified by Oracle's installation documentation. If you are installing any release andedition of Oracle 12cR1, you must have 64‐bit hardware with at least 2GB RAM and atleast 10GB free of disk space.If you are not sure if you have a 32‐bit or 64‐bit operating system, click on“Start Accessories System Tools System Information”. Under the entry for “SystemType”, it will indicate what type of hardware you have. It will look something like this:If you do not have 64‐bit hardware, the entry for “System type” might be something like“X86‐based PC”. If so, you will want to install Oracle Express or a prior edition of Oracle,because Oracle 12c only works on 64‐bit hardware. If these hardware requirements are aproblem for you please contact your instructor for assistance.Page 4 of 75
OracleEditionsOracle 12c can be installed in one of four editions ‐‐ Enterprise, Standard Edition,Standard Edition One, and Express Edition. All editions come with the core relationalDBMS along with full SQL support. The main difference in functionality between theeditions is how many advanced features are supported, including features pertaining tohigh availability, scalability, performance, manageability, data warehousing, andbusiness intelligence. Unless you need the advanced features provided by the Enterpriseor Standard Editions, it is recommended that you install Standard Edition One.CommonPlatformsOracle runs on all common platforms, including the Windows family, the latestMacintosh operating systems, several Linux variants, and several Unix variants. Oraclesupports the features that we use in our courses on all platforms, and it doesn’t matterwhat platform your Oracle runs on. You will connect to Oracle using a SQL client, forexample Oracle SQL Developer, TOAD, or SQL*Plus. Oracle can be on the same machineas the client or on another machine on the same LAN or anywhere on the Internet.PlatformIndependenceOracle behaves mostly the same regardless of the platform except for database sizelimitations and performance. Your exercises will behave the same way across all Oracleplatforms.Preparationsand SetupYou can obtain a copy of Oracle by downloading Oracle database software directly fromOracle. Most people with broadband should be able to complete the download and installthe program with minimal difficulty.Setting up Oracle is not like setting up an ordinary application. Oracle and other DBMSare more deeply integrated with the operating system than ordinary applications. Oracleinstalls do many more things than application installs. The installer will check for themany problems that can occur on your system. Oracle installations on unmodifiedenvironments usually occur without significant issues, but many things can go wrong,particularly with modified operating system environments. Expect the unexpected, anddon’t feel embarrassed if something unexpected happens. Unexpected events arecommon for database installations. Just contact your instructor of facilitator, who willhelp you.Page 5 of 75
Downloading and Installing OracleStep 1: Creating an OTN AccountIntroductionLog On toOTNThis section guides you through the sub‐steps to create your own OracleTechnology Network (OTN) account. Before you can download Oracle youmust create and login to an Oracle Technology Network account.Go to http://www.oracle.com to log onto the Oracle Technology Network. Oracle isregularly updates their web site, so what you see may be different than the following.Click on the “Oracle Technology Network” tab at the top or just enterhttp://www.oracle.com/technology into your browser and you will see something like this:Page 6 of 75
Click on “Sign In/Register for Account” in the top bar. You should see something like this:Page 7 of 75
If you already have an Oracle account, enter your new username andpassword, and then click the "Go" button to continue.Sign Up Foryour OracleOTN AccountIf you don't already have an Oracle account, click on “Create your Oracleaccount now” at the bottom of the right box. You should see somethinglike the following:Page 8 of 75
Type in your email address and a password for your new OTN account. Click Confirm. Note that Oracle uses the portion of your email address to the left of the"@" sign as your OTN user name. If the site complains that the user name is alreadytaken, you will need to use another email address, or create a new one. It is easy tocreate a new email account at sites like yahoo.com. I used such a Yahoo email addressbelow.Page 9 of 75
You will then be presented with a long form asking for your name, address, etc. Completethe form and click "continue." You will find yourself logged into the OTN. Click on the“Downloads” tab to get to the Oracle database downloads.If you look in the upper right hand corner you should see your first name and “Sign Out”,which indicates that you are logged onto OTN.Click on the “Download Database 12c” link to download 12c Release 1, or click on one ofthe links next to “Database” to get to the downloads page.Step 2: Downloading Oracle 12c Release 1IntroductionSave theZippedInstallationFileThe following instructions guide you through the sub‐steps to downloadthe Oracle zip file appropriate for your operating system.Create a directory for the installation files, such as C:\Oracle12cR1, and download the twozip files into that directory. You will see something similar to the following:Page 10 of 75
While you are waiting for the download to finish is a good time to turn off On‐AccessScanning in MacAfee Antivirus and other antivirus (AV) programs that scan data that isaccessed by the file system. On‐access scanning will greatly slow some of the later stagesof the installation. Your AV software may behave differently, but you should just be awarethat some AV programs inject themselves in the middle of the large Oracle install filesystem data transfers. You may therefore want to adjust your AV configuration to shortenthe install time. The install can succeed with on‐access scanning enabled, but it will take alot longer. Your perimeter AV defenses will not interfere with the install, and they shouldbe left on.Sometimes it happens that downloads time out or otherwise fail. This usually has to dowith the internet connection that you are using. If this happens repeatedly to the pointwhere you are unable to obtain the zipped file in a timely manner, contact your facilitator.Step 3: Unzipping OracleIntroductionThe following instructions guide you through the sub‐steps to unzip thezipped files that you just downloaded.Unzip OracleInstallationFileIf a zip program is present or your operating supports unzipping just double click on thefirst file you downloaded. The zip program should launch. In WinZip, the resulting screenlooks similar to this:Page 11 of 75
We are next going to extract all files into the same directory where we downloaded the zipfile. Click Extract in the toolbar at the top.You will see a window like the following. Navigate to the folder to which you downloadedthe zip, as in this example:Page 12 of 75
Then check that the radio button for All files/folders in archive is selected and that the Usefolder names box is checked, as above. Then click Extract. You will see something like this:While this is extracting is a good time to take a look at the download directory that youcreated, such as C:\Oracle12cR1. The Oracle12c directory should look something like thisin detailed view.Notice that all of the Oracle files are being unzipped under the database folder. Theunzipped files will not be much bigger than the compressed zip files, because all of thelarger files that are being unzipped are compressed jar files, which cannot be compressmuch further.After a few minutes the unzipping will finish, and you need to repeat these steps for thesecond file you downloaded. After unzipping both files, you have now completed the stepsof downloading and unzipping Oracle. If you are short of disk space you can now deletePage 13 of 75
the zip files.Important: For your Oracle installation to succeed, the contents of the extraction of bothzip files must end up in the same directory. Oracle has provided you with two files for abetter download experience; however, the installer expects there to be a singledirectory structure containing all of the contents from both zip files. There are twoprimary ways to accomplish this. The first is to unzip each zip file into the samedirectory. The second is to unzip each zip file into different directories, but thenmanually copy the contents of the second directory into the first.Step 4: Installing Oracle 12cIntroductionThis section contains step‐by‐step instructions for installing Oracle 12c from the unzippedfiles on your hard disk.Before beginning the install you should download the latest Windows updates and closeother applications on the machine. Closing other applications frees up resources for theinstall. If you have not done so already you should temporarily disable any on‐accessscanning in your antivirus software.Install OracleNext launch the Oracle Installer by navigating to the database directory, then double‐clicking on the file setup.exe.If the setup.exe program launches, but the Oracle installer doesn’t start after a couple ofminutes, there may be a problem with your Java installation. When using Windows 7 orWindows 8, right click on setup.exe as choose the option “Run as Administrator”.It may take several minutes for the Oracle Universal Installer to launch, during whichPage 14 of 75
time you will see a DOS‐style text window reporting the checks before the launch. Whenthe Oracle Universal Installer launches, you will see a screen like the following.Click theClick thebutton, and you will see the following warning:button.The "Step 2 of 11" screen appears.Page 15 of 75
Ensure that the following radio button is selected:Then click thebutton. The following screen appears.Page 16 of 75
Ensure that the following radio button is selected:Then click thebutton. The following screen appears.Page 17 of 75
Ensure that the following radio button is selected:Then click theappears.button. The next screen titled "Installing database ‐ Step 5 of 10",Page 18 of 75
You have three options for this screen:1. “Use Existing Windows User” will let you use the account you’re logged in withprovided the account does not have Administrator privileges.2. “Create New Windows User” will create a new local Windows user for theaccount which will not have Administrator privileges.3. “Use Windows Built‐in Account” will use the built‐in account on Windows.In a production environment, it is better to use a standard Windows account rather thanthe Windows Built‐in Account for additional security. For our purposes, the WindowsBuilt‐in Account will be fine.Page 19 of 75
Selecting the Built‐in Account may bring up this messageSelect “Yes” to continue.You should now see this screen:NOTE: There are important parameters that must be checked on this screen so thatthe installation of the software and the creation of your database will completesuccessfully. GO SLOWLY !Page 20 of 75
There are many options to specify here, so we will go over each in turn. The default“Oracle base” pathname is drive:\app\UserName. When you change this, "Softwarelocation" and "Database file location" will be updated automatically to use this base.When the Oracle base has been changed, you should see the following:Unless you are in need of the advanced features of Enterprise Edition or StandardEdition, choose Standard Edition One for your database edition. Note that at BostonUniversity, Enterprise Edition is only required for CS674 Database Security.Do not modify the character set, and choose "ORCL" for your global database name.Type in a simple Global Database Name. Do not use the domain.name Global DatabaseName format (e.g. myDomain.mySID) unless you have a domain controller and static IPfor Oracle, as you would likely have in a production Oracle installation. Use a simple“un‐dotted” name such as ORCL instead. If you have more than one Oracle instancerunning on your machine, make sure that the Global Database Name (SID) is differentfor each instance.Type in and confirm an administrative password that you will remember. You will needthis password later to create your user login, so you should write the password down.Keep the password simple. Security is not an issue for your student database, butforgetting your password can be a real problem if you can’t login to your databaselater. Oracle requires that a password should have more than 8 characters, andcombine both letters and numbers. If you later can’t remember your password seeAppendix D for how to reset your SYSTEM password on Windows platforms withoutreinstalling Oracle.Page 21 of 75
Next you see this option on the screen:Make sure to uncheck this option. A “Container Database” is a concept new withOracle 12c, and you do not need a container database for BU courses. Using acontainer database will make your database harder to use, and will cause some stepsin this installation guide to fail.After all options have been entered, your screen will look like the following:Click thebutton. Oracle will now perform prerequisite checks to ensure thatyour system is compliant with its requirements.Page 22 of 75
If all checks pass, you will only see this screen for a short time.If all checks do not pass, the screen will inform you in what areas your system is notcompliant with Oracle's requirements. The fix for each of these will be individualized toyour system. A common prerequisite failure is the fact that your machine does not havea static IP address. Many desktops and laptops dynamically obtain their IP addressthrough DHCP, and if so, you will need to install and the Microsoft Loopback Adapterwith a static IP address. Reference Appendix C for more information on installing andconfiguring the Microsoft Loopback Adapter.Another common prerequisite failure is that your PATH environment variable will exceedthe maximum after Oracle appends its own directory. See the troubleshooting section,and Appendix E, for more information on how to solve this issue.After all prerequisite checks pass, you will see a summary screen similar to the following:Page 23 of 75
After reviewing the installation options, click thebutton to begin installation.You will see an installation screen with a progress bar, and Oracle is now performingmany steps to ensure a complete and successful installation. This step will take frombetween several minutes to an hour or so, depending on the speed of your computer. Iusually try to glance over at the screen from time to time to see if there have been anyexceptions that cause the Installer or Windows to ask me questions.Page 24 of 75
Configure theOracle InstallWhen the main install finishes, the Oracle installer will launch the DatabaseConfiguration Assistant window.Page 25 of 75
If you see the following popup from Windows Firewall, just click Allow access. You maysee this several times. Your machine may be very sluggish when the database creationassistant is running. This is normal.Typically the database configuration assistant will complete successfully withoutrequiring any interaction from you. When completed, the Oracle installer will displaythe following window:Page 26 of 75
Click the "OK" button, and you will see the following screen, which indicates that thedatabase configuration was successful:Page 27 of 75
Click the "CLOSE" button, and the Oracle installer will exit.Step 5: Verifying a Successful InstallTo verify that the install was successful, we will connect to our new Oracle instance.Go to Start / All Programs/Oracle – OraDB12 Home1 / Application Development andlaunch SQLPlus. Fill in the username with SYSTEM, and type in the password that youchose during the install. You do not need to enter a Host String if your Oracle database ison the same machine as SQLPlus.Page 28 of 75
Click OK to login. If you see a screen similar to the following, then Oraclehas successfully run many production‐strength integrity checks againstthe database and allowed you to connect.Congratulations! You have now successfully installed Oracle, started the database, andverified that it is accepting connections.Page 29 of 75
Installing the Oracle SQL Developer ClientStep 1: Downloading Oracle SQL DeveloperIntroductionWith the database installed, you now need to download and use a client that is capable ofconnecting to the database. Modern clients are graphical and have many features toenhance productivity. If you already have a working copy of a SQL client you prefer, youdo not need to complete this section. Simply setup a connection to your installeddatabase and continue with the next section. Otherwise, it is recommended that youinstall the free Oracle SQL Developer client. This section contains step‐by‐stepinstructions for downloading and using Oracle SQL Developer.DownloadOracle SQLDeveloperOn Oracle.com, click on the Downloads/SQL Developer link:This will take you to a page of Oracle SQL Developer downloads for different platforms anddifferent Java configurations.Page 30 of 75
Before downloading, you must first accept the license agreement. Then click on“Download” link for the “Windows 64‐bit with JDK 8 included” option. This option includesJava and allows you to run the client by simply downloading and unzipping it, without amore complex installation process. However, if you have Windows 32‐bit, you will need touse the alternative “Windows 32‐bit/64‐bit” option, and ensure that you also have Java 8installed.Since you have already logged into the OTN to download Oracle, clicking on the link hereshould immediately begin the file download. The file name will start with “sqldeveloper”,and then be followed by the version that is being downloaded. Save the file into theC:\Oracle directory you used to download the database, or into another directory of yourchoice that is easy for you to remember.Page 31 of 75
Unzip SQLDeveloperUse the zipping program of your choice to unzip the file. There are many such tools, but ifyou do not have one already, you can download 7‐zip at http://www.7‐zip.org/download.html. Once the file is unzipped, you will see a directory named“sqldeveloper”. It will look something like this:Step 2: Launching Oracle SQL DeveloperLaunchOracle SQLDeveloperTo launch Oracle SQL Developer, simply navigate into the newly created “sqldeveloper”directory, and execute “sqldeveloper”. This standalone client does not require aninstallation before being used.Page 32 of 75
Simply double‐click “sqldeveloper” to launch the program. You can return to this directoryeach time you wish to launch Oracle SQL Developer, or you can create a shortcut andplace it on your desktop.Step 3: Connecting to Your DatabaseIntroductionIn any SQL client, we must first establish a connection to the database before typing ourSQL commands. A connection opens a communication pathway between the client andthe database. In Oracle SQL Developer, the term “connection” is overloaded to indicateboth inactive and active communication pathways, as well as all of the configurationinformation necessary to connect again and again to the same database.Page 33 of 75
Connectingas the SystemUserWe first need to connect to the database as the “system” user, so that we can create ourown user to complete the assignments. To start, right click on the Connections category,then select “New Connection ” from the context menu.Oracle SQL Developer will launch the New Connection dialog, which requestsconfiguration information about this new connection.Page 34 of 75
You will need to modify the following four fields – Connection Name, Username,Password, and SID. The Connection Name is just an identifier that you are giving yourconnection, so that you may identify it in the future. You can type anything you want thatis memorable. We will use the name “system” because this connection is for the systemuser. The username is “system”. The password is whatever you chose your password to beduring the Oracle installation process.The SID will be whatever you chose your Global Database Name to be during theinstallation process. Type that here, and do not try to guess. Recall that we recommendedthat you choose “ORCL”. If you installed Oracle Express Edition, it did not ask you for yourSID, and automatically established your SID to be “XE”.Page 35 of 75
Click thebutton to ensure that you are able to connect. If you are able toconnect, it will state “Status: Success” in the lower left‐hand part of the dialog. If there isan issue, it will display the issue in the place of the success status. You will need to fix anyissues issue before proceeding to connect.Simply click thebutton to establish the connection. When you do so, OracleSQL Developer will open up a blank SQL worksheet.Page 36 of 75
In this SQL worksheet, you can type commands, execute them, and see the results.Congratulations! You have now successfully launched Oracle SQL Developer andestablished a connection to your database.Page 37 of 75
Creating a Database User to Complete Your AssignmentsStep 1: Creating Your Own UserCreate theUserThe SYSTEM account that we are now logged in under is the initial DBA account, and ithas so many privileges that it is risky for routine use. We will next create an ordinaryuser of the sort that we will use for this class. I will call this user “student”, but you cansubstitute any name. Choose a password that you can remember. Just type in thefollowing:CREATE USER student IDENTIFIED BY studentpasswordDEFAULT TABLESPACE USERS TEMPORARY TABLESPACE TEMP;This SQL command creates user “student” with password “studentpassword” and setsup two important defaults for student’s account. Note the semicolon at the end. Uppercase is conventional for SQL keywords in the Oracle community. When you have typedthis command, it will look like this:We now need to execute this command for it to take effect in the database. Click theicon to do so. When executed, the results of the command – the fact that the user iscreated – should display in a pane below the command.Page 38 of 75
Give the UserBasicPrivilegesNext we will give user “student” the privilege to connect to the database and theprivilege to create database resources. Type and
These setup instructions are for Oracle 12c. Oracle has maintained upward compatibility for SQL between Oracle versions for many years, so if you cannot install Oracle 12c on your own
