Transcription
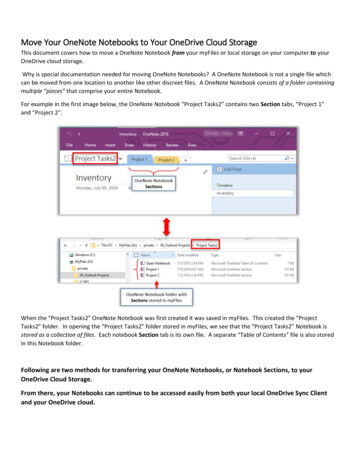
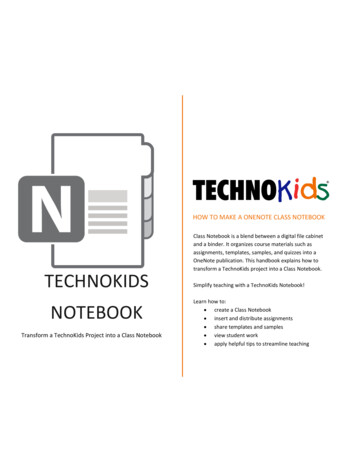
HOW TO MAKE A ONENOTE CLASS NOTEBOOKClass Notebook is a blend between a digital file cabinetand a binder. It organizes course materials such asassignments, templates, samples, and quizzes into aOneNote publication. This handbook explains how totransform a TechnoKids project into a Class Notebook.TECHNOKIDSNOTEBOOKTransform a TechnoKids Project into a Class NotebookSimplify teaching with a TechnoKids Notebook!Learn how to: create a Class Notebook insert and distribute assignments share templates and samples view student work apply helpful tips to streamline teaching
TechnoKids NotebookContentsGet Started .1About the TechnoKids Notebook.1Install Software and Download the TechnoKids Files .2Become Familiar with the TechnoKids Project .3Prepare to Create a TechnoKids Notebook .4About Student Notebooks .4Create a Class Notebook .5Sign into Office 365 and Create a Class Notebook .5Set Up the TechnoKids Notebook .5Introduce the Project .7Add TechnoKids Assignments and Assessment to the Class Notebook .9Locate the TechnoKids Workbook Files .9Add TechnoKids Assignments .9Distribute an Assignment Page to Each Student’s Notebook .11Locate the Assessment Files .12Add Assessment Files.12Add Resources to the Content Library .14Locate TechnoKids Templates and Samples .14Add a Template to the Content Library .14Add a Sample File to the Library .15How Students Use the TechnoKids Notebook .17Open the TechnoKids Notebook .17Annotate an Assignment .18Save a Copy of a Template.19View a Sample File .20Submit Completed Work .21How the Teacher Views Student Work .22View an Assignment and Add Text .22View an Assignment and Insert Stickers .23View Completed Work .24Tips for Using a Class Notebook .25Lock the Collaboration Space to Restrict Student Access .25Add or Remove Students .26Sync a Notebook to Post Instant Changes .27Empty the Recycle Bin if the Notebook is Sluggish .28Notebook Will Not Open in OneNote Desktop App .29i
TechnoKids OneNote Class NotebookTransform a TechnoKids Project into a Class NotebookA Class Notebook is an ideal way to distribute TechnoKids project assignments and resource files. Follow theinstructions to create a TechnoKids Notebook for the entire class. You will learn how to produce unique personalnotebooks that each student can use to complete worksheets, follow assignment instructions, and submit work.Get StartedAbout the TechnoKids NotebookThe TechnoKids Notebook you make using OneNote Class Notebook will have several parts:PARTS OF A TECHNOKIDS NOTEBOOK Welcome A section that everyone in the class can view. It is best suited to posting an overview of theTechnoKids project. It can also be used for general information such as due dates or announcements.Although assignments can be added to this space, it is not ideal because they are always in view. To directthe pacing of instruction, teachers should use the Teacher Only section instead. Collaboration Space A public section where everyone in your class can share and collaborate. Theinformation in this space can be edited by any student. When working on a TechnoKids project you mightwant to use this section to brainstorm topic ideas or create a community forum for questions andanswers. It is important for educators to moderate student contributions to this space. To restrict accesssections can be locked or moved. Refer to Lock the Collaboration Space. Content Library A section where teachers share TechnoKids resources such as templates and samples.The files are read-only. Students can view the content but cannot make any changes. To work with a file,they must make their own copy. Teacher Only A private section the teacher uses to direct the flow of instruction. It is not available bydefault and must be enabled. Use this section to add TechnoKids assignments, reviews, and markingsheets ahead of time. These pages remain hidden from students until the teacher distributes them tostudents' notebooks. Student Notebooks A section that lists student notebooks. Each one contains content shared by theteacher or created by the student. The student can edit or add pages to complete TechnoKids worksheetsor submit links to their completed projects. The teacher can access every student’s notebook to trackprogress or provide feedback. Students cannot see classmates' notebooks.1
TechnoKids OneNote Class NotebookInstall Software and Download the TechnoKids FilesTo transform a TechnoKids project into a Class Notebook complete the following steps:1.Verify that you have an Office 365 School Account for yourself and your students. Class Notebook is notavailable to personal or business accounts.2.To transform a TechnoKids project into a Class Notebook you can use any OneNote app. However, toplace the PDF assignments onto a OneNote page you will require the OneNote desktop app (formerlyOneNote 2016).ABOUT ONENOTE and ONENOTE FOR WINDOWS 10OneNote comes with your Office 365 subscription. It differs from OneNote for Windows 10 (included withWindows) whereas the "Class Notebook Add-in" is not available for OneNote for Windows 10.3.To prepare, install the desktop version of OneNote and the Class Notebook Add-in:a.Download OneNote.b.Download the Class Notebook Add-in.4.It is advised to make OneNote the default app. To learn how, refer to Notebook Will Not Open inOneNote.5.Check if you have Adobe Acrobat Professional or Adobe Acrobat Reader on your device. If you do not,download Adobe Acrobat Reader for free.6.Visit the TechnoKids Library and download a project. Make sure you unzip the folder. You can store thefiles in OneDrive or on your device.7.On your Windows device, set your default PDF viewer to Adobe Acrobat:a.Right click on a TechnoKids PDF file, such as a Teacher Guide.b.Choose Open with c.Pick Choose another app d.From the list, select the Adobe Acrobat version that is on your device.e.Check Always use this app to open .pdf files.f.Click OK.STUDENTS AND CLASS NOTEBOOKThe preparatory steps listed above are for the teacher. Students do not need to complete them toaccess a Class Notebook. To work seamlessly, it is ideal if your students are using a desktop version ofMicrosoft Office. However, if this is not available, students should install the following Microsoft appsonto their device: OneDrive, OneNote, Excel, Word, and PowerPoint.2
TechnoKids OneNote Class NotebookBecome Familiar with the TechnoKids ProjectPrior to creating a TechnoKids Notebook it is recommended that you familiarize yourself with the lessons in theTechnoKids project and location of the resource files.1.Open the Teacher Guide in Adobe Acrobat.2.Refer to the Prepare to Teach section to learn about preparatory steps.3.Determine the assignments, reviews, and skill reviews your students will complete. It is a good idea toselect more than you think you can accomplish. This will give you flexibility when teaching.4.Study the Materials List. Notice the location of the project resources. You will transfer many of the filesinto your TechnoKids Notebook.5.Open the Resources folder for the TechnoKids project. Become familiar with the different files. Many willbe uploaded to the Content Library or transformed into OneNote pages for Student Notebooks: Assessment files are Word documents. They will be added to OneNote pages. Templates and samples are Office documents such as Word, Excel, or PowerPoint. They will beplaced into the Content Library. Workbook files are PDFs. These will be added to OneNote pages and can be annotated.3
TechnoKids OneNote Class NotebookPrepare to Create a TechnoKids NotebookMicrosoft has seven steps that guide you through creating a Class Notebook. They are Add Notebook Name,Notebook Overview, Add Another Teacher, Add Student Name, Design Private Spaces, Preview, and Done. Moststeps are straightforward and are explained in this handbook. However, step 5 Design Private Spaces, requiresplanning. Read the following information to understand how you will divide the Student Notebooks into privatespaces or sections.About Student NotebooksTo make a TechnoKids Notebook, you must divide the Student Notebooks into private spaces. Do not get confusedby the terminology used by Microsoft. A private space is like a divider in a binder. It separates the notebook usedby students into sections. Similar to a real binder, pages can be added into each section. However, unlike a realbinder, the teacher can instantly insert a worksheet such as a TechnoKids assignment, review, or marking sheetinto every student’s notebook.The Student Notebooks you create will have three private spaces or sections:Each student’snotebook will haveprivate spaces orsections.TechnoKidsassignments aredistributed by theteacher and appearas pages in eachstudent’s notebook.SECTIONS IN A STUDENT’S NOTEBOOK Assignments This section will include TechnoKids assignments. PDF files in the TechnoKids Workbookfolder will be transformed into OneNote pages. This will allow students to type answers into worksheetsor follow step-by-step instructions. Assessment TechnoKids projects include reviews, skill reviews, checklists, marking sheets, and/or rubricsto assess student knowledge. Word files in the TechnoKids Assessment folder will be transformed intoOneNote pages. This will allow students to answer questions or complete tasks to demonstrate learning. My Work This section will be used by the student to share project files with the teacher. Students willattach their work onto a page to make it easy to track progress or evaluate completed work.4
TechnoKids OneNote Class NotebookCreate a Class NotebookSign into Office 365 and Create a Class Notebook1.Sign into your Office 365 account at https://www.office.com/.2.Click the App LauncherSelect Class Notebook.3.You may be prompted to sign into your account again.4.Click Create a class notebook., and choose All apps Set Up the TechnoKids NotebookMicrosoft has seven steps that guide you through creating a Class Notebook. They are Add Notebook Name,Notebook Overview, Add Another Teacher, Add Student Name, Design Private Spaces, Preview, and Done.1.Add Notebook Name: Type a notebook name such as the title of the TechnoKids project. For example,TechnoBiography. When done, click Next.2.Notebook Overview: This screen provides information about the Class Notebook. Click Next.5
TechnoKids OneNote Class Notebook3.Add Another Teacher: If you are co-teaching, type the names or email addresses of the other teachers.Click Next.4.Add Student Names: Type the names or email addresses of your students. Click Next.5.Design Private Spaces: A private space is a section added to each Student’s Notebook. By default,Microsoft adds several sections. Your TechnoKids Notebook needs Assignments, Assessment, and MyWork:a. Double click each section to rename it.b. Remove the extra section by clicking Delete X.c. When done, click Next.This stepcreatessections ineach Student’snotebook.TIPS TO ADD, DELETE, OR EDIT A SECTION6. Sections will be listed alphabetically when the Notebook is completed. To add another section, click Add Section. After the Class Notebook is created, new sections can be added, or existing sections renamed. An unwanted section cannot easily be removed after the Class Notebook is created. In this case, eachstudent must manually remove it from their personal notebook.Preview: Click to preview both the Teacher's notebook and the Student's notebook. Click Create.6
TechnoKids OneNote Class Notebook7.Done: The notebook has been created. To see it, click the Open in OneNote Online link.The Class Notebooktab will not show inOneNote if you aremissing the Add-in.8.Verify that the Class Notebook Add-in was installed. You will see a Class Notebook tab at the top of thewindow. If you do not see Class Notebook, download the Class Notebook Add-in.Introduce the ProjectWelcome is a section that everyone in the class can view. The default Welcome section provides an overview tothe notebook with helpful links. You will add a page into this section to introduce the TechnoKids project.1.With your TechnoKids Notebook open in OneNote online, select the Welcome section.2.From the pages pane, click Add Page to insert a new page.3.Drag the Untitled Page to the top of the list or drag the Welcome to Class Notebook page down below thenewly added page. This will make it the first screen students see when they open this section.4.On the new page, type the title, About Project Name.7
TechnoKids OneNote Class Notebook5.Click in the blank area below the title to describe the project. You can find descriptions of each projectfrom the TechnoKids Overview document.8
TechnoKids OneNote Class NotebookAdd TechnoKids Assignments and Assessment to the Class NotebookTo transform a TechnoKids project into a Class Notebook you can use any OneNote app. However, to place the PDFassignments onto a OneNote page you must have OneNote. It comes with your Office 365 subscription. This is theonly time you need to use the desktop version of the software.Locate the TechnoKids Workbook FilesThe TechnoKids assignments are stored in a Workbook folder. The files are in PDF format. To place them insideyour TechnoKids Notebook ensure you have OneNote and Adobe Acrobat installed. Please note that OneNote forWindows 10 does not allow the Class Notebook Add-in. Refer to Install Software and Download the TechnoKidsFiles.Prior to completing the following steps, you must locate the Workbook files.1.Open the TechnoKids project folder, such as INT-BIOGRAPHY.2.Locate the Resources folder, such as TechnoBiography Resources.3.Open the project name folder, such as Biography.4.Inside the folder is a Workbook folder containing assignments and extension activities. You will add thesefiles to the Class Notebook.Add TechnoKids AssignmentsTo keep students from looking too far ahead, insert TechnoKids assignments as pages into the Teacher Onlysection. This allows you to control the pacing of instruction as the content remains hidden from students until theyare distributed. Please note, you can also place the TechnoKids assignments into the Welcome section. However,the pages will always be viewable by students.1.With your TechnoKids Notebook open in OneNote online, click Open in Desktop app.2.Click Open to switch apps.If you are not asked to Open OneNote, it is missing from your device.Refer to Install Software and Download the TechnoKids Files.3.Have patience. The TechnoKids Notebook needs time to load.9
TechnoKids OneNote Class Notebook4.Click the Teacher Only tab.NOTEBOOK PANEIf you cannot see tabs at the top of the window, locate the Teacher Only section from the NotebookPane, on the left side. You can switch views, by unpinning the Notebook Pane.5.Click Create a New Section.6.Inside the section tab, type Assignments.7.Click in the page below. From the Insert tab, click File Printout.8.Locate the TechnoKids assignment. It will be in the Workbook folder. Refer to Locate the TechnoKidsWorkbook Files for assistance.EXAMPLE: C:\Users\username\Documents\int-biography\Office 2019\Biography Resources\Biography\Workbook9.Select the first assignment. DO NOT SELECT MORE THAN ONE ASSIGNMENT AT A TIME!10. Click Insert. The file will open in Adobe Acrobat before displaying in the TechnoKids Notebook. If this stepfails, refer to Install Software and Download the TechnoKids Files to install Adobe Acrobat and make it thedefault PDF reader.11. At the top of the page, add or edit the assignment title.10
TechnoKids OneNote Class Notebook12. To lock the assignment, right click on it. Choose Set Picture as Background.TIPS You can Set Picture as Background for all documents. From the File tab, click Options Advanced. Inthe Printouts section, enable Automatically set inserted file printouts in the background. Click OK. If an assignment contains a hyperlink, it will not be active. Add a text box and type the link for students.13. To add another assignment, click Add Page in the Pages pane. Repeat until done.Distribute an Assignment Page to Each Student’s NotebookWhen the class is ready to complete a TechnoKids assignment, you must distribute it. This will place a copy of thepage into the Assignments section of each Student’s notebook.1.Open the TechnoKids Notebook in OneNote online.2.Select the Teacher Only section. Click Assignments.3.Select the assignment you want to distribute.4.Click the Class Notebook tab.5.Click Distribute Page. From the menu, select Assignments. This sends the selection to the correspondingstudent section.6.To verify that the assignment appears in each student’s notebook, select a student from the left pane.Click Assignments to see the page.ABOUT STUDENT USE OF AN ASSIGNMENTStudents can type answers into worksheets. To learn more, refer to Annotate an Assignment.11
TechnoKids OneNote Class NotebookLocate the Assessment FilesTechnoKids projects includes reviews, skill reviews, checklists, marking sheets, and/or rubrics to assess studentknowledge. Word files in the TechnoKids Assessment folder will be transformed into OneNote pages. This willallow students to answer questions or complete tasks to demonstrate learning.Prior to completing these steps, you must locate the Assessment files.1.Open the TechnoKids project folder, such as INT-BIOGRAPHY.2.Locate the Resources folder, such as TechnoBiography Resources.3.Open the Assessment folder.4.Inside the folder are Word files containing reviews, skill reviews, checklists, marking sheets, and/orrubrics. You can add these files to the Class Notebook.Add Assessment FilesAssessment tools can be used by students to take quizzes, monitor learning, or view grading criteria. They areWord files. Follow the instructions to insert them as a File Printout using OneNote online.1.With your TechnoKids Notebook open in OneNote online, select the Teacher Only section.2.Select a section in Teacher Only such as Using the Teacher Only Space.3.Click Add Section.4.Type Assessment. Click OK.5.Type a section title such as Marking Sheet.6.Click in the page below. From the Insert tab, click File. Select Insert File Printout.Select Insert File Printout if thetemplate is Word. This willgenerate a preview of the file.7.You may need to click Choose File.8.Locate the TechnoKids assessment tool. It will be in the Assessment folder. Click Open.Refer to Locate the Assessment Files for assistance.EXAMPLE: C:\Users\username\Documents\int-biography\Office 2019\Biography Resources\Assessment12
TechnoKids OneNote Class Notebook9.You may need to click Insert.10. An icon of the assessment tool appears on the page. A preview displays on the page.11. Add a page title. Example: Marking Sheet, Quiz, Skill Summary.DISTRIBUTE ASSESSMENT TOOLSWhen the class is ready to take a quiz, complete a checklist, or view a marking sheet you must distribute it. Placea copy of the page into the Assessment section of each student’s notebook. They can use the annotation tools inOneNote online to answer questions. Instructions are similar to Distribute an Assignment Page to Each Student’sNotebook:1. Open the TechnoKids Notebook in OneNote online.2. Select the Assessment section in Teacher Only.3. Select the assessment page you want to distribute.4. Click the Class Notebook tab.5. Click Distribute Page and choose Assessment from the menu.6. To verify that the assessment appears in each student’s notebook, select a Student.7. Click Assessment to see the page.13
TechnoKids OneNote Class NotebookAdd Resources to the Content LibraryThe Content Library is a section where teachers share TechnoKids resources such as templates and samples. Thefiles are read-only. Students can view the content but cannot make any changes. To work with a file, they mustmake their own copy.Locate TechnoKids Templates and SamplesSome TechnoKids projects include template or samples. The files could be Word, Excel, PowerPoint, PNG, or PDFs.Prior to completing these steps, locate the resource files.1.Open the TechnoKids project folder on your device, such as INT-BIOGRAPHY.2.Locate the Resources folder, such as Biography Resources.3.Open the project name folder, such as Biography.4.Samples and templates that students need to complete the activities will be listed. Refer to BecomeFamiliar with the TechnoKids Project to learn about the resources required.Add a Template to the Content LibraryTemplates are files that are used by students to complete project activities. There are two ways to insert theresources using OneNote online – as an Attachment or as a File Printout. Select the option that best fits the filetype. Files that are PowerPoint or Excel should be attached. They appear as icons on the page. Word or PDF filesshould be inserted as a File Printout as this will generate a preview of the document on the page.1.With your TechnoKids Notebook open in OneNote online, select the Content Library section.2.Select a section in Content Library such as Using the Content Library.3.Click Add Section.4.Type Templates. Click OK.5.Type a page title such as Project Templates.6.Click in the page below. From the Insert tab, click File. Make a choice from the options:Select Insert as Attachment if thetemplate is Excel, PowerPoint, oranother file type.Select Insert File Printout if thetemplate is Word or PDF. This willgenerate a preview of the file.7.You may need to click Choose File.14
TechnoKids OneNote Class Notebook8.Locate the TechnoKids template. It will be in the Project folder. Click Open.Refer to Locate TechnoKids Templates and Samples for assistance.EXAMPLE: C:\Users\username\Documents\int-biography\Office 2019\Biography Resources\Biography9.You may need to click Insert.10. An icon of the template appears on the page. If the file, is a Word document, a preview will also display:11. Add a page name.12. Repeat steps 6-11 to insert additional templates.ABOUT STUDENT USE OF THE TEMPLATETemplates are read-only. To make a copy of the file, students double click the icon on the page. Theywill need to download the file and save a copy to their OneDrive or another location. Refer to Save aCopy of a Template.Add a Sample File to the LibrarySamples are examples of a finished product. To add them into the Content Library, you can follow the same stepsas inserting a template. However, if you want students to preview the sample from within the TechnoKidsNotebook, follow these instructions. They require OneNote and Adobe Acrobat. Refer to Install Software andDownload the TechnoKids Files.1.With your TechnoKids Notebook open in OneNote online, click Open in Desktop app.2.Click Open.If you are not asked to Open OneNote, it is missing from your device.Refer to Install Software and Download the TechnoKids Files.3.If you see a security notice, click Yes to continue.4.Have patience. The TechnoKids Notebook needs time to load.15
TechnoKids OneNote Class Notebook5.Click the Content Library tab.6.Click Create a New Section.NOTEBOOK PANEIf you cannot see tabs at the top of the window, locate the Content Library section from the NotebookPane, on the left side. You can switch views, by unpinning the Notebook Pane.7.Inside the section tab, type Samples.8.Click in the page below. From the Insert tab, click File Printout.9.Locate the TechnoKids sample. It will be in the Project folder. Click Open.Refer to Locate TechnoKids Templates and Samples for assistance.EXAMPLE: C:\Users\username\Documents\int-map\Office 2019\Map Resources\Map10. You may need to select the sample file and click Insert.11. At the top of the page, add or edit the sample title.ABOUT STUDENTS USE OF THE SAMPLEDepending on the file type students can preview the example directly in the Class Notebook.However, to play the resource in the source program, they must double click the icon. Theymay then need to download or open it in the source application.16
TechnoKids OneNote Class NotebookHow Students Use the TechnoKids NotebookFollow the instructions to learn how to open a TechnoKids Notebook, annotate a worksheet, save a copy of atemplate, view a sample, and submit work.Open the TechnoKids Notebook1.As a student, sign into an Office 365 account at https://www.office.com/.2.Click the App Launcher, and choose OneNote.You may be prompted to sign into your account again.3.Click Class notebooks.4.Open the TechnoKids Notebook.5.From the Student’s notebook, click the Assignments section.6.In the Pages pane, click to select an assignment:17
TechnoKids OneNote Class NotebookAnnotate an Assignment1.As a student, sign into an Office 365 account at www.office.com.2.Open the TechnoKids Notebook.3.From the Student’s notebook, click the Assignments section.4.In the Pages pane, click to select an assignment.5.Click the Draw tab.6.To type an answer into a worksheet, select Type.7.Click in the white space beside where you want to create a text box. If you click directly on the worksheet,the text box will appear at the bottom of the page.8.Drag the text box onto the worksheet. Type your answer:Draw a text boxto type in ananswer.To move a textbox, drag thetitle bar.Drag the outlineto resize thetext box.TEXT BOX TIPS 9.To remove a text box, click on it. Press the DELETE key on the keyboard.To format the words, select text. Right click to show a mini toolbar. Use the commands tochange the font, style, or font color.To circle an answer, mark a checkbox, or draw a line to match options, select the Pen10. Pick an ink color, such as red. Draw on the worksheet.PEN TIPS To move a drawing, select itand then drag to a new location. To delete a drawing, select the Eraserand then click on the ink.11. Changes are saved automatically.18.
TechnoKids OneNote Class NotebookSave a Copy of a TemplateA temp
sections can be locked or moved. Refer to Lock the Collaboration Space. 3. Content Library: A section where teachers share TechnoKids resources such as templates and samples. The files are read-only. Students can view the content but cannot make any change
