Transcription
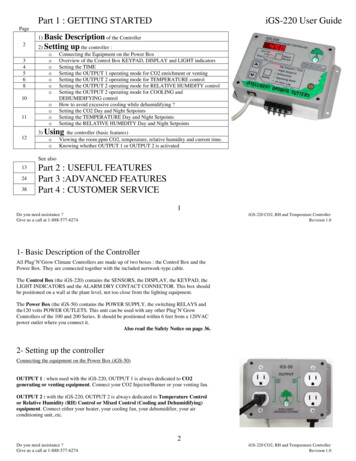
Part 1 : GETTING STARTEDiGS-220 User GuidePage1) Basic234568Description of the Controller2) Setting up the controller :ooooooo101112ooooConnecting the Equipment on the Power BoxOverview of the Control Box KEYPAD, DISPLAY and LIGHT indicatorsSetting the TIMESetting the OUTPUT 1 operating mode for CO2 enrichment or ventingSetting the OUTPUT 2 operating mode for TEMPERATURE controlSetting the OUTPUT 2 operating mode for RELATIVE HUMIDITY controlSetting the OUTPUT 2 operating mode for COOLING andDEHUMIDIFYING controlHow to avoid excessive cooling while dehumidifying ?Setting the CO2 Day and Night SetpointsSetting the TEMPERATURE Day and Night SetpointsSetting the RELATIVE HUMIDITY Day and Night Setpoints3) Using the controller (basic features)ooViewing the room ppm CO2, temperature, relative humidity and current time.Knowing whether OUTPUT 1 or OUTPUT 2 is activatedSee also132438Part 2 : USEFUL FEATURESPart 3 :ADVANCED FEATURESPart 4 : CUSTOMER SERVICE1Do you need assistance ?Give us a call at 1-888-577-6274iGS-220 CO2, RH and Temperature ControllerRevision 1.01- Basic Description of the ControllerAll Plug’N’Grow Climate Controllers are made up of two boxes : the Control Box and thePower Box. They are connected together with the included nertwork-type cable.The Control Box (the iGS-220) contains the SENSORS, the DISPLAY, the KEYPAD, theLIGHT INDICATORS and the ALARM DRY CONTACT CONNECTOR. This box shouldbe positioned on a wall at the plant level, not too close from the lighting equipment.The Power Box (the iGS-50) contains the POWER SUPPLY, the switching RELAYS andthe120 volts POWER OUTLETS. This unit can be used with any other Plug’N’GrowControllers of the 100 and 200 Series. It should be positioned within 6 feet from a 120VACpower outlet where you connect it.Also read the Safety Notice on page 36.2- Setting up the controllerConnecting the equipment on the Power Box (iGS-50)OUTPUT 1 : when used with the iGS-220, OUTPUT 1 is always dedicated to CO2generating or venting equipment. Connect your CO2 Injector/Burner or your venting fan.OUTPUT 2 : with the iGS-220, OUTPUT 2 is always dedicated to Temperature Controlor Relative Humidity (RH) Control or Mixed Control (Cooling and Dehumidifying)equipment. Connect either your heater, your cooling fan, your dehumidifier, your airconditioning unit, etc.2Do you need assistance ?Give us a call at 1-888-577-6274iGS-220 CO2, RH and Temperature ControllerRevision 1.0
Overview of the Control Box LIGHT INDICATORS, KEYPAD and DISPLAYThe LIGHTINDICATORS are formed of two groups :The three “Select Sensor” lights are : [ppm CO2] [%RH] [Temp C/ F]and the five “Modify” lights are : [Day Setpoint/Time] [Night Setpoint] [Differential] [Operating Mode] [24-H Log]The KEYPAD is made up of 4 keys : SELECT SENSOR : press repeatedly to choose among the three “SelectSensor” lights above, or Time reading; MODIFY : press repeatedly to choose among the five “Modify” lights above. UP and DOWN ARROWS : press to change the value or setting of theinformation on screen, enabled only in some menus or modes.Note : these Steady and Flashing lights symbols will be usedthroughout the manual.The DISPLAY : the room climate conditions, time and controller settings can beviewed on the 4-digit display. Letters may also appear on the display in some menus.NOTE : in the text, the KEYS will be indicated in upper case,and the [light indicators] within square brackets.3Do you need assistance ?Give us a call at 1-888-577-6274iGS-220 CO2, RH and Temperature ControllerRevision 1.0Setting the TIMEDo you really need to set the time ?YES if you want the 24-Hour Logger to keep track of the actual MIN, MAX andAVERAGE values of CO2, RH or TEMP in the past 24 hours and then store theinformation in the right hour frame.1.2.3.4.5.Press the SELECT SENSOR key until [%RH] and [Temp C/ F] lights turn on.Press the MODIFY key until the[Day Setpoint / Time] turns on.Press the UP ARROW key to modify the HOUR; if you keep it pressed for morethan 1 sec., the value will increase automatically.Press the DOWN ARROW key to modify the MINUTES; if you keep it pressedfor more than 1 sec., the value will decrease automatically.To exit, press the MODIFY key until all [Modify] lights turn off.Notice : this controller does not provide for daylight time savings. The timeshould be corrected in April and October by the user.4Do you need assistance ?Give us a call at 1-888-577-6274iGS-220 CO2, RH and Temperature ControllerRevision 1.0
Setting the OUTPUT 1 operating mode for CO2 enrichment or venting1.2.3.4.5.Press the SELECT SENSOR key until the [ppm CO2] light turns on.Press the MODIFY key until the [Operating Mode] light turns on.From Table 1 below, choose the Code of your desired Operating Mode.Press the ARROW keys (up or down) to enter the selected Code.To exit, press the MODIFY key until all [Modify] lights turn off.CO2 Operating Mode (for Output 1)Add (enrich) during the day onlyAdd (enrich) during the night onlyAdd (enrich) during day and nightReduce (vent) during the day onlyReduce (vent) during the night onlyReduce (vent) during day and nightCodeExample : 1-01, adding CO2 during the day1-01 *1-021-031-041-051-06* Factory DefaultTable 1DO YOU NEED ASSISTANCE ? GIVE US A CALL AT 1-888-577-62745Do you need assistance ?Give us a call at 1-888-577-6274iGS-220 CO2, RH and Temperature ControllerRevision 1.0Setting the OUTPUT 2 operating mode for RELATIVE HUMIDITY control :Note : OUTPUT 2 can also be set for temperature control. See page 8.To Humidify :1.2.3.4.5.Press the SELECT SENSOR key until the [%RH] light turns on.Press the MODIFY key until the [Operating Mode] light turns on.From Table 2 on next page, choose the Code of your desired Operating Mode.Press the ARROW keys (up or down) to enter the selected Code.To exit, press the MODIFY key until all [Modify] lights turn off.To Dehumidify :1.2.3.4.5.Press the SELECT SENSOR key until the [%RH] light turns on.Press the MODIFY key until the [Operating Mode] light turns on.From Table 3 on next page, choose the Code of your desired Operating Mode.Press the ARROW keys (up or down) to enter the selected Code.To exit, press the MODIFY key until all [Modify] lights turn off.Example : 2-21, humidify day and nightonly when CO2 (Output 1) is OFF6Do you need assistance ?Give us a call at 1-888-577-6274iGS-220 CO2, RH and Temperature ControllerRevision 1.0
Humidifier is STOPPEDwhen CO2 is injected or ventedHumidify day onlyHumidify night onlyHumidify day and nightOFF delay :noneOFF delay :5 minutesOFF delay :10 minutesHumidifier isFULLY INDEPENDANTof CO2 injection or ventingOFF delay -24CO2 injection or venting isSTOPPED when humidifier isactivated.OFF delay :none2-052-152-25* Factory Default : see page 10.Table 2Note : OFF delay will keep your Output 2 OFF, once the CO2 process is over, for 5 or 10 more minutes. If the EmergencyMode (see page 14) is properly set up, the OFF delay will be interrupted when emergency condition appears.Dehumidifier or fan is STOPPEDwhen CO2 is injected or ventedDehumidify day onlyDehumidify night onlyDehumidify day and nightOFF delaynoneOFF delay5 minutesOFF delay10 ifier or fan isFULLYINDEPENDANTof CO2 injection orventingOFF delaynone2-342-442-54CO2 injection or venting isSTOPPED when dehumidifier or fanis activated.OFF delaynone2-352-452-55* Factory Default : see page 10.Table 37Do you need assistance ?Give us a call at 1-888-577-6274iGS-220 CO2, RH and Temperature ControllerRevision 1.0Setting the OUTPUT 2 operating mode for TEMPERATURE control :Note : OUTPUT 2 can also be set for cooling and dehumidifying control. See page 10.To Heat :1.2.3.4.5.Press the SELECT SENSOR key until the [Temp C/ F] light turns on.Press the MODIFY key until the [Operating Mode] light turns on.From Table 4 on next page, choose the Code of your desired Operating Mode.Press the ARROW keys (up or down) to enter the selected Code.To exit, press the MODIFY key until all [Modify] lights turn off.To Cool :1.2.3.4.5.Press the SELECT SENSOR key until the [Temp C/ F] light turns on.Press the MODIFY key until the [Operating Mode] light turns on.From Table 5 on next page, choose the Code of your desired Operating Mode.Press the ARROW keys (up or down) to enter the selected Code.To exit, press the MODIFY key until all [Modify] lights turn off.Example : 3-04, humidify day and nightINDEPENDENTLY from CO2 output.8Do you need assistance ?Give us a call at 1-888-577-6274iGS-220 CO2, RH and Temperature ControllerRevision 1.0
Heater is STOPPEDwhen CO2 is injected or ventedHeating day onlyHeating night onlyHeating day and nightOFF delaynoneOFF delay5 minutesOFF delay10 minutesHeater isFULLY INDEPENDANTof CO2 injection or ventingOFF -143-24CO2 injection or venting isSTOPPED when heater isactivated.OFF delaynone3-053-153-25* Factory Default : see page 10.Table 4Cooler or fan is STOPPEDwhen CO2 is injected or ventedOFF delaynoneCooling day onlyCooling night onlyCooling day and nightOFF delay5 minutes3-313-413-51OFF delay10 minutes3-323-423-52Cooler or fan is FULLYINDEPENDANTof CO2 injection orventingOFF delaynone3-333-433-53CO2 injection or venting is STOPPEDwhen cooler or fan is activated.OFF delaynone3-343-443-543-353-453-55* Factory Default : see page 10.Table 59Do you need assistance ?Give us a call at 1-888-577-6274iGS-220 CO2, RH and Temperature ControllerRevision 1.0Setting the OUTPUT 2 operating mode for COOLING AND DEHUMIDIFYING control :Note : OUTPUT 2 can also be set for independent temperature or humidity control. See pages 6 and 8.To Cool and Dehumidifying with the same equipment (generally a fan) :1.2.3.4.5.Press the SELECT SENSOR key until the [Temp C/ F] light turns on.Press the MODIFY key until the [Operating Mode] light turns on.From Table 6 below, choose the Code of your desired Operating Mode.Press the ARROW keys (up or down) to enter the selected Code.To exit, press the MODIFY key until all [Modify] lights turn off.How to avoid excessive cooling while dehumidifying ?The LOW TEMPERATURE LIMIT used for alarm purpose (see page 16) is also used todefine a cooling limit, that is, the output 2 will be turned off whenever the temperaturedrops below this value. Make sure to set the LOW TEMPERATURE LIMIT for limiting thecooling effect according to this formula :Example :4-31,cooling during the day onlyand when CO2 (Output 1) is OFFCOOLING LIMIT LOW TEMPERATURE LIMIT 5 C (or 9 F)Fan is STOPPEDwhen CO2 is injected or ventedCooling & dehum. day onlyCooling & dehum. night onlyCooling & dehum. day and nightOFF delaynoneOFF delay5 minutesOFF delay10 minutes4-314-414-51*4-324-424-524-334-434-53Fan is FULLYINDEPENDANTof CO2 injection orventingOFF delaynone4-344-444-54CO2 injection or venting isSTOPPED when cooler or fan isactivated.OFF delaynone4-354-454-55* Factory DefaultTable 610Do you need assistance ?Give us a call at 1-888-577-6274iGS-220 CO2, RH and Temperature ControllerRevision 1.0
Setting the CO2 Day and Night Setpoints1.2.3.4.Press the SELECT SENSOR key until the [ppm CO2] light turns on.Press the MODIFY key until the [Day Setpoint / Time] or[Night Setpoint] light turns on.Press the ARROW keys (up or down) to modify the current value; if you keep it pressed formore than 1 sec., the value will vary automatically.To exit, press the MODIFY key until all [Modify] lights turn off.Setting the RELATIVE HUMIDITY Day and Night SetpointsNote : this setpoint will apply whenever you are humidifying or dehumidifying, as defined by theoutput 2 operating mode.1.2.3.4.Press the SELECT SENSOR key until the [%RH] light turns on.Press the MODIFY key until the [Day Setpoint / Time] or[Night Setpoint] light turns on.Press the ARROW keys (up or down) to modify the current value; if you keep it pressed formore than 1 sec., the value will vary automatically.To exit, press the MODIFY key until all [Modify] lights turn off.Setting the TEMPERATURE Day and Night SetpointsNote : this setpoint will apply whenever you’re are cooling or heating, as defined by the output 2operating mode.1.2.3.4.Press the SELECT SENSOR key until the [Temp C/ F] light turns on.Press the MODIFY key until the [Day Setpoint / Time] or[Night Setpoint] light turns on.Press the ARROW keys (up or down) to modify the current value; if you keep it pressed formore than 1 sec., the value will vary automatically.To exit, press the MODIFY key until all [Modify] lights turn off.11Do you need assistance ?Give us a call at 1-888-577-6274iGS-220 CO2, RH and Temperature ControllerRevision 1.03- Using the controller (basic features)Viewing the room ppm CO2, relative humidity, temperature and current time.1.Make sure that all [Modify] lights are off. If not, press MODIFY repeatedly untilthey all turn off.2.Press the SELECT SENSOR key to view the room conditions or time in thefollowing order [ppm CO2] light ON to view the ambient CO2 level (ppm CO2) [%RH] light ON to view the ambient relative humidity level [Temp C/ F] light ON to view the ambient temperature level Both [Temp C/ F] and [%RH] lights ON to view the current timeKnowing whether OUTPUT 1 or OUTPUT 2 is activatedWhile viewing the actual CO2 level (ppm CO2) CO2 Output 1 is ACTIVATED if the display blinks (½ sec. ON, ½ sec. OFF) CO2 Output 1 is NOT ACTIVATED if the display is steady (does not blink)While viewing the actual humidity level or temperature RH-TEMP Output 2 is ACTIVATED if the display blinks (½ sec. ON, ½ sec. OFF) RH-TEMP Output 2 is NOT ACTIVATED if the display is steady (does not blink)Example of Output 2 flashing while displaying ambient temperature12Do you need assistance ?Give us a call at 1-888-577-6274iGS-220 CO2, RH and Temperature ControllerRevision 1.0
Part 2 : USEFUL FEATURESiGS-220 User GuidePage4) Changing14the temperature units : Celsius or Fahrenheit5) Enabling or disabling Alarmsoooo151617186)19202123Advice, Error and Alarm Messagesooo7)22What does ALARM mean ?You DO NOT want to use the iGS-220 alarmsYou DO want to use the iGS-220 alarmsThe Alarm Dry Contact ConnectorAdvise messages (Adv) : do not panic ! just for your information Error messages (Err) : an automatically detected problem requires your attention Alarm messages (ALr) : a user defined alarm condition has been detected 24-Hour LogoooDo you need to use the 24-Hour log ?Activating the data loggerReading the recorded valuesSee also12438Part 1 : GETTING STARTEDPart 3 : ADVANCED FEATURESPart 4 : CUSTOMER SERVICE13Do you need assistance ?Give us a call at 1-888-577-6274iGS-220 CO2, RH and Temperature ControllerRevision 1.04- Changing the temperature units : Celsius or Fahrenheit ?Note : the default units, as shipped from the manufacturer, are the Celsius ( C). Working in C or in Fwill not change any control features, since only the display functions are affected. In other words, theprecision of the temperature control is not dependent of the selected units.1.2.3.4.5.Make sure that all [Modify] lights are off. If not, press MODIFY repeatedly untilthey all turn off.Press the SELECT SENSOR key until [Temp C/ F] light turns on.Press and hold down the MODIFY key until CELS or FAHr shows up on thedisplay; it takes about 3 seconds.As soon as you release the key, the new units are enabled.To toggle between Celsius and Fahrenheit, return to step 3.5- Enabling and disabling AlarmsWhat does ALARM mean ?The iGS-220 supports two kinds of alarms : the USER ALARM and the AUTOMATICEMERGENCY MODE.1) The USER ALARM : the user can set HIGH and LOW limits on temperature and relative humiditylevels to be met in the growing room. Whenever the conditions go above the HIGH limits or below theLOW limits, an alarm will be triggered and the dry contact alarm output will be activated. See page 17.It is up to the user to enable or disable this feature.2) The AUTOMATIC EMERGENCY MODE : our experience tells us that in some set-ups, prioritywill be given to CO2 enrichment over temperature or humidity control. As an example, in the case of anempty CO2 bottle, the controller will keep the Output 2 OFF, preventing the heating or cooling orhumidifying equipment to operate, due to the high priority defective CO2 equipment. In such a case, theAutomatic Emergency Mode will suspend CO2 high priority temporarily and allow the heater orcooler or humidifier (on Output 2) to operate INDEPENDENTLY of the CO2 equipment. Thisautomatic feature is always enabled when the USER ALARM is enabled.14Do you need assistance ?Give us a call at 1-888-577-6274iGS-220 CO2, RH and Temperature ControllerRevision 1.0
You DO NOT want to use the iGS-220 AlarmsFirst, DISABLE the Relative Humidity Alarm Limits :1.2.3.4.5.6.7.Press the SELECT SENSOR key until [% RH] light turns on.Press the MODIFY key until [Operating Mode] light turns on.Press the MODIFY key one more time to see the LOW limit (leftmost digit is L)Use the ARROW keys to adjust the value much below the lowest expectedtemperature in your room.Press the MODIFY key one more time to see the HIGH limit (leftmost digit is H)Use the ARROW keys to adjust the value much above the highest expectedtemperature in your room.To exit, press the MODIFY key until all [Modify] lights turn off.And finally DISABLE the Temperature Alarm Limits :1.2.Press the SELECT SENSOR key until [Temp C/ F] light turns on.Repeat steps 2 to step 7 as above for temperature.BE AWARE that the AUTOMATIC EMERGENCY MODE will also be DISABLED.Make sure to read more about this topic on page 14.Example for Low and High alarm limits for RH15Do you need assistance ?Give us a call at 1-888-577-6274iGS-220 CO2, RH and Temperature ControllerRevision 1.0You DO want to use the iGS-220 AlarmsIn order to ENABLE this controller safety feature, you may need to modify the defaultalarm limits as follows :First, ENABLE the Relative Humidity Alarm Limits :1.2.3.4.5.6.7.Press the SELECT SENSOR key until [% RH] light turns on.Press the MODIFY key until [Operating Mode] light turns on.Press the MODIFY key one more time to see the LOW limit (leftmost digit is L)Use the ARROW keys to set the desired alarm LOW LIMITPress the MODIFY key one more time to see the HIGH limit (leftmost digit is H)Use the ARROW keys to set the desired alarm HIGH LEVELTo exit, press the MODIFY key until all [Modify] lights turn off.And finally ENABLE the Temperature Alarm Limits :1.2.Press the SELECT SENSOR key until [Temp C/ F] light turns on.Repeat steps 2 to step 7 as above for temperature.BE AWARE that the AUTOMATIC EMERGENCY MODE will also be ENABLED. Itdoes mean that whenever any relative humidity levels or temperature get as close as 5% or5 C or 9 F of any alarm limits, the relative humidity or temperature equipment will startoperating INDEPENDENTLY of the CO2 generating or venting equipment. If the user hadalready selected an operating mode with equal priorities on both outputs, or with a priorityset for output 2, the Emergency Mode will never be activated.Example for Low and High alarm limits for Temp C / F16Do you need assistance ?Give us a call at 1-888-577-6274iGS-220 CO2, RH and Temperature ControllerRevision 1.0
The Alarm Dry Contact ConnectorStep 1 : Do you need it ?YES, if you have an automatic dialing equipment to reach you by phone, or if you have any kind ofalarm system you want to interface with your controller.NO, you do not own such equipment and you prefer your controller to operate stand alone, with noother equipment connected to it Step 2 : Select your contact configuration (if needed) :Contact A (connection made between terminals COM and A) is FAIL SAFE and will CLOSE wheneverany of theses 3 conditions occurs :- a power outage, a power supply failure or a catastrophic hardware failure- a sensor or memory failure- any Temp or RH high or low limit has been reachedContact B (connection made between terminals COM and B) is STANDARD and will CLOSE onlywhen any of these 2 conditions occurs :- a sensor or memory failure- any Temp or RH high or low limit has been reachedBe aware that if the relay itself or its internal driving circuit is damaged, the alarm may not beactivated although an alarm condition is present. This is not a fail-safe configuration.Step 3 : Finally, the system needs to know which contact you are using (if needed) :1.2.3.4.5.6.Press the SELECT SENSOR key until [Temp C/ F] or [%RH] light turns on.Press the MODIFY key until [Operating Mode] light turns on.Press the MODIFY key one more time to see the LOW limit (display leftmost digit is L)Press and hold down the MODIFY key until [Operating Mode] light flashesRelease MODIFY and use the ARROW keys to select A (upper case) or B (lower case)To exit, press the MODIFY key until all [Modify] lights turn off.17Do you need assistance ?Give us a call at 1-888-577-6274iGS-220 CO2, RH and Temperature ControllerRevision 1.06- Advice, Error and Alarm MessagesThe iGS-220 is able to display three types of message to the user.The ADVICE messages DO NOT require immediate attention or action to be taken. They simplyinform the user that a special condition has been met, that may require some non urgent user validation,although the module KEEPS CONTROLLING the equipment.The ERROR messages DO require immediate attention. They show up when a hardware failure hasbeen detected. It is recommended to connect an automatic dialer or any other alarm system to the AlarmDry Contact Connector (see page 17). While displaying Error Messages, the module STOPSCONTROLLING the equipment, turning the iGS-50 OUTPUTS OFF.The ALARM messages ONLY INDICATE USER ALARM conditions. The Alarm Dry ContactConnector can also be used (see page 17), as for Error messages. The module KEEPS CONTROLLINGthe equipment.See MESSAGE DESCRIPTIONS and INSTRUCTIONSin tables 7, 8 and 9on pages 19, 20, 21.Examples for Advice #6, Error #3 and Alarm #118Do you need assistance ?Give us a call at 1-888-577-6274iGS-220 CO2, RH and Temperature ControllerRevision 1.0
The ADVICE MESSAGESADv#123CauseSystem ActionUser ActionCO2 sensor overflow :CO2 level is above 5000 ppm.As soon as CO2 level returns below 5000 ppm, message iscleared.The CO2 sensor calibration is nowrecommended, since 1 year timer hasnow elapsed.Automatic system recovery hascompleted successfully.As soon as CO2 sensor is recalibrated, message is cleared. Timeris reset to 1 year.Ventilate if actually too much CO2 in yourroom. If message still there, callPlug’n’Grow Hotline.You’ll need to recalibrate your CO2 sensor.Refer to page 30.4,5NOT USED6The system has restarted after a shortpower outage of less than 2 hours.Message is cleared as soon as you enter the edit mode, that is,when you press the MODIFY key at least once.Double check your setpoints and operatingmodes, to make sure that the recovered dataare the most recent settings. If not callPlug’n’Grow Hotline.At power on, time is always displayed.Nothing special, just make sure the time isstill good.Message is cleared as soon as MODIFY or SELECT SENSORkey is pressed at least once.78The system has restarted after a poweroutage lasting between 2 and 36 hoursThe system has restarted after a longpower outage of more than 36 hours.Also, 24-h log data have been partially erased, for the duration ofthe power outage.At power on, time is always displayed. For long power outage,time likely needs to be set. Message is cleared as soon as the timeon screen has been set.You need to enter the current time since ithas been lost due to the long power outagewhich has drawn all current from therechargeable backup batteries.Also, 24-h log data have been fully erased.Note : these batteries are recharged in justseconds after power has returned.Table 719Do you need assistance ?Give us a call at 1-888-577-6274iGS-220 CO2, RH and Temperature ControllerRevision 1.0The ERROR MESSAGESErr#1, 2CauseSystem ActionUser ActionNot Used3CO2 sensor is not working.The CO2 equipment connected to OUTPUT 1 isSTOPPED and the ALARM DRY CONTACT isclosed.Disconnect and restart your module. Ifthe problem persists, call Plug’n’GrowHotline at 1-888-577-62744Temp/RH sensor is not working.The fan or heater or humidifier connected toOUTPUT 2 is STOPPED and the ALARM DRYCONTACT is closed.Disconnect and restart your module. Ifthe problem persists, call Plug’n’GrowHotline at 1-888-577-62745Not Used6Automatic system recovery hasfailed.Both OUTPUTS are STOPPED and the ALARMDRY CONTACT is closed.Disconnect and restart your module. Ifthe problem persists, call Plug’n’GrowHotline at 1-888-577-62747, 8Not UsedTable 820Do you need assistance ?Give us a call at 1-888-577-6274iGS-220 CO2, RH and Temperature ControllerRevision 1.0
The ALARM MESSAGESALr#12CauseSystem ActionUser ActionRelative Humidity in the room iscurrently BELOW the LOW limitRelative Humidity in the room iscurrently ABOVE the HIGH limit3Temperature in the room is currentlyBELOW the LOW limit4Temperature in the room is currentlyABOVE the HIGH limit5The Emergency Mode is currentlyactivated. See page 14.6While dehumidifying, the Cooling Limithas been reached. See page 10.7,8NOT USEDThe ALARM DRY CONTACT is activated (closed).FIRST, confirm the state of ambientrelative humidity and temperature anddetermine which if any is causing the alarmSECOND, if no problems are evident,readjust your limits to prevent triggering :The ALARM DRY CONTACT is activated (closed). The CO2high priority mode is temporarily suspended. Operating Modeon Output 2 is automatically modified to be independent ofCO2 process, that is, the Operating Mode code last digit will beforced to “4” (meaning “independent”). When viewing theOperating Mode, the rightmost dot point is also flashing whilethe Emergency Mode is activated.SEE PAGE 15 to disable the alarms.SEE PAGE 16 to set the limits correctly.SEE PAGE 14 for Emergency ModeTHIRD, if the problem persists, callPlug’n’Grow Hotline at 1-888-577-6274The ALARM DRY CONTACT is activated (closed). While inDehumidifying only, or Cooling and Dehumidifying Modes,the Output 2 is turned OFF, until the temperature warms upabove the cooling limit.Table 921Do you need assistance ?Give us a call at 1-888-577-6274iGS-220 CO2, RH and Temperature ControllerRevision 1.07- 24-Hour LogDo you need to use the 24-hour log ?YES, if you suspect that an equipment is not working well and that you need to see theactual climate conditions in the past 24 hours, or you are simply interested in knowing howthese conditions evolved in your room to detect abnormal situations or to learn more aboutplant behavior during the night Activating the 24-hour logThe data logger is always active. You do not really need to enable or disable it, it operatescontinuously, constantly replacing the “old” values by “new” values. At any time during theday, you can see the MINIMUM, MAXIMUM and AVERAGE values for EACH HOUR ofthe 24 past hours. It does mean that each climate condition (CO2 ppm, % RH or Temp in Cor F) will have 72 values recorded (3 values per hour x 24 hours) for your information.To make sure the right information is stored in the right time frame, you need to setthe time as described on page 4. If you do not set the time and let it go as it is, the 24-hourlog will still memorize the actual values but the time references stored in your 24-hour logwill not match with the actual time. In other words, the information will be there, but it willbe quite confusing trying to figure out the actual time a specific condition happened.22Do you need assistance ?Give us a call at 1-888-577-6274iGS-220 CO2, RH and Temperature ControllerRevision 1.0
Reading the recorded valuesViewing the recorded values is very simple : you just need to select the specific hour (in thepast 24 hours) you need to know more about and then the system will scroll automaticallyon screen the MIN, AVERAGE (AVG) and MAX values. To see the next or previous hourinformation, you just need to press a key, and the system will start scrolling the new valuesassociated with this new hour frame.As an example, let’s say it is 10:15 AM on Sept. 15th. Be aware that the “newest”information you can observe was stored at 10:00 the same day, for conditions prevailingbetween 9:00 AM and 10:00 AM. On the other hand, the “oldest” information can beobserved in the 11:00 AM hour frame, and it represents the conditions prevailing between10:00 AM and 11:00 AM on Sept 14th. What will happen at 11:00 on Sept 15th ? Verysimple : the data stored on Sept. 14th at 11:00 AM (the “oldest” information describedabove) will be replaced by those conditions that just prevailed in the past hour, between10:00 AM and 11:00 AM today Sept. 15th. In other words, old data are continuouslyreplaced by new values, hour after hour.To view the CO2 ppm recorded values, as shown, do as follows :1.2.3.4.5.Press the SELECT SENSOR key until [CO2 ppm] light turns on.Press the MODIFY key until [24-Hour Log] light turns on.The system will start scrolling automatically the MIN, AVG and MAX values forthe most recent hour.Press the DOWN ARROW to step back in time or the UP ARROW to return tothe most recent information.To exit, press the MODIFY key until all [Modify] lights turn off.To view RH or Temp recorded values, return to step 1 above and select either the [% RH]light or the [Temp C/ F] light.Example of 24-Log sequence viewing for CO223Do you need assistance ?Give us a call at 1-888-577-6274Page25Part 3 : ADVANCED FEATURES8)299)3010)11)3612)13)37Do you need to calibrate your CO2 sensors ?Do you need to calibrate your relative humidity or temperature sensors ?Hintsoooo333435Setpoint and differential : what does it mean ?Working with automatic self-adaptive differential : recommended for CO2 control.Working with a fixed differential : recommended for RH and temperature control.Setting the differential offset : above, below or centered on the setpointCO2 Reading Correction due to AltitudeSensor Calibrationoo31iGS-220 User GuideFine tuning the controloooo26272832iGS-220 CO2, RH and Temperature Controller
Part 1 : GETTING STARTED iGS-220 User Guide 1) Basic Description of the Controller 2 2) Setting up the controller : o Connecting the Equipment on the Power Box 3 o Overview of the Control Box KEYPAD, DISPLAY and LIGHT indicators 4 o Setting the TIME 5 o Setting