Transcription
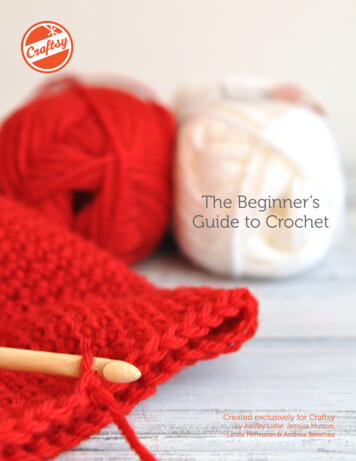
The Beginner’sGuide to CrochetCreated exclusively for Craftsyby Ashley Little, Jessica Hutton,Linda Permann & Andrea Sanchez
TABLE OF CONTENTS03050814Meet the ExpertsGet to Know Your Crochet AbbreviationsHow to Crochet a ChainFrom Needles to Hook:A Beginning Crochet Tutorial
Ashley LittleJessica HuttonAshley Little is a writer and editor who left her jobat Martha Stewart to freelance in the mountainsof Asheville, North Carolina. She has her handsin all kinds of crafts, from knitting to crochetingand sewing. When she’s not crafting, she’s eatingpeanut butter, listening to Paul McCartney, andplaying ukulele–sometimes all three at the sametime. You can see what Ashley is making on herblog, The Feisty Redhead (thefeistyredhead.blogspot.com/).Jessica Hutton is originally from Maine and grewup in Upstate NY. After earning a BFA in ceramicsfrom SUNY Potsdam and moving around thecountry as a starving artist for a few years, shedecided to do a quick stint in the Army whichbrought her to beautiful, sunny CO! Always withat least 5 projects running at any given time,Jessica loves to make things of all sorts workingwith wood, clay, metal, glass, paper, fabric,epoxies, paint, wax and anything else she can gether hands on. Jessica is incredibly excited to helpwork on new tutorials to share this wonderfulworld of crafting with others.3
Linda PermannAndrea SanchezLinda Permann is an internationally publishedcrochet designer and writer, and the author ofthree books: Sugar and Spice, Little Crochet andCrochet Adorned. She has contributed to CrochetToday, Interweave Crochet and many othermagazines, and sells her own line of patternsunder the name Lindamade. Her work has alsobeen featured on PBS’ popular TV series, Knit andCrochet Now. She was the founding Craft andDecorating Editor of Adorn magazine, and alsoloves to sew, knit and garden when she has sparetime. Since teaching herself to crochet over 10years ago, Linda has taught hundreds of people tohook. She considers herself a “Crochet Evangelist”and loves to share her enthusiasm for the craft.She blogs at Lindamade (www.lindamade.com/wordpress).Andrea Sanchez is a yarn crazy knitter andknitwear designer who spends more time knittingthan cleaning her house. When she’s not knitting,she’s thinking about knitting, or working at herother job as a kindergarten teacher. She lives inOhio with her husband and son, and two darlingdogs.You can find her patterns here on Craftsyand read more about her life, crafting, andother daily musing on her blog, Life on Laffer(lifeonlaffer.blogspot.com).4
Get to Know YourCrochet AbbreviationsBy Ashley LittleIf you’re new to crocheting, patterns probably look like a foreignlanguage to you. “Sc2tog, sc to last 3 st, bpdc.” Say what? But onceyou learn what each abbreviation means, you’ll be able to read crochetpatterns easily without even referring to a guide.THE FIRST STEP TO DECODING ALL THOSE CRAZY LINESIS TO FIGURE OUT WHAT EACH ABBREVIATION MEANS.Keep this reference nearby as you’re working through your firstcrochet patterns.It’s worth noting that not all patterns are alike. While abbreviations forbasic stitches (single crochet, double crochet, etc.) remains the sameacross the board, other abbreviations may be different depending onthe designer.As your crochet skills advance, you’ll find that you probably won’teven need to refer to a list anymore. Until then, this guide will get youstarted with the basics.5
Abbreviationsbeg beginningbpdc back post double crochetch chain stitchch sp chain spacecont continuedc double crochetdec decreasedtr double treble crochetfpdc front post double crochetfpsc front post single crochetfptr front post treble crochethdc half double crochetinc increaselp loopmc main colorpm place markerrem remainingrep repeatrs right sidersc reverse single crochetsc single crochetsc2tog single crochet two stitches togethersc3tog single crochet three stitches togethersk skipsl slipsl st slip stitchst stitcht-ch turning chaintbl through the back looptr treble crochetws wrong sideyrh yarn round hookSymbolsSometimes you’ll see symbols like parentheses and brackets usedin a crochet pattern. These symbols are simply telling you to repeatwhatever instructions are within the bracket.For example:(Sk 2 sc, sc in next 3 sts) 4 times.6
That means you should skip two single crochet, then single crochetin the next three stitches. You should do this four times. Then you canmove on to the next part of the pattern.Special AbbreviationsOften, patterns will have their own special abbreviations. For example,you might be crocheting a sweater that has a special bobble stitch.The pattern will indicate this abbreviation at the beginning near thegauge information and provide specific instructions for making thestitch. When you come to that abbreviation in the pattern, you can justrefer back to the stitch instructions at the beginning. Easy!7
How toCrochet a ChainBy Linda Permann & Jessica HuttonSTEP 1:Begin with a slip knot. To start,form a pretzel with the tail endlying underneath the loop ofthe ball end.Make sure to slide loops downpast the hook throat to the hookshaft (wider part of the hook)for consistent sizing.STEP 2:Insert your hook under the tailend of the yarn.STEP 3:Pull each end of the slip knot totighten the loop around your8
hook. Be sure the loop is comfortably loose around the shaftof the hook.Hold your hook with your dominant hand (the same hand you writewith), using a knife grip, the same way you would cut a steak.STEP 4:Next, let’s learn how to hold theyarn. Wrap the yarn up and overyour pinkie. I like to achieve thisby holding the yarn IN FRONTof my whole hand, placing mypinkie very near the hook andhooking my pinkie up towardsme to grab the yarn. The ballend of the yarn should behanging from the front side ofyour pinkie.STEP 5:Flip your hand around towardsthe hook to make a loop aroundyour pinkie finger.9
STEP 6:Dip your index fingerunderneath the yarn strandcoming from your hook.STEP 7:Turn your hand towards youagain. Here’s how the yarnshould look. You don’t want alot of space (yarn length) between your two hands at this point, justabout as much as shown here. A longer strand will be hard to control,so just drop it and start over if you need to.STEP 8:Adjust your index finger to control the yarn tension for more or lessslack. Point your index finger up to keep yarn controlled, bring yourfinger down to loosen the yarn strand.10
Hold the base of the slip knot between your thumb and middle fingerfor stability. This can be a hard skill to learn because we are so used topinching with our index finger and thumb. Point your index finger atthe sky (crochet fever!) to keep yourself from wanting to use it.STEP 9:Dip your hook under the yarn from the fron to catch your yarn. Theyarn should be coming around the back and over the top of yourhook, this will keep it from falling off as you pull it through.STEP 10:Turn the hook so thatthe head is facing downand won’t catch theloop of yarn already onthe hook.STEP 11:Draw the yarn (andhook) through the loopalready on your hook.This is easiest to do11
when the hook is pointing down. Tug on the base of the slip knot withyour non-dominant hand to open up the loop if necessary to make iteasier to slide the new loop through.AND, VOILA! Your first chain! Repeat this process, dipping the hookunder the yarn to catch a loop and pulling it through the loop on thehook to create more chains.12
As your chain gets longer, move your non-dominant thumb andmiddle finger up so that you are always grasping the bottom of theloop that’s on the hook. This will keep the loop nice and open whil youslide new loops through it.If you need to count the chains, look for the V shapes. The loop onyour hook never counts as a chain, nor does the slip knot. If youalways keep the V’s facing you, you’ll make a neater chain. Feel thechain, the “bumpy” side should always be on the back.For more information or to learn more stitches, check out my Craftsy classes:Crafty Crochet Embellishments s/22) and BeyondRectangles 1). You’ll learn the basics and beyond!And, that’s how simple it is to crochet a chain. Keep practicing andyou’ll start to get in the groove and make consisten stitches! If you findyour chains to be too tight, remember to keep sliding the loop up tothe largest part of the hook after you pull each loop through, and keepa loose grip. It doesn’t take any pressure to pull the yarn through. Mostimportantly, relax and have fun!13
From Needles to HookA Beginning Crochet TutorialBy Andrea SanchezFor those of you who are nervous to try a new craft or think perhapscrochet is extremely difficult, I want to tell you that you can do it!Just follow along with step-by-step tutorial on two of the most basiccrochet stitches: single and double crochet.Single CrochetSingle crochet is abbreviated as sc. When you are preparing to worka row of single crochet you will prepare by chaining one. This will giveyour stitch the height it needs.Note: For the single crochet tutorial, I have already worked a rowof sc in the photos.STEP 1:Insert your hook under both loops of the stitch below (those arethe little v’s).14
STEP 2:Yarn over, and pull up a loop. You will now have two loops on yourhook.STEP 3:Yarn over and pull through both loops on your hook. You know havemade one single crochet and should have only one loop on your hook.15
STEP 4:Repeat this across the row.16
Double CrochetDouble crochet, abbreviated as dc, is a taller stitch than the singlecrochet. When beginning a double crochet row, you will need to chain3 before you turn your work.STEP 1:Yarn over and then insert your hook through both loops on thestitch below.STEP 2:Yarn over and pullup a loop. You willnow have threeloops on your hook.17
STEP 3:Yarn over and pull through two loops. You should now have two loopson your hook.STEP 4:Yarn over and pull through the remaining two loops. You know haveonly one loop on your hook and have worked one double crochet.18
STEP 5:Repeat this across the row.You can see how the double crochets are about as tall as the two rowsof single crochets.Just like with knitting, tension is important to creating even stitches,and this will take some practice. When chaining, I hold the workingyarn in my left hand and pinch the tail end and any chains made withmy thumb and index finger. This helps keep the yarn taut and keepsthe chain steady as I work.19
20
wordpress). Andrea Sanchez is a yarn crazy knitter and knitwear designer who spends more time knitting than cleaning her house. When she’s not knitting, she’s thinking about knitting, or working at her other job as a kindergarten teacher. She lives in Ohio with her husband and son, and t