Transcription
Pardot Landing PageExperience ImplementationGuideSalesforce, Summer ’22PREVIEWNote: This release is in preview. Features described in this document don’t become generally availableuntil the latest general availability date that Salesforce announces for this release. Before then, andwhere features are noted as beta, pilot, or developer preview, we can’t guarantee general availabilitywithin any particular time frame or at all. Make your purchase decisions only on the basis of generallyavailable products and features.@salesforcedocsLast updated: April 22, 2022
Copyright 2000–2022 salesforce.com, inc. All rights reserved. Salesforce is a registered trademark of salesforce.com, inc.,as are other names and marks. Other marks appearing herein may be trademarks of their respective owners.
CONTENTSEnhanced Landing Page Experience . . . . . . . . . . . . . . . . . . . . . . . . . . . . . . . . . . . . . . . 1Considerations for the Enhanced Landing Page Experience . . . . . . . . . . . . . . . . . . . . . . . . . 2Enhanced Landing Page Experience Permissions . . . . . . . . . . . . . . . . . . . . . . . . . . . . . . . . 3Set Up the Enhanced Landing Page Experience . . . . . . . . . . . . . . . . . . . . . . . . . . . . . . . . . 5Configure Salesforce CMS for Pardot Landing Pages . . . . . . . . . . . . . . . . . . . . . . . . . . . . . . 5Create an Enhanced Landing Page . . . . . . . . . . . . . . . . . . . . . . . . . . . . . . . . . . . . . . . . . . 6Enhanced Landing Page Record Fields . . . . . . . . . . . . . . . . . . . . . . . . . . . . . . . . . . . . 7Style Pardot Forms on Enhanced Landing Pages . . . . . . . . . . . . . . . . . . . . . . . . . . . . . 8Using Form Styles with Enhanced Landing Pages . . . . . . . . . . . . . . . . . . . . . . . . . . . . . 9Use Custom Code with Enhanced Landing Pages . . . . . . . . . . . . . . . . . . . . . . . . . . . . 10Publish an Enhanced Landing Page . . . . . . . . . . . . . . . . . . . . . . . . . . . . . . . . . . . . . . . . . 11
ENHANCED LANDING PAGE EXPERIENCEAs of Winter ’22, Pardot Lightning App users can choose which experience to use when creatinglanding pages. The enhanced landing page experience uses a drag-and-drop editor and can beaccessed from Pardot Lightning App only. It’s built on Salesforce, and supports list views, actions,reporting, and other functionality that comes with Salesforce Lightning Experience.EDITIONSAvailable in: All PardotEditionsLooking for a PDF of this content? Check out the Enhanced Landing Page Experience ImplementationGuide (PDF).To use the enhanced landing page experience, click the Landing Pages tab. Create or open a landing page record, and click Edit inBuilder. Landing pages created in the enhanced experience are called enhanced landing pages.Note: Classic landing pages are still available: Classic Landing PagesConsiderations for the Enhanced Landing Page ExperienceKeep these considerations in mind before you work with the enhanced landing page experience.Enhanced Landing Page Experience PermissionsVarious permissions are necessary to set up, create, and publish landing pages in the enhanced landing page experience.Set Up the Enhanced Landing Page ExperiencePardot’s enhanced landing page experience is enabled at the same time as the Pardot email experience. If you already enabled theemail experience, no other setup is needed.1
Enhanced Landing Page ExperienceConsiderations for the Enhanced Landing Page ExperienceConfigure Salesforce CMS for Pardot Landing PagesWhen you create landing pages with Pardot, you can use Salesforce CMS as a unified image repository. The CMS workspace is whereyou can save files and control user access. The CMS channel determines where those files can be published. Images published toyour channel become available while marketers are building landing pages.Create an Enhanced Landing PageWhen you create an enhanced landing page, you associate it with a campaign and then edit the content. Drag in templates fromthe Layout section to quickly insert rows and columns. Then you can add these component types: Image, Pardot Form, Rich Text,Button, and HTML.Publish an Enhanced Landing PageWhen you finish designing an enhanced landing page, you can publish it to the web. Before publishing, add settings such as vanityURL, unpublish redirect URL, and search engine indexing on the landing page record.Considerations for the Enhanced Landing Page ExperienceKeep these considerations in mind before you work with the enhanced landing page experience.EDITIONSSetting Up Enhanced Landing PagesAvailable in: All PardotEditions The enhanced landing page builder uses the same permissions and CMS integration as enhancedPardot email. If the enhanced email experience is configured, your users can typically get startedwith landing pages right away. Updates to landing page record layouts typically appear automatically. But if the Landing Page Lightning record page or page layoutis already customized, your admin must manually add new fields and tabs.Creating Records When you create an enhanced landing page, it must be associated with a connected campaign. The landing page’s campaign must be associated with one business unit. The business unit assignment is required to publish thelanding page. If you don’t use Pardot Business Units, only Connected Campaigns settings define the relationship.Note: A connected campaign and a business unit have a one-to-one relationship that’s controlled in your connector settings.To assign a business unit, configure the record type settings and trigger a sync. See About Record Types. If you can’t find a field or tab on the landing page object, such as the Unpublish Redirect URL field, ask your admin to check for recentrelease updates. Some components must be added manually.Building Content You can use Salesforce CMS as an image repository. You can also include absolute URL links to public images hosted by a third party.Salesforce Files aren’t supported. When you design landing page content, it’s stored in an HTML field. The HTML field must not exceed 384 KB. Active content, such as JavaScript or SVG files, isn’t supported in enhanced landing pages.2
Enhanced Landing Page ExperienceEnhanced Landing Page Experience PermissionsUsing Iframes Iframes are supported in the HTML component. A placeholder for the iframe content appears on the builder canvas and recordhome. Iframed content is rendered only on the published landing page. To make sure your iframe is responsive when you publish your landing page, review the embed code.– When your embed code is already responsive: Verify that the iframe tag includes a style attribute or a width attribute as apercentage. The builder doesn’t make any changes to the embed code.– When your embed code isn’t responsive: Verify that the iframe tag includes width and height attributes as pixels and doesn’tinclude a style attribute. The builder makes changes to the embed code when it’s rendered, which make the iframe responsive.Publishing a Landing Page You must publish a landing page to make it available online. When you edit a published landing page, the status updates to Published(With Changes), and must be published again before the edits appear online. The public link on a landing page record shows your primary tracker domain. If you enter a vanity URL, the path works with any ofyour custom tracker domains. When you publish an enhanced landing page, an associated Pardot record is created. The Pardot record tracks engagement activitiesand stores metrics, which are synced back to the main landing page record in Salesforce. When you unpublish an enhanced landing page in Salesforce, the associated Pardot record is archived. If you republish it, weunarchive the original Pardot record to retain previous metrics.Allocations Most Pardot editions support up to 1,000 enhanced landing pages at one time. Published and unpublished enhanced landing pagescount toward this number. Classic landing pages are unlimited. Pardot Growth accounts support 50 landing pages, counting any classic landing pages and published, enhanced landing pages.Enhanced Landing Page Experience PermissionsVarious permissions are necessary to set up, create, and publish landing pages in the enhancedlanding page experience.Permission Sets and User RolesThe ability to view the Landing Page object is included in the Sales Cloud User, Service Cloud User,and CRM User permission sets.EDITIONSAvailable in: All PardotEditions with SalesforceProfessional, Enterprise,Performance, andUnlimited EditionsAn admin can create the Use Pardot Content Experience permission set on the Content Setup pageof Marketing Setup. It includes access to the drag-and-drop builders for email and landing pages and access to Salesforce CMS (ContentManagement System) and its Channels and Workspace tabs. It also lets users manage email content records and activate email contentfor use in Engagement Studio.To publish or unpublish a landing page, users must also have a Marketing user role in Pardot, or the individual permissions indicated inthe table.3
Enhanced Landing Page ExperienceEnhanced Landing Page Experience PermissionsIndividual PermissionsPermission NameLocationTypeDescriptionAccess Drag and DropContent BuilderSalesforce SetupSystem PermissionsProvides access to theOnenhanced email andlanding page builders inPardot Lightning AppCreate CMS Workspaces Salesforce Setupand ChannelsSystem PermissionsAllows non-admin users Optionalto create channels andworkspaces in SalesforceCMSSalesforce CMSSalesforce Setup(standard SalesforceCMS)App AssignmentsProvides access toSalesforce CMSCMS ChannelsSalesforce SetupObject SettingsMakes the CMS Channels Available, Visibletab available for selectionin Pardot Lightning AppCMS WorkspacesSalesforce SetupObject SettingsMakes the CMSAvailable, VisibleWorkspaces tab availablefor selection in PardotLightning AppLanding PagesPardot Settings, UserRolesMarketing tabProvides access to Pardot View, Create, Deletelanding page recordsCampaignsPardot Settings, UserRolesMarketing tabProvides access to Pardot ViewcampaignsFormsPardot Settings, UserRolesMarketing tabProvides access to Pardot Viewforms4ConfigurationOn
Enhanced Landing Page ExperienceSet Up the Enhanced Landing Page ExperienceSet Up the Enhanced Landing Page ExperiencePardot’s enhanced landing page experience is enabled at the same time as the Pardot emailexperience. If you already enabled the email experience, no other setup is needed.EDITIONS1. From Marketing Setup, in the Quick Find box, enter Content, and then select Content Setup.Available in: All PardotEditions2. Review the prerequisites, and set up any that are missing.3. To create the permission set that allows users access to the email and landing page experiences,click Create Permission Set, review the details, and save.If the Create button is inactive, the permission set has already been created. Skip to the nextstep.USER PERMISSIONSTo assign permissions: Assign Permission Sets4. To open the permission set, click Manage Assignments.and5. From the Use Pardot Content Experience permission set page, click Manage Assignments.View Setup andConfiguration6. Select the users who need the permissions, and click Assign.7. Back in Marketing Setup, follow the steps to create a CMS workspace and channel.The selected channel is used in the drag-and-drop builders for Pardot email and landing pages.8. Encourage users to add the Landing Pages tab to their Pardot Lightning App toolbar.Users with the Use Pardot Content Experience permission set can now create and edit landingpages. Publishing permissions require a Pardot admin or marketing user role.To configure CMS: Salesforce admin roleORCreate CMS Channelsand Workspaces systempermissionConfigure Salesforce CMS for Pardot Landing PagesWhen you create landing pages with Pardot, you can use Salesforce CMS as a unified imagerepository. The CMS workspace is where you can save files and control user access. The CMS channeldetermines where those files can be published. Images published to your channel become availablewhile marketers are building landing pages.CMS contributors must have the Salesforce user license. Salesforce CMS can be used with Pardotemail and landing page experiences.1. Click the CMS Home action menu, select CMS Channel, and then click Create Channel.2. Name the channel something descriptive, such as Pardot Content or a business unit name, andthen save it. You can edit the channel name at any time.3. Edit the new channel to configure its domain.a. From the channel list, click the action menu, and then select Edit.b. Select Enable Domain, choose the domain you configured from the dropdown, and thensave.4. Click the CMS Home action menu, select CMS Workspace, and then click Add Workspace.EDITIONSAvailable in: All PardotEditions with SalesforceProfessional, Enterprise,Performance, andUnlimited EditionsUSER PERMISSIONSTo configure SalesforceCMS: Modify All DataORCreate CMS Workspacesand Channels5. To configure your workspace, follow the prompts.a. Name the workspace and select the channel you want to include.b. Select the Salesforce users that need access to the workspace, and then select a role for each.A content manager has full access to a workspace’s files. A content admin can also edit the workspace settings.5
Enhanced Landing Page ExperienceCreate an Enhanced Landing Pagec. Select the languages you want to support and include a default language.d. Review your settings, and then click Done.6. From the Content Setup page, click Select Channel, choose the one you created from the dropdown, and save.Create an Enhanced Landing PageWhen you create an enhanced landing page, you associate it with a campaign and then edit thecontent. Drag in templates from the Layout section to quickly insert rows and columns. Then youcan add these component types: Image, Pardot Form, Rich Text, Button, and HTML.1. In the Pardot Lightning App, open the Landing Pages tab and click New.EDITIONSAvailable in: All PardotEditionsIf you don’t see this tab, check the More tab or edit your toolbar to include it.USER PERMISSIONS2. Enter a name and campaign, and then save.3. To make the landing page available at a URL that you choose, enter a path in the Vanity URLfield.4. To redirect viewers if the landing page is ever removed, enter a secure, absolute URL in theUnpublished Redirect URL field.5. To add content to the landing page, click Edit in Builder.6. Add or drag in a prebuilt layout from the Layouts list.7. Click an item in the Components list and drag it into the canvas.To edit an enhanced landingpage: Access Drag-And-DropBuilderTo add images fromSalesforce CMS: Salesforce CMS appassignment8. Use the editing pane to customize the content and style of each component.9. Save your work.The landing page now appears on the Landing Pages list view in Draft status. To publish your changes, return to the record view andclick Publish.Enhanced Landing Page Record FieldsPardot’s enhanced landing pages include a variety of fields that contain content, redirect instructions, and other helpful information.Sections include Information, Engagement Metrics, Publication Information, System Information, and Content and Settings tabs.6
Enhanced Landing Page ExperienceEnhanced Landing Page Record FieldsStyle Pardot Forms on Enhanced Landing PagesYou can adjust the colors, fonts, and other styles of a Pardot form in the editing panel of the enhanced landing page builder. Thestyles that you add here apply to the landing page only and don’t overwrite the form record’s original styles.Using Form Styles with Enhanced Landing PagesYou can customize styles on the form component in enhanced landing pages. Make sure that you’re familiar with the relationshipbetween Pardot form records and enhanced landing pages before you get started.Use Custom Code with Enhanced Landing PagesTo further customize landing pages, you can add custom code, including script, style, comment, noscript, and link tags to the headerand footer code. You can also copy, edit, or remove code at any time. The header and footer code blocks are available on the Settingstab of an enhanced landing page record.Enhanced Landing Page Record FieldsPardot’s enhanced landing pages include a variety of fields that contain content, redirect instructions,and other helpful information. Sections include Information, Engagement Metrics, PublicationInformation, System Information, and Content and Settings tabs.Note: If you don’t see these fields, your landing page records require customization. Anadmin can add the Content and Settings tabs in the Lightning App Builder.EDITIONSAvailable in: All PardotEditionsInformationLanding Page NameThe descriptive name of the landing page. This value isn’t visible to landing page visitors.CampaignThe name of the campaign associated with the landing pageContentThe HTML of your landing page. The content HTML file is stored behind the scenes, but you can access a preview of the landingpage on the Content tab.StatusThe status of the landing page. Available values are Draft, Published, and Published (with changes). Default value is Draft.Public LinkThe public URL where the landing page is available based on your primary tracker domain. This field is blank until you publish thelanding page for the first time. The URL is removed when the landing page is unpublished.Content Last SavedThe timestamp for the most recent update to the landing page. Changes to these fields trigger the timestamp to be updated: LandingPage Name, Campaign, Content, Header Code, Footer Code, Vanity URL, Search Engine Indexing, and Unpublish Redirect URL.Content Last Saved ByThe name of the person who most recently updated the landing page. Changes to these fields trigger the timestamp to be updated:Landing Page Name, Campaign, Content, Header Code, Footer Code, Vanity URL, Search Engine Indexing, and Unpublish RedirectURL.Last PublishedThe timestamp for the most recent publication of the landing page.Last Published ByThe username of the person who most recently published the landing page.7
Enhanced Landing Page ExperienceStyle Pardot Forms on Enhanced Landing PagesHide from Search Engine IndexingIndicates whether the landing page is available for public search. By default, landing pages are searchable, so the box is deselected.Vanity URLThe path portion of your preferred landing page URL to be appended to your tracker domains. The Vanity URL field doesn’t supporta full URL.Unpublish Redirect URLThe URL used when the landing page is unpublished. By default, an unpublished landing page redirects to the website in your PardotSettings. To redirect viewers to another site, enter a complete URL that starts with https://.System InformationCreated ByThe username of the person who created the landing page record.Last Modified ByThe username of the person who most recently edited any part of the landing page record.SourceIndicates either a classic landing page or an enhanced landing page. Classic landing pages are labeled Pardot. Enhanced landingpages are labeled Salesforce.Settings TabHeader CodeA field for more styles, links, and scripts. This field appears in the Settings tab.Footer CodeA field for more styles, links, and scripts. This field appears in the Settings tab.Style Pardot Forms on Enhanced Landing PagesYou can adjust the colors, fonts, and other styles of a Pardot form in the editing panel of the enhancedlanding page builder. The styles that you add here apply to the landing page only and don’t overwritethe form record’s original styles.Form styles can be applied to the background, field labels, inputs, checkboxes, radio buttons, andthe submit button. Editable styles vary based on the element type. Styles apply to the formcomponent and not the selected form itself. For example, if you add Form A and apply styles, andthen replace it with Form B, the styles that you added still appear in the component.To reset the styles, remove the form component, and then add it again.Note: When you open a landing page with form that was added before Spring ’22, theoriginal styles don’t change unless you apply additional styles in the Style tab.1. Open a landing page and click Edit in Builder.2. Add a form.3. On the form’s editing pane, click Style.4. Expand a section to customize the available style settings.5. When you’re finished, save the page.8EDITIONSAvailable in: All PardotEditionsUSER PERMISSIONSTo edit a builder landingpage: Access Drag-And-DropBuilder
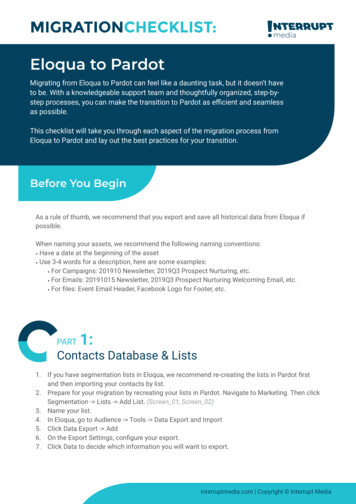
Enhanced Landing Page ExperienceUsing Form Styles with Enhanced Landing Pages6. To publish changes, go back to the landing page record and click Publish.Using Form Styles with Enhanced Landing PagesYou can customize styles on the form component in enhanced landing pages. Make sure that you’refamiliar with the relationship between Pardot form records and enhanced landing pages beforeyou get started.The most important thing to know is that styles applied on the Pardot form record are usedeverywhere that form appears, even if you edit the styles in the enhanced landing page builder.There are a few ways to apply styles to a Pardot form.EDITIONSAvailable in: All PardotEditions Use the styles on the Look and Feel section of a Pardot form. Apply custom code in the Above Form section of a Pardot form. Use the Style tab on a form component in the enhanced landing page builder.To allow users to edit a form’s styles in the enhanced landing page builder, verify that the form record’s Styles tab shows Default forevery item (1). Click Clear to revert to the default font color (2).To retain original styles on branded forms on enhanced landing pages, protect the form against certain style changes by modifying yourcustom styles on the Pardot form record.Note: If you try to edit styles in a form component and the changes don’t take effect, check for existing styles. Open the Pardotform record’s Look and Feel section and the Above Form source code to identify if any styles are overriding your changes.Form Style PropertiesMany properties are available on the Form component’s Styles tab.BackgroundThe background color controls the color of the page or container behind your landing page content.Form PositionForm position controls the form’s margins within its container.LabelsLabel styles control the label’s position and font details for each of your form’s inputs.InputsInput properties apply to text fields, text areas, and dropdowns.The properties Background Color, Border Color, and Border Width also apply to checkboxes and radio buttons.Dropdown Icon Color controls the down arrow icon inside the dropdown field.Focus styles are applied when someone moves to a form field, frequently with a mouse click or the Tab key. Focus and Error stylesdon’t appear on the canvas but are visible on the published landing page.9
Enhanced Landing Page ExperienceUse Custom Code with Enhanced Landing PagesCheckboxes and Radio ButtonsThese styles apply to checkboxes and radio buttons only.Alignment options indicate whether boxes or buttons appear horizontally or vertically.The Selected State Color controls a checkbox or radio button when someone selects it. This color is used on the button’s border andthe icon inside it: the checkmark for checkboxes and the circle for radio buttons.ButtonsButtons properties apply to the form’s submit button only.Corner Radius controls how rounded the corners of your button are.Use Custom Code with Enhanced Landing PagesTo further customize landing pages, you can add custom code, including script, style, comment,noscript, and link tags to the header and footer code. You can also copy, edit, or remove code atany time. The header and footer code blocks are available on the Settings tab of an enhancedlanding page record.EDITIONSAvailable in: All PardotEditions1. From an enhanced landing page, navigate to the Settings tab.USER PERMISSIONS2. For the Header Code or Footer Code block, click Add.To change existing code in these blocks, click Edit.3. Enter the code that you want to include, and then save.Header and Footer code blocks support script, style, link, noscript, and comment tags such as !-–hidden text-- .4. Review and resolve any errors.5. To publish the landing page, click Publish.Note: If you can’t find the Settings tab, an admin can add the Header Code and Footer Codefields using the Lightning App Builder. To add the fields, open a Landing Page Lightningrecord page, create a tab and name it Settings. Then, drag in the Landing Pages - Header &Footer component. Save the page and activate it for users.10To edit an enhanced landingpage: Access Drag-And-DropBuilderTo customize a Lightningrecord page: Customize Application
Enhanced Landing Page ExperiencePublish an Enhanced Landing PagePublish an Enhanced Landing PageWhen you finish designing an enhanced landing page, you can publish it to the web. Beforepublishing, add settings such as vanity URL, unpublish redirect URL, and search engine indexingon the landing page record.When you create or edit an enhanced landing page, the content and settings are saved but notpublished. Some of the fields are validated when you click Publish. To finalize your landing pageor make changes available online, you must publish or republish the landing page.EDITIONSAvailable in: All PardotEditionsUSER PERMISSIONS1. In Pardot Lightning App, open a builder landing page record.To edit a builder landingpage record: Access Drag-And-DropBuilder2. Preview the landing page on the Content tab.3. In the toolbar, click Publish.4. On the Publish window, click Publish.Review and resolve any validation errors.After you publish a landing page for the first time, the Public Link field is populated and the Statusis updated to Published. To view your page online, paste the public link into your browser.Engagement History metrics for landing pages include builder landing page metrics. You can usethe Source field to filter statistics.To publish a landing page: Pardot Admin orMarketing user roleORA custom Pardot userrole that includes Viewand Create/Edit onLanding PagesTo unpublish a landingpage: Pardot Admin orMarketing user roleORA custom Pardot userrole that includes Viewand Delete on LandingPages11
Dec 15, 2021 · 1. From Marketing Setup, in the Quick Find box, enter Content, and then select Content Setup . 2. Review the prerequisites, and set up any that are missing. 3. To create the permission set that allows users access to the email and landing page experiences, click Create