Transcription
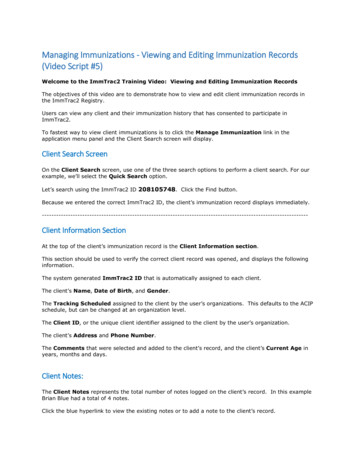
Managing Immunizations - Viewing and Editing Immunization Records(Video Script #5)Welcome to the ImmTrac2 Training Video: Viewing and Editing Immunization RecordsThe objectives of this video are to demonstrate how to view and edit client immunization records inthe ImmTrac2 Registry.Users can view any client and their immunization history that has consented to participate inImmTrac2.To fastest way to view client immunizations is to click the Manage Immunization link in theapplication menu panel and the Client Search screen will display.Client Search ScreenOn the Client Search screen, use one of the three search options to perform a client search. For ourexample, we’ll select the Quick Search option.Let’s search using the ImmTrac2 ID 208105748. Click the Find button.Because we entered the correct ImmTrac2 ID, the client’s immunization record displays ------------------------Client Information SectionAt the top of the client’s immunization record is the Client Information section.This section should be used to verify the correct client record was opened, and displays the followinginformation.The system generated ImmTrac2 ID that is automatically assigned to each client.The client’s Name, Date of Birth, and Gender.The Tracking Scheduled assigned to the client by the user’s organizations. This defaults to the ACIPschedule, but can be changed at an organization level.The Client ID, or the unique client identifier assigned to the client by the user’s organization.The client’s Address and Phone Number.The Comments that were selected and added to the client’s record, and the client’s Current Age inyears, months and days.Client Notes:The Client Notes represents the total number of notes logged on the client’s record. In this exampleBrian Blue had a total of 4 notes.Click the blue hyperlink to view the existing notes or to add a note to the client’s record.
The Client Notes screen opens in a separate browser window. The existing notes display at thebottom of the screenUse the Create New Note section to enter a new notes on the client’s record. Then click the SaveNote button. The following message displays: “Note successfully saved.”Immunization RecordNext, let’s review the Immunization Record. This section lists all immunizations received by the clientthat have been logged or uploaded into the ImmTrac2 registry.The immunization table includes the following information:Vaccine GroupThe vaccine group for the immunization received.Date AdminThe date the vaccine was administered.Click the date hyperlink to view the "Explanation of Dose Status" pop-up window for that particularimmunization.The pop-up window displays the tracking schedule rules for the selected vaccine series. Close thepop-up window to return to ImmTrac2.SeriesA sequence number along with the total number of doses within the immunization series displays for avalid immunization. An example is “1 of 4.”Vaccine [Trade Name]The name of the vaccine provided by the manufacturer.DoseThe dose magnitude reflects how many or how much of a dose was administered to the client. Forexample 2 or 3 does, or a full or half dose. If the field is blank, it’s a historical immunization.Owned?Indicates whether the immunization was entered by the user's organization or by anotherorganization.A blank means the user's organization entered the vaccine record. A ‘No’ means the record wasentered by another organization.Click on the hyperlink to view the name and contact information of the organization that entered therecord in a pop-up window.The pop-up window provides the Organization’s Name, Address, Contact Name and Phone number.Close the window to return to ImmTrac2.
ReactionDisplays an indication of whether a reaction occurred. A blank means no reaction was entered inImmTrac2 for that vaccine.A 'Yes' means a reaction was recorded. Click the hyperlink to open a pop-up window describing thereaction.The pop-up window lists all reactions that occurred as a result of the administered immunization.Close the window to return to ImmTrac2.Hist?Indicates whether the immunization record was entered as a historical immunization.A Historical Immunization was not administered by the user’s organization, but the user’s organizationdid add the information to the ImmTrac2 registry.A 'Yes' in this field indicates the record was entered as a historical immunization.DisasterIndicates whether the vaccine was administered during a disaster event. A ‘Yes’ in this columnmeans a disaster–related immunization was administered during a disaster event.EditDisplays a clickable icon that navigates the user to the Edit Immunization screen. Editing animmunization will be discussed later in the video.Vaccines Recommended by the Selected Tracking ScheduleAt the bottom of the screen is the Vaccines Recommend by the Selected Tracking Schedule section.This section displays the recommended vaccines and the corresponding vaccination dates based on theselected tracking schedule for the client.This section displays the following information.SelectUse the Select check boxes to select any of the recommended vaccines to quickly add them to theclient’s record.The Select check box does not display if the vaccine is no longer needed or recommended.Vaccine GroupThe vaccine group names for the recommended vaccine. Click the name to view the "Explanation ofDose Status" pop-up window.The pop-up window displays the tracking schedule rules for the selected vaccine series. Close thewindow to return to ImmTrac2.VaccineThe vaccine name.
Earliest DateThe earliest date the client can receive the recommended vaccine.Recommended DateThe date the client is recommended to receive the vaccine.Past Due DateThe date the client is past due to receive the recommended vaccine.Command Buttons:Now that we have reviewed the main section of the Immunization screen, let’s review the commandbuttons. There are 5 command buttons available on this screen.Add New Imms: Click this button to add a new non-scheduled immunization to the client’simmunization record.Add Historical Imms: Click this button to add a historical immunization to the client’s immunizationrecord.NOTE: For more details on how to add immunizations, please view the ImmTrac2 Training Video:Adding Immunizations.Edit Client: Click this button to quickly navigate to the View/Edit Client record screen.Reports: Click this button to navigate to the Reports Available for Client screen, to generate and printreports for the selected client.This screen gives the user access to the client’s Official Immunization Record and the ImmunizationsNeeded Report. Selecting a report hyperlink opens the report in a separate browser window.Click Cancel to return to the client’s immunization record.Print Official Immunization Record: Click this button to view and print the client’s official immunizationrecord in a separate browser window.Click OK to acknowledge the client or guardian has consented to print the Official Immunization Record.The client’s official immunization record displays.NOTE: The format of the official immunization record will change to meet the requirements of theDepartment of State Health Services.Close the browser window to return to ImmTrac2.View Immunization Details / Edit an ImmunizationNow that we have completed the review of the immunization history screen, let’s learn how to viewimmunization details and edit an immunization.
Reminder: Users can only edit immunization details if the vaccine was administer by theirorganization. This is represented by a blank in the Owned column.Click the Edit icon to open the Edit Immunization screen.On the Edit Immunization screen, white fields are editable.The Manufacturer, Vaccine Lot Number, Data Administered, and Vaccine Eligibility fields are requiredand must always remain populated.The Reactions to Immunizations section at the bottom of the screen, should be used to note reactionsto the vaccine. This section can be updated by any user regardless if the immunization is owned.If edits are made, click the Save button to update the record and return to the client’s immunizationrecord.Users can also delete an immunization if the vaccine is owned by their organization by clicking theDelete button.When the pop-up message displays, click OK to delete the immunization. Users are returned to theimmunization history and the client’s record is updated.Note: The ImmTrac2 Customer Support Team can also delete immunization.For more detailed information regarding any of these topics, see the Online User Manual located onthe Related Links tab.Please review the other ImmTrac2 videos at https://immtrac.dshs.texas.gov at your convenience.
Welcome to the ImmTrac2 Training Video: Viewing and Editing Immunization Records The objectives of this video are to demonstrate how to view and edit client immunization records in the ImmTrac2 Registry. Users can view any client and their immunization histor
