Transcription
A Very Basic Introduction to MSW Logo ProgrammingBelow I have reproduced a selection of notes from a course in Logo that I taught several years ago. I hope thatthe notes are of help to anyone who is interested in learning to use this programming language. The notes areorganised into five key areas. It would be good to be familiar with one step before moving to the next one.1. GETTING STARTEDTo get started with MSW Logo, you just need to know a few commands:Forward (Number refers to line length; can be abbreviated to FD )Back (Number refers to line length; can be abbreviated to BK )Right (Number always refers to measure of angle; can be abbreviated to RT )Left (Number always refers to measure of angle; can be abbreviated to LT )HomeClearscreen (CS)PenUp (PU)PenDown (PD)Hideturtle (HT)ShowTurtle (ST)Penerase (PE)PenPaint (PPT)Try experimenting with these in order to get an idea of what each one does.2. USING THE REPEAT COMMANDA next step is to begin using the repeat command. Try typing the following into the commandscreen:Repeat 3 [fd 50 rt 50]Experiment by making other shapes using the repeat command. This table might help you. Trymaking these shapes, filling in the details requested:PolygonNameTriangleNumber ofsidesSize ofexternalanglesSize ofinternalanglesInstructions to the roductory MSW Logo Tutorial (2003)
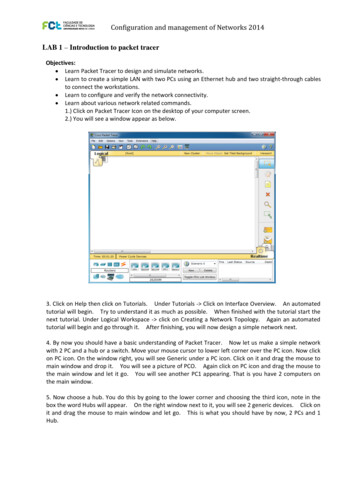
OctagonNonagonDecagon3. WRITING AND SAVING PROCEDURESAs you get more experience of using logo, you will find that it is beneficial to teach the computeradditional commands that it can store and retrieve when you wish. These commands are known asprocedures. In order to teach the turtle a new procedure you need to open a new window in MSWLogo. This window is known as the 'editor window.'The editor window can be opened by typing "edall" in the input box. Try doing this first. Note thatthe two words that appear "to" and "end" are the first and last words respectively that you will needto use when writing any procedure.Close the window. You can do this by clicking on "File" and then "Save and exit" (see diagrambelow).Another way of closing the windowis simply clicking on the 'x' button onthe top right of the window. Whenyou do this the dialogue box thatyou see to the left will appear.www.seandelaney.comIntroductory MSW Logo Tutorial (2003)
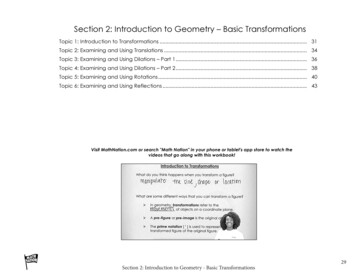
Because you have made no changes it doesn't really matter whether you click on yes or no.However, because you will want the turtle to remember things later, it is probably best to get intothe habit now of clicking on "YES."Suppose you want the turtle to be able to draw a square. You need to use the editor window to tellthe turtle what to do. Start off by opening the editor window. Then type: "To Square". Next, hit the'return' key. Type the instructions for drawing a square, using the repeat command (see above).When you have typed the instructions for drawing a square, hit the return key and then type: "end".Close the editor window. Save the changes. Now, it is time to check out if your procedure works. Inthe input window type: "square". If the turtle draws a square you have written the procedurecorrectly.Try writing procedures to draw the shapes named in the table above.After each of the shapes that you made above, you saved the changes. However, as soon as you exitMSW Logo these procedures will be lost unless you save them to a folder on your own computer. Inorder to do this, you need to go to File on the top right of the main MSW Logo screen and click on'SaveAs' (See below).Doing this will open a dialog box like this:www.seandelaney.comIntroductory MSW Logo Tutorial (2003)
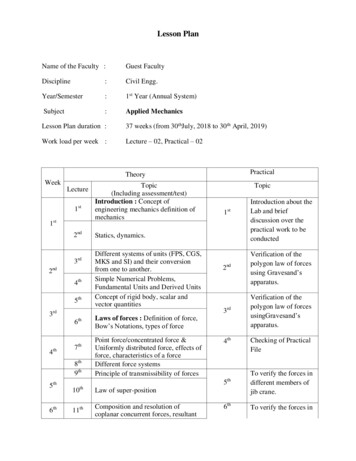
Choose a file in which to save your work. Call it something like "My Logo Projects." The folder nameis just random. You can call your file whatever you like as long as you will be able to find the most upto date one quickly.4. LOADING FILES AND INTRODUCTING VARIABLESAbove you learned to save the procedures that you had prepared and typed into the "Edall"window. In order to have the benefit of this work you now need to load the work that you havesaved. You do this by launching MSW Logo (if you have not already done this) and going to the Filemenu and clicking on Load.(See diagram)This will open up a dialog box, that looks something like this one:www.seandelaney.comIntroductory MSW Logo Tutorial (2003)
You now need to open the most recent logo file which you saved (this should be the one thatcontains the most correct procedures). When you have done this you can test if it is working bytyping in the names of one of the procedures that you created, such as "pentagon", and see whathappens. If the turtle draws a pentagon you have correctly loaded the file. If not, see if you canestablish why.The shapes above can now (hopefully!) be drawn by the computer simply by typing in the shape'sname into the Input window and hitting the 'Enter' key. However, there is a problem. If you wantto make something more complicated than a square, such as a house, you may need to use squaresor rectangles of different sizes. Therefore you need to learn how to write procedures for shapes, sothat you can vary, the size of the shape.Look at the procedure that you wrote to draw a triangle. If you wanted to draw a smaller triangle,what measurements would you have to change? What measurements would stay the same?In order to be able to draw shapes of different sizes, you need to introduce a variable. In otherwords, instead of putting in a number for the size when you write the procedure, you put in a letter(e.g. 'x') or a word and then you put in the actual measurement that you want when you type thename of the procedure into the input window.One other thing, when you give your procedure a name you need to warn it to expect a variable andnot a number. This is done by naming the variable and putting a colon before it. It will probably beeasier to grasp this using an example:To triangle :size (Notice that the variable is mentioned here with the colon before it)Repeat 3 [ fd :size rt 120] (Notice that instead of putting in the length of one side of the triangle you type in a colonand the name of the variable)EndTo test if this works now, save it and type in triangle 50 (Remember in order for the turtle to be ableto draw the shape you now have to tell it the value of the variable when you ask the turtle to drawthe shape) in the input box. Now, try drawing triangles of different sizes.Now, go back to all the shapes in your editor window and put variables into them all.Test that each new procedure works by making shapes of different sizes.Challenge: Write a command for a rectangle, using variables and the repeat command. [Hint: youcan use more than one variable provided you give them different names].5. CHANGING THE COLOUR OF DRAWINGSIt is good to be able to add colour to your shapes. In order to be able to include colour in yourpictures, you need to refer to a table where each colour is given a particular code. Here is such atable.www.seandelaney.comIntroductory MSW Logo Tutorial (2003)
NameIndexRGB valuesNameIndexRGB valuesBlack0[000]Brown8[155 96 59]Blue1[ 0 0 255]Light brown9[197 136 18]Green2[ 0 255 0 ]Mid-green10[100 162 64]Cyan3[ 0 255 255]Blue-green11[120 187 187]Red4[255 0 0 ]Salmon12[255 149 119]Magenta5[255 0 255]Blue-ish13[144 113 208]Yellow6[255 255 0 ]Orange14[255 163 0 ]White7[255 255 255]Silver15[183 183 183]If you want to change the pen colour to one of the colours above, you simply write the command'Setpencolor ' followed by the appropriate RGB values into the procedure before the command thattells the turtle what line(s) to draw. E.g. Setpencolor [ 0 255 255]. (Notice the US spelling of 'color').Try doing this to some of the procedures for shapes that you have already written. (NOTE: THE RGBVALUES SIMPLY DEFINE THE AMOUNT OF EACH OF THE COLOURS, RED, GREEN AND BLUE THAT YOUWANT TO BE PUT INTO THE MIX. LOOK, FOR EXAMPLE, AT THE VALUE FOR BLUE, THE VALUE IS 0FOR RED, 0 FOR GREEN AND HIGHEST FOR BLUE)It is also possible to fill a closed shape with a colour of your choice. In order to do this you first setthe colour using the command "setfc" followed by the appropriate RGB values from the tableabove. This tells the turtle what colour you will fill the shape with.In order to fill the shape you need to place the turtle inside the shape you want to fill (if the pencolour is different from the 'fill' colour you may need to type 'penup (pu) before moving it). Whenthe turtle is inside the shape you are ready to fill the shape. You simply type the command 'fill' intothe procedure.Good luck!www.seandelaney.comIntroductory MSW Logo Tutorial (2003)
www.seandelaney.com Introductory MSW Logo Tutorial (2003) A Very Basic Introduction to MSW Logo Programming Below I have reproduced a selection of notes from a course in Logo that I taught several years ago. I hope that the notes are of help to anyone who is interested in learning to use this programming language. The notes are organised into five key areas. It would be good to be familiar .