Transcription
Word ProcessingwithOpenOfficeWriter
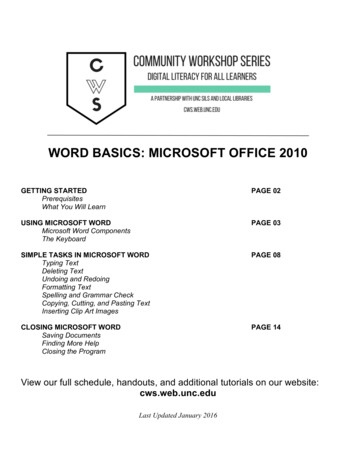
Word Processing with OpenOffice Writer – Part 1Part I: Introduction to OpenOffice WriterOpenOffice Writer is an open-source free software program with features commonlyfound in commercial word processing programs like Microsoft Word. It allows you todesign and produce text documents that can include graphics, tables, or charts.Because OpenOffice Writer has so many components, Word Processing withOpenOffice Writer will be taught in three parts.Part I will focus on the introduction and basics of the program, including thewriting program and usual features found in word processors.Part 2 will focus navigating, formatting text, and numbering and bullets.Part 3 will focus on working with columns, tables, and images.Opening Writer1. Double click the Open Office icon on the desktop.2. Click the “Text Document” icon in the startup window.3. OR You may click the “Start” button, got to “All programs,” locate “OpenOffice,and click on “OpenOffice Writer.”1
Word Processing with OpenOffice Writer – Part 1Components of the Writer Window(Picture below is a new document screen)Menu BarTitle BarStandard ToolbarFormatting toolbarStatus BarThere are 5 visible bars:Title Bar – displays the Title of the document and the name of the application.Menu Bar – lists commands in a menu style: File, Edit, View, Insert, Format,Table, Tools, Window, Help.Standard (or Function) Toolbar – includes icons for common actions: Open,Save, Copy, Cut, Paste, etc.,Formatting Toolbar – contains icons and scroll menus for formatting the text.Status Bar – displays about the document: the current page, current page style,the language, the current Insert mode, the current selection mode, the viewlayout icons, the zoom slider, and the current viewing percentage.2
Word Processing with OpenOffice Writer – Part 1Help and Tips FeatureYou can use the Help system as a complete reference for OpenOffice applications,including instructions for simple and complex tasks. You can also press F1 to launch theHelp feature.1. Click Tools, then Options.2. Then click General under OpenOffice.org.3. Under Help, make sure the Tips box is checked. This displays the name of theicon when the pointer is placed over the icon. Extended Tips displays a briefdescription of the icon’s function.Creating a New Text DocumentWhen you open OpenOffice Writer, it automatically creates a new blank document.There are three ways to create a new document:1. Select File from the Menu Bar; scroll down toNew, then Text Document.2. You can also type CTRL N on your keyboard(hold down the CTRL Key and type N)3. Click on the New Document icon on theFunction Toolbar and select Text Document(as shown below).3
Word Processing with OpenOffice Writer – Part 1Opening a FileThere are two ways to open an existingdocument:1. Select File from the Menu Bar; scrolldown to Open, then choose the file.2. Click the Open File iconon theFunction Toolbar.The Open File dialog box will appear asshown on the right. From the drop down list,locate and choose the file you wish to open.Page SetupTo change your page layout, on the Menu Bar, go to Format Page. This will bring upthe Page Layout dialog box (as shown below).Format – changes the paper size of your documentOrientation – changes the orientation of your document from portrait tolandscape.Margins – changes the margin size of your document. The default is one inch.Note: Don’t forget to click “OK” to save your changes.4
Word Processing with OpenOffice Writer – Part 1Entering TextAfter you have opened a new document, you are now ready to start entering text. Youwill notice there is a blinking vertical cursor on your screen. This is called the insertionpoint. (In a new document, it is always in the upper left corner.) The insertion pointindicates the point at which text will appear when you type. Keep in mind that in a wordprocessing program like OpenOffice Writer, there is no need to press Enter for the nextline. That will be done automatically. However, there is no automatic indent.Checking Spelling and GrammarOpenOffice Writer provides a spelling and grammarchecker, which can be used in two ways:AutoSpellcheck checks each word as it is typed anddisplays a red squiggly line under any misspelledwords. Once these are corrected, they disappear.Proper names or places that are not recognized bythe program may remain displayed as misspelled.You may choose to add it to the dictionary or leaveit.You may also perform a separate spelling andgrammar check by clicking the Spelling andGrammar icon. Thischecks the entiredocument or selection. Adialog box will appear (asshown below).Ignore Once ignoresspelling and grammaticalrules for that selectiononce.Ignore All ignores spellingand grammatical rules forthat selection and all futureoccurrences in thedocument.Change will change the misspelled word or the grammatical error to whateveryou select, whether the suggested changes or your own.Add includes a word into the existing dictionary. Some words you may wish toadd might include: proper names, slang words, or other colloquial words.When the spelling and grammar check is complete, a dialog box will appear stating so.Click “OK” and continue with your document.5
Word Processing with OpenOffice Writer – Part 1Saving a DocumentWhenever you create a document, you will want to save your work. It is a good habit tosave your work as often as you can while in the process of creating it. Saving your workis one of the most important aspects of working with any application. Unsaved work isoften not recoverable, and all the work you will have put in will be lost.*Note: The Regional Library Computer Center computers are in training modes for classes. Tosave in this mode, click on Computer. Click on the arrow to the immediate right of computer inthe address bar. A drop down menu should appear. Choose desktop as the destination to savethe file.On your personal computer, there are two ways to save a document:1. Select File from the Menu Bar; scroll down to Save.2. Click on the Save icon on the Function Toolbar.If you are saving for the first time, a Save File dialog box will appear.Saving and Exporting DocumentsThere is not a big difference between “Saving” a file and “Exporting” a file. When yousave a file, you are saving it withincompatible extensions of similarprograms. When you are exportinga file, you are sending the documentinto another application. InOpenOffice Writer, you can save thedocuments in a variety of formats,including the standardized OpenDocument format (ODF) or aMicrosoft Word (.doc) format. Youcan also export your document in aPortable Document Format (PDF).6
Word Processing with OpenOffice Writer – Part 1PrintingPage PreviewIn this mode you will see your document as it will be printed. You may view each pageindividually or simultaneously. You can also zoom in and out. When you are done withthe preview, you may either print directly or close the preview and return to yourdocument.To print a page, you may either click the Print icon or go to the Menu Bar File Print. This will bring up the Print dialog box. *We will not be printing for the class.1. Choose your printer.2. Choose your page range. Use a hyphen for continues pages and a comma forseparate pages. Click “All” to print all pages.3. Choose the number of copies4. Click “Print.”7
Word Processing with OpenOffice Writer – Part 1Closing a DocumentTo close a document, click File Close. A dialog box will appear. Save – The document is saved and then closed. Discard – The document is closed, and all modifications since the last save are lost. Cancel – Nothing happens, and you return to the document.Note: Not saving your document regularly will result in loss of recent changes made toyour document or your entire file.Exiting the ApplicationTo close the application completely, click File Exit. If all the documents have beensaved, OpenOffice Writer will close immediately. If any documents have been modifiedbut not saved, a warning message appears. Follow the procedure in “Saving aDocument” or “Closing a Document” to save or discard your changes.Exercise: Part 11.2.3.4.5.6.7.8.Open the OpenOffice Writer program.When the program opens, create a new blank document.Change the margins to 1.5 inches.Type a three- to five-sentence description of yourself.Make another paragraph. Type a three- to five-sentence description of your best friend.Practice navigating and selecting text.Save the document as Practice 1 on the desktop.Close the document and then the application.8
Word Processing with OpenOffice Writer – Part 2Part II: Text and FormattingNavigating OpenOffice WriterUse YourSpace BarRight ArrowLeft ArrowEnter or Return KeyDown Arrow KeyUp ArrowHorizontal ScrollbarVertical ScrollbarCtrl HomeCtrl EndHomeEndCtrl Ctrl Ctrl Ctrl Page UpPage DownDelete KeyTo GoOne space to the rightOne place to the right (without deleting)One place to the left (without deleting)Hard line break to next lineDown one space (without a break)Up one spaceScroll document left to rightScroll document up and downBeginning of documentEnd of documentBeginning of a lineEnd of a lineOne word to the rightOne word to the leftPrevious ParagraphNext ParagraphUp one section in documentDown one section in documentDeletes the character to the right of theblinking cursor or insertion point.Backspace KeyDeletes the character to the left of theblinking cursor or insertion point.Red Squiggly lines indicate that a word is misspelled according to theOpenOffice dictionary.Header and FootersInserting headers and/or footers in a document allows you toinsert text that you want printed on every page of a document.Headers always appear at the top of a page; footers appear atthe bottom.1. Under Insert located on the Menu Bar, choose Headeror Footer, then one of the submenu options.2. All activates the header on all the pages of thedocument.3. Default activates the header only on the pages that usethe default page style.9
Word Processing with OpenOffice Writer – Part 24. Type in your desired header or footer.5. Follow the instruction to place a footer in your document. To place a pagenumber, go back to the Menu Bar, choose Insert, then Fields, and then PageNumber.Selecting TextWord – position the cursor in the middle of the word and double click.Sentence – position the cursor within the sentence and triple click.Entire paragraph – position the cursor within the paragraph and click four times.Entire Document – (1) Hold down the control key on the keyboard and press A.(CTRL A) OR (2) Choose Edit on the menu bar and choose Select All (asshown on the right).Selecting items that are not consecutiveo To select nonconsecutive items:1. Select the first piece of text.2. Hold down the Control (Ctrl) key and use the mouse to click on thenext selection.3. Repeat as often as needed.Formatting TextFormatting a text changes its appearance in the document: font, size, bold, underline,italics, and its orientation on the page. You can do so by choosing the icons and dropmenus on the Formatting Toolbar or by utilizing the Styles and Formatting window.Changing Your FontNote: Some of the buttons on the formatting toolbar are toggle buttons. This means ifyou click on them once, you will format the selected text. If you click them again, you willremove that formatting from the selected text.Font – Select your text. Choose the desired font from the Font drop downmenu. The text will change upon your selection. (You may undo yourselection at any time.)Size – Sizes are measured in “points.” The default font and size is TimesNew Roman, 12 point. To change the size, make your text selection andchoose the desired size from the Size drop menu.10
Word Processing with OpenOffice Writer – Part 2Bold, Italics, Underline – These icons are located on the FormattingToolbar.Text AlignmentYou may alter the alignment of your text in your document: Left,Center, Right, Justified. The icons are located on theFormatting Toolbar.Left – the left edge of the selected text is aligned but the right edge is not.Center – the selected text is centered on the page.Right – the right edge of the selected text is alignedbut the left edge is not.Justify – both sides are aligned. Spacing may varybetween words to accommodate the justification.Changing Font Color and HighlightingYou may change the font color in two ways:1. Select a text and click on the Font Color icon.Choose your desired color.2. Open the Font Color dialog box (by clicking the dropdown arrow). Select your desired color. When youmove your cursor to your text, you will see a “paintbucket.” Simply click on your mouse and hold yourleft button to select your text. When you are finished,click on the Font Color icon to toggle out of the function. Click the “X” to removethe Font Color box.Highlighting and BackgroundHighlighting allows you to electronicallyshade text as if you were using a penhighlighter. The Highlight dialog box onthe toolbar works exactly like the FontColor, but it highlights more than just thecharacters of the selected text. TheBackground function changes thebackground color of the currentparagraph or selected paragraphs. Bothfunctions can be undone by clicking NoFill in their boxes.11
Word Processing with OpenOffice Writer – Part 2Cut, Copy, and PasteThese actions will allow you to easily copy or move text, data, graphics, or art from onelocation to another in your document as well as from one application to another. Thesecan be found on the Menu Toolbar or under the Edit drop down menu.Cut – Removes the selection from its present position to be placed to anotherposition.Copy – Duplicates the selection.Paste – Places the selection into another location in the document or into anotherapplication.Drag and DropThe Drag and Drop feature enables you to quickly move a text, a selection, a graphicor art from one location of the document to another by clicking on the desired context,holdi
You can use the Help system as a complete reference for OpenOffice applications, including instructions for simple and complex tasks. You can also press F1 to launch the Help feature. 1. Click Tools, then Options. 2. Then click General under OpenOffice.org. 3. Under Help, make sure the Tips box is checked. This displays the name of the icon when the pointer is placed over the icon. Extended .
