Transcription
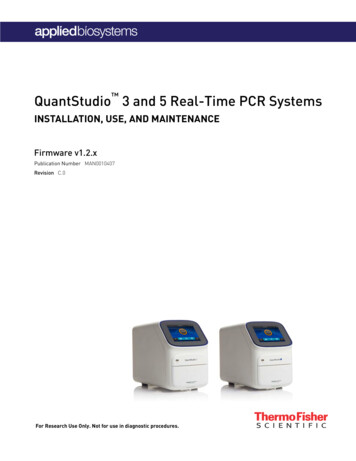
QuantStudio 3 and 5 Real-Time PCR SystemsINSTALLATION, USE, AND MAINTENANCEFirmware v1.2.xPublication Number MAN0010407Revision C.0For Research Use Only. Not for use in diagnostic procedures.
The information in this guide is subject to change without notice.DISCLAIMERTO THE EXTENT ALLOWED BY LAW, LIFE TECHNOLOGIES AND/OR ITS AFFILIATE(S) WILL NOT BE LIABLE FOR SPECIAL, INCIDENTAL, INDIRECT,PUNITIVE, MULTIPLE, OR CONSEQUENTIAL DAMAGES IN CONNECTION WITH OR ARISING FROM THIS DOCUMENT, INCLUDING YOUR USE OF IT.Limited Use Label License No. 474: Real-Time PCR System for Research Use OnlyNotice to Purchaser: The purchase of this instrument conveys to the purchaser the limited, non-transferable right to use the purchased instrumentonly, under intellectual property rights that are owned and/or controlled by Life Technologies and relate specifically to the instrument. Purchase of theinstrument includes the right to use the instrument for internal research and to perform services (including the right to report the results of servicesfor a fee) by the purchaser only, but does not convey rights to use any other products, reagents, assays or methods such as the 5' nuclease assayprocess. The sale of this instrument is expressly conditioned on the purchaser not reselling, repackaging, or distributing this instrument, or any of itscomponents, and no such rights are conveyed expressly, by implication, or by estoppel. For information on obtaining additional rights, please contactoutlicensing@lifetech.com or Out Licensing, Life Technologies, 5791 Van Allen Way, Carlsbad, California 92008. Limited Use Label License No. 572: Cy and CyDyeNotice to Purchaser: Cy and CyDye are registered trademarks of GE Healthcare.Corporate entityLife Technologies Carlsbad, CA 92008 USA Toll Free in USA 1.800.955.6288TRADEMARKSCy is a trademark of GE Healthcare UK Limited. Adobe, Acrobat, and Reader are trademarks of Adobe Systems, Inc. Microsoft, Internet Explorer, andWindows are trademarks of Microsoft Corporation. Apple, Safari, and Macintosh are trademarks of Apple, Inc. Mozilla and Firefox are trademarks ofMozilla Foundation. TaqMan is a registered trademark of Roche Molecular Systems, Inc., used under permission and license. All trademarks are theproperty of Thermo Fisher Scientific and its subsidiaries unless otherwise specified. 2015 Thermo Fisher Scientific Inc. All rights reserved.
ContentsAbout this guide . . . . . . . . . . . . . . . . . . . . . . . . . . . . . . . . . . . . . . . . . . . . . . . . . . . . . . . . . . . . 8Revision history . . . . . . . . . . . . . . . . . . . . . . . . . . . . . . . . . . . . . . . . . . . . . . . . . . . . . . . . . . . . . . . . . 8Purpose . . . . . . . . . . . . . . . . . . . . . . . . . . . . . . . . . . . . . . . . . . . . . . . . . . . . . . . . . . . . . . . . . . . . . . . 9 CHAPTER 1 Product information . . . . . . . . . . . . . . . . . . . . . . . . . . . . . . . . . . . . . . 10Instrument hardware description . . . . . . . . . . . . . . . . . . . . . . . . . . . . . . . . . . . . . . . . . . . . . . . . 10Instrument overview . . . . . . . . . . . . . . . . . . . . . . . . . . . . . . . . . . . . . . . . . . . . . . . . . . . . . . . 10Parts of the instrument . . . . . . . . . . . . . . . . . . . . . . . . . . . . . . . . . . . . . . . . . . . . . . . . . . . . . 13Software description . . . . . . . . . . . . . . . . . . . . . . . . . . . . . . . . . . . . . . . . . . . . . . . . . . . . . . . . . . .Instrument, desktop, and cloud software features . . . . . . . . . . . . . . . . . . . . . . . . . . . . .Folders, templates, experiments, and projects . . . . . . . . . . . . . . . . . . . . . . . . . . . . . . . .Third-party software installation . . . . . . . . . . . . . . . . . . . . . . . . . . . . . . . . . . . . . . . . . . . .14141516Network connection options . . . . . . . . . . . . . . . . . . . . . . . . . . . . . . . . . . . . . . . . . . . . . . . . . . . . . 16Experiment types . . . . . . . . . . . . . . . . . . . . . . . . . . . . . . . . . . . . . . . . . . . . . . . . . . . . . . . . . . . . . . 17 CHAPTER 2 Start, sign on, and configure the instrument . . . . . . . . . . 19Installation and instrument verification . . . . . . . . . . . . . . . . . . . . . . . . . . . . . . . . . . . . . . . . . . . 19Precautions for use . . . . . . . . . . . . . . . . . . . . . . . . . . . . . . . . . . . . . . . . . . . . . . . . . . . . . . . . . . . . 20Power on the instrument . . . . . . . . . . . . . . . . . . . . . . . . . . . . . . . . . . . . . . . . . . . . . . . . . . . . . . . . 20Parts of the home screen . . . . . . . . . . . . . . . . . . . . . . . . . . . . . . . . . . . . . . . . . . . . . . . . . . . . . . . 21Use the instrument without signing in . . . . . . . . . . . . . . . . . . . . . . . . . . . . . . . . . . . . . . . . . . . . 23Create a new instrument profile . . . . . . . . . . . . . . . . . . . . . . . . . . . . . . . . . . . . . . . . . . . . . . . . . 23Sign In . . . . . . . . . . . . . . . . . . . . . . . . . . . . . . . . . . . . . . . . . . . . . . . . . . . . . . . . . . . . . . . . . . . . . . . . 23Sign out . . . . . . . . . . . . . . . . . . . . . . . . . . . . . . . . . . . . . . . . . . . . . . . . . . . . . . . . . . . . . . . . . . . . . . . 24Link your instrument profile to your Thermo Fisher Cloud account . . . . . . . . . . . . . . . . . . . 24Link your instrument profile to Thermo Fisher Cloud . . . . . . . . . . . . . . . . . . . . . . . . . . . 24Create an instrument profile and link to Thermo Fisher Cloud . . . . . . . . . . . . . . . . . . . 24Configure instrument settings . . . . . . . . . . . . . . . . . . . . . . . . . . . . . . . . . . . . . . . . . . . . . . . . . . . 25QuantStudio 3 and 5 Real-Time PCR Systems Installation, Use, and Maintenance Guide3
Contents CHAPTER 3 Create and run experiments on the instrument . . . . . . . 28Workflow . . . . . . . . . . . . . . . . . . . . . . . . . . . . . . . . . . . . . . . . . . . . . . . . . . . . . . . . . . . . . . . . . . . . . 28Options for running an experiment . . . . . . . . . . . . . . . . . . . . . . . . . . . . . . . . . . . . . . . . . . . . . . .Create and run an experiment from a template . . . . . . . . . . . . . . . . . . . . . . . . . . . . . . . .Run an experiment from a saved file . . . . . . . . . . . . . . . . . . . . . . . . . . . . . . . . . . . . . . . . .Repeat your last experiment run . . . . . . . . . . . . . . . . . . . . . . . . . . . . . . . . . . . . . . . . . . . . .29292930Edit an experiment before starting a run . . . . . . . . . . . . . . . . . . . . . . . . . . . . . . . . . . . . . . . . . .Define experiment properties . . . . . . . . . . . . . . . . . . . . . . . . . . . . . . . . . . . . . . . . . . . . . . .Edit a method . . . . . . . . . . . . . . . . . . . . . . . . . . . . . . . . . . . . . . . . . . . . . . . . . . . . . . . . . . . . .Define plate wells . . . . . . . . . . . . . . . . . . . . . . . . . . . . . . . . . . . . . . . . . . . . . . . . . . . . . . . . . .31313235Load and unload a plate in the instrument . . . . . . . . . . . . . . . . . . . . . . . . . . . . . . . . . . . . . . . . . 36 View, pause, or stop a run . . . . . . . . . . . . . . . . . . . . . . . . . . . . . . . . . . . . . . . . . . . . . . . . . . . . . . .View well details . . . . . . . . . . . . . . . . . . . . . . . . . . . . . . . . . . . . . . . . . . . . . . . . . . . . . . . . . . .Pause or stop a run . . . . . . . . . . . . . . . . . . . . . . . . . . . . . . . . . . . . . . . . . . . . . . . . . . . . . . . .Adjust the graphical view of an experiment . . . . . . . . . . . . . . . . . . . . . . . . . . . . . . . . . . .Lock the touchscreen during a run . . . . . . . . . . . . . . . . . . . . . . . . . . . . . . . . . . . . . . . . . . .3737373738Transfer, view, or manage files and results . . . . . . . . . . . . . . . . . . . . . . . . . . . . . . . . . . . . . . . .Transfer experiment results . . . . . . . . . . . . . . . . . . . . . . . . . . . . . . . . . . . . . . . . . . . . . . . .View run history . . . . . . . . . . . . . . . . . . . . . . . . . . . . . . . . . . . . . . . . . . . . . . . . . . . . . . . . . . .Manage template (.edt) files . . . . . . . . . . . . . . . . . . . . . . . . . . . . . . . . . . . . . . . . . . . . . . . . .38383839CHAPTER 4 Calibrate and verify instrument performance . . . . . . . . . 40Calibration and verification schedule . . . . . . . . . . . . . . . . . . . . . . . . . . . . . . . . . . . . . . . . . . . . . 40Calibration descriptions . . . . . . . . . . . . . . . . . . . . . . . . . . . . . . . . . . . . . . . . . . . . . . . . . . . . . . . . 41View the calibration status and set reminders . . . . . . . . . . . . . . . . . . . . . . . . . . . . . . . . . . . . . 41View calibration status and set reminders in the instrument . . . . . . . . . . . . . . . . . . . . 41View calibration status and set reminders in the Cloud . . . . . . . . . . . . . . . . . . . . . . . . . 424Perform ROI/Uniformity, Background, and Dye calibrations . . . . . . . . . . . . . . . . . . . . . . . . . .Workflow: Calibration . . . . . . . . . . . . . . . . . . . . . . . . . . . . . . . . . . . . . . . . . . . . . . . . . . . . . .Prepare a calibration plate . . . . . . . . . . . . . . . . . . . . . . . . . . . . . . . . . . . . . . . . . . . . . . . . . .Perform calibrations . . . . . . . . . . . . . . . . . . . . . . . . . . . . . . . . . . . . . . . . . . . . . . . . . . . . . . .View calibration images and transfer results to USB . . . . . . . . . . . . . . . . . . . . . . . . . . .Troubleshoot calibration failure . . . . . . . . . . . . . . . . . . . . . . . . . . . . . . . . . . . . . . . . . . . . .Identify contamination . . . . . . . . . . . . . . . . . . . . . . . . . . . . . . . . . . . . . . . . . . . . . . . . . . . . . .Create a background plate (optional) . . . . . . . . . . . . . . . . . . . . . . . . . . . . . . . . . . . . . . . . .4242434446474748Perform instrument verification using RNase P plates . . . . . . . . . . . . . . . . . . . . . . . . . . . . . .Instrument verification description and schedule . . . . . . . . . . . . . . . . . . . . . . . . . . . . . .RNase P Instrument Verification Plates . . . . . . . . . . . . . . . . . . . . . . . . . . . . . . . . . . . . . . .Analytical performance . . . . . . . . . . . . . . . . . . . . . . . . . . . . . . . . . . . . . . . . . . . . . . . . . . . . .Installation specification . . . . . . . . . . . . . . . . . . . . . . . . . . . . . . . . . . . . . . . . . . . . . . . . . . . .Prepare an RNase P plate . . . . . . . . . . . . . . . . . . . . . . . . . . . . . . . . . . . . . . . . . . . . . . . . . . .Perform RNase P verification . . . . . . . . . . . . . . . . . . . . . . . . . . . . . . . . . . . . . . . . . . . . . . .Troubleshoot verification failure . . . . . . . . . . . . . . . . . . . . . . . . . . . . . . . . . . . . . . . . . . . . .4949495050505153QuantStudio 3 and 5 Real-Time PCR Systems Installation, Use, and Maintenance Guide
ContentsCalibrate custom dyes . . . . . . . . . . . . . . . . . . . . . . . . . . . . . . . . . . . . . . . . . . . . . . . . . . . . . . . . . .Custom dyes overview . . . . . . . . . . . . . . . . . . . . . . . . . . . . . . . . . . . . . . . . . . . . . . . . . . . . . .Dilute the custom dye to an optimal concentration . . . . . . . . . . . . . . . . . . . . . . . . . . . . .Calibrate the custom dye . . . . . . . . . . . . . . . . . . . . . . . . . . . . . . . . . . . . . . . . . . . . . . . . . . .54545457Calibrate for a custom melt curve experiment . . . . . . . . . . . . . . . . . . . . . . . . . . . . . . . . . . . . . 60 CHAPTER 5 Maintain the instrument . . . . . . . . . . . . . . . . . . . . . . . . . . . . . . . . . 62Backup or restore the instrument . . . . . . . . . . . . . . . . . . . . . . . . . . . . . . . . . . . . . . . . . . . . . . . . 62Decontaminate the sample block . . . . . . . . . . . . . . . . . . . . . . . . . . . . . . . . . . . . . . . . . . . . . . . . .Materials required . . . . . . . . . . . . . . . . . . . . . . . . . . . . . . . . . . . . . . . . . . . . . . . . . . . . . . . . .Clean the sample block . . . . . . . . . . . . . . . . . . . . . . . . . . . . . . . . . . . . . . . . . . . . . . . . . . . . .Solvents for cleaning the sample block . . . . . . . . . . . . . . . . . . . . . . . . . . . . . . . . . . . . . . .63636365Replace the instrument fuses . . . . . . . . . . . . . . . . . . . . . . . . . . . . . . . . . . . . . . . . . . . . . . . . . . . . 65Materials required . . . . . . . . . . . . . . . . . . . . . . . . . . . . . . . . . . . . . . . . . . . . . . . . . . . . . . . . . 65Replace the fuses . . . . . . . . . . . . . . . . . . . . . . . . . . . . . . . . . . . . . . . . . . . . . . . . . . . . . . . . . . 66Power on or off, store, and move . . . . . . . . . . . . . . . . . . . . . . . . . . . . . . . . . . . . . . . . . . . . . . . . .Enable sleep mode . . . . . . . . . . . . . . . . . . . . . . . . . . . . . . . . . . . . . . . . . . . . . . . . . . . . . . . . .Power on the instrument . . . . . . . . . . . . . . . . . . . . . . . . . . . . . . . . . . . . . . . . . . . . . . . . . . .Power off the instrument . . . . . . . . . . . . . . . . . . . . . . . . . . . . . . . . . . . . . . . . . . . . . . . . . . .Prepare the instrument to ship, move, or store . . . . . . . . . . . . . . . . . . . . . . . . . . . . . . . .Move the instrument . . . . . . . . . . . . . . . . . . . . . . . . . . . . . . . . . . . . . . . . . . . . . . . . . . . . . . .Return the instrument for service . . . . . . . . . . . . . . . . . . . . . . . . . . . . . . . . . . . . . . . . . . . . 66666767676868CHAPTER 6 Profile and instrument configuration tasks . . . . . . . . . . . . 70Initial start up . . . . . . . . . . . . . . . . . . . . . . . . . . . . . . . . . . . . . . . . . . . . . . . . . . . . . . . . . . . . . . . . . 70Manage profiles . . . . . . . . . . . . . . . . . . . . . . . . . . . . . . . . . . . . . . . . . . . . . . . . . . . . . . . . . . . . . . .Create an administrator profile . . . . . . . . . . . . . . . . . . . . . . . . . . . . . . . . . . . . . . . . . . . . . .View all user profiles (Administrator only) . . . . . . . . . . . . . . . . . . . . . . . . . . . . . . . . . . . .Manage all instrument profiles (Administrator only) . . . . . . . . . . . . . . . . . . . . . . . . . . .Edit a user profile . . . . . . . . . . . . . . . . . . . . . . . . . . . . . . . . . . . . . . . . . . . . . . . . . . . . . . . . . .7171717172Enable SAE mode (Administrator only) . . . . . . . . . . . . . . . . . . . . . . . . . . . . . . . . . . . . . . . . . . . . 72Require sign-in (Administrator only) . . . . . . . . . . . . . . . . . . . . . . . . . . . . . . . . . . . . . . . . . . . . . . 73Enable remote instrument monitoring (Administrator only) . . . . . . . . . . . . . . . . . . . . . . . . . . 73Update instrument software (Administrator only) . . . . . . . . . . . . . . . . . . . . . . . . . . . . . . . . . . 73Restore factory defaults . . . . . . . . . . . . . . . . . . . . . . . . . . . . . . . . . . . . . . . . . . . . . . . . . . . . . . . . 74Configure the network . . . . . . . . . . . . . . . . . . . . . . . . . . . . . . . . . . . . . . . . . . . . . . . . . . . . . . . . . . 74Set up a wired connection . . . . . . . . . . . . . . . . . . . . . . . . . . . . . . . . . . . . . . . . . . . . . . . . . . . 74Set up a wireless connection . . . . . . . . . . . . . . . . . . . . . . . . . . . . . . . . . . . . . . . . . . . . . . . . 75Select a Cloud region (Administrator only) . . . . . . . . . . . . . . . . . . . . . . . . . . . . . . . . . . . . . . . . . 75Manage the instrument name (Administrator only) . . . . . . . . . . . . . . . . . . . . . . . . . . . . . . . . . 75Set the date and time . . . . . . . . . . . . . . . . . . . . . . . . . . . . . . . . . . . . . . . . . . . . . . . . . . . . . . . . . . . 76Manage the Sign Out Timer (Administrator only) . . . . . . . . . . . . . . . . . . . . . . . . . . . . . . . . . . . 76QuantStudio 3 and 5 Real-Time PCR Systems Installation, Use, and Maintenance Guide5
Contents APPENDIX A Install and connect the instrument to a network . . . . . 77Workflow: Install and connect to a network . . . . . . . . . . . . . . . . . . . . . . . . . . . . . . . . . . . . . . . . 77Before you begin . . . . . . . . . . . . . . . . . . . . . . . . . . . . . . . . . . . . . . . . . . . . . . . . . . . . . . . . . . . . . . . 78Unpack and install the instrument . . . . . . . . . . . . . . . . . . . . . . . . . . . . . . . . . . . . . . . . . . . . . . . 78Power on and follow the startup wizard . . . . . . . . . . . . . . . . . . . . . . . . . . . . . . . . . . . . . . . . . . . 79Connect the instrument and the computer directly or to a LAN . . . . . . . . . . . . . . . . . . . . . . . 79Instrument and computer connections . . . . . . . . . . . . . . . . . . . . . . . . . . . . . . . . . . . . . . . . . . . . 81 Download and install the QuantStudio Design and Analysis desktop Software . . . . . . . . .Computer requirements for the desktop software . . . . . . . . . . . . . . . . . . . . . . . . . . . . . .Download the desktop software . . . . . . . . . . . . . . . . . . . . . . . . . . . . . . . . . . . . . . . . . . . . .Install the software . . . . . . . . . . . . . . . . . . . . . . . . . . . . . . . . . . . . . . . . . . . . . . . . . . . . . . . .82828282Networking . . . . . . . . . . . . . . . . . . . . . . . . . . . . . . . . . . . . . . . . . . . . . . . . . . . . . . . . . . . . . . . . . . .Supported network configuration options . . . . . . . . . . . . . . . . . . . . . . . . . . . . . . . . . . . . .Control and monitor networked instruments . . . . . . . . . . . . . . . . . . . . . . . . . . . . . . . . . .About the Ethernet port . . . . . . . . . . . . . . . . . . . . . . . . . . . . . . . . . . . . . . . . . . . . . . . . . . . .Firewall ports that must be open . . . . . . . . . . . . . . . . . . . . . . . . . . . . . . . . . . . . . . . . . . . .Networking guidelines and best practices . . . . . . . . . . . . . . . . . . . . . . . . . . . . . . . . . . . . .848485858585 APPENDIX B Troubleshooting . . . . . . . . . . . . . . . . . . . . . . . . . . . . . . . . . . . . . . . . . 87 APPENDIX C Parts and materials . . . . . . . . . . . . . . . . . . . . . . . . . . . . . . . . . . . . . 88Kits, consumables, and accessories . . . . . . . . . . . . . . . . . . . . . . . . . . . . . . . . . . . . . . . . . . . . . . 8896-Well (0.2-mL) consumables . . . . . . . . . . . . . . . . . . . . . . . . . . . . . . . . . . . . . . . . . . . . . . . . . . 88384-well consumables . . . . . . . . . . . . . . . . . . . . . . . . . . . . . . . . . . . . . . . . . . . . . . . . . . . . . . . . . . 8996-Well Fast (0.1-mL) consumables . . . . . . . . . . . . . . . . . . . . . . . . . . . . . . . . . . . . . . . . . . . . . . 90 QuantStudio 3 and 5 Systems accessories . . . . . . . . . . . . . . . . . . . . . . . . . . . . . . . . . . . . . . . . 91General-use materials and consumables . . . . . . . . . . . . . . . . . . . . . . . . . . . . . . . . . . . . . . . . . 91 APPENDIX D Instrument specification and layout . . . . . . . . . . . . . . . . . . . 92Configured system dimensions . . . . . . . . . . . . . . . . . . . . . . . . . . . . . . . . . . . . . . . . . . . . . . . . . . 93Instrument clearances . . . . . . . . . . . . . . . . . . . . . . . . . . . . . . . . . . . . . . . . . . . . . . . . . . . . . 94Electrical requirements . . . . . . . . . . . . . . . . . . . . . . . . . . . . . . . . . . . . . . . . . . . . . . . . . . . . . . . . . 94Environmental requirements . . . . . . . . . . . . . . . . . . . . . . . . . . . . . . . . . . . . . . . . . . . . . . . . . . . . 95Network requirements . . . . . . . . . . . . . . . . . . . . . . . . . . . . . . . . . . . . . . . . . . . . . . . . . . . . . . . . . . 956QuantStudio 3 and 5 Real-Time PCR Systems Installation, Use, and Maintenance Guide
Contents APPENDIX E Safety . . . . . . . . . . . . . . . . . . . . . . . . . . . . . . . . . . . . . . . . . . . . . . . . . . . . . 97Symbols on this instrument . . . . . . . . . . . . . . . . . . . . . . . . . . . . . . . . . . . . . . . . . . . . . . . . . . . . . 98Conformity symbols . . . . . . . . . . . . . . . . . . . . . . . . . . . . . . . . . . . . . . . . . . . . . . . . . . . . . . . . 99Safety alerts on this instrument . . . . . . . . . . . . . . . . . . . . . . . . . . . . . . . . . . . . . . . . . . . . . . . . . 100Location of safety labels on the instrument . . . . . . . . . . . . . . . . . . . . . . . . . . . . . . . . . . 100Safety information for instruments not manufactured by Thermo Fisher Scientific . . . . 101Instrument safety . . . . . . . . . . . . . . . . . . . . . . . . . . . . . . . . . . . . . . . . . . . . . . . . . . . . . . . . . . . . .General . . . . . . . . . . . . . . . . . . . . . . . . . . . . . . . . . . . . . . . . . . . . . . . . . . . . . . . . . . . . . . . . .Physical injury . . . . . . . . . . . . . . . . . . . . . . . . . . . . . . . . . . . . . . . . . . . . . . . . . . . . . . . . . . .Electrical . . . . . . . . . . . . . . . . . . . . . . . . . . . . . . . . . . . . . . . . . . . . . . . . . . . . . . . . . . . . . . . .Cleaning and decontamination . . . . . . . . . . . . . . . . . . . . . . . . . . . . . . . . . . . . . . . . . . . . .101101102103103Safety and electromagnetic compatibility (EMC) standards . . . . . . . . . . . . . . . . . . . . . . . . .Safety compliance . . . . . . . . . . . . . . . . . . . . . . . . . . . . . . . . . . . . . . . . . . . . . . . . . . . . . . . .EMC . . . . . . . . . . . . . . . . . . . . . . . . . . . . . . . . . . . . . . . . . . . . . . . . . . . . . . . . . . . . . . . . . . . .Environmental design . . . . . . . . . . . . . . . . . . . . . . . . . . . . . . . . . . . . . . . . . . . . . . . . . . . . .103104104105Chemical safety . . . . . . . . . . . . . . . . . . . . . . . . . . . . . . . . . . . . . . . . . . . . . . . . . . . . . . . . . . . . . . . 105Biological hazard safety . . . . . . . . . . . . . . . . . . . . . . . . . . . . . . . . . . . . . . . . . . . . . . . . . . . . . . . . 106 Documentation and support . . . . . . . . . . . . . . . . . . . . . . . . . . . . . . . . . . . . . . . . . . . 107Related documentation . . . . . . . . . . . . . . . . . . . . . . . . . . . . . . . . . . . . . . . . . . . . . . . . . . . . . . . . 107Obtain information from the Help system . . . . . . . . . . . . . . . . . . . . . . . . . . . . . . . . . . . . . . . . 108Customer and technical support . . . . . . . . . . . . . . . . . . . . . . . . . . . . . . . . . . . . . . . . . . . . . . . . 108Limited product warranty . . . . . . . . . . . . . . . . . . . . . . . . . . . . . . . . . . . . . . . . . . . . . . . . . . . . . . 109Index . . . . . . . . . . . . . . . . . . . . . . . . . . . . . . . . . . . . . . . . . . . . . . . . . . . . . . . . . . . . . . . . . . . . . 110QuantStudio 3 and 5 Real-Time PCR Systems Installation, Use, and Maintenance Guide7
About this guideRevision historyRevisionC.0DateDescriptionDecember 2015 Updates – describes new features in Firmwarev1.2.x, including: Updated workflow to create an instrumentprofile Streamlined workflow for connectivity to theThermo Fisher Cloud Improved display of VeriFlex Zones Plate insert reminder before starting run Support for 96-well Fast (0.1 mL) platesB.0September 2015 Updates – describes new features in Firmwarev1.1.x, including: Experiment runs: monitor real-time data, editcycle number and lock screen during a run, viewend plot, and support for 384-well plates File management: access Network folders,navigate folder structures and save templateson instrument, and perform batch actions forfile management Instrument configuration: support for Security,Audit, and e-Signature (SAE), smart monitoring,and choice of server regionIncludes information on software featurecomparison, definitions of terms, parts of method,network connection options, experiment types,desktop software installation.A.08April 2015New document. Describes installation, operation,and maintenance of the QuantStudio 3 and 5 RealTime PCR Systems.QuantStudio 3 and 5 Real-Time PCR Systems Installation, Use, and Maintenance Guide
About this guidePurposePurposeThis guide provides information about installing, using, and maintaining theQuantStudio 3 and 5 Real-Time PCR Systems.Note: For information and instructions on performing experiments on these systems,refer to the QuantStudio Design and Analysis desktop Software User Guide (Pub. no.MAN0010408).QuantStudio 3 and 5 Real-Time PCR Systems Installation, Use, and Maintenance Guide9
1Product information Instrument hardware description . . . . . . . . . . . . . . . . . . . . . . . . . . . . . . . . . . . . . . . 10Software description . . . . . . . . . . . . . . . . . . . . . . . . . . . . . . . . . . . . . . . . . . . . . . . . . . 14Network connection options . . . . . . . . . . . . . . . . . . . . . . . . . . . . . . . . . . . . . . . . . . . 16Experiment types . . . . . . . . . . . . . . . . . . . . . . . . . . . . . . . . . . . . . . . . . . . . . . . . . . . . . 17Instrument hardware descriptionInstrumentoverviewThe QuantStudio 3 and 5 Real-Time PCR Systems use fluorescent-based polymerasechain reaction (PCR) reagents to perform: Quantitative detection of target nucleic acid sequences (targets). Qualitative detection of targets (endpoint analysis). Qualitative analysis of the PCR product (post-PCR melt curve analysis).The following fixed-block configurations are available:QuantStudio 3 Real-Time PCR SystemQuantStudio 5 Real-Time PCR System 96-Well VeriFlex 0.2-mL Block(4 Color) 96-Well VeriFlex 0.2-mL Block(6 Color De‑coupled) 96-Well VeriFlex 0.1-mL Block(4 Color) 384-Well Block (5 Color) 96–Well VeriFlex 0.1-mL Block(6 Color De‑coupled)The instrument can be run directly from the touchscreen to create and startexperiments. To design experiments or to analyze data, the instrument can beintegrated with QuantStudio Design and Analysis Software (desktop or cloud).An optional barcode scanner and optional wireless adapter can be purchasedseparately.10QuantStudio 3 and 5 Real-Time PCR Systems Installation, Use, and Maintenance Guide
Chapter 1 Product informationInstrument hardware description1Instrument filters and supported dyesSystem dyesThe QuantStudio 3 and 5 Systems use a coupled four-color, coupled five-color, or decoupled six-color filter set that supports the dyes shown in the following table andfigure. For more information about the spectral dye calibration kits available for theQuantStudio 3 and 5 Systems, contact Support.PeakchannelColorx1-m1[1][2][3]Filter wavelength(nm)[1]Pre-calibrateddyesExample customdyesExcitationEmissionBlue470 15520 15FAM and SYBR GreenSYT09x2-m2Green520 10558 12VIC HEX , TET , andJOE [2]x3-m3Yellow550 10587 10ABY , NED , andTAMRA Cy 3x4-m4Orange580 10623 14JUN and ROX Texas Red x5-m5Red640 10682 14Cy 5 andMUSTANGPURPLE LIZ x6-m6DeepRed662 10711 12None[3]Cy 5.5The central wavelengths are the optimized wavelengths.The HEX and TET dyes from Thermo Fisher Scientific fall within the emission wavelength range of thesystem, therefore they can be added and adapted for use in experiments on the system. To add any of thesedyes to the Dye Library, perform a custom dye calibration.This filter set currently does not support any dyes supplied by Thermo Fisher m1 x2-m2 x3-m3 x4-m4 x5-m5 x6-m612x1-m1 — FAM , SYBR Green2 x2-m2 — VIC 3 x3-m3 — ABY , NED , Cy 3, and TAMRA 1345x4-m4 — JUN , ROX , and Texas Red 5 x5-m5 — Cy 5 and MUSTANG PURPLE 4QuantStudio 3 and 5 Real-Time PCR Systems Installation, Use, and Maintenance Guide11
1Chapter 1 Product informationInstrument hardware descriptionCustom dyesThe QuantStudio 3 and 5 Systems can run assays designed with custom dyes (dyesnot supplied by Thermo Fisher Scientific or dyes not pre-calibrated with theinstrument). Custom dyes must excite between 455 – 672 nm and emit between 505 –723 nm. Select a custom dye that does not overlap with other dyes used in anexperiment (see the filter-wavelength table in “System dyes“ on page 11).To use a custom dye and add it to the Dye Library, perform a custom dye calibration(see “Calibrate custom dyes“ on page 54).About data collectionThe instrument collects raw fluorescence data at different points during the PCRcycle, depending on the type of run performed.When you create an experiment template (.edt file) in the desktop or cloud software,you can customize the optical filter channels through which the instrument collectsdata. You can specify a filter channel set for all PCR thermal protocols and, optionally,a different filter set for the melt curve stage(s).Run typeReal-timeExperiment type Standard curveDuring the thermal cycling protocol. Relative standard curveTypical timing is to collect data at each cycleof a PCR stage or continuously during a meltstage. Comparative CT (DDCT) Melt curvePost-PCR(endpoint)Data collection point Genotyping Presence/ Absence After thermal cycling is completed.For Presence/Absence and Genotypingexperiments, data collection before thePCR cycle is optional, but recommended. (Optional) Before thermal cycling starts.Collecting data during the run canconfirm genotyping results by viewingtraces in allelic discrimination plots orviewing genotyping calls at earliercycles.12QuantStudio 3 and 5 Real-Time PCR Systems Installation, Use, and Maintenance Guide
Chapter 1 Product informationInstrument hardware description1Blocks with VeriFlex ZonesApplied Biosystems VeriFlex technology provides independent temperature zonesthat offer enhanced functionality and prec
Plate insert reminder before starting run Support for 96-well Fast (0.1 mL) plates B.0 September 2015 Updates – describes new features in Firmware v1.1.x, including: Experiment runs: monitor real-time data, edit cycle number and lock screen dur