Transcription
4mixed-mediaart techniquespresented by cloth paper scissors 12431who can resistmagic?2moira ackersfusion-dyed collagetraci bautistawatercolor3 mixed-mediatechniquesjacqueline sullivantextured backgrounds4for collageMisty mawn
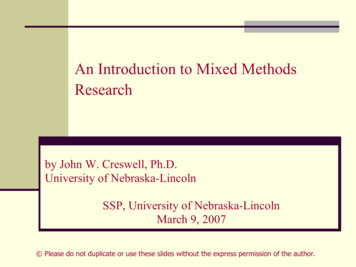
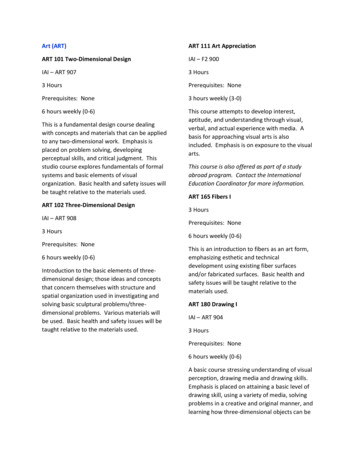
here at Cloth Paper Scissors , we’reall about starting from scratch andthat’s why our first-ever eBook isa collection of four different approachesto mixed-media backgrounds. Whetheryou like to work on paper or canvas, theseideas will get you started. Use any or allof these techniques to jump start a dayof creativity or work them into your ownprivate day of experimentation.We’re starting things off with MoiraAckers’s unique approach to resists, whichare highlighted with acrylic wax. Next,Traci Bautista’s fascinating fusion-dyedcollage process will have you running tothe grocery store for the jumbo pack ofpaper towels. Those of you who enjoy themore transparent side of vibrancy willfind Jacqueline Sullivan’s mixed-mediawatercolor techniques both inspiring andapproachable. And if you love texture,you’ll appreciate Misty Mawn’s article ontextured backgrounds for collage.Whether you like to lay it on thick orlayer it on in transparent washes, thiseBook contains ideas you can start usingtoday to kick off a creative spell of artmaking.4 Mixed-mediaArt Techniquespresented byCloth Paper Scissors editorassistant editorJenn MasonBarbara Delaneycreative servicesDivision Art DirectorPhotographeLarissa DavisLarry SteinProjects and information are for inspiration and personal use only. Cloth paper Scissors is not responsiblefor any liability arising from errors, omissions, ormistakes contained in this eBook, and readers shouldproceed cautiously, especially with respect to technicalinformation.Interweave Press LLC grants permission to photocopyany patterns published in thisissue for personal use only.Jenn MasonEditorN e e d f r e s h i n s p i r a t i o n ? look insidecloth paper scissors where you’ll find ideas for: Mixed-media stitchEncaustic collage Art journalingBook making AssemblageUpcycled art orking with foundWobjectsSurface designMetal workingPrintmakingclothpaperscissors.com4 Mixed-Media Art Techniques presented by Interweave Press LLCAvailable onnewsstandsworldwide andthroughsubscription.Toll-free within the U.S. & Canada: 800.406.5283International customers: 760.291.1519 (not toll-free)Cloth Paper Scissors Magazine,P.O. Box 469087, Escondido, CA 92046-9350clothpaperscissors.com2
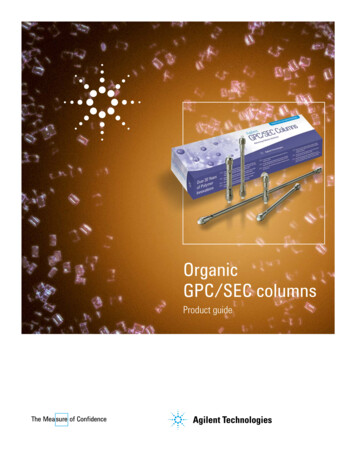
Adapted fromCloth Paper Scissors Spring 2006who can resistmagic?materials A thin, foam-based material such asQuickprint (UK), Darice Foamies, ora styrofoam meat tray (thoroughlywashed and dried) Acrylic paintsi Water-based pigments or inks,created to further some design work, in my journals, or just as book covers or Ballpoint penwrapping paper, I am always pleased with the results. What appeals to me most Plastic sheeting to protect workProcion dye powders, or foodcoloringdidn’t invent this simple resist printing technique, but over several years Ihave made it my own and I really love the results. Whether I use the papersis that this technique is inexpensive, quick, safe, and very flexible. This is thesort of activity you can do at home, and you might even let the kids join in (onceyou’ve tried it out a couple of times). Moreover, it is a method that will provideyou with wonderful surfaces to work on and develop in your own projects. It canbe as sophisticated or as simple as you wish.Once you’ve got your supplies togetheryou need to set aside some time. I liketo give myself a full day and reallycreate a mountain of papers. They’llalways be useful. You need to have alarge surface to work on and makesure everything is covered to protectit. I like to work in my kitchen and putthe wet papers to dry on plastic sheetson my living room floor. Wear plasticgloves if you hate messy hands. And thenkick the kids out, at least the first timeyou do this, and get to work.For this project I worked from photos I’dtaken of a wall in Cambridge, England.I loved the mix of windows and theirchaotic placement. I created a brick wallblock and several window blocks.4 Mixed-Media Art Techniques presented by Interweave Press LLC Paperssurface 2" to 3" paint brushes or spongebrushes Brayers Tubs or old trays to mix your colors Acrylic wax Scissors Pens Rubber gloves (optional) A container of water (for soakingbrushes)Left: Building shapes and spires in resist witha red/orange wash.byMoira Ackersclothpaperscissors.com3
A window from a wall in Cambridge, England,inspiration for the project on the followingpages.directionscreate your printingblocks1.2.Cut your foam (Quickprint, DariceFoamies, or styrofoam meat tray,washed and dried) into shapes thatsuit your design source. Cut yourblocks, taking care to size themappropriately. Blocks bigger thanyour hand can be difficult to grasp,while blocks cut too small are alsoawkward to work with.Lightly draw your design onto yourfoam sheet but don’t press into thefoam yet.3.When you’re happy with youroutlines, go over them using aballpoint pen, pressing firmly topierce the skin of the sheet andcreate an impression.4.This is not a precise process, so gofor simple, bold designs at first.Brick wall and windowblocks created in foam.Images were lightly drawn andthen etched into the foam with a ballpoint pen.You can always add lines for detailslater. It is important to note thatQuickprint has a grain. If you workagainst it with your pen, you'll geta more jagged line. This can be anadvantage giving your line interest,but if you don’t like it, turn it aroundand work in the other direction.Remember that this is a negativeprocess so the lines you’ve drawn arewhere the paint won’t be, and detailslike writing need to be reversed.4 Mixed-Media Art Techniques presented by Interweave Press LLCacrylic waxAcrylic wax has the appearance andfeel of wax but is actually a waterbased medium. It can be mixed withcolor or bronze powders and drieswith a slightly less transparent finishthan acrylic varnish. It gives an unusualand mysterious finish to artwork and isuseful for a wide range of applicationsas it is resistant to water and heat.clothpaperscissors.com4
Sample 1: Paper stamped with the brick walldesign and some window designs, in differentcolors.printing(see sample 1)1.Lay your paper out on the table.You can scrunch it first and thensmooth it flat for added texture.This technique is a simple printingprocess.2.Mix your acrylic paint using a smallamount at a time. This allows you toadd and change your colors as youlike. Acrylic paints dry fast, whichis great for this process but bad forthe brushes. If the brushes dry thereis no saving them; that’s why I usecheap brushes.3.Brush a light covering of youracrylic onto your print block (toomuch paint will cause the image tosmudge). Place the block face downon your paper.Sample 2: The stamped paper with a watercolorwash.Sample 3: A coat of acrylic wax applied overall.using light colors on dark paper asthey’ll look a bit sad and dull at first).Don’t despair—there are a lot ofexperiments you can do at this stage.For example, by printing twice fromthe block without adding paint, you’llget a much fainter second print. Youcan also rotate or stagger your block.the watercolorwash (see sample 2)While the acrylic paint dries, make upyour watercolor wash of inks, dyes, orfood coloring. Mix them in tubs withmouths wide enough for you to dip yourbrushes in.4.Run the brayer over the block andthen peel the block off the paper.Wash over the entire surface of yourprinted paper. The dry acrylic, nowa plastic surface, will “resist” thewatercolor paint, just like in batik. Thisis where the magic happens. Suddenlyyour printed designs jump out at you.5.Repeat the printing process, coveringas much or as little of the paperas you wish. Remember that thisis the beginning, so it won’t lookmagical yet (especially if you’reYou can cover the whole paper with onecolor wash, but I like to start at one endwith one color and work through thesheet using other colors, allowing themto mix and blend.4 Mixed-Media Art Techniques presented by Interweave Press LLCA variety of line motifs repeated, with a wash inshades of blue.clothpaperscissors.com5
You can leave the paint as is to dry orpat or dab the excess paint with papertoweling to speed up the drying time.Remember that wet paper is fragile andwill tear. Also, the watercolors will drylighter since they are transparent. If youscrunched the paper at the beginning,the broken fibers of the paper will absorbmore paint, giving added texture. Anyspare paint can be stored in a jar forfuture use.adding the acrylicwax (see sample 3)Allow your paper to dry. Don’t bedisappointed that some of the “magic”has gone as your paper dries with a dulllook. Water down your acrylic wax (1:1)and then brush this over your paper. Iusually do several coats and this gives ita lovely gleam. When brushing on thewax it will appear milky but like PVAglue it dries clear. Let it dry for at leasta day. Store the diluted wax in a jar forfuture use; it will last for ages.So there you have it. Beautiful papersfor you to work with. I’m sure once youhave a go you’ll keep doing it and work itto suit your own style.You can reach Moira by emailing:moira.ackers@ntlworld.com.resourcesDarice Foamies Available at Michael’s andat Jo-Ann Fabricsacrylic wax Polyvine Products (U.S.)www.polyvine.com Art Van Go (U.K. & Europe)www.artvango.co.ukAbove: The final product, brick and window images covering the sheet. Unique paper for a varietyof uses.4 Mixed-Media Art Techniques presented by Interweave Press LLCclothpaperscissors.com6
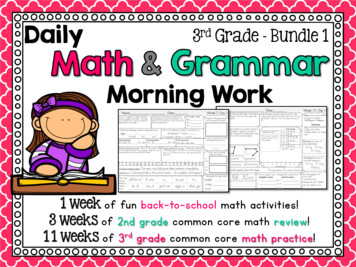
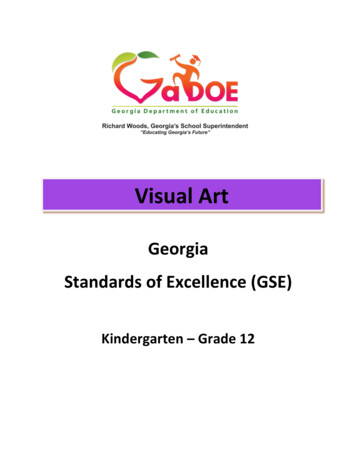
fushion-dyedcollageobyAdapted fromCloth Paper Scissors Summer 2005Traci Bautistane of my favorite art materialsis the unassuming papertowel. Because of its absorbentnature and various textures, thepaper towel is a great canvas onwhich to create beautifully dyedpapers. After teaching kids’ artworkshops, I found that papertowels became an inexpensive,readily available alternative tohigh-end rice paper for teachingthe Japanese art of dyeing paperknown as orizomegami. Needlessto say, I have stacks of dyed papertowels and napkins anxiouslywaiting to be used in my artwork.From this, fusion-dyed paperswere born. This collagetechnique merges layersof dyed paper towels,ephemera, and paint tocreate beautiful, transparent,textured pieces of art.“Funky Heart” Collage created with glued layers of dyed paper towels, accented with astencilled heart and a square pattern created with square brushes.dyeingmaterialsDyed papertowels. Various water-based mediaLiquid watercolorsDye-based ink refillsPigment ink refillsIridescent calligraphy inksGolden fluid acrylicsUltra-fine art glitter3 oz. plastic Dixie cups4 Mixed-Media Art Techniques presented by Interweave Press LLC Craft sticks2-ply paper towelsPipette/eye dropperFreezer paperSpray water bottleBrayercreating the dyeUsing a separate cup for each color, mixyour choice of water-based dye mediumwith a bit of water. Depending on theintensity of color you desire, add moreclothpaperscissors.com7
or less water. To create a metallic dye,add a few drops of gold or silver fluidacrylic or iridescent acrylic ink to yourmixture. To add sparkle, drop a pinch ofglitter into your dye mixture. Stir dyewith a craft stick.dyeing the paperfolded dip dyeingThis method creates controlled patterns.To begin, fold a paper towel. Experimentwith different folds; squares, rectangles,triangles, and accordion pleats willall produce different and interestingpatterns. Dip the folded paper towel intovarious dye colors (I use 2–3 colors).Fill a pipette with dye and squeeze someonto the paper towel to spot dye andcreate lines of color. The colors willbegin to run together in some spots,blending and creating new colors.scrunch dyeingThis method creates free-form/tie-dyepatterns. Crumple a paper towel and dipit into various colors. Squeeze the papertowel to spread color. Take another papertowel and squeeze out the extra dye ontoit and you’ll have an extra dyed papertowel.freezer paper dyeingThis creates random spotted patterns.Drizzle various watercolors, inks, andfluid acrylics over the shiny side of alarge piece of freezer paper. Sprinkleglitter over the paper and then spraywith a water bottle to disperse and mixthe colors. Place a paper towel overthe top of the freezer paper to pick upthe paint and continue to spray waterto blend the colors on the paper towel.Continue to add color to the freezerpaper and then roll a brayer over the topuntil the paper towel is completely dyed.Drizzle interference colors over the topof the dyed paper towel.tips on dyeing All water-based media areintermixable. Avoid dipping into the three primarycolors (red, yellow, and blue) as thiscreates muddy brown. Metallic paint will settle to thebottom of cups; stir completely andoften. Clean tools, cups, and brushes withpaper towels and use those in yourart—never waste them! Dyed paper towels can be used wet ordry for collage techniques. Do not use waterproof or solventbased inks; they create a gum-likesolution when mixed. If using watercolors to dye, thepapers will bleed when collagedtogether. After dyeing a paper towel,place it between two pieces of whiteconstruction paper and rub gently totake a monoprint.4 Mixed-Media Art Techniques presented by Interweave Press LLCVarious collage ephemera includingblack-and-white photocopies, Asian joss papers,dyed paper towel cut-outs, and printed napkins.collagematerials Craft glueWater2" flat paintbrushVarious collage ephemera (Japaneselace paper, tissue paper, joss paper,napkins, maps, music sheets, dictionarypages)Black-and-white photocopies1" foam brushVarious size flat paintbrushesGolden heavy body acrylic paintRubber/foam stamps (I preferunmounted.)StencilsGolden glossy soft gel mediumoptionalMiscellaneous flat brushesWite-Out penDimensional glitter paintMetallic crayonsPortfolio oil pastelsBlack Sumi or India inkclothpaperscissors.com8
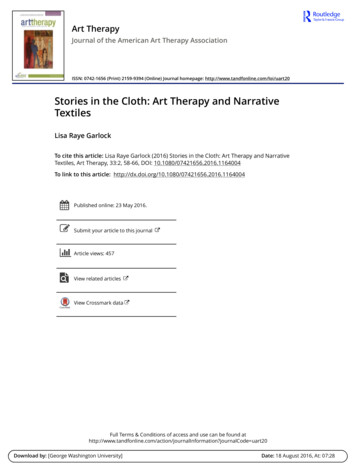
“Three Hearts” A collage created with freezer paper dyed paper towels. Repeating heartpattern created with heavy-body acrylics painted through a handmade heart stencil.4.The fusion-dyed technique with layered papertowels creates transparent paper.creatingfusion-dyed collagebasic technique — layering dyedpaper towels1.Mix glue with water (use a 4:1 ratio,glue to water) in a large plastic cup.2.With a 2" flat brush, spread the gluemixture over the shiny surface of an18" x 30" piece of freezer paper.3.Pull apart the layers of pre-dyed 2-plypaper towels and place a single layerof the dyed paper towel onto theglued surface.Coat the top of the paper towelwith a layer of the glue mixture.Continue to layer dyed paper towels,overlapping the edges to fill theentire piece of freezer paper. Be sureto coat each layer of the collage withthe glue mixture as you go.5.Cut shapes like hearts or flowersfrom the dyed towels and adhere withthe glue mixture, building up thelayers of the collage. Let collage drycompletely.6.Once dry, carefully peel it fromfreezer paper and you have abeautiful transparent collage.4 Mixed-Media Art Techniques presented by Interweave Press LLCvariations :1.Seal the collage with a coat ofglossy soft gel medium to create ashiny finish. Accent the top layer bypainting patterns with heavy-bodyacrylics using stencils, stamps, andflat brushes.2.Follow the basic technique and thenlayer ephemera to create a focalpoint. Coat the layer with the gluemixture and then write words andphrases over the top of collagewith dimensional glitter paint orWiteOut pens.3.Follow the basic technique and thencut a shape from one of your dyedpaper towels. Place the cutout ontoyour collage and apply a coat of theclothpaperscissors.com9
Detail of a black-and-white ephemeraphotocopy background.glue mixture. Let stand for a minuteand lift off the shape. You will noticethat the cutout has dyed the bottomlayer. Repeat to create a pattern.4.Fusion-dyed collage over black-andwhite backgrounds are great forinvitations and cards. Spread gluemixture over the shiny surface ofcollage tips Leverage your artwork. Make colorphotocopies or scan it to use ascollage sheets in other artwork. Thin, printed tissue papers andnapkins work great for fusiontechniques because they drytransparent. Let collages dry completely (dryingtime is 2 hours to overnight) andthen peel away from freezerpaper.“love.dream.play.be”— The base layer is a collaged background of a dictionary page andenlarged black-and-white photocopies of words, letters, and symbols created in Photoshop thenlayered with dyed paper towels and accented with joss paper and words written with CrayolaSpider Writers.a 12" x 18" piece of freezer paper.Place an 11" x 17" black-and-whitephotocopy background or collagepieces of various photocopies on top.Coat the top with the glue mixture.Collage a single layer of dyed papertowel until the entire photocopy iscovered and then coat this layer withthe glue mixture. Seal the top layerof collage with a coat of glossy gelmedium.4 Mixed-Media Art Techniques presented by Interweave Press LLCnote: This collage will not be transparentif the background is completely coveredwith photocopies.creating black - and - whitebackground papers Create interesting, bold, blackand-white line art backgrounds byenlarging images and words on a copymachine.clothpaperscissors.com10
uses for yourcollage papers Create an artful wall hanging. Cover a composition book. Use as book/journal covers andpages.Make invitations or cards.Make scrapbook pagebackgrounds.Make fusion-dyed ATCs.Create themed backgrounds withvarious words and symbols inPhotoshop or Microsoft Word.collage Apply heavy-body acrylic with a foambrush through stencils to createpatterns. Apply heavy-body acrylic paint witha foam brush to a stamp and stamp apattern.Create brush marks with black Sumiink or use an eyedropper to make inkdoodle backgrounds.Copy and enlarge written journalpages or handwritten letters.art. Play, explore, dream, create. I liketo work on multiple large pieces at atime so I can let layers dry and keepmy ideas fresh and not focused on justone collage. Explore the variations ofthis technique to create your very ownfusion-dyed collage.To see more of Traci's work visitwww.treicdesigns.com. Paint repeating square patterns withflat brushes. Paint more ink drawings witha pipette using black Sumi orwaterproof India ink.Liquid watercolor, pipettes, craftsticks, art glitter, iridescent colorsDrip melted metallic crayon over thetop of collage. Enlarge fonts, dictionary pages, andmaps.putmoreaccenting over fusion - dyed Use rub-on letters over the top of thecollage. Draw designs with water-soluble oilpastels. Stitch a photo to your collage.The basic technique and variations area jumpstart for you to create endlessresources Available at local craft and artsupply storeswww.dickblick.comBrilliance and Opalite Pigment inkrefills www.tsukineko.comGolden fluids, glazes, heavy bodyacrylics www.goldenpaints.comUnmounted stamps, stencils Available at a variety of craft andart supply storestexturein your lifeideas, textiles, and techniquesrelated to embellished and contemporary art quilting. Inside,you’ll find design inspiration, step-by-step directions, gorgeousphoto graphy, and motivation for developing your personal style,Quilting Arts Magazine exploresat all skill levels.quiltingarts.com800.406.5283 (U.S. & Canada)760.291.1519 (International)Quilting Arts Magazine , P.O. Box 469087, Escondido, CA 92046-93504 Mixed-Media Art Techniques presented by Interweave Press LLCclothpaperscissors.com11
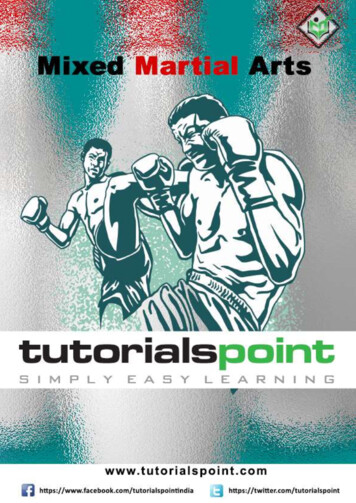
mixed-mediawatercolorAdapted fromCloth Paper Scissors Spring 2005techniquesbywJacqueline Sullivanhen we think of watercolorpainting, often imagesof flower bouquets or serenelandscapes come to mind.However, one does not need toknow how to paint a scene or astill life (or want to) in order toenjoy the lush beauty and benefitsof watercolor paints. A fewyears ago I began experimentingby adding other media to mywatercolor paints and was amazedwith the resulting papers. I usetransparent watercolor techniqueswith mixed media to createcolorful, textured backgrounds formy calligraphic works, collage,mixed media, and handmadebooks.materials Several plastic water bottles withsquirt-top caps Transparent watercolors Watercolor paper A shallow tray (like a cookie sheet) Spray bottle Small palette Distilled water 2 large containers for water An inexpensive, flat, 1" brush Masonite board (optional) Dust masktransparentwatercolorsThe trick to mixing transparentwatercolors is to mix the color withthe water before it is applied to thepaper. After you premix the colors, youcan then use the plastic water bottleto pour them on the paper, ratherthan using the traditional palette andbrush. By minimizing direct contactwith the paper surface, you will achievetransparent color with glazing. Glazingis a technique of layering transparent4 Mixed-Media Art Techniques presented by Interweave Press LLCcolors over one another, allowing thecolors underneath to shine through thetop color.colors and paintsIt is best to stay within a limited palette.A palette of primary colors (red, yellow,and blue) plus some earth colors willhelp build shadows and tonal qualities.While you are learning, it is a good ideato have no more than three colors onyour paper; they will blend and formother colors. Make your fourth color aneutral. I use Payne’s gray as a neutralcolor. It blends with all colors and quietsclothpaperscissors.com12
down some of the more brilliant colors.Some brands of burnt umber also workwell as a neutralizing color.One group of premixed colors that I useis alizarin crimson, phthalo blue, hansayellow, quinacridone gold, sap green,burnt sienna, and Payne’s gray. To thisgroup I sometimes add burnt umber,quinacridone violet, and yellow ochre.In addition to having these pre-mixedcolors in bottles, a small palette with thesame colors on it can be used to enhanceareas of color while the paper is wet.My preferred brands of watercolor paintsare American Journey or Daniel Smith(see Resources). Less expensive brandsof paint can be grainy and pale, but bothof these brands offer a wide range ofpaperIt is important to go with a name brand of paper because inexpensive watercolorpaper will only frustrate you. On many of the cheaper papers, pigment slides rightoff, a very discouraging result, especially for beginners who may think they are doingsomething wrong. Winsor-Newton, Arches, Frabriano, and Lanaquarelle are allgood brands of watercolor paper. There are three main types of watercolor paper tochoose from: rough, hot press, and cold press.rough Rough paper is what it says: rough. It is suited for dry brush and texturaltechniques, but challenging to work on.hot press This paper is pressed with heat in the manufacturing process to give it avery smooth surface. But because there are no hills and valleys on hot press paper, itis easy for the pigment to just “slide off” when working very wet.cold press This paper has some hills and valleys, but not as many nor arethey as deep as rough paper. The hills and valleys will vary from manufacturer tomanufacturer. These features help “grab” the pigment, giving the artist a bit morecontrol. Cold press papers take wet-in-wet smoothly, allowing the pigment to blendsoftly and freely.Watercolor paper usually comes in 90-, 140-, and 300-lb. weights. The 90-lb. paperis the lightest and is good for book pages and for making decorative papers to coverboard for book covers. It does, however, have to be stretched and taped to a boardfor working because it buckles when wet. Suitable for anything that calls for cardstock, 140-lb. paper is heavy enough for stand-alone covers of books. It is also heavyenough to take the weight of various acrylic media for mixed-media work and it willhold up to scraping, spraying, and pouring of wet media. Heavy and strong, 300-lb.paper is great for a base for collage work. It is also good for layering and tearing, acollage technique that will bring a third dimension to your paintings.4 Mixed-Media Art Techniques presented by Interweave Press LLCcolors of fairly good quality. Pigmentsfrom different manufacturers are usuallycompatible. For these techniques, youjust need to be sure that you are using“transparent watercolors.” However,be aware that colors with the samename will vary from one manufacturerto another, and some research andexperimentation may be necessary tocome up with a palette that works foryou.paintingmixing the paintTo mix the paint, put a small amountof water in the bottom of a bottle. Addabout 2.5 ML (1 2 tsp.) of paint to thewater and shake to mix. Add another 4ounces of water to the bottle and shakeagain, thoroughly dissolving all ofthe pigment. The strength of pigmentvaries greatly from one manufactureto another. These proportions may bechanged depending on the depth of coloryou are looking for.Once you have your paints mixed andhave selected your paper, it is time to getyour work area ready. Be sure to haveall of the listed materials on hand. Youmay want to have a few other colors foradding details to your paintings. Fillthe spray bottle with clear water. Theshallow tray is necessary for catchingdrips and excess paint. One of the largecontainers is for clean water to wetyour paper and the second is for rinsingbrushes. The flat brush is for “pushing”the paint a bit. You may also want around brush for some minimal detailing.1.With your paper lying flat, use thespray bottle to wet the paper in areaswhere you want paint colors to flowand mix. It should be damp (wet butno puddles). After you wet the paper,brush the water out evenly into thearea that you are going to paint. Or ifclothpaperscissors.com13
you want more control, use a large 2" wash brush to spreadthe water onto the paper.2.Shake your first bottle of color to mix it and then pouron some paint. Tilt and rotate your board to get the colormoving, letting the excess drip into your shallow pan.3.Before adding another color, let the first color find its placeon the paper and “rest” a bit, or you will just keep washingthe first color off with the next.4.Once your first paint has found its place and is notcollecting in puddles, add a second color. Choose analogouscolors (colors that are next to each other on the colorwheel) such as yellow to green to blue, or alizarin toviolet to blue. If you “cross over” the color wheel and usecomplementary colors, when the colors run together youwill get a muddy brown color.This method will give you a beautiful flowing watercolor wash.It makes a great background or abstract on its own or you cango further and use some additional techniques to give it moretexture and interest.tips The best types of containers to use are plastic water bottleswith sport tops (tops that pull to open and squirt). Thesebottles give you the ability to control the direction of thecolorsAbove: Watercolor paintings cut up, woven, and layered into a newpiece of art.Transparent watercolors can be classified in three categories:earth colors, mineral colors, and dye (or carbon) colors.earth colors These include umbers, ochres, and oxides andare made from ground earth, such as mineral rich soils or clay.These colors tend to be heavy, grainy, and not as saturatedas other colors. Some special effects, particularly the salt andalcohol techniques, usually do not work with the earth colors.mineral colors These colors are inorganic. Thisclassification includes all cadmiums, ultramarines, and cobaltblues. These colors are brilliant and somewhat opaque.Special effects work on these colors but not as dramatically ason the carbon colors.carbon or dye colors These colors are organic andstaining. They include alizarin crimson, phthalo blue, phthalogreen, and viridian colors. These colors are very strong andactually “stain” the paper. Some can be fugitive, that is, theyfade with time. But special effects used on these colors are verydramatic.4 Mixed-Media Art Techniques presented by Interweave Press LLCpigment and to “pour” on the color. Select bottles withrelatively flat bottoms, rather than bottles with conicalshapes on the inside bottom. Any creases and/or recessedshapes in the bottom of the bottle tend to trap the pigment. Use distilled water for mixing. This keeps the paint fromforming mold; pre-mixed paints are then usable from onepainting session to the next. If you are working larger than 11" x 15" you will want tostretch your watercolor paper onto a board. I use a piece of1 4" finished Masonite for this. As some Masonite will bleedand stain when wet, seal the board first with an acrylicmedium and allow to dry. Then tape your paper downsolidly with masking tape on all four edges, pulling it tight.This way you can tip and turn the board and paper to getthe paint to flow where you want it.clothpaperscissors.com14
mixed-media techniquessaltsandcharcoalAdding salt to the painting makesstar-like white shapes in the paint asthe salt pushes away the paint colors,creating light spots in the wash. Youcan use different types of salt (tablesalt, kosher salt, etc.) to get differentsize “stars.” Salt works better on dye orcarbon colors; it has very little effect onthe earth colors, and the effect is lessdramatic on the mineral colors.Sand has the opposite effect of saltin that it makes a dark texture in thewash. Try different textures of sand fordifferent looks; you will be amazed atthe number of textures there are invarious “sands.” In my studio there arecontainers marked East Coast sand,West Coast sand, play sand, and evenaquarium gravel.For a dark, moody look in yourwatercolor wash, try some powderedcharcoal, which is available in mostart supply stores. Powdered pastels canalso be used in this manner to lightenup areas that have gotten too dark ormuddy in the original wash. Pastels givethe wash a powdery, airbrushed look.Sprinkle the salt on the paper wheny
cloth paper scissors Mixed-media stitch Art journaling Assemblage Working with found objects Surface design Metal working Printmaking Encaustic collage Book making Upcycled art Available on newsstands worldwide and through subscription. where you’ll find ideas