Transcription
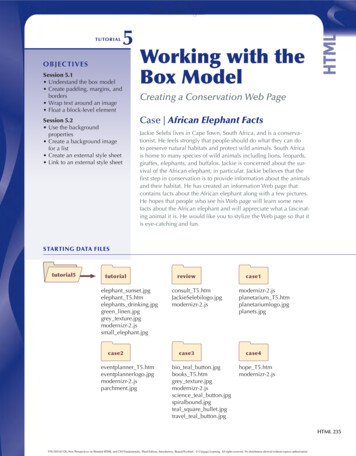
TUTORIAL5O B J E C T I V ESSession 5.1 Understand the box model Create padding, margins, andborders Wrap text around an image Float a block-level elementSession 5.2 Use the backgroundproperties Create a background imagefor a list Create an external style sheet Link to an external style sheetWorking with theBox ModelCreating a Conservation Web PageCase African Elephant FactsJackie Selebi lives in Cape Town, South Africa, and is a conservationist. He feels strongly that people should do what they can doto preserve natural habitats and protect wild animals. South Africais home to many species of wild animals including lions, leopards,giraffes, elephants, and buffalos. Jackie is concerned about the survival of the African elephant, in particular. Jackie believes that thefirst step in conservation is to provide information about the animalsand their habitat. He has created an information Web page thatcontains facts about the African elephant along with a few pictures.He hopes that people who see his Web page will learn some newfacts about the African elephant and will appreciate what a fascinating animal it is. He would like you to stylize the Web page so that itis eye-catching and fun.STARTING DATA FILEStutorial5tutorialelephant sunset.jpgelephant T5.htmelephants drinking.jpggreen linen.jpggrey texture.jpgmodernizr-2.jssmall elephant.jpgcase2eventplanner jpgreviewconsult T5.htmJackieSelebilogo.jpgmodernizr-2.jscase3bio teal button.jpgbooks T5.htmgrey texture.jpgmodernizr-2.jsscience teal button.jpgspiralbound.jpgteal square bullet.jpgtravel teal button.jpgcase1modernizr-2.jsplanetarium T5.htmplanetariumlogo.jpgplanets.jpgcase4hope T5.htmmodernizr-2.jsHTML 2359781305163126, New Perspectives on Blended HTML and CSS Fundamentals, Third Edition, Introductory, Bojack/Scollard - Cengage Learning. All rights reserved. No distribution allowed without express authorization.
HTML 236HTML and CSS Tutorial 5 Working with the Box ModelSESSION 5.1 VISUAL OVERVIEWThe border-bottom property appliesonly to the border at the bottom of thebox that contains the element.The border-side shorthandproperties list border propertiesas follows: border-side:style weight color.h3 {border-bottom: solid thick darkkhaki;padding-bottom: 0.5em;}padding-bottom: 0.5em;The padding-bottom propertyspecifies the amount of whitespace between the bottom of thecontent and the bottom of thebox that contains the element.clear:bothThe clear property specifiesthe sides of an element wherefloat elements cannot be placed.Johan Swanepoel/Shutterstock.com; Pichugin Dmitry/Shutterstock.com9781305163126, New Perspectives on Blended HTML and CSS Fundamentals, Third Edition, Introductory, Bojack/Scollard - Cengage Learning. All rights reserved. No distribution allowed without express authorization.
Tutorial 5 Working with the Box Model HTML and CSSHTML 237ALIGN, FLOAT, AND CLEAR PROPERTIES4px4pxPadding is the spacebetween the content andthe edge of the box thatcontains the element.The border property appliesvalues to all four sides of thebox that contains an element.img.right {border: double thick black;float: right;margin: 10px 0 10px 10px;}The float property positionsblock-level elements to the leftor right side of the Web page.The margin property values are listedin a clockwise direction, with the firstvalue representing the top, as follows:margin: top right bottom left.9781305163126, New Perspectives on Blended HTML and CSS Fundamentals, Third Edition, Introductory, Bojack/Scollard - Cengage Learning. All rights reserved. No distribution allowed without express authorization.
HTML 238HTML and CSS Tutorial 5 Working with the Box ModelUnderstanding the Box ModelYou meet with Jackie to discuss the design of the African Elephant Facts Web page.Jackie would like a design that is simple yet has a bit of interest. He’d like the picturesof the elephants to be staggered so one picture is in the top left, and the other pictureis along the right edge, further down the page. He knows there’s quite a bit of information, and sometimes a Web page can look too crowded when this is the case. He’d likea bit of space around some of the elements so the content doesn’t look too cramped.Creating the layout Jackie wants requires an understanding of the CSS box model.The CSS box model describes the imaginary boxes that are formed around elementsin a Web page. In HTML, every element is treated as though it were a box. The boxmodel consists of four parts: a content area, padding, borders, and margins. Becausethe elements you’ve created so far haven’t had borders, you haven’t seen the boxes, butthey’ve been there. The content area is the area that contains the box content, such astext or an image. By default, the content just barely fits into the box; there is no whitespace surrounding the content. The box properties are used to add white space anda border around the content. The three most commonly used CSS box properties arepadding, border, and margin. Two other box properties you’ve already used with theimg element are width and height. You’ve also specified margins for the body elementin a previous tutorial. The padding, border, and margin properties all affect placement of the content inside an element.Padding is white space that surrounds the box content. It is the space between the content and the edge of the box that contains the element. A border, which is a visible solid ordecorative ruled line, can be placed around the padding. Borders are useful because theycan separate the content of one box from another or call attention to a box. Optionally,you can change a border’s color, style, and width. The margin is white space outside theborder. The margin creates breathing room—separation between the boxes so they aren’tcrowded on the page. To some extent, you’ve already seen margin space around blocklevel elements, such as headings. For example, you’ve seen that headings are precededand followed by what appears to be a blank line. However, the browser is actually usingits own default settings to create the top and bottom margins for the heading. The relationship among the padding, the border, and the margins is shown in Figure 5-1.Figure 5-1The box modelYou don’t have to use all three of these box properties at the same time. For example,you may want to have padding and margin space around the contents of an element,but not a border. You could even set the padding, margin, and a border to each specificside of an element individually. Jackie has provided the Web page he created, alongwith the images. You’ll view Jackie’s Web page in your Web browser now, recognizingthat it will be displayed using the Web browser’s default styles.9781305163126, New Perspectives on Blended HTML and CSS Fundamentals, Third Edition, Introductory, Bojack/Scollard - Cengage Learning. All rights reserved. No distribution allowed without express authorization.
Tutorial 5 Working with the Box Model HTML and CSSHTML 239To open the African Elephant Facts Web page:Figure 5-2 1. Open the elephant T5.htm file in your text editor. Enter your name and today'sdate in the comment section of the file, and then save it as elephant.htm. 2. Take a few minutes to view the content and structure of the elephant.htm filein your text editor. 3. Open the elephant.htm file in your Web browser. Figure 5-2 shows the current layout and content.African Elephant Facts Web pageJohan Swanepoel/ Shutterstock.com; Pichugin Dmitry/Shutterstock.com9781305163126, New Perspectives on Blended HTML and CSS Fundamentals, Third Edition, Introductory, Bojack/Scollard - Cengage Learning. All rights reserved. No distribution allowed without express authorization.
HTML 240HTML and CSS Tutorial 5 Working with the Box ModelJackie would like a sans-serif font for the text. He’d also like the text to be white ona dark background, and in a larger font size than normal. You’ll use the CSS3 colordarkslategray, font Verdana or sans-serif, and the size 1.1em.To style the body element selector: 1. Return to the elephant.htm file in your text editor.2. After the title element, insert the following code as shown in Figure 5-3. Inthis example, you’ll use some comments to identify some of the styles: style type “text/css” /* body */body {background-color: darkslategray;color: white;font-size: 1.1em;font-family: Verdana, sans-serif;} /style Figure 5-3Style code for the body element 3. Save the file.4. Return to your Web browser, and then click the Refresh button to view thestyle changes in the file. The Web page should look similar to Figure 5-4.9781305163126, New Perspectives on Blended HTML and CSS Fundamentals, Third Edition, Introductory, Bojack/Scollard - Cengage Learning. All rights reserved. No distribution allowed without express authorization.
Tutorial 5 Working with the Box Model HTML and CSSFigure 5-4HTML 241African Elephant Fact Web page with body style appliedJohan Swanepoel/Shutterstock.com; Pichugin Dmitry/Shutterstock.comThe page already looks much better than Jackie’s original. Jackie has noticed thattext sometimes appears too close to an image, however, and that images often havetoo much space around them. You’ll use the CSS padding and margin properties toimprove this situation.Understanding the Padding and MarginPropertiesAs explained earlier, padding is the internal white space that surrounds the contents ofan element; the padding properties control this internal white space. By default, thecontent of an element does not have padding, but all major Web browsers add varyingamounts of padding by default. Values for both the padding and the margin propertiescan be expressed using any of the following measurements: em (em values) px (pixels) mm (millimeters) cm (centimeters) in (inches) % (percentage of the container element)You set the padding for an element using the padding property, which has the syntax:padding: width;where width sets the size of the padding on all four sides of the element using one ofthe CSS units of measure.9781305163126, New Perspectives on Blended HTML and CSS Fundamentals, Third Edition, Introductory, Bojack/Scollard - Cengage Learning. All rights reserved. No distribution allowed without express authorization.
HTML 242HTML and CSS Tutorial 5 Working with the Box ModelYou can set the padding for each side individually by using the following fourproperties: padding-top padding-right padding-bottom padding-leftFor example, to set the padding on the left side of images using em values, you coulduse the following code:img {padding-left: 1em;}REFERENCESetting Padding To set the padding within an element, use:padding: width;where width sets the size of the padding on all four sides of the element using one ofthe CSS units of measure. Use individual padding properties as follows: padding–top is used to set only the padding along the top edge of an element. padding–right is used to set only the padding along the right edge of anelement. padding–bottom is used to set only the padding along the bottom edge of anelement. padding–left is used to set only the padding along the left edge of an element. To set the padding within an element using the shorthand property, use:padding: top right bottom leftwhere top is the size of the padding on the top edge, right is the size of the padding on the right edge, bottom is the size of the padding on the bottom edge, andleft is the size of the padding on the left edge.Padding and marginsettings are preservedeven when the size of thebrowser window changes.The margin properties control the external white space, which is the white spaceoutside the border. You’ve used the margin properties in the body element previously.It’s intuitive to think that the body element has margins, much like the page of a document in a word-processing application. In fact, every element has margins. The marginproperties are often used to create white space around images. Without customization,images may appear too close to their surrounding text.You can set the margin for each side individually by using the following fourproperties: margin-top margin-right margin-bottom margin-left9781305163126, New Perspectives on Blended HTML and CSS Fundamentals, Third Edition, Introductory, Bojack/Scollard - Cengage Learning. All rights reserved. No distribution allowed without express authorization.
Tutorial 5 Working with the Box Model HTML and CSSHTML 243REFERENCESetting Margins To set the margin space around an element, use:margin: width;where width is the size of the margin using one of the CSS units of measure. Use individual margin properties as follows: margin–top is used to set only the margin along the top edge of an element. margin–right is used to set only the margin along the right edge of an element. margin–bottom is used to set only the margin along the bottom edge of anelement. margin–left is used to set only the margin along the left edge of an element. To set the margin for an element using the shorthand property use:margin: top right bottom leftwhere top is the size of the margin on the top edge, right is the size of the marginon the right edge, bottom is the size of the margin on the bottom edge, and left isthe size of the margin on the left edge.Using the padding and margin Shorthand PropertiesYou can declare the top, right, bottom, and left margins for a selector separately asshown in the following code:img {margin-top: 4px;margin-right: 4px;margin-bottom: 4px;margin-left: 4px;}However, you can make your code more compact and easier to write by taking advantage of shorthand properties for padding and margins. The padding property is a shorthand property that sets the padding on all four sides. The following code would createthe same amount of padding on all four sides of an h1 element:h1 {padding: 4px;}Similarly, the margin property is a shorthand property that sets the margin on all foursides. The following code would create the same amount of margin space on all foursides of an h2 element:h2 {margin: 1em;}Web developers seldomplace a unit measurement after the value of0 because zero of anymeasurement is 0. Forexample, 0em would beentered as simply 0.You can also use the padding and margin properties to be more specific than declaringthe same value for all four sides at once. Here’s how these shorthand properties work: If one value is listed, the value is used for all four sides equally. If two values are listed, the first value is applied to the top and bottom equally, andthe second value is applied to the left and right sides equally. If three values are listed, the first value is applied to the top, the second value is appliedto the left and right sides equally, and the third value is applied to the bottom. If four values are listed, the values are applied clockwise starting from the top, in thefollowing order: top, right, bottom, left.9781305163126, New Perspectives on Blended HTML and CSS Fundamentals, Third Edition, Introductory, Bojack/Scollard - Cengage Learning. All rights reserved. No distribution allowed without express authorization.
HTML 244HTML and CSS Tutorial 5 Working with the Box ModelEvery value except for 0 must have an accompanying measurement, with no spacebetween the value and the measurement—in other words, 1em, not 1 em. For valuesthat are less than 1, it’s a good coding practice to precede the value with a leading zero(for example, 0.2em), so anyone reading your code can easily recognize that the valueis less than 1.Figure 5-5 summarizes how to set values for the padding and margin shorthandproperties.Figure 5-5Setting values for the padding and margin shorthand propertiesValuesApplies to these sides, in this orderExample1All sides equallypadding: 4px;2Top and bottom equally, left and right equallymargin: 10px 4px;3Top, left and right equally, bottompadding: 4px 10px 4px;4Top, right, bottom, leftmargin: 0 0 0 4px;INSIGHTUnderstanding How Margins CollapseWhen designing a Web page, you could have two adjacent vertical boxes on the page.For example, it’s quite common to place an image above or below another image tocreate an image gallery. In such a case, it can be difficult to determine the top and bottom of the images because of margin collapse, which occurs when two adjoining topand bottom margins combine to form a single margin. Browsers render the greater ofthe two adjacent margins, not the sum of both. For example, let’s say that you had twoimages on your Web page, with one image positioned directly below the other. If thetop image had a bottom margin of 25px and the bottom image had a top margin of20px, you might expect the distance between the two images to be 45px because25 20 45. However, the actual distance would be 25px, which is the larger of thetwo margins. Margin collapse occurs only when two vertical margins come in contact.The margins of two images that are side by side do not collapse. In later tutorials onCSS layouts, you will learn how to correct margin collapse problems.Jackie would like the h1 and h2 heading text centered horizontally and the headingsstyled with a background color. He would like the headings to be a bit further apartthan the default. You’ll set the left margin for the h1 element to be 10px, and you’ll setthe top and left margins for the h2 element to 10px. You’ll use the margin and paddingproperties to style these elements.9781305163126, New Perspectives on Blended HTML and CSS Fundamentals, Third Edition, Introductory, Bojack/Scollard - Cengage Learning. All rights reserved. No distribution allowed without express authorization.
Tutorial 5 Working with the Box Model HTML and CSSHTML 245To style the h1 and h2 elements:Be sure to separate eachvalue of the margin property with a space only. Donot type a comma separator after each value. 1. Return to the elephant.htm file in your text editor.2. Within the embedded style sheet, insert the following code as shown inFigure 5-6:/* headings */h1{background-color: black;margin: 0 0 0 10px;padding: 4px;text-align: center;}h2{background-color: gray;margin: 10px 0 0 10px;padding: 4px;text-align: center;}Figure 5-6Margin and padding CSS codethe margin propertyhas four valuesseparated by spacesthe single value forpadding applies toall sides (top, right,bottom, and left) 3. Save the file.4. Return to your Web browser, and then click the Refresh or Reload buttonto view the style changes in the file. The Web page should look similar toFigure 5-7.9781305163126, New Perspectives on Blended HTML and CSS Fundamentals, Third Edition, Introductory, Bojack/Scollard - Cengage Learning. All rights reserved. No distribution allowed without express authorization.
HTML 246HTML and CSS Tutorial 5 Working with the Box ModelFigure 5-7Web page rendered with padding and marginsmargin: 0 0 0 10px;the 10px valueis the left margin10px top andbottom marginPichugin Dmitry/Shutterstock.comJackie would like you to add a border around one of the elephant images so it standsout a bit more. You’ll use the border properties to do this.Using the Border PropertiesYou use the border properties to place a decorative border around the contents andpadding of an element. Recall that in the box model, the border is located between thepadding and the margin. You can change a border’s style, color, and width.Setting Border StylesThe border style value can be any one of the following: solid double dotted dashed groove ridge inset outset none (no border; the default)Border styles, unfortunately, can look different in each browser. Figure 5-8 illustratesthe border styles as they appear in Internet Explorer.9781305163126, New Perspectives on Blended HTML and CSS Fundamentals, Third Edition, Introductory, Bojack/Scollard - Cengage Learning. All rights reserved. No distribution allowed without express authorization.
Tutorial 5 Working with the Box Model HTML and CSSFigure 5-8Borders rendered in Internet Explorergroove, ridge,inset, and outsetrender exactlythe sameFigure 5-9 illustrates the border styles as they appear in Chrome.Figure 5-9Borders rendered in ChromeFigure 5-10 illustrates the border styles as they appear in Safari.Figure 5-10Borders rendered in Safari9781305163126, New Perspectives on Blended HTML and CSS Fundamentals, Third Edition, Introductory, Bojack/Scollard - Cengage Learning. All rights reserved. No distribution allowed without express authorization.HTML 247
HTML 248HTML and CSS Tutorial 5 Working with the Box ModelThere are five border-style properties: border-top-style border-right-style border-bottom-style border-left-style border-styleThe border-style property is the shorthand property you can use to set the values forall four border styles with one declaration.You set the border color using the border-color property. You can use the CSS3color names, or the hex or RGB code.Setting Border WidthBorder width can be expressed using the keywords thin, medium, and thick, as avalue in pixels or ems, or as a percentage. Browsers display the thicknesses of thekeyword values slightly differently, but in general, a thin border is 1px wide, a mediumborder is 3px or 4px wide, and a thick border is 4px (or more) wide. When creatingpage layouts in which elements have borders, it’s best to avoid these browser discrepancies, so instead of using keywords, you should rely on pixel values to express borderthickness. Figure 5-11 illustrates various border widths.Figure 5-11Border thicknessesThere are five border-width properties: border-top-width border-right-width border-bottom-width border-left-width border-widthThe border-width property is the shorthand property you can use to set the widthvalues for all four borders at once.Setting Border ColorThe border color can be a named color, a hex value, or an RGB value. There are fiveborder-color properties: border-top-color border-right-color border-bottom-color border-left-color border-color9781305163126, New Perspectives on Blended HTML and CSS Fundamentals, Third Edition, Introductory, Bojack/Scollard - Cengage Learning. All rights reserved. No distribution allowed without express authorization.
Tutorial 5 Working with the Box Model HTML and CSSHTML 249The border-color property is the shorthand property you can use to set the colorvalues for all four borders at once. Figure 5-12 illustrates the border colors.Figure 5-12Border colorsUsing the Border Shorthand PropertiesThere are eight border shorthand properties. As you saw in the previous section, the following three properties change the border style, width, or color for all four borders: border-color border-style border-widthThe following four properties change the border style, width, and color for an individual border: border-top border-right border-bottom border-leftFinally, the border property changes the border style, width, and color for all four borders. You must specify a border style when you use the border shorthand property. Usespaces, not commas, to separate values when using the border shorthand properties.The following border shorthand property sets the border color for all sides tomaroon:h1 {border-color: maroon;}The following code sets the top border to be solid, thin, and red:h2 {border-top: solid thin red;}The following code sets all borders to be inset, thick, and orange:h3 {border: inset thick orange;}You can list the border style, thickness, and color in any order, and you do not haveto specify three values; however, if you use two values, one of them must be a borderstyle. If you omit a value for color, the border color matches the element’s color. Forexample, to use the border shorthand property to change borders to appear in navy,you would enter the following code:h1 {border: dotted navy;}9781305163126, New Perspectives on Blended HTML and CSS Fundamentals, Third Edition, Introductory, Bojack/Scollard - Cengage Learning. All rights reserved. No distribution allowed without express authorization.
HTML 250HTML and CSS Tutorial 5 Working with the Box ModelNote that a border style—in this instance, dotted—must be specified. The borderproperty is clearly favored over the use of the HTML horizontal rule (hr) element,which draws a horizontal line across the screen. Screen readers have trouble interpreting the horizontal rule element, so for accessibility reasons, you should always substitute the border property in place of the horizontal rule element. Another advantage ofusing the CSS border properties is that you can create vertical ruled lines by changingthe border on the left or right. You cannot create vertical ruled lines by using HTMLcode alone.REFERENCESetting the Appearance of all Four Borders at Once To set the border width, use:border-width: width;where width is one of the CSS units of measure. To set the border color, use:border-color: value;where value is a named color, RGB color, or hexadecimal color value. To set the border style, use:border-style: style;where style is none, solid, double, dotted, dashed, outset, inset, groove,or ridge. To use the border shorthand property, enter:border: style color width;orborder-side: style color width;where style is the border style, color is the border color, width is the border width,and side is top, right, bottom, or left. Although not all three values need to bespecified and values can be entered in any order, at minimum you must specify aborder style.Jackie would like a solid darkkhaki bottom border below the h3 elements. You’ll alsouse the padding property to create some white space between the bottom border andthe h3 heading text.To create a bottom border for the h3 elements:Be sure to separate eachvalue of the borderbottom property with aspace only. Do not typea comma separator aftereach value. 1. Return to the elephant.htm file in your text editor.2. On a blank line below the style for the h2 element, type the following codeto style the h3 element, as shown in Figure 5-13:h3{border-bottom: solid thick darkkhaki;padding-bottom: 0.5em;}9781305163126, New Perspectives on Blended HTML and CSS Fundamentals, Third Edition, Introductory, Bojack/Scollard - Cengage Learning. All rights reserved. No distribution allowed without express authorization.
Tutorial 5 Working with the Box Model HTML and CSSFigure 5-13HTML 251Bottom border and padding for the h3 elementstyle value listedfirst, followed bythickness and colorspace charactersseparate values Figure 5-143. Save the file.4. Return to your Web browser, and then click the Refresh or Reload buttonto view the style changes in the file. The Web page should look similar toFigure 5-14.Padding and border below the h3 elements0.5em paddingabove and belowthe thick borderJohan Swanepoel/Shutterstock.comJackie would like the h1 and h2 elements to be placed to the right of the first image.He would also like the second image to be placed along the right edge of the Webpage. You’ll create these effects by using the float property.Using the float PropertyTwo additional box properties are the float and clear properties. The float property is used to position boxes on the page and to wrap content, such as text, around abox. If the float property for an element has a value of left, the element appears atthe left edge of the containing element, which may be the browser window, and theremaining page content wraps to the right of the element. Likewise, if the float property for an element has a value of right, the element appears at the right edge of thebrowser window and the remaining page content wraps to the left of the element.The clear property is used to specify whether or not an element can have anotherfloating element beside it. Specifically, the clear property specifies the side or sideswhere floating elements are not allowed. If the clear property is set to none, floating elements are not allowed on either side. This type of double-negative logic can be difficult tounderstand, but basically if the clear property for an element is set to none, then floatingelements are allowed on all sides of the element. If the clear property for an element isset to both, no floating elements are allowed on either side of the element.9781305163126, New Perspectives on Blended HTML and CSS Fundamentals, Third Edition, Introductory, Bojack/Scollard - Cengage Learning. All rights reserved. No distribution allowed without express authorization.
HTML 252HTML and CSS Tutorial 5 Working with the Box ModelREFERENCEUsing the float and clear Properties To float an element, use the style:float: position;where position is left, right, or none. To set the restrictions for floating elements on either side of an element use the style:clear: value;where value is none or both.The float propertydoes not have a value ofcenter or middle. If youwant to center an imagehorizontally, use the textalign property on theelement that contains theimg element (such as ap element).Any element can be floated. One of the most common elements to float is theimage element.Jackie would like you to place the first image in the top-left corner, with the h1 andh2 elements to the right of that image. He’d also like you to add some white space onthe right side and bottom of the image. You’ll use the float property to float the firstimage to the left, and wrap the h1 and h2 elements to the right. You’ll use the marginproperty to add right and bottom margins of 10px.To float an image left and add margin space: 1. Return to the elephant.htm file in your text editor.2. On a blank line below the style for the h3 element, type the following codeto style the img element, as shown in Figure 5-15:img {float: left;margin: 0 10px 10px 0;}Figure 5-15Floating the first image on the left 3. Save the file.4. Return to your Web browser, and then click the Refresh or Reload buttonto view the style changes in the file. The Web page should
Tutorial 5 Working with the Box Model HTML and CSS HTML 239 To open the African Elephant Facts Web page: 1. Open the elephant_T5.htm file in your text editor. Enter your name and today's date in the comment section of the file, and then save it as elephant.htm. 2. Take a few minutes t