Transcription
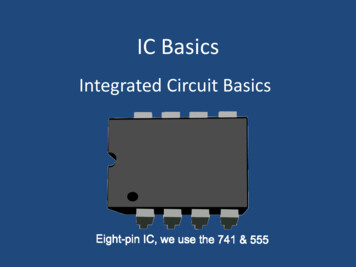
Electronic CircuitBasicsWithTinkercadBy Alex ReyesDigital Maestro Magazinedigitalmaestro.org
Electric Circuits with Tinker CAD and STEM IntegrationTable of ContentsTable of Contents .2Electronic Circuit Basics with TinkerCAD .3Closed Circuit with an LED .6The TinkerCad Pushbutton .12An LED Circuit with A Push Button 14Troubleshooting the Switch.15The Switch Solution . 16Using A Slide Switch in Circuits .17Circuits and Resistors .22Links to resources .28Project Properties .29A Circuit with An LED and Resistor .31Circuits with A Potentiometer .36Potentiometer Resistance Value .38Student Activities .40Circuits with Capacitors .41Charging and Discharging the Capacitor .44Student Activity: .45Circuits with Arduino .46Blinking LED .51Page 2 : Digital Maestro Magazine : digitalmaestro.org
Electric Circuits with Tinker CAD and STEM IntegrationElectronic Circuit Basics with TinkerCADTinkerCAD is a free online service for creatingbasic 3D shapes and developing digital prototypes of electronic components. These prototypes include basic circuits with LED lights,buzzers, switches, and even light sensors.These prototypes can include a microprocessor as part of the design. Microprocessorsare the simplest form of computer that can beprogrammed. They can be programmed tomanipulate electronic components like LEDlights and buzzers. Microprocessors can beprogrammed to gather information from sensors and interpret that information. They areused in a variety of devices all around us.They are in microwaves, refrigerators, cars,computers and many other electronic devices.!Go to the left side of the page after logging inand click the circuits menu option.!The process used in TinkerCAD is often usedfor rapid prototyping. Prototyping is a processwhere we can develop components in a flexible manner than can be quickly updated andmodified to test a variety of options when developing a project or product. We will use thisprocess of prototyping to learn how to createbasic electronic circuits.Go over to https://tinkercad.com and createa free account. Tinkercad integrates with Social Media services like Facebook. It also Integrates with services like Microsoft andGoogle. Students can use their district accounts to log into Tinkercad if your districtuses active directory accounts with Google orMicrosoft.Click the create button to build a new circuit.!A circuit project is created and opened. A circuit project includes a variety of electroniccomponents. Electronic components includeLEDs, buttons, resistors, and a power source.The components we can use are displayed ina panel at the bottom of the page.Page 3 : Digital Maestro Magazine : digitalmaestro.org
Electric Circuits with Tinker CAD and STEM Integration!!Components are commonly assembled usinga Breadboard. A Breadboard is a piece ofplastic that has several holes. These holes areused to hold different components. Find theBreadboard component and click on it once.The Breadboard has a grid of thirty by tenholes in the main area. The rows are numbered 1 to 30 and the columns are labeledwith the letters A through J. The columns Athrough E are separated from columns Fthrough J by a piece of plastic.!!The Breadboard will be selected and temporarily attached to the mouse pointer. Movethe mouse pointer onto the workspace andclick the mouse button to place the Breadboard onto the workspace.The edges of the board contain two columnswith the same number of rows. These columns have negative and positive symbols.These columns and holes are used for thepower supply. The components in the centerpart of the board will tap into these columnsto draw electric current.!The Breadboard might appear too small ortoo large in the work area. Click on the zoomto fit button so the Breadboard is centeredand magnified.!Page 4 : Digital Maestro Magazine : digitalmaestro.org
Electric Circuits with Tinker CAD and STEM IntegrationMove your mouse pointer over one of theholes in the center part of the board. The holebeneath will be identified with a red squareand a black border. The other holes will beidentified with green circles. These green circles indicate that each hole in the row is connected to each other hole in the row. There isa wire linking any connection within the samerow. We will use this linking to help developconnect components.!Let’s jump in and build our first circuit.Page 5 : Digital Maestro Magazine : digitalmaestro.org
Electric Circuits with Tinker CAD and STEM IntegrationClosed Circuit with an LEDOur first project will create a basic closed circuit with a light. Our light will be supplied by aLight Emitting Diode, LED. Click the Components button to open the components drawerif it isn’t already open.An LED has connections that make it differentfrom a regular light bulb. An LED has oneconnection called a Cathode and anothercalled an Anode. The Anode lead is usuallylonger than the cathode. This distinction isimportant because the anode must be connected to the positive end of an electric circuit. Current flows in only one directionthrough an LED.!Click the LED component. It will attach itselfto the mouse pointer.!The LED anode in our circuit is identified by abent lead. This is where the positive currentmust connect.!Place the LED onto the board so that eachwire of the LED is in a hole. The wire comingfrom a component is often called a lead. It ispronounced like the word lead in leader andnot the soft metal lead.!We need a power source to power the LED.Open the components panel and find a battery. We will use the AA battery with 1.5 voltsfor our first circuit.!Page 6 : Digital Maestro Magazine : digitalmaestro.org
Electric Circuits with Tinker CAD and STEM Integration!We can zoom in and out of our project usingthe scroll wheel on our mouse or touch gestures on a track pad, but that can be difficult.It might be easier to use these short cut keycombinations. If you are on a Windows orChromebook computer, hold the Control keyand press the Plus key to zoom in or the minus key to zoom out. On a Mac, hold theCommand key and use the Plus to zoom inor the minus to zoom out. Tap the plus or minuskey a couple of times.Place the battery along the left side of theBreadboard.Zoom out of the project so you can see thebattery alongside the Breadboard.!Click the active components button to closethe components panel.!The terminals for the battery are at right angles to the Breadboard connectors. Batteryterminals are the negative and positive connections. The terminals in this example, arepointing up.!Page 7 : Digital Maestro Magazine : digitalmaestro.org
Electric Circuits with Tinker CAD and STEM IntegrationI find it useful for the terminals to be directlyacross from the connectors. We can rotatethe battery so the connections are easier.Click the battery once to make sure it is selected. A blue border appears around selected components.We need to connect the battery to theBreadboard so it supplies voltage to our LED.We connect components to one anotherwhen they are not on the same row with Leadwires or Jumper wires. These are wires coated with a plastic and exposed end that canbe used to jump from one component to another. This is one reason they are calledjumper wires.Move your mouse pointer over the top terminal. A square will appear over the terminaland a label will appear identifying the terminalas the negative battery terminal.!Click the rotate button in the button bar. Thiswill rotate the component clockwise in smallincrements of about 30 degrees each. Clickthe button three times to rotate the battery90-degrees clockwise.!!Click once on the terminal and move themouse pointer to the first hole in the negativecolumn. Click once on the hole to completethe connection. This is how we create jumperwire connections. All the other holes in thenegative column are identified with a greencircle. This means that all these holes arejoined and can be used to connect the negative end of wires or components.!The terminals should be facing the Breadboard.!Page 8 : Digital Maestro Magazine : digitalmaestro.org
Electric Circuits with Tinker CAD and STEM IntegrationRepeat the process with the positive terminaland place the jumper wire onto the positivehole on the breadboard. When a connectionis completed the ends of the wire will be identified with circles.Select the red color.!Repeat the process for the negative terminalwire and change the wire color to black.!This is a simple circuit with only a few wiresbut circuits can get complicated very quicklywith many wires jumping from one location toanother. It is usually a good idea to identifythese wires with colors. There are some standard colors that are used in electronics. Redis usually used for positive connections andblack for negative connections in DC circuits.Sometimes green is used.!Make sure the positive terminal wire is still selected. A Breadboard wire configuration panelis located on the right side of the page. Clickthe color selector.One of the benefits of using a Breadboard isthat components can be easily moved aroundto form new connections or to make room forother components. Click and drag the LED tocolumn f.!!Page 9 : Digital Maestro Magazine : digitalmaestro.org
Electric Circuits with Tinker CAD and STEM IntegrationThe LED will light up when we have a closedcircuit. This circuit isn’t closed yet. We needtwo wires to close the circuit. One wire for thepositive and one for negative. The positivecurrent must flow through the anode in ourLED. Click on Row 4 Column J to begin ajumper wire. Connect the other end of thewire to the positive column.In the simulation, nothing happens until werun the simulation. Click the Start Simulationbutton.!The LED on the Breadboard will change to alighter color to simulate that the LED hasturned on.!Connect another wire from Row 3 Column Jto the negative terminal column.!!Our circuit is now complete. We shouldchange the color or our wires so they matchthe polarities.The LED doesn’t appear all that bright. Thatisn’t because of the program but because ofthe voltage being supplied to the LED. Thesingle battery we used in the circuit is supplying a low voltage. In this example, we want alow voltage because LEDs have a limit. Toomuch voltage and the LED will blow out andstop working. This is where a simulator is veryuseful. In a real-world application, wewouldn’t want to burn out our LED.!Page 10 : Digital Maestro Magazine : digitalmaestro.org
Electric Circuits with Tinker CAD and STEM IntegrationClick the battery once.!Start the simulation and observe what happens to the LED. The star over the LED indicates that the LED blew out. In the physicalworld, this would mean that our LED is nolonger good and needs to be replaced. LEDsare not very expensive but if you start blowingout several at a time it can get expensive. In afuture lesson, we will learn how to use resistors so the LED doesn’t get damaged.Go to the battery configuration panel andclick the battery count selector.!Click the battery component and return thenumber of batteries to one.!Select two batteries.In this lesson, we created a circuit and usedthe Simulate button to turn the LED ON orOFF. In the physical world, we use switchesand in the next lesson we will use a switch toturn the LED ON and OFF.!Page 11 : Digital Maestro Magazine : digitalmaestro.org
Electric Circuits with Tinker CAD and STEM IntegrationThe TinkerCad PushbuttonIn this lesson, we will be using a pushbuttonto complete a circuit with an LED. Before creating the circuit with the pushbutton, let’s takea look at how the pushbutton works. Thepushbutton is a temporary connection. Clicking the mouse button on your computer overthe pushbutton will simulate pushing a buttonand closing a circuit. The mechanism for doing this is not visible so I have created illustrations to help explain.Looking at the button from the side we seethat the button floats above the two wireswith a spring. The spring isn’t shown in theimage. When the button is above the wires asshown in the illustration, the electric currentcannot flow through the circuit. The current isshown in the image uses a red dashed arrowpointing up.The button has one large circle in the centerthat is used to close the circuit. There are fourconnectors on the pushbutton. There is oneconnector on each corner of the button.!When the button is pressed, the circuit closes. The arrow with the dashed lines in the image represents current flowing from one endof the switch to the other.!Looking inside the button just under thecover, we see that the left and right connectors are really two wires. One wire on eachside of the button.!If we connect a circuit from one side of theswitch to the same side of the switch on theother end, then the wire within the switch willallow current to flow through when the buttonis not pressed.!Page 12 : Digital Maestro Magazine : digitalmaestro.org
Electric Circuits with Tinker CAD and STEM IntegrationConnections can also be made at the opposite end from the other connection as shownin the image below.!When connecting components, we need tomake sure that the connections are made atopposite ends of the switch. A connectioncan be made to diagonally opposite ends asshown in the image below.!Connecting to the proper ends of the buttonis important to make sure the circuit works asintended.!Page 13 : Digital Maestro Magazine : digitalmaestro.org
Electric Circuits with Tinker CAD and STEM IntegrationAn LED Circuit with A Push ButtonCircuits usually have a button that is used toopen and close the circuit. We will be usingthe same circuit constructed in the previouslesson and add a button.The closed circuit will include the button.Placing the button where one end of the button’s connector is on f3 forms part of ourclosed circuit. Remember that everything in anumbered row is connected. This means thatthe button is connected to one end of theLED, and the jumper wire running from j3 isconnected to the negative rail. We need tomove the jumper wire from the positive terminal so it connects to the other side of the button. This will complete the circuit.!Open the components panel and find thePushbutton component.!!Click once on the positive terminal jump wire.This will select the wire so we can remove itfrom the circuit. We don’t need the wire hereand it’s a good idea to keep things organizedand free of extra wiring. Press the delete keyon your keyboard after selecting the wire.Place the Pushbutton component so that oneend is on column F and the other end is oncolumn E. In this switch, the diagonal terminals represent the opposite ends of theswitch. This means that the current will flowfrom E5 to F3, as represented in the diagrambelow.!Page 14 : Digital Maestro Magazine : digitalmaestro.org
Electric Circuits with Tinker CAD and STEM IntegrationWe need the positive connection to be madeon the other side of the button. The breadboard has positive and negative rails on bothends. We will reconnect the positive end ofour battery pack to the other end of thebreadboard. Click the positive terminal wire.!Connect a jumper wire from the positive rail tothe row that matches the opposite side of thebutton.!Move the mouse pointer to the end of thewire that is connected to the breadboard. Theconnection point of the wire will highlight anda white dot will appear where the wire connects to the breadboard. Click on this whitedot to detach and drag the wire to anotherlocation.!Click and drag the end of the wire to the other side of the breadboard and connect it tothe positive side of the rail.!Troubleshooting the SwitchI don’t like to solve problems for my audienceduring presentations and I won’t solve theproblem for you here either. Run the simulation and press the button. Does the LED turnon? What do you think is the reason for theLED not working as we intended? I’ll give youa hint. The anode on the LED must be connected to the positive connection of the electric current flow.I really did make this mistake and it took me a couple ofminutes to realize what I had done. I was going to startall over again but I realized this is a good teachable moment. You are likely to make this mistake yourself andleaving it in seemed like a great teaching opportunity.Page 15 : Digital Maestro Magazine : digitalmaestro.org
Electric Circuits with Tinker CAD and STEM IntegrationStop the simulation before proceeding to thesolution. We cannot move components whilethe simulation is running. Just like you shouldnot move components when electric currentis flowing through them in a real circuit.Teachers might want to relate this to a real-world situation. For example, turning off the electricity to a section oftheir home if they ever intend on working on electric circuits and discuss the dangers of electrocution.!Run the simulation and press the push buttonwith the mouse pointer. The LED will remain litwhile the button is pressed. Release the button and the LED will turn OFF.!The Switch Solution!Move the LED so the anode is connected tothe push button terminal. This means movingthe LED one row up to row 2.This is the completed circuit.!!After moving the LED, the negative jumperwire is no longer connected to the cathodeend of the LED. We don’t need to delete thejumper wire. Existing jumper wires can bemoved. Click once on the jumper wire andmove one end so it connects the cathode ofthe LED.Buttons are a common way of controlling theflow of electricity through a circuit. In futurelessons, we will explore other switch optionsthat are controlled by physical switches andcomputers.Page 16 : Digital Maestro Magazine : digitalmaestro.org
Electric Circuits with Tinker CAD and STEM IntegrationUsing A Slide Switch in CircuitsIn the previous lesson, we used a Pushbuttonto pass voltage to the LED. The Pushbuttonis a temporary button. When the button is released, so is the connection that closes thecircuit. A Slide Switch is more permanent because it will continue to maintain either anopen or close circuit without the user havingto keep a finger on the switch.!Find the Slideswitch component and place iton the breadboard.To create a new project for this circuit weneed to return to the main TinkerCad page.Click the TinkerCad icon located in the topleft side of the web page.!Create a new circuit.Place the switch in the bottom half of thebreadboard. Leave at least one columnabove and below the switch for jumper wires.!!!Find the small breadboard component in thecomponents panel. Click on it once and placeit on the workspace.Page 17 : Digital Maestro Magazine : digitalmaestro.org
Electric Circuits with Tinker CAD and STEM IntegrationGet an LED to place on the breadboard.!Connect the negative and positive batteryterminals to the corresponding holes on thebreadboard. Don’t forget to change thejumper wire colors.!Place the LED in the upper half of the breadboard and leave space for jumper wires.!Get a 1.5-volt battery and place it near thelower half of the breadboard on the left side.!!Let’s talk a little about the switch. The switchhas three wires that connect to the breadboard. Only two of the wires are used to create a closed circuit. The center wire is alwayspart of the circuit. The left or right wire coming from the switch is used to complete thecircuit. The wires coming from the switch arecalled leads. The part of the switch that slideshas lines or ridges like a real switch.Rotate the battery so the terminals are facingthe breadboard near the negative and positive rails.!Page 18 : Digital Maestro Magazine : digitalmaestro.org
Electric Circuits with Tinker CAD and STEM IntegrationConnect a jumper wire from the positive rail tothe center lead on the switch.Click the “Start Simulation” button.!!Connect a jumper wire from the negative railto the left lead on the switch.The LED is not lit because the switch is in theOFF position. Click the switch once to move itto the ON position.!!Connect jumper wires to connect the positiverow of the button to the row that connectsthe LED Anode. Remember that the Anode ofan LED must be connected to the positivewire. Connect the Cathode side of the LED tothe negative row of the switch.The LED will light and remain lit until we clickthe switch again to move the Slideswitch orstop the simulation. Click the switch to openthe circuit and turn the LED OFF.!!Page 19 : Digital Maestro Magazine : digitalmaestro.org
Electric Circuits with Tinker CAD and STEM IntegrationStop the simulation so we can rewire theswitch.!!Move your mouse pointer over the bottomend of the wire. The end of the wire willchange to a white dot. Click and drag this dotto move this end of the wire to a new location.Click once on the jumper wire coming fromthe negative rail. Press the Delete button onyour keyboard to delete the wire.!!Connect the wire to the row that connectsthe right side of the switch lead.Connect the right side of the switch to thenegative rail with a jumper wire.!!The Cathode side of the LED needs to beconnected to the negative side of the switchto close the circuit when the switch is flipped.Click once on the jumper wire for the LEDCathode.Page 20 : Digital Maestro Magazine : digitalmaestro.org
Electric Circuits with Tinker CAD and STEM IntegrationPress the “Start Simulation” button. Noticethe position of the switch in our circuit andthe status of the LED light. Changing the sidethat the wires connect to the Switch alsochanges the side that the Switch must bemoved in order for the circuit to be closed.Click the Switch once to open the circuit.!We can use one side or the other of theSwitch to complete a circuit. We cannot useboth sides of this switch at the same time. Tryconnecting a jumper wire to both sides of theswitch and see what happens.!The circuit is open and the light is not receiving current or voltage.!You will find that the LED will not light at all.Page 21 : Digital Maestro Magazine : digitalmaestro.org
Electric Circuits with Tinker CAD and STEM IntegrationCircuits and ResistorsIn the previous lessons, we created a circuitthat lit an LED. In one of the lessons weadded two batteries to the circuit and theLED was damaged. The LED was damagedbecause it received too much voltage. LEDsare low voltage or low wattage componentsand don’t need much electricity to get themto emit light. This is one of the reasons theyare so useful for lighting homes, businesses,and even cities. Their low power consumptionmakes them ideal when conserving energy.Power sources like batteries are designed toproduce large voltages and generate currentto power energy hungry components. In thepast, one of these energy hungry components was the Incandescent Light Bulb,which requires more voltage than an LED.Ohm’s Law states that we can calculate theamount of voltage in a circuit by multiplyingthe electrical current by the resistance in thecircuit. In the formula, we use the letter “I” forCurrent. The letter “I” is used in honor of theman who formulated Ampère's force law bywhich we measure current and made electricmotors possible from electro magnets. André-Marie Ampère, who was French, used itin a French phrase, “intensité de courant,(current intensity)”. So, the letter “I” actuallystands for Intensity.When constructing circuits, we have a varietyof components that require different voltagesand current. We will learn how resistors areused to restrict the flow of current to electricalcomponents. Electrical current is measured inAmps. In this lesson, we will learn aboutOhm’s Law and how we use it to understandwhat is going on when we use resistors in acircuit.!The formula can be manipulated to find thecurrent in a circuit. To find the current in a circuit we divide the Voltage by the Resistance.!We can use the formula to find the resistancein a circuit. To solve for resistance, we dividevoltage by the current.Page 22 : Digital Maestro Magazine : digitalmaestro.org
Electric Circuits with Tinker CAD and STEM IntegrationTeaching: Student should work out how we arrived asthese formulas. It is a good idea to introduce or revisitformulas and how we can manipulate them to solve fordifferent solutions.!Go to the battery options panel and changethe battery count from one to four.!Create a new circuit. Return to the main Tinkercad Circuit page by clicking the TinkerCadlogo. Click the “Create new Circuit” button.!Scroll to the bottom of the components listand find the Multi-meter component.!Find the small Breadboard component andplace it on the canvas.!!Find the battery component and place it onthe canvas to the left of the breadboard.Page 23 : Digital Maestro Magazine : digitalmaestro.org
Electric Circuits with Tinker CAD and STEM IntegrationPlace the Multi-meter near the center of thebreadboard in the upper half. Make sure toleave columns f and g available so we canmake jumper wire connections.Connect jumper wires from the negative battery terminal to the negative rail on the breadboard and connect a jumper wire from thepositive battery terminal to the positive rail onthe breadboard.!!Click on the battery pack so it is selected andclick the rotate button so the terminals on thebattery pack are facing the breadboard.Change the color of the wires so they areblack for negative and red for positive.!!Move the battery pack so the terminals arenear the positive and negative rails at the bottom of the breadboard.Add a jumper wire that connects the negativeend of the Multi-meter across the gap to theother side of the breadboard.!!Page 24 : Digital Maestro Magazine : digitalmaestro.org
Electric Circuits with Tinker CAD and STEM IntegrationConnect two more jumper wires. One wire willconnect the positive terminal of the Multi-meter to the lower half of the bread board. Theother jumper wire will connect the negativerail to the multi-meter along one of the rows.In the image below that would be along row14.!!We will be using this setup to learn about current flow across a resistor. While the resistoris still selected we can see that the resistanceof this resistor is measured at 1 Kilo-Ohm.The symbol next to the letter k is the Greekletter Omega(Ω). The Omega symbol is usedbecause the “Om” in Omega sounds similarto Ohm. One Kilo-Ohm is 1000 Ohms.Click the Components button to open thecomponents panel.!Click the symbol selector to see other measurement symbols for Ohms. There is a totalof eight. We won’t be using most of thesemeasurement symbols. I want to point out afew that will be used in this and other chapters.!Find the resistor.!Place the resistor on the breadboard so thatone end connects to the positive rail and theother end is opposite the positive terminal forthe Multi-meter.Page 25 : Digital Maestro Magazine : digitalmaestro.org
Electric Circuits with Tinker CAD and STEM IntegrationThe Omega symbol by itself represents oneOhm. The symbol above the Omega with thelower case “m” before it is a measurement inmilli-ohms. The Symbol before milli-ohms withthe “u” before it is micro-ohms. In our circuits,we will be using Ohms, milli-ohms and kiloohms.!Click on the letter “V” on the meter. The meterindicates that there is 6 volts going throughthe circuit.!Make sure the resistance unit of measure isset to kilo-ohms and click the Start Simulationbutton.!Click on the letter “R” on the meter. The meter displays an error message. We are gettingthis error because the connection to measureresistance across a resistor is different fromthe one we are currently using.The error message doesn’t mean much inthis example because we know that the resistance value is 1 kilo-ohm. We know this because we set the value on the resistor configuration panel.!The meter measures that there is 5.99 miliamps flowing through the circuit. The Multimeter has three measurement options. The“A” is selected on the meter. This means it isset to measure Amps or Current.!Page 26 : Digital Maestro Magazine : digitalmaestro.org
Electric Circuits with Tinker CAD and STEM IntegrationThere are other ways of knowing the resistance of a resistor. Each resistor comes witha set of color bands. These color bands tellus the resistance value of the resistor. Toknow the value, we need to know what thecolor bands mean. In this example, we knowthat the colors brown, black, and red designate a resistor with 1 kilo-ohm.!Another way to find the resistance value ofthe resistor is to use Ohms Law. To find theresistance we divide voltage by the current.The meter provides this information for us.The voltage is 6 and the current is 5.99 amps.Dividing 6 by 5.99 comes very close to 1, and1 kilo-ohm is the value of our resistor.There is another color that is as close to theother colors. This color is used to inform us ofthe tolerance of the resistor. Resistors aremade out of a variety of materials. These materials include carbon and metal. The materials are not perfect and the amount of resistance in these materials can vary. A goldband informs us that the resistor has a tolerance of plus or minus 5 percent. This meansthat the resistance ca
Electronic Circuit Basics with TinkerCAD TinkerCAD is a free online service for creating basic 3D shapes and developing digital pro-totypes of electronic components. These pro-totypes include basic circuits with LED lights, buzzers, switches, and even light sensors. These protot