Transcription
MSI CENTERUser Guide(For MSI’s Motherboards & Desktops)
ContentsAbout MSI CENTER. 4Get Started. 5System Requirements. 5Supported Hardware. 5Installing MSI Center. 5Launching MSI Center. 7How to completely remove MSI Center. 7MSI CENTER Basics. 8Feature Sets. 9Gaming Mode. 10Gaming Mode Option. 10How to Add Games into Gaming Mode. 11How to Remove Games from Gaming Mode. 12How to Enable Gaming Mode. 13Smart Priority. 14How to Enable Smart Priority. 15User Scenario. 16Selecting User Scenario. 16Canceling User Scenario. 17Setting User Options. 18How to Adjust the CPU Frequency. 18How to Adjust the Motherboard Voltage. 19How to Use Game Boost. 20How to Adjust the GPU and GPU Memory Frequency. 22How to Adjust the DRAM Timing. 23How to Adjust the DRAM Voltage. 24Adjusting the Fan Speed. 25How to Enable MSI Fast Boot. 27Hardware Monitoring. 28FROZR AI Cooling (optional). 29How to enable FROZR AI Cooling. 29Setting Manual Mode for FROZR AI Cooling. 30Game Highlights. 31How to Share Game Highlights to Social Media . 32How to Remove Game Highlights. 33Installing MSI Companion. 342Contents
Setting MSI Companion. 36Setting Game Highlights. 38True Color. 40True Color Preset Options. 40How to customize screen color. 41LAN Manager. 42Network Control Menu. 42Setting Network Speed. 43Customizing Application Priorities. 44Mystic Light. 45DYNAMIC DASHBOARD Control Panel (optional). 52DYNAMIC DASHBOARD II Control Panel (optional). 54Gaming Gear. 56Gaming Dial (optional). 57Duet Display (optional). 60Create a New Screen Profile. 61Activating Duet Screen Capture. 61MSI Sound Tune (optional). 62Speed Up. 63Super Charger. 64Coreliquid (optional). 65Product Registration. 69Live Update. 71System Info. 72Microsoft APP. 73Notices. 74Copyright. 74Revision History. 74Contents3
About MSI CENTER Optimize game settings and enjoy a high quality gaming experience. System performance tuning, you can choose overclock or silent. Monitor system information. Adjust the best display settings for your eyes. Register your MSI products. Control the LED light effects and synchronize effects to your devices. Manage network connection settings. Use utilities to control special features. ImportantTHE SOFTWARE FEATURES IN THIS USER GUIDE VARY BYPRODUCT.THE SCREENSHOTS FOR THE UI IN THIS USER GUIDE ARE FORREFERENCE ONLY AND THE ACTUAL UI DESIGN MAY VARY.4About MSI CENTER
Get StartedSystem Requirements Operating System: Windows 10 64-bitSupported Hardware Motherboard: MSI motherboards Graphics card: MSI NVIDIA and AMD graphics cardsInstalling MSI Center1. Go to MSI Website download MSI Center.2. Extract the downloaded file.3. Double-click on the extracted MSI Center setup program.4. Click Install to continue the process.5. Open the Start6. Hover over More.menu, then right-click on MSI Center.7. Select Run as administrator.Get Started5
8. Please wait until the installation is complete.9. You can start to use MSI Center.6Get Started
Launching MSI CenterOpen the Startmenu, then select MSI CenterHow to completely remove MSI Center1. Open the Start2. Select Apps.menu, then select settings.3. Uninstall MSI Center.4. Uninstall MSI Center SDK.Get Started7
MSI CENTER Basics ImportantThe screenshots for the UI in this user guide are for reference only and the actual UIdesign may vary.Features MenuMonitor Tab8MSI CENTER BasicsSupport MenuMy DeviceSettingsFeature sets
Feature SetsFeature Sets allows you to download, update, or uninstall MSI exclusive features.Therefore, you can choose the features you want to build your own MSI center.The items you candownloadClick here to installFeature Sets9
Gaming ModeThe Gaming Mode feature will optimize the computer system, monitor, cooler andother peripherals to provide the best gaming experience.Go to Features Gaming Mode.Refresh softwarelist buttonGaming Modeswitch ImportantApplications Optimized by Gaming ModeGaming Mode doesn’t support PRO Series Motherboards.Gaming Mode OptionGame Mode switch and option settings are available in the upper right corner of eachgame icon. You can choose whether the game applies Game Mode, such as SystemPerformance, True Color, Nahimic and Touchpad Disable while playing the game.Option Settings10Gaming ModeOn/Off Gaming mode
How to Add Games into Gaming ModeClick Add Game button. Then select the game's .exe file.Add Game buttonAdd Game buttonGaming Mode11
How to Remove Games from Gaming Mode1. Click Remove Game icon.Remove Game button2. When prompted, click Yes button to confirm this deletion, or click Cancel buttonto cancel this process.12Gaming Mode
How to Enable Gaming ModeYou can enable the Gaming Mode to adjust settings for System Performance, TrueColor, Nahimic, Mystic Light and Game Highlights while playing the game.1. Go to Features Gaming Mode.2. Turn on the switch for the game.Option Settings3. Turn on Gaming Mode switch.On/Off the switchGaming Mode switch4. Play the game.Gaming Mode13
Smart PriorityThe Smart Priority feature will optimize the computer system, monitor, cooler andother peripherals to provide the best experience while using creative applications.Go to Features Smart Priority.User Priority Mode: User-defined software priority.Real-Time Mode: The top level of the windows hasbest performance.Smart Priority Mode: Automatically prioritizesystem resources to your most commonly usedprograms based on AI calculation.You can drag and dropto set the prioritySmart Priority main switchList softwaresupported by SmartPriorityEdit the software listRefresh the software list ImportantAdd software to the software listSmart Priority doesn’t support PRO Series Motherboards.14Smart Priority
How to Enable Smart PriorityYou can enable the Smart Priority for Processor Affinity, System Performance andApplication Priority while using creative applications.1. Go to Features Smart Priority, and turn on Smart Priority main switch.Turn on Smart Priority main switch2. Select one of the options.3. Run the application. ImportantIn order to apply the settings, the Smart Priority must be enabled before running thesoftware.Smart Priority15
User ScenarioIn addition to Gaming mode, users can choose from three scenarios and onecustomized option depending on different situations. Each scenario has defaultsettings for CPU, DRAM, Fan, and Graphics Card. There is one more function calledSoftware Control Mode, which can switch on/off only CPU and Fan settings in theselected mode.Selecting User Scenario1. Go to Features User Scenario.2. Turn on/off Software Control Mode in the upper right corner of the screen.3. Select one mode among Extreme Performance/ Balanced/ Silent/ Customize.4. Restart your computer to apply the settings. Extreme Performance – A configuration that boosts the highest possibleperformance for AAA games, and enables overclocking. Balance - MSI recommended settings for most users. Silent - A configuration that allows system to run smoothly with minimumloading. Customize - Customize the performance level and fan speed as desired.16User Scenario
Canceling User Scenario1. Click on the selected scenario again.2. Restart your computer to apply the BIOS settings.How to disable CPU/Fan settings when applying User Scenario1. Turn off Software Control Mode in the upper right corner of the screen.2. Select one of the options to apply the mode except for CPU/Fan settings.3. Restart your computer to apply the settings. Important Software Control Mode only controls the options in User Scenario, not includingGaming Mode. After turning on or off Software Control Mode, you need to select one of UserScenario modes to apply the settings. If you turn on Gaming Mode switch and also select one of User Scenario modes, thesystem will apply Gaming Mode settings first.User Scenario17
Setting User OptionsIn the lower right corner of User icon, click the settingoptions.icon to customize userClick to set User OptionsHow to Adjust the CPU Frequency1. Go to Features User Scenario, click Customize.2. In the MB section, click CPU Frequency setting.Click hereCPU frequency Ratio * BCLKSelect all or individual cores18User ScenarioClick/to adjust CPU ratio andBase Clock frequency (BCLK). Youcan also fill out the value in the inputbox.Apply changesDefault values
How to Adjust the Motherboard Voltage1. Go to Features User Scenario, click Customize.2. In the MB section, click Voltage settingBack.Click hereClick/to adjust voltage value.You can also fill out the value in theinput box.Current voltage valueRangeApply changesDefault valuesUser Scenario19
How to Use Game BoostThe GAME BOOST feature allows you to overclock your computer.1. Go to Features User Scenario, click Customize.2. In the MB section, click Game Boost settingClick here.For Motherboard with Game BoostOn/Off button to enable/disableGame Boost featureApply changesFunction description20User Scenario
For Motherboard with Game Boost 8 StagesApply changesFunction descriptionClick 0 11 number to select a stagefrom number 0 (default) to number 11(extreme) for overclocking the processor.GAME BOOST Dial Button allows you switchGAME BOOST control between software (SW) andhardware (HW) by clicking on the center button.User Scenario21
How to Adjust the GPU and GPU Memory Frequency1. Go to Features User Scenario, click Customize.2. Click/to adjust GPU Frequency and GPU Memory Frequency. You can alsofill out the value in the input box.3. Click the Apply button to apply change.22User Scenario
How to Adjust the DRAM Timing1. Go to Features User Scenario, click Customize.2. In the DRAM section, click DRAM Timings setting.Click hereBackSelect the DRAM ChannelClick to select an available valuefrom the drop-down menuApply changesDefault valuesUser Scenario23
How to Adjust the DRAM Voltage1. Go to Features User Scenario, click Customize.2. In the DRAM section, click Voltage setting.Click hereClick/to adjust voltage value.You can also fill out the value in theinput box.BackCurrent voltage valueRangeApply changesDefault values24User Scenario
Adjusting the Fan SpeedFan speed control panel provides Smart Fan and Manual Fan settings. You can switchthe control mode by clicking the Smart Fan or Manual Fan tabs on the Fan controlpanel.How to enter the fan speed control panel1. Go to Features User Scenario, click Customize.2. In the Fan section, click CPU/ PUMP/ SYS fan settingClick here.How to use the Smart Fan control panelThe Smart Fan control panel contains 4 dotswhich allow you to drag and adjust the SmartSpeed slopes. The fan speed will change alongwith the Smart Speed curve.Current fan speedThe white dot will create stripchart in real time.Fan Tune - click toautomatically optimizethe smart fan setting.Default settingUser Scenario25
How to use the Manual Fan control panelCurrent fan speedDefault settingClick the percentage tomanually control thefan speed.26User ScenarioFan Tune - click toautomatically optimizethe smart fan setting.
How to Enable MSI Fast BootThe MSI Fast Boot feature can decrease computer startup time.1. Go to Features User Scenario, click Customize.2. In the MB section, turn on MSI Fast Boot switch.Click here3. Click the Apply button to apply changes.4. Reboot your computer, and MSI Fast Boot will be enabled.User Scenario27
Hardware MonitoringHardware Monitoring feature provides a custom hardware monitor gadget to displaythe system status.Click hereClick to free up memoryHardware Requirements for Resizable Bar:When Resizable Bar isDisabled, click to showinformation MSI Motherboard: Intel Z390/ H310/ B360/ H370/ Z370/ X299/ Z490/ B460/ H410/ Z590/ B560/ H510 AMD B550/ X570/ A520/ X470/ B450/ X470/ B450/ X399/ TRX40 MSI Graphics card: NVIDIA 3000 series AMD 6000 series ImportantResizable Bar will be available when the computer hardware meets one of the aboverequirements.28Hardware Monitoring
FROZR AI Cooling (optional)FROZR AI Cooling feature will use AI technology to detect CPU & GPU temperaturesand automatically adjust fan duty of system fans to a proper value.Supported Hardware: Motherboard: Support PCIe 4.0 slots Graphics card: MSI NVIDIA 3000 series and AMD 6000 series graphics cards ImportantFROZR AI Cooling will be available when the computer hardware meets both of theabove requirements.How to enable FROZR AI Cooling1. Go to Features FROZR AI Cooling.2. Select one among Performance/ Silent/ Manual Mode. Performance - Boost extreme performance with higher fan speed. Silent - Adjust fan speed for best cooling and silence. Manual - Customize fan speed as desired.Choose one mode fromthe drop-down menuCurrent fan speedOn/Off the switchOn - To use FROZR AI Coolingto control system fansOff - To apply User ScenarioCustomize settings to controlsystem fansCurrent fan speed curveFROZR AI Cooling (optional)29
Setting Manual Mode for FROZR AI Cooling1. Go to Features FROZR AI Cooling.2. Select Manual Mode from the drop-down menu.3. Fill out CPU&GPU temperatures and the corresponding fan duty for differentthree stages.Blue curve - GPU fan dutyGreen curve - System fan dutyRed curve - CPU fan dutyClick to applyfor Defaultsettings30FROZR AI Cooling (optional)Click to applyfor ManualMode settings
Game HighlightsGame Highlights feature will automatically capture clips of amazing gameplaymoments. It looks for certain events which occurs in games, and saves the capturedvideos in your local folder.Go to Features Game Highlights.Gameplaydisplay zoneVideo timeline ImportantDisplay certainevent clipsAuto capturedevent clipsSupported gamesdisplayed in thedrop-down listSettingGame videorecord listGame Highlights feature only supports certain series Motherboards. In addition, thisfunction is currently available in Fortnite, League of Legends, Apex Legends, Valorant,PUBG, Overwatch, Heroes of the Storm.Game Highlights31
How to Share Game Highlights to Social MediaGame Highlights feature supports uploading videos directly to social media, such asYouTube, Twitter, and Discord.Options to open files in thefolder and to directly shareclips to social media32Game Highlights
How to Remove Game HighlightsYou can choose to delete game highlight video which includes several clips or toremove one single game highlight clip from the whole game video.Click here toremove the gamehighlight videoClick here toremove the gamehighlight clipGame Highlights33
Installing MSI CompanionBefore you enable Game Highlights function, you should install MSI Companion first.1. Go to Features Game Highlights.2. When a prompt window appears, click Download MSI Companion app.Click here3. Execute MSI Companion-Installer.exe, and click Next to continue the process.4. Select I have read and accepted Overwolf’s terms and Privacy Policy.34Game Highlights
5. After finishing MSI companion and Overwolf Installation, click Launch to activateMSI companion.How to Activate MSI CompanionYou can activate MSI companion by one of the following methods: Open Overwolf in System Tray, and click MSI Companion. Press ctrl tab in games to open Overwolf, and click MSI Companion Click MSI Companionon the desktop.Game Highlights35
Setting MSI CompanionAfter activating MSI Companion app, you can adjust settings about Control and Displayfrom the pop-up window.On Control tabPin the window to bealways on topLinked to User Scenariosetting in MSI CenterLinked to True Colorsetting in MSI CenterAdjust system volumeAdjust mouse sensitivityOn/Off Windows Keys36Game Highlights
On Display tabPin the window to bealways on topAdjust font size for systemmonitorAdjust transparency formonitor backgroundClick the setting icon tochoose the detailed items youwant to display on the screenSelect the systemperformance you want todisplay on the screenSystem monitorPin the window to bealways on topGame Highlights37
Setting Game Highlights Go to Features Game Highlights, and click setting Adjust settings for Games, Capture, and Storage.On Games tabOn/Off Game Highlights38Game Highlights.Click here
On Capture tabAdjust hotkey settingsfor manual captureOn Storage tabSelect Auto Manage/ ManualManage for file size and diskspace settingsGame Highlights39
True ColorWith True Color function, you can adjust the best screen gamma, saturation,brightness and contrast settings for your eyes.The True Color feature supports games in windowed mode.Go to Features True Color.Select one of screen color settingsTrue Color Preset OptionsWhen you click the preset option, the screen settings will be immediately applied toyour computer. The detailed options are as follows: EyeRest - reduces blue light of your computer screen for eye care. Gaming - enhances the contrast of the screen. Movie - enhances the dynamic contrast of the screen. Customize - allows you to adjust gamma, contrast and color balance of yourcomputer screen. Please refer to the instructions on page 41. Default - uses the system default setting.40True Color
How to customize screen colorThe True Color control panel has a Customize feature that allows you to customizeyour own colors.1. Click the settingicon in the lower right corner of Customize icon.Click the gear icon2. Click and drag the sliders to adjust the Gamma, Level, Brightness and Contrast onRed, Green and Blue tabs.3. Click the Apply button to save the settings.True Color41
LAN ManagerLAN Manager is applied to Windows 10 network traffic shaping. It keeps your internetspeed stable and faster during heavy uploads/downloads and reduces the ping valueof online games. If your motherboard has a Wi-Fi module, it can also provide virtualaccess point functionality for your mobile device for traffic shaping.To use LAN Manager:1. Install the LAN driver.2. Connect your computer to the internet.3. Go to Features LAN Manager.Shows thecurrent networkconfigurationLAN Managermain switchShows theWireless networkaround youNetwork control menuNetwork Control MenuOther relevant settings on the LAN Manager Control Panel are as follows: Priority - customizes application network bandwidth priorities. Usage - displays the application network usage status. Network Test - allows you to set up bandwidth control. Advanced Setting - allows you to expand RWIN to accelerate download speed.You can also block IP address and set up virtual access point.42LAN Manager
Setting Network Speed1. Select the Network Test control panel.2. Click Test Network Speed.3. cFos Speed Test web page will be opened.4. Clickto test Upload speed, and clickto test Download speed.5. Fill in the speed test results in the Upload speed and Download speed inputboxes.6. Check the Enable Bandwidth Control checkbox.LAN Manager43
Customizing Application PrioritiesThe Priority control panel displays what application is currently using networkbandwidth.1. Test and set the network speed as described previously.2. Select the Priority control panel.3. Use the category bar to filter the displayed applications categories.4. Click the drop-down menu next to the application name to select the priority of theapplication.Note: To stop some applications from using bandwidth, you can clickapplication.44LAN Managerto block the
Mystic LightMystic Light feature allows you to control LED light effects of MSI & partner products.For some earlier products, you can go to product download page to download theapplicable LED control software.When you click the Applybutton, the LED effect settingscan be saved to Profile1 3,and you can switch to differentsettings by clicking Profile1 3.DevicesynchronizationAll SynchronizationLED item dropdown menuGame SyncThird partycontrol settingMystic Lightmain switchClick to accessAmbient LinkDYNAMICDASHBOARD buttonApply buttonLight effect pattern Light effect, LED color,speed and brightnesslever selectorsMystic Light45
Device synchronization - In this section, you may synchronize LED light effect toyour devices. All synchronization - Click the big chain icon on the left side of all the devices.Click the big chain icon To synchronize devices - Click the chain icon above device icon. When the chainicon turns red, it indicates that the device has synchronized LED effect settingswith other devices.Chain icon - indicates the devicehas been synchronized.Broken-chain icon - indicates thedevice is not synchronized. Individual - You can also change settings for one single device. To do that, clickthe chain icon and the color will turn gray as below.Device icon - click it to change LED effect setting for thisdevice. When the icon turns red, it indicates the deviceyou’re currently setting. LED item drop-down menu - Click to select the LED item on the device. The LEDeffects vary depending on your LED item selection.46Mystic Light
Light effect drop-down menuClick it to select LED light effects. Please notethat the options about light effects would be moreor less depending on the devices you have. It willonly list the light effects which are available for allapplicable devices. LED Color selector - In this section, you may select the color for one single lighteffect (Stack, Breathing, Flashing etc.).The outer arc is a custom color picker and the inner arc is the default color pickerthat cannot be changed. You can simply change the LED color by clicking on thecolor on the outer or inner arc. To store a custom color, click one of the color slotson the outer arc to store the color of your choice.You can specify a color by editing anRGB (red, green, blue) color valuebetween 0 and 255.Drag the brightness slider up to increase brightness ordrag down to decrease brightness.Use the Hue Circle to choose the color you want. The color you choosewill be displayed on the center circle. Effect speed and brightness levelDrag the sliders to adjust the LEDlight effect switching speed and lightbrightness.Please note that these functions will onlybe available if your device supports it.Mystic Light47
Ambient LinkWith the Ambient Link feature, it will provide visual color feedback on Philips Hue andNanoleaf depending on what is happening in games. To use Ambient Link, you need tofollow the instructions below to complete the link setup.Supported Motherboards MEG Z390 GODLIKE MAG B550M MORTAR WIFI MPG Z390 GAMING PRO CARBON AC MEG Z590 ACE MEG Z390 ACE MPG Z390 GAMING EDGE AC Z390I CORSAIR MPG Z390M GAMING EDGE AC MPG X570 GAMING PRO CARBON WIFI MPG Z390I GAMING EDGE AC MEG X570 GODLIKE MEG X570 ACE MEG X570 UNIFY PRESTIGE X570 CREATION MPG X570 GAMING EDGE WIFI Creator TRX40 MEG Z490 GODLIKE MEG Z490 ACE MEG Z490 UNIFY MPG Z490 GAMING CARBON WIFI MPG Z490M GAMING EDGE WIFI MEG Z490I UNIFY MPG Z490 GAMING EDGE WIFI MAG B460M MORTAR WIFI MAG X570 TOMAHAWK WIFI MPG B460I GAMING EDGE WIFI B450M BAZOOKA MAX WIFI MPG B550 GAMING CARBON WIFI MPG B550 GAMING EDGE WIFI MPG B550I GAMING EDGE WIFI48Mystic Light MEG Z590 GODLIKE MEG Z590 ACE GOLD EDITION MEG Z590I UNIFY MPG Z590 GAMING CARBON WIFI MPG Z590 GAMING EDGE WIFI MPG Z590 GAMING EDGE WIFI SP MAG Z590 TOMAHAWK WIFI MEG Z590 UNIFY MEG Z590 UNIFY-X MAG B560 TOMAHAWK WIFI MAG B560M MORTAR WIFI MPG B560I GAMING EDGE WIFI
Network Requirements The router is broadcasting a 2.4GHz network. The Wi-Fi network is using WPA/WPA2 security. The router is configured for any of the Wi-Fi modes a/b/g/n.Philips Hue Setup (optional)1. Plug in your Hue bridge and it will automatically power up.2. Connect it to the router LAN port.3. Wait for the two lights to come on and you are good to go. (Left is power light andcenter is local networkNanoleaf Setup (optional) The router is compatible with Bonjour (mDNS).Mystic Light49
Ambient Link Control PanelGame Mode and Ambient Mode can only be activated one at a time in the AmbientLink control panel. Game Mode tabClick to synchronize/ nonsynchronize the gameSynchronization main switchClick to access the game control panelSelect Game Event,color and brightnessBackPreview the effect50Mystic LightApply changes
Ambient Mode tabPreview the effectON/OFF backgroundlight & musicClick to select an effectas background lightDrag the slider to adjust lightbrightness Ambient Link tabClick to detect Click to switch to PhilipsHue and NanoleafdevicesClick tosynchronizeRe-synchronize Removethe deviceCurrent statusAdjust orientationor positionMystic
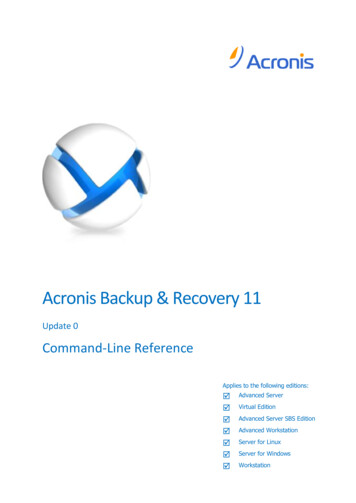
How to Adjust the GPU and GPU Memory Frequency 1. Go to Features User Scenario, click Customize. 2. Click / to adjust GPU Frequency and GPU Memory Frequency. You can also fill out the value in