Transcription
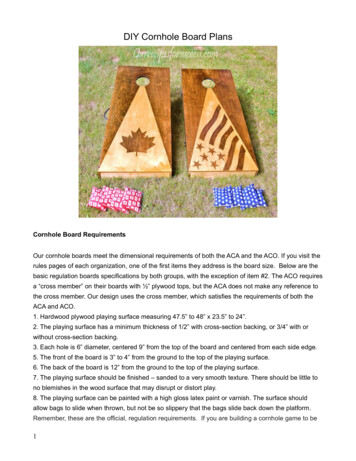
DIY Cornhole Board PlansCornhole Board RequirementsOur cornhole boards meet the dimensional requirements of both the ACA and the ACO. If you visit therules pages of each organization, one of the first items they address is the board size. Below are thebasic regulation boards specifications by both groups, with the exception of item #2. The ACO requiresa “cross member” on their boards with ½” plywood tops, but the ACA does not make any reference tothe cross member. Our design uses the cross member, which satisfies the requirements of both theACA and ACO.1. Hardwood plywood playing surface measuring 47.5” to 48” x 23.5” to 24”.2. The playing surface has a minimum thickness of 1/2” with cross-section backing, or 3/4” with orwithout cross-section backing.3. Each hole is 6” diameter, centered 9” from the top of the board and centered from each side edge.5. The front of the board is 3” to 4” from the ground to the top of the playing surface.6. The back of the board is 12” from the ground to the top of the playing surface.7. The playing surface should be finished – sanded to a very smooth texture. There should be little tono blemishes in the wood surface that may disrupt or distort play.8. The playing surface can be painted with a high gloss latex paint or varnish. The surface shouldallow bags to slide when thrown, but not be so slippery that the bags slide back down the platform.Remember, these are the official, regulation requirements. If you are building a cornhole game to be1
used at your home for backyard barbeques, you can make slight adjustments as needed. Forexample, if you had a sheet of ⅜” plywood leftover from a project, I believe it would work just fine forthe top. I would definitely recommend using the cross member in that case. But, because of theoverall construction of our board design, I don’t think it would affect the performance of the boards atall.Free Cornhole Board PlansBelow are the plans for our cornhole boards. We’ve built a couple of sets now and are very happywith how they’ve turned out. Feel free to share the plans with your family and friends.2
Materials Needed To Make A Cornhole GameMany plans call for using 2x4 lumber to build their boards, but we chose to use 1x3 inch lumber toconstruct our board’s frame and legs. This was done in an effort to help keep the overall weight of theboards down. The finished project is still very sturdy and doesn’t affect the playing of the game. Let’stake a look at what you’ll need for this project.Plywood - 1 sheet of plywood, smooth finish on one side. You only need half of this (4’x4’) for onecornhole set.1x3 boards - 5, 8-foot boardsWood screws - 1-1/4” for the top and 1-5/8” for the frame. Drywall screws or similar stainless steelwood screws work well for putting the boards together. Use whatever works best with your colorscheme.3
Bolts - Carriage bolts, washers, and locknuts - ⅜”x2-½” bolts work well. The locknuts should beadjusted to hold the legs snuggly, yet allow them to be folded up easily.Glue - Optional, but highly recommended. Helps hold all component together tightly for years oftrouble-free use.Hardware - Hinges (separable), latches, and handles (Optional).Tools Needed To Make A Cornhole GameSafety glasses and hearing protection (for more info on home project safety, please considerreading our article on personal protective equipment, (PPE))Tape measureSaw (table/circular)Drill, drill bits, and countersink bitJigsaw6” hole saw (or jigsaw)Sander (or sandpaper and sanding block)Carpenters squareStep by Step InstructionsBecause most table or circular saw blades are about ⅛” wide, the exact dimension of your plywoodwill be approximately 1/16th of an inch under 2’. However, with the large tolerances mentioned above,this is fine. You just need to make sure to make those minor adjustments when cutting the 1x3 boards.We did our best to reflect this in our plans, but because not all cuts are exact it doesn’t hurt to take aquick measurement before cutting.Cutting The PlywoodYou only need half a sheet (4’x4’) for one cornhole game set. You can purchase 4’x4’ sheets frommost of the home supply stores. However, if you have a use for the other half sheet of plywood (asecond cornhole game maybe?), it’s normally more cost effective to buy a full sheet. Mark and cut the4’x4’ plywood into two equal pieces measuring roughly 2’x4’. We recommend cutting the plywood withthe grain, as shown in the diagram, especially if you’re going to stain the wood. We feel the finishedproduct just looks better.4
Cutting The 1x3 BoardsWe recommend getting the exact measurements of the 2’x4’ plywood top and adjust the 1”x3”measurements accordingly. In general, these are the measurements you should have following ourplans. (see the plans above)The sides will be 47-15/16” ( 1/16”).The front, back, and cross member boards should be 21-7/16” ( 1/16”).Cut the leg boards to 12”. They are a little long, but will be trimmed to the exact length later in theproject.The leg cross members should be cut to 19-15/16” ( 1/16”).Layout The 1x3On a flat, level surface dry fit all the 1x3 boards together. Make sure the cross member board fitssnugly between the side boards. We like to do this to make sure the overall dimensions of the frameare the same as the plywood top. This helps ensures all the piece fit together nicely. If not, now is thetime to make those minor adjustment before you begin the assembly.5
Drill Relief, Pilot, and Countersink HolesThis is important when using thinner material on any project. Pre-drilling these holes helps preventcracking and splitting the boards, yet makes for tight secure joints. For more information on pilot andclearance hole sizing, visit the DIYDATA.COM website. They have good reference information.Pilot holes are drilled in the board that the screw will anchor into and should be smaller than thescrew diameter.Clearance holes are drilled through the board that the screw passes through and is about the samesize as the outside diameter of the screw threads. This allows the board to be pulled tightly against theboard it's being anchored to.The countersink ensures the screw heads are flush with the finished surface. This is very importantfor the screws holding the top in place.The relief holes, with a countersink, will be drilled in the 4’ side pieces. Two holes at each end of theboards at ⅜” in from the ends and two holes in the middle boards at 2’. This will put the screws in thecenter of the front, back, and cross member boards when assembled. See the board diagram for moredetail.For the pilot holes, start with one of the side boards and the front board. Hold the ends of the twoboards together and drill the pilot holes using the relief holes as a guide. This ensures the holes arealigned perfectly. Repeat this with cross members, the back boards, and the other side boards.6
Assembling Your Cornhole BoardAt this point it’s time to add a little glue to the joints and screw the 1”x3” boards together. Make surethe screws are tight and the screw heads are slightly recessed into the countersink. Continue securingall the boards in the same fashion.With the 1”x3” frame assembled it's time to attach the plywood top. Apply a small bead of glue to thetop of all the frame boards, including the cross member. Carefully set the plywood top onto the frame.Adjust until all edges are evenly spaced. Nows a good time to verify that the frame and top are square,using the carpenters square. You can tweak the frame a little while the glue is still wet, then screw thetop to the frame.Along with the glue, we used a total of 12 screws to secure the top. Five screws on each side and onescrew centered on the front and back boards. The middle screws on the side boards were set in 2”,so they are anchored into the cross member board. This just helps tie all the pieces together for astronger overall design.7
Cutting The “Target” HoleWith the board assembled, it’s time to cut the target hole. The target is a 6” hole that is center in thecornhole board, 6” in from the back board. The diagram shows the location and dimensions.This hole can be cut in a couple different ways. The first way is to use a jigsaw. Once the centerlocation of the hole is marked you’ll need to mark the line to cut using a drafting compass. Then drill apilot hole inside the piece that is being cut out to insert the jigsaw blade. Cut the 6” hole following theline. After cutting the hole you will want to sand the inside of the hole making it as round as possible.We chose to use a 6” arbor type hole saw to cut our target. This gives you a very clean, round hole,and the process is much simpler. Just find the center mark for the hole, as described above, and drillthe hole. To get a clean hole on both sides, there is an extra step you need to take.Start by drilling approximately half way through the plywood. Make sure the center drill went all theway through the plywood. Then flip the board over, place the center drill in the hole just made, andfinish drilling the hole. Just a little light sanding and you’re done. If you are planning on making morethan one board, I would consider investing in a hole saw. Watch this short video on how to drill thehole.Note: Hole saws can grab the material you are cutting in. When cutting wood keep the drill speeddown, hang on to the drill tightly, and be prepared to release the drill trigger. Hole saws are a greattool, just be prepared when using them.8
Preparing The LegsStart by marking the location ⅜” hole that will be used to attach the leg to the assembled cornholeboard. Put a pencil mark on the leg board centered on the board (1-¼”) and a 1-¼” in from the end ofthe board. Before drilling the hole use a drafting compass to mark the radius on the end of the legboards that will need to be cut. You could also use a soup can or some other round object that isapproximately 2-½” in diameter to trace the radius on the end of the board too. The accompanyingdiagram has more location and radius detail. With the radius marked go ahead and drill the ⅜” hole inthe leg boards.The legs get attached to the underside end of the cornhole board with the 6” target. Place the end ofthe leg board, with the hole in it, against the side board and snuggly in the corner against the backboard. Mark the location of the hole on the side board with a pencil. Repeat this on the other side.Next drill a ⅜” hole in the side board on the pencil mark you just made. Using a jigsaw round off theend of the leg boards by cutting on the radius marks made above. Sand the rounded off ends smooth.Temporarily attach the legs to the cornhole board. Make sure each leg moves freely. You may need toremove them and sand the ends a few times to make sure the move smoothly.Cut The Legs To Length9
With the legs cut and attached, this is the best way we found to cut the legs to length. This methodallows you to get the exact 12” height for the back of the cornhole board. It works best with a couplesawhorses and a piece of plywood at least 4’ long.Set the cornhole board on the sawhorses. Position the board so one of the legs hangs down over theedge of the plywood on the saw and leave the second leg folded up. Block the back end of thecornhole board up to get exactly 12” to the top of the board. Now mark a line on the leg where it meetsthe top edge of the plywood. Reposition the cornhole board and do the same to the other leg. Cutboth legs on the lines you drew. When reassembled, the board is set on a flat, solid surface the backof your board will be exactly 12” high.Attaching The Leg Cross Member SupportWe chose to add a cross member to our legs for added strength and stability. In the diagram you cansee that the 1x3 is oriented vertically. This gives it more “side to side” movement strength. Why youask? Well. eventually little Sean or Kendra (our children’s names) will climb on top of the game whileplaying. Although not recommended, these boards will take some abuse.The exact location of the support is not critical. I would keep it closer to the ground and somewhere in10
the middle of the legs. Our plans call for it placed 3” from the ground and set in ¾”. The mostimportant part will be to drill the clearance holes in the legs at the exact same location. This is doneeasiest by clamping the two legs together and drilling both of them at once. You’ll want to remove thelegs to add the cross member. It’s much easier.After assembling the legs, make sure they swing freely before finishing. If you notice we call for thesupport to be 1/16” of an inch smaller than you might expect. This extra space allows for the finish onthe board and so it will swing freely.Sand All Surfaces SmoothAfter the board is fully assembled, sand all the surfaces. That completes the construction of yourcornhole board!Cornhole Board FinishesTo fully complete it all you have to do is put a finish on it. The finish on your cornhole boards are amatter of personal preference. They can be painted, stained, or embossed with your favorite college orcompany logo. It’s up to you, so be creative! Remember, the only stipulations per the ACO are “thesurface should allow bags to slide when thrown, but not be so slippery that the bags slide back downthe platform”.Staining Tip - If you are staining your boards, with a design, we would like to offer one very importanttip. Before staining, score all the lines with a thin bladed razor bladed razor knife. This X-Acto knifefrom Amazon is a perfect example of what to use. You’ll need to make the score lines at least 1/16”deep. These score lines will help prevent the stain from “bleeding”. This will give you a nice clean linebetween two different colors of stain.11
How To Make Your Own Cornhole BagsAccording to the ACA and ACO, the finished bag dimensions should be 6” square. They shallhave stitched seams on all four sides and weigh between 14oz. and 16oz. That’sapproximately 2 cups of dried corn. Dried beans can be used too. The bags are to be madeof a durable material such as duck cloth, canvas, or suede.We chose to purchase a set of bags only because we wanted something with patterns that fitwith our board design. That may be one of the biggest limiting factor for not making your ownboards. If you want bags with custom designs, check out Amazon and Etsy. They both havegood selections.ConclusionBy following these plans you can easily make a nice, sturdy set of cornhole boards that willprovide you with years of enjoyment. Feel free to share these plans with your family andfriends and visit us at “ourrecipesforsuccess.com” for more DIY home projects.12
Watch this short video on how to drill the hole. Note: Hole saws can grab the material you are cutting in. When cutting wood keep the drill speed down, hang on to the drill tightly, and be prepa