Transcription
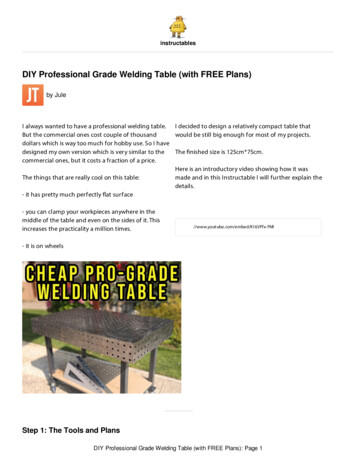
instructablesDIY Professional Grade Welding Table (with FREE Plans)by JuleI always wanted to have a professional welding table. I decided to design a relatively compact table thatBut the commercial ones cost couple of thousandwould be still big enough for most of my projects.dollars which is way too much for hobby use. So I havedesigned my own version which is very similar to theThe nished size is 125cm*75cm.commercial ones, but it costs a fraction of a price.Here is an introductory video showing how it wasThe things that are really cool on this table:made and in this Instructable I will further explain thedetails.- it has pretty much perfectly at surface- you can clamp your workpieces anywhere in themiddle of the table and even on the sides of it. Thisincreases the practicality a million times.//www.yout ube.com/embed/K16VFfx-FMI- it is on wheelsStep 1: The Tools and PlansDIY Professional Grade Welding Table (with FREE Plans): Page 1
I attached the plans I made for CNC laser-cutting thesheet metal. This is a slightly improved version of whatI have built in the video. It has bigger oval holes onthe long reinforcement plates for easier accessing ofthe bolts for legs attachment.details on the drawings should be adjustedaccordingly for the parts to t correctly together.Editing is easy to do with QCAD free CAD editingsoftware.Initially I wanted to sell the plans but I decided to give The clamping holes on the top of the table arethem for free to the Instructables community :)standard 16mm diameter holes. You could buy theexpensive welding clamps or you could make yourBut if you like to support me, you can always buy me a own for 5 bucks as I will show you later.co ee :)For assembling the table, you don't need much tools.:https://www.buymeaco ee.com/JTMakesIt- a welderThe plans don't include legs. You should make legssized according to your needs.- clamps or threaded rods for tightening everythingtogether before weldingThe table top surface is sized 125cm*75cm.-angle grinder with cutting and grinding attachmentsEverything is designed to be cut from 6mm thickmetal plate.- a friend to help you manipulate the table whenwelding, since the thing weighs almost 100kg.If you would use 1/4 inch steel plate or other, J3AUYU/FD6CVJYKCJ3AUYU.dxf YV/FEXS5TQKCJ3AUYV.dxf Step 2: Send the .dxf Plans to Metalworking Shop for Laser CuttingDIY Professional Grade Welding Table (with FREE Plans): Page 2DownloadDownload
I went to a local metalworking shop and ordered laser cutting for my parts from 6mm steel plate.They were happy to do it. I got a very good deal and material plus work costed me around 250 euro. Which is dirtcheap for what it is.Step 3: Assemble and Tighten Everyting TogetherParts go together like puzzles.would cause the table surface to be crooked and notperfectly at.You should be able to fully assemble the parts withonly light taps with a hammer.I clamped the top plate down to the reinforcementribs with threaded rods and then placed a ton ofYou don't need a perfectly at surface to assembleclamps around and around. I have borrowed clampsthe table. The design of the table ensures the tablefrom my friends and family and I got almost 18will be perfectly at even if you assemble it on a sofa :) clamps in total :)You just need to clamp everything tightly together.You want everything to sit properly together. Youdon't want any gaps in between the plates. The gapsIf you don't have so many clamps available you coulduse threaded rods to tighten everything all around.DIY Professional Grade Welding Table (with FREE Plans): Page 3
Step 4: Weld, Weld, WeldDIY Professional Grade Welding Table (with FREE Plans): Page 4
Then start welding.The welds shall be made inside the holes where thetwo parts join.You will want to have a friend nearby. The tableweight around 100kg and it is very heavy to turnaround by yourself. I also used a chain pulley to helplift the table.I welded everything together with a stick welder sinceI do not have a MIG welder yet. I had some extra workwith removing the slag, but it is doable.Initially you want to lightly spot weld everythingtogether and when everything is tapped, you shouldproceed to fully weld everything. This way the tabledoesn't end up warped.I welded in short sleeves which is a big no-no. But thetemperatures were very high that day. At least put onsome sun cream, else you will get sunburn on yourhands. Welding produces a lot of UV light.Step 5: Making the Table LegsThen I proceeded to make the legs.I bought thick wall 50mm steel tubing and welded itto the laser cut plates. On the bottom side I weldedthe plates for attaching the wheels.I wanted my table to be on wheels, since I work insidemy garage and I need to move the table out of theway when not in use. You should buy wheels that havea brake and rotational lock. The table is much morestable this way.I made my table to be a little higher - 90 cm heightwith wheels attached, so I don't need to bend downso much when standing next to it.DIY Professional Grade Welding Table (with FREE Plans): Page 5
Step 6: Paint and PolishI painted the legs and underside of the table withspray paint so it doesn't rust.But you don't want to have the top side painted sinceyou want good electrical contact between your partsand the table for welding. This way you can have theground terminal hooked directly to the table.After some work, you will see that rust can quicklyform on bare metal.I polished the top with polycarbonate polishing wheelon an angle grinder. This is a very good wheel, since itremoves rust, paint and welding marks, but does notdamage the metal and your table top will remain at.I nished the top with rust preventing oil. You can alsouse WD-40 or wax.The nish needs to be applied every once in a while.DIY Professional Grade Welding Table (with FREE Plans): Page 6
Step 7: Finished TableNow you can enjoy your table in its full glory!- four wheels with brake and rotational lock - 50 The cost breakdown:- Saturday spent with a welder - free- many hours of designing the plans for lasere cutting- freeTotal: 350 Which is around ve times cheaper than buying one.- laser cutting material - 250 Totally worth it!- steel tubing for legs bolts, welding electrodes andpaint - 50 DIY Professional Grade Welding Table (with FREE Plans): Page 7
Step 8: Cheap Welding ClampsYou will also need special clamps for using with thistable.First, cut the top part o the clamp. Then cut thethreaded part from the boltYou can buy then already made but a few clamps willset your wallet back more than you paid for yourhomemade table!But the thread from the bolt and weld the bolt headto the end of the clamp. That's it!You need to make custom clamps yourself.I made myself four welding clamps and their totalcost was 25 .You will need to buy those cheap 5 F-clamps andstandard 16mm partly threaded bolt.DIY Professional Grade Welding Table (with FREE Plans): Page 8
Step 9: Right Angle BracketsIn the plans you will also nd two right angle brackets You can follow me on Facebook and Instagramwhich come in handy when assembling bigger stu .https://www.facebook.com/JTMakesItFeel free to make them as well! They are heavy dutyand will last you a lifetime.https://www.instagram.com/jt makes itThis is all! I hope you enjoyed my Instructable! Pleasevote for it in the metalwork contest!for spoilers on what I am currently working on,behind the scenes and other extras!Thank you!DIY Professional Grade Welding Table (with FREE Plans): Page 9
While I applaud your ability to build this, this is far from your own idea. I understand you likely can'tget these kits where you are located, but you should at least reference where the idea came fabblock-fb2448-188-weld-tables-by-certiflatYou did supply the dxf's for your build, which is a large step in making this. That being said anyonecan find the general models here: https://grabcad.com/library?page 1&time all time&sort recent&query fabblockAn assembly video the original designers:https://www.youtube.com/watch?v Y PseJ7 nAcHi,Thanks for the comment.Many manufacturers are producing welding tables with similar design. I was mainly looking atSiegmund tables while designing. This is the first time I heard for weldtables.com. Similar table isalso sold on texasmetalworks.com.And the DXF plans are attached in step nr. 1. You probably missed it.This is the whole point of this instructable - to have plans and build your own for a fraction of thecost (and having way more fun doing it).Once I get my new workshop built I will definitely build a welding table for it, and I LOVE thisdesign, I likely will use it for mine as well. Thank you for sharing.Thank you for kind words :) Don't forget to vote for my instructable in the metalworking contest :)I liked it too . Why cut the threads off the clamps ? . Leave them on and maybe they might beuseful otherwise with a nut below the table?Thanks!I cut them off so the clamp is shorter and easier to use in 99% of cases.You could leave them on if you liked.The rolled threads on the bolt are a slightly larger diameter than the shaft of the bolt.DIY Professional Grade Welding Table (with FREE Plans): Page 10
Wow! Nice idea. Cool execution. But you neglected to say how much the laser (water jet?) cuttingand steel cost while justifying the build by indicating welding tables wee bit too pricey. So, how'dyou afford it?Thanks!The last step of the instructable includes the cost breakdown. You must have missed it :)That's a very cool welding table! Thanks so much for sharing the design files with us! Nice videotoo.Thank you!Don't forget to vote for my instructable in the metalworking contest :)You got my vote for sure! Awesome project and thanks for sharing! Been thinking about making aphysics version with some mods to make more rigid, dense and cushioned in a similar fashion.Thanks for sharing again!Thank you for your vote!If you make your version of the table, don't forget to post in on Instructables!And don't forget to vote for my instructable in the metalworking contest :)Great design and thorough instructions. Save up a bit and replace those casters with a set of metalones. They aren't that expensive and will last as long as the table. Now. where did I put thatplasma table. LOLThanks!Yes metal casters would be great, but I'm saving for a MIG welder :)Ohhhhhh mind blowing work, both video tutorial and making!!!!Thanks!If you liked it, please vote for my instructable in the metalworking contest :)I voted for your project as it is well designed and requires minimal effort to assemble and the endresult is a fully functional welding table with a high degree of flatness. Great project and thank youfor your excellent plans.Thank you!DIY Professional Grade Welding Table (with FREE Plans): Page 11
DIY Professional Grade Welding Table (with FREE Plans) by Jule Step 1: The Tools and Plans I always wanted to have a professional welding table. But the commercial ones cost couple of thousand dollars which is way too much for hobby use. So I have designed my own version which is very similar