Transcription
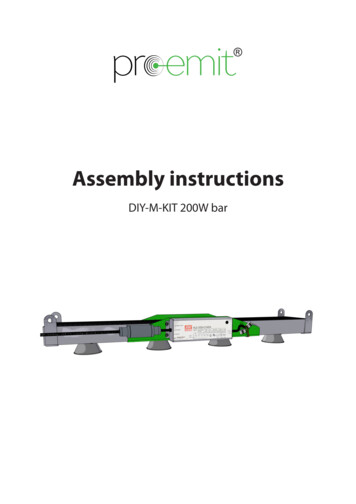
Assembly instructionsDIY-M-KIT 200W bar
Parts listDIY M-Kit 200W bar4xegraf GraphitThermal conductive pad4xCree CXB 3500 CD 3500K3 Step (N0HCD35G)4xIDEAL LED Array Holder50-2303CR4xIDEAL Reflector Adapter50-2300AN4xLedil Angelina Reflector90 F13838 ANGELINA-XW4xpro-emit DIY-M-KITholder2xpro-emit DIY-M-KITconnection angle2xpro-emit DIY-M-KITHeatsink(450x138x50.5mm)1xDriverMeanWell HLG 185HC1400A1xParlat cable sleeveA16xM3 Allen key screwB8xM4 nut(4x replacement)C8xM4 washer(4x replacement)D8xM4 Allen key screw(4x replacement)EFGHIK4xM6 washer(4x replacement )12xM6 Allen key screw2xWago clamp1x150cmLED connection cableblue1x100 cmLED connection cableblack1x100cmLED connection cablered1x3m power cablewith plug1234567891011Page 2
1I243GAssemble the MeanWell HLG 185H (I) driver to the connection angle bracket(G) with M4 Allenkey screw (4), M4 washer(3) and M4 nut (2).26FHScrew the connection angle bracket and holder (F) to the heatsink (H) by use of M6 Allen key(6).Page 3
36GFHScrew the holder (F) and brackets (G) to the heatsink (H) using M6 Allen screws (6).4Insert the Cree CXB 3590 (B) in the IDEAL LED Array Holder (C) and carefully stick the thermalconductive pad (A).4.14.24.3BABCCWhile insert of Cree CXB 3590(B) into the IDEAL LED ArrayHolder (C), slightly push backholders pin back to insert andclamp the Cree CXB 3590.Attention: pole on the IDEALLED Array Holder (C) and poleon the Cree CXB 3590 (B) mustmatch!B CCarefully remove thermal conductive pad (A) from paper andstick the adhesive side on thebackside of clamped Cree CXB3590 (B C).The thermal pad must be in linewith the Cree CXB 3590 on allsides.Caution: If the pad sticks, it cannot be removed without damage!Page 4
5(Caution: do not use overstress the screws - risk of breakage!)1HFix the IDEAL LED Array Holder with Cree CXB 3590 (A B C) to the heatsink (H) with Allenkey Screws (1). Please position the pole of IDEAL LED Array Holder as shown in the picture.6(Caution: do not use overstress the screws - risk of breakage!)1DHCAssemble IDEAL Reflector adapter (D) to IDEAL LED Array Holder (C) by using M3 Allen keyscrews (1).Page 5
7Danger: Risk of electric shock!The electric connection must be done by a qualified electric expertCaution: The power plug must be not plugged in duringassembly!Open a Wago terminal (7) lever and connect theblack LED connection cable (9) and the black (a) LEDdriver cable.7a9Open another Wago terminal (7) lever and connectthe red LED connection cable (10) to the red (b) LEDdriver cable.b710KgKc11defOpen the cable sleeve (K) and insert the stripped power cable (11) and the stripped driver cable (c)as shown in the picture.The thin rubber cord must be pierced and the cable passed through. The hole for the cable mustnot become too big, as the rubber will seal on the cable. Connect the three wires of the two cableswith the correct/same color through the bridge (g) and tighten them with the screws. Screw thecable sleeve back together and ensure that the cables are securely anchored.Page 6
8Cut the red and black cable (9 10) to the correctlength and strip 6-8mm at both ends.Insert LED connection cableblack (9) in the - pole of theIDEAL LED array holder (C).Insert LED connection cablered (10) in the pole of theIDEAL LED array holder (C).CC910CC8Insert LED connection cableblue (8) in the - pole of theIDEAL LED array holder (C).Cut the blue LED connection cable (8) to the correctlength and strip 6-8mm at both ends.8Insert LED connection cableblue (8) in the pole of theIDEAL LED array holder (C).Page 7
9EDPlug the Ledil Angelina reflector (E) to the IDEAL Reflector Adapters (D) and lock them by slighttwisting.Your DIY-M-Kit 200W bar is now ready for use!Page 8
DIY M-Kit 200W bar 1x Driver MeanWell HLG 185H C1400A A G F E D C B I H 1x Parlat cable sleeve K 4x egraf Graphit Thermal conductive pad 4x Cree CXB 3500 CD 3500K 3 Step (N0HCD35G) 4x IDEAL LED Array Holder 50-2303CR 4x IDEAL Reflector Adapter 50-2300AN 4x Ledil Angelina Reflector 90 F13838_ANGELINA-XW 4x pro-emit DIY-M-KIT holder 2x pro-emit DIY-M-KIT connection angle 2x pro-emit DIY