Transcription
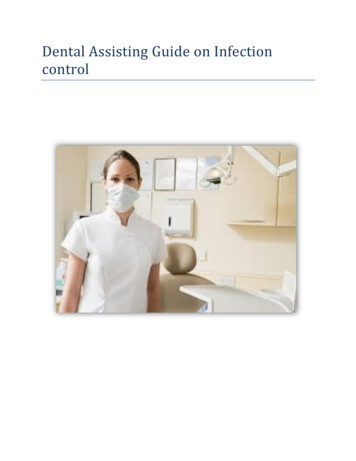
Dental Assisting Guide on Infectioncontrol
Table of ContentsiiiTable of ContentsTable of Contents . iiiIntroduction . vChapter 1: Infection Control . 9Hazard Symbols: . 9The Goal of Infection Control. 10Barrier Techniques . 10Uniforms and Clinical Attire . 11Hair style . 11Other Attentions . 11Hand washing. 12Gloves . 13Latex Gloves . 13Sterile Latex Gloves . 13Vinyl Gloves . 13Utility Gloves . 13Plastic Gloves (food handlers gloves). 13Guidelines for using gloves . 14Masks . 14Rules for wearing mask . 14Protective Eyewear . 15Rules for Protective eyewear . 15Face Shields . 15Protective eyewear for patients . 15Rubber Dam . 15Chapter 2: Operatory cleanup . 19Steps in operatory cleanup . 19While wearing Heavy-Duty Gloves, Mask, and Eye Protection . 19After Removing gloves . 19Operatory surface disinfection . 20
ivDental Assisting Guide on Infection ControlUsing the Ultrasonic Cleaner . 20Rinsing and drying instruments . 21Chapter 3: Sterilization . 25Chemical Vapor Sterilization . 25Autoclaving . 25Dry Heat Sterilization . 25Process indicators. 26Spore Test . 26Autoclave wrap . 27Autoclave tape . 27Steps for Bagging Instruments for sterilization . 27Loading the Autoclave . 28Operating the Autoclave . 28Index . 29
IntroductionvIntroductionAfter becoming a dental assistant, dental assistants from time to time need to go over materialabout their everyday task just to refresh their memory. Dental assistants sometimes forget how toproperly carry out certain task or do not know how to complete a task and end up performing thetask incorrectly. In addition, different tasks are always either being revised or added to theoverall task of a dental assistant.The purpose of this Manual is to provide a basic instruction guidebook on infection control stepsand guidelines for dental assistants who have been working as a dental assistant for more than ayear. As a result dental assistants can continue to perform infection control steps in the correctmanner, limiting the amount of contamination to a minimum.This manual provides information on infection control techniques and awareness, how toproperly clean up the operatory and lastly how to properly sterilize instruments in the dentalclinic.
Chapter 1 Infection Control
Chapter 19Chapter 1: Infection ControlHazard Symbols:Ionizing Radiation – any radiation, as a stream of alphaparticles or x-rays, that produces ionization as it passesthrough a medium.Biohazard symbol - indicates potentially infectiousmaterials or sharp instruments that have been exposed toblood, saliva, or OPIMElectric Shock Hazard symbol- indicates the potential forelectric shock.Carcinogen hazard symbol – indicates a cancer causingagent.Poison symbol – indicates a chemical that is poisonous.Laser symbol- indicates a laser that may be in use.
10Dental Assisting Guide on Infection ControlThe Goal of Infection ControlThe goal of infection control is to eliminate exposure to blood borne pathogens and otherpotentially infectious materials (OPIMS) though to following steps:1. Prevention of contamination: This is done by using all techniques that limit crosscontamination. This includes using barrier techniques, disposables, or single-usematerials.2. Sterilization: by using the sterilization techniques all microbes are killed. Instrumentsthat are used intraorally are sterilized using the preferred heat method.3. Maintain sterility: Sterility is maintained after sterilization by protecting them fromcontamination. This is done by wrapping instruments prior to sterilization and keepingthem that way until they are ready to be used.4. Disinfection: Disinfection is used to reduce the microbial population in situations wheresterilization is not possible.Barrier TechniquesThese barrier techniques are used to protect you from coming into contact with pathogens.Barrier Techniques include: Appropriate clinical attireGlovesMasksProtective eyewearRubber damOther disposable barriers to prevent contamination
Chapter 111Uniforms and Clinical AttireOperatory attire can be spattered and contaminated with pathogenic microbes. Precautions mustbe made so that garments won’t transmit diseases outside of the office. Protective clothing such as gowns, clinic jackets or lab coats must be worn with allpatient contact.Protective clothing must have a high neck and long sleeves.Protective clothing must not be worn to or from work.Protective clothing must be changed when visibly soiled or torn and at the end of the day.Hair styleHair should always be worn in a style that does not require touching during treatments. Hairstyles should be off the face and controlled so that it won’t fall down into the operating field.Other AttentionsCosmetics are prohibited in the laboratory, operatory, and sterilization areas. This includescontact solutions and all types of makeup.
12Dental Assisting Guide on Infection ControlHand washing1. Remove all jewelry. Jewelry can harbor microbes and may tear gloves.2. Use a liquid soap that is dispensed with a foot activated dispenser.3. Wash hands with a vigorous scrubbing motion using a liquid antimicrobial soap and coolwater.a. Thoroughly rinse hands with cool water and thoroughly dry to prevent irritation.Dry hands with a single use towel.4. For additional protection, us an antiseptic soap before putting on gloves.5. Nails should be cut short and clean. Make sure to get soap solution underneath the nailsas well.6. Do not touch the faucet with your hands. After using a paper towel to dry hands and thenarms, use the towel to turn off the faucets.7. Put on gloves carefully.a. If using sterile surgical gloves, make sure not to touch the outside of glove
Chapter 113GlovesGloves are important to wear so that they form a barrier between you the blood and OPIMS thatyou come in contact with.Latex GlovesAlso known as exam gloves, latex gloves are not sterile. They are used only for barrierprotection. They must be worm with every patient during treatment. (Figure 1)Sterile Latex GlovesSterile Latex Gloves are worn for invasive procedures, such as a surgical procedure. (Figure 2)Vinyl GlovesVinyl gloves are worn for those patients who are allergic to latex materials. (Figure 3)Utility GlovesAlso known as heavy duty puncture resistant gloves, utility gloves are worn when cleaning upthe operatory and when dealing with soiled instruments. (Figure 4)Plastic Gloves (food handlers gloves)Plastic gloves are made up of a light weight plastic making them not acceptable for most dentalprocedures. However they can be used to be placed over contaminated gloves when inanimateobjects must be touched, such as the dental chart. (Figure 5)Figure 1Figure 4Figure 2Figure 3Figure 5
14Dental Assisting Guide on Infection ControlGuidelines for using gloves1. Your hands must be washed thoroughly with an antimicrobial soap before putting ongloves and after removing them.2. Every time you leave the dental chair remove your gloves and wash your hands. Or youcan just use the overglove process.3. Each pair of gloves is used for only one patient and then discarded before handling a newpatient.4. When gloves start to become damaged or even torn, remove them immediately, washyour hands thoroughly and reglove before going back to complete the dental procedure.5. A pair of gloves can be used for a maximum of 60 minutes (1 hour). If the procedure islonger than an hour than reglove.6. After completing a dental procedure, take off gloves carefully, and wash handsthoroughly with an antiseptic soap.MasksMasks are always worn in order to protect the person wearing it from any infection caused byaerosols, droplets, or spatter.Masks should be changed every hour due to the decrease efficiency when moisture is trapped.Rules for wearing mask1.2.3.4.Wear a mask during every dental procedure.Wear one mask for only one patient and discarded at the end of the patient visit.The mask must be able to fit the contours of the face and cover up the nose.The outside of the mask is contaminated during the procedure; therefore it should not betouched during treatment.a. Discard the mask immediately after removal.
Chapter 115Protective EyewearProtective eyewear should always be worn during patient laboratory and sterilization procedures.This way eyes are protected from aerosols, droplets, spatter, and splash.Rules for Protective eyewear1. Wear protective eyewear whenever there is a risk of eye contamination during treatment,in the laboratory or during sterilization procedures.2. Glasses must be cleaned between uses.Face ShieldsFace shields should be a chin-length plastic shield that protects the entire facial area from splashand spatter. When a face shield is worn, a face mask must also be worn.Protective eyewear for patientsPatients must also wear protective eyewear during procedures to also protect them from eyecontamination. Tinted glasses are acceptable to protect eyes form the operating light.Rubber DamA rubber dam is a thin sheet of latex that is used to isolate a pacific tooth being treated during aprocedure. Rubber dams help to maintain a clear operating field and reduce the amount ofcontamination generated.
Chapter 2 Operatory Cleanup
Chapter 2Chapter 2: Operatory cleanupSteps in operatory cleanupWhile wearing Heavy-Duty Gloves, Mask, and Eye Protection1. Discard all used disposables and place in a plastic lined container.2. Place solid instruments into a holding solution and remove the container to thesterilization area.3. Remove and discard protective barriers in operatory.4. Complete procedure for operatory cleaning and disinfections.5. Clean instruments and prepare them for sterilization.6. After removing gloves, wash hands thoroughly.After Removing gloves1.2.3.4.Place clean barriers in the operatoryPlace the sterile instrument pack or tray for the next patient without opening.Seat and prepare the next patient. Drape patient and ready patient’s records for review.Wash hands before globing to assist in patient care.19
20Dental Assisting Guide on Infection ControlOperatory surface disinfectionAll surfaces touched during dental procedures in the operatory must be disinfected. Theresurfaces include: light handles, chair switches, air/water syringe, hand piece tubing, x-ray head,operatory surfaces, and drawer handles.The operatory should be cleaned and disinfected using the Spray-Wipe-Spray technique.1. Spray: to clean, apply the solution with a spray bottle, a wet sponge, or paper towel.Thoroughly scrub the surfaces to remove debris. Discard the sponge and paper towel sothat contamination is not possible.2. Wipe: wipe and clean the disinfected surfaces with a clean paper towel.3. Spray: to disinfect, spray or sponge the surface again, leaving it moist.Using the Ultrasonic CleanerAfter cleaning up the dental operatory, used dental instruments should be placed into theultrasonic cleaner to be mechanically scrubbed. While wearing heavy-duty globes, remove the basket of solid instruments from theholding solution within the cleaner.Rinse the instruments thoroughly with hot waterPlace the soiled instruments in the ultrasonic cleaner basket and lower in the cleaningsolution.Cover the pan and set the timer for the time recommended by the manufacturer.
Chapter 221Rinsing and drying instruments When the cleaning cycle is done in the ultrasonic cleaner, remove the basket with heavyduty gloves.Rinse within the basket under cool waterEmpty the instruments onto a clean dry paper towel.Use another paper towel to pat the instruments dry.(discard both paper towels when done)Lastly wrap instruments for sterilization.
Chapter 3 Sterilization
Chapter 325Chapter 3: SterilizationThe most commonly used forms of sterilization used in the dental office includes: chemicalvapor sterilization, autoclaving, and dry heat.Chemical Vapor SterilizationThis type of sterilization uses a chemical steam instead of water. Chemical Vapor Sterilizationdoes not rust, dull or cored metal instruments, however it is not recommended for large loads ofwrapped instruments due to inadequate ventilation.AutoclavingAutoclaving sterilizes by use of steam under pressure. This is the most commonly used type ofsterilization in the dental office. Autoclaving results are consistent and instruments can bewrapped prior to sterilization. A disadvantage is that the steam will rust, dull and corrode certainmetals.Dry Heat SterilizationDry head sterilization is mainly for instruments that will rust in an autoclave. Advantages of dryheat sterilization are that instruments will not rust, however this process is very time consuming.
26Dental Assisting Guide on Infection ControlVerifying sterilizationProcess indicatorsHeat sensitive tapes can be used to seal instrument packages, or process indicators can be placedwithin the package. These tapes change color when they are exposed to heat. The tape guarantyheat change but does not assure proper sterilization conditionsSpore TestSpore test also known as sporicidal test, are a biological verification of sterilization. Spore testshould be conducted monthly in a small private practice, and weekly in a busy practice.Commonly used spore test consists of three special strips of paper. Two are placed inside the instrument package in a test load. The third is kept as a control.An outside laboratory then analyses the strips and the sends by the resultsA negative report indicates that sterilization did occur.A positive report indicates that corrective procedures must immediately be taken
Chapter 327Autoclave wrapFor the autoclave sterilization process, instruments can be either bagged or wrapped. For bothmethods, the material used must be porous so that steam will penetrate to the instruments.Cloth, paper, or a special nylon film can be used for the autoclave procedure.Autoclave tapeA color indicator autoclave tape is used to that it changes color when exposed to steam. Howeverit does that guaranty sterilization was successful.You may write on the tape to label the contents of the package. Precautions must be taken to notpuncture the wrapping with a pen or pencil.Steps for Bagging Instruments for sterilization1.2.3.4.Clean, dry, and group instruments.Label bag. A paper autoclave bag, nylon tubing, or a combination of both can be used.Slip the instruments into the bag, being careful not to puncture the bag.Close the bag with druggist’s wrap. And seal with autoclave tape or heat seal.
28Dental Assisting Guide on Infection ControlLoading the AutoclaveTrapped air in the autoclave can prevent proper sterilization. Therefore items should be arrangedto facilitate the top to bottom flow of the steam.It is important to never overload the autoclave. Packages should always be separated from eachother with adequate space and contain proper wrapping materials to permit a free flow of steamaround all packaged items.Operating the Autoclave1. Read the manufacturer’s directions and follow them exactly for the autoclave.2. Check the water level, and make sure all valves are adjusted properly every time you runthe autoclave.3. Sufficient time should be allowed for the autoclave to warm up.4. At about 15 pounds of pressure, 15 to 30 minutes of autoclaving is good enough tosterilize most items.5. After the sterilization period is complete and the pressure returns back to zero once again,the autoclave door can be opened slightly.a. This allows for the steam to slowly evaporate.6. After three to four minutes, the instruments will be ready to remove from the autoclave.a. Caution: the instruments may still me hot.
Chapter 329Indexaerosols, 14, 15antimicrobial soap, 12, 14Biohazard symbol, 9Carcinogen hazard symbol, 9Cosmetics, 11Disinfection, 10droplets, 14, 15Electric Shock Hazard symbol, 9heat seal, 27Ionizing Radiation, 9jewelry, 12Laser symbol, 9nylon film, 27Poison symbol, 9Prevention of contamination, 10Protective clothing, 11puncture, 13, 27spatter, 14, 15sporicidal, 26Spray, 20sterility, 10Sterilization, iv, 10, 23, 25ultrasonic cleaner, 20, 21warm up, 28Wipe, 20
20 Dental Assisting Guide on Infection Control Operatory surface disinfection All surfaces touched during dental procedures in the operatory must be disinfected. There surfaces include: light handles, chair switches, air/water syringe, hand piece tu