Transcription
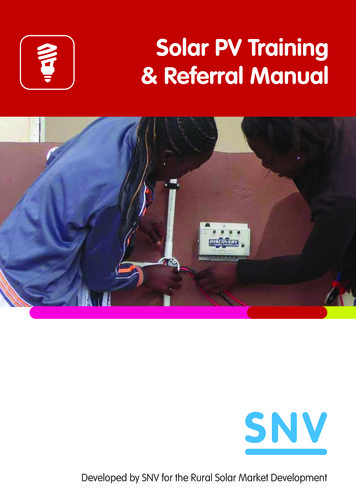
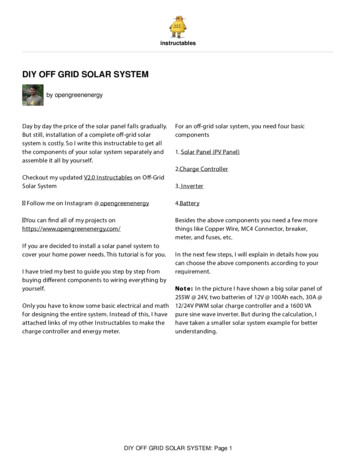
instructablesDIY OFF GRID SOLAR SYSTEMby opengreenenergyDay by day the price of the solar panel falls gradually.But still, installation of a complete o -grid solarsystem is costly. So I write this instructable to get allthe components of your solar system separately andassemble it all by yourself.For an o -grid solar system, you need four basiccomponents1. Solar Panel (PV Panel)2.Charge ControllerCheckout my updated V2.0 Instructables on O -GridSolar SystemFollow me on Instagram @ opengreenenergyYou can nd all of my projects onhttps://www.opengreenenergy.com/3. Inverter4.BatteryBesides the above components you need a few morethings like Copper Wire, MC4 Connector, breaker,meter, and fuses, etc.If you are decided to install a solar panel system tocover your home power needs. This tutorial is for you.I have tried my best to guide you step by step frombuying di erent components to wiring everything byyourself.In the next few steps, I will explain in details how youcan choose the above components according to yourrequirement.No t e : In the picture I have shown a big solar panel of255W @ 24V, two batteries of 12V @ 100Ah each, 30A @Only you have to know some basic electrical and math 12/24V PWM solar charge controller and a 1600 VAfor designing the entire system. Instead of this, I have pure sine wave inverter. But during the calculation, Iattached links of my other Instructables to make thehave taken a smaller solar system example for bettercharge controller and energy meter.understanding.DIY OFF GRID SOLAR SYSTEM: Page 1
https://youtu.be/X 0AecD6E1MStep 1: CALCULATE YOUR LOADDIY OFF GRID SOLAR SYSTEM: Page 2
Before choosing the components you have tocalculate what is your load, how much time it will runetc. If anyone knows basic maths then It is very simpleto calculate.product of power rating of your appliances and time (hr) of the run.1. Decide what appliances (light, fan, tv, etc ) you wantto run and how much time (hour).Lets you want to run an 11W CFL for 5hour from thesolar panel, then the watt-hour is equal to2. See the speci cation chart in your appliances forpower rating.Watt Hour 11W x 5 hr 55Exa m ple :3. Calculate the W a t t Ho ur which is equal to the4. Calculate the total Watt Hour: Just like a CFLcalculate the watt-hour for all the appliances and addthem together.Considering 30% energy lost in the system.Exa m ple :So total Watt Hour per day 365 x 1.3 474.5 Whwhich can be round o to 475 WhCFL 11W x 5 hr 55Now the load calculation is over. The next thing is tochoose the right components to match your loadrequirement.Fan 50 W x 3hr 150TV 80W x 2hr 160If you are not interested to do the above maths thenuse a load calculator for this calculation. You can usethis nice Load --------Total Watt Hour 55 150 160 365Step 2: SOLAR PANEL SELECTIONDIY OFF GRID SOLAR SYSTEM: Page 3
The Solar Panel converts the sunlight into electricityas direct current (DC). These are typically categorizedasm o no cry s t a lline or po ly cry s t a lline .Monocrystalline is costlier and e cient than thepolycrystalline panel.Solar panels are generally rated under standard testconditions (STC): irradiance of 1,000 W/m², the solarspectrum of AM 1.5 and module temperature at 25 C.RAT ING O F S O L AR PANEL :The solar panel size should be selected in such a waythat it will charge the battery fully during the one daytime.During the 12hr day time, the sunlight is not uniformit also di ers according to your location around theglobe. So we can assume 4 hours of e ective sunlightwhich will generate the rated power.Total Wp of PV panel capacity needed 475Wh /4 118.75 WBy taking some margin you can choose a 120 Watt,12v solar panel.Here you should not confuse with the 12V. I wrote 12Vas it is suitable for charging the 12V battery. Butactually the Solar panel voltage is around 17V ormore.https://youtu.be/sZx6qDj2EOoStep 3: BATTERY SELECTIONDIY OFF GRID SOLAR SYSTEM: Page 4
The output from the solar panel is dc power. Thissystems have 12 or 24 V.power is generated during day time only. So if youwant to run a dc load during day time then it seems to In this project, I am selecting the 12 V system.be very easy. But doing this is not a good decisionbecauseRAT ING O F BAT T ERY: Most of the appliances need a constant ratedvoltage to run e ciently. Solar panel voltage is notconstant it varies according to the sunlight.Batteries capacity are rated in term of Ampere Hour. If you want to run the appliances during the nightthen it is impossible.Watt Hour Voltage (Volts) x Current (Amperes) x Time(Hours)The above problem is solved by using a battery tostore the solar power during the day time and use itaccording to your choice. It will provide a constantsource of stable, reliable power.Battery Voltage 12V ( as our system is 12V)There is various kind of Batteries. Car and bikebatteries are designed for supplying short bursts ofhigh current and then be recharged and are notdesigned for deep discharge. But the solar battery is adeep-cycle lead-acid battery that allows for partialdischarge and allows for deep slow discharge. Thelead-acid tubular battery is perfect for a solar system.Ni-MH batteries and Li-Ion batteries are also used inmany small power applications.Note: Before going to choose the components todecide your system voltage 12/24 or 48 V.Higher thevoltage lesser the current and lesser will be thecopper loss in the conductor. This will reduce yourconductor size also. Most of the small home solarPower Voltage X CurrentBattery capacity Load /Voltage 475/12 39.58 AhPractically battery are not ideal, so we have toconsider the loss. Let the battery loss is 15%.So battery capacity required is 39.58 / 0.85 46.56 AhFor better battery life, they are not allowed todischarge fully (100% ). For ooded lead-acid battery60% depth of discharge (DOD) is considered as goodpractice.So Capacity Required 46.56 /0.6 77.61 AhYou can select a deep cycle lead-acid battery with acapacity of more than 77.61 Ah.You can round o to 80 AhDIY OFF GRID SOLAR SYSTEM: Page 5
https://youtu.be/oPzMkLtihLwStep 4: CHARGE CONTROLLER SELECTIONA solar charge controller is a device that is placedbetween a solar panel and a battery. It regulates thevoltage and current coming from your solar panels. Itis used to maintain the proper charging voltage onthe batteries. As the input voltage from the solarpanel rises, the charge controller regulates the chargeto the batteries preventing any overcharging.Usually, the solar power systems use 12-volt batteries,however, Solar panels can deliver far more voltagethan is required to charge the batteries. By, in essence,converting the excess voltage into amps, the chargevoltage can be kept at an optimal level while the timerequired to fully charge the batteries is reduced. Thisallows the solar power system to operate optimally atall times.You can read my latest article on selecting the rightcharge controller for your Solar PV SystemTy pe s o f Cha rg e co nt ro lle r :1.ON OFFM PPT Cha rg e Co nt ro lle r is m o s t e e ct iv eunde r t he s e co ndit io ns :1. Cold weather, cloudy or haz y days2. When the battery is deeply dischargedTry to avoid the ON/OFF charge controller as it is theleast e cient.RAT ING O F CHARGE CO NT RO LLER :Since our system is rated 12V, the Charge controller isalso 12VCurrent rating Power output of Panels / Voltage 120 W/ 12V 10 ABy taking a 20% margin, you can choose a 10 x1.2 12A charge controller. But the next rating controlleravailable in the market is 15A. So choose a ChargeController of 12 V and a current rating of 15 A.If you like to reduce your system cost you can make aPWM charge controller. For step by step instruction,you can see my instructable on PWM CHARGECONTROLLER.2. PWM3. MPPTAmong the 3 charge controllers, MPPT has thehighest e ciency but it is costly. So you can use eitherPWM or MPPT.You may also like my new design on Solar ChargeController.DIY OFF GRID SOLAR SYSTEM: Page 6
https://youtu.be/qGmEz58Ixk4Step 5: INVERTER SELECTIONDIY OFF GRID SOLAR SYSTEM: Page 7
The solar panel (PV) that receive the sun’s rays andconvert them into electricity called direct current(DC). DC is then converted into alternating current(AC) through a device called an Inverter. AC electricityows through every outlet of your home, poweringthe appliances.The power rating should be equal or more than thetotal load in watt at any instant.In our case the maximum load at any instant Tv(50W ) Fan (80W ) CFL (11W ) 141WBy taking some margin we can choose a 200Winverter.Ty pe s1. Square WaveAs our system is 12 v we have to select a 12V DC to230V/50Hz or 110V/60Hz AC pure sine wave inverter.2. Modi ed Sine Wave3. Pure Sine WaveSquare wave inverter is cheaper among the all butnot suitable for all appliances. Modi ed Sine Waveoutput is also not suitable for certain appliances,particularly those with capacitive andelectromagnetic devices such as a fridge, microwaveoven and most kinds of motors. Typically modi edsine wave inverters work at lower e ciency than puresine wave inverters.No t e :Appliances like fridge, hair drier, vacuum cleaner,washing machine, etc likely to have their startingpower consumption several times greater than theirnormal working power (typically this is caused byelectric motors or capacitors in such appliances). Thisshould be taken into account when choosing theright size of the inverter.So as per my opinion choose a pure sine wave inverter.It may be grid-tied or stand-alone. In our case, it isobviously stand alone.RAT ING O F INVERT ER :DIY OFF GRID SOLAR SYSTEM: Page 8
Step 6: SERIES AND PARALLEL CONNECTIONDIY OFF GRID SOLAR SYSTEM: Page 9
After calculating the battery capacity and solar panelrating you have to wire them. In many cases, thecalculated solar panel size or battery is not readilyavailable in the form of a single unit in the market. Soyou have to add a small solar panel or batteries tomatch your system requirement. To match therequired voltage and current rating we have to useseries and parallel connection.1. S e rie s Co nne ct io n :lets 4 12V batteries are connected in series, then thecombination will produce 12 12 12 12 48 volts.In a series combination, the current or amperage isthe same.So if these devices were batteries and each batteryhad a rating of 12 Volts and 100 Ah then the totalvalue of this series circuit would be 48 Volt, 100Ah. Ifthey were solar panels and each solar panel had arating of 17 volts(Osc voltage) and were rated at 5amps each then the total circuit value would be 68volts, 5 amps.To wire any device in series you must connect thepositive terminal of one device to the negativeterminal of the next device. The device in our case maybe a solar panel or battery.2. Pa ra lle l Co nne ct io n :In series connection the individual voltages of eachdevice are additive.Exa m ple :In a parallel connection, you must connect thepositive terminal of the rst device to the positiveterminal of the next device and negative terminal ofthe rst device to the negative terminal of the nextdevice.In a parallel connection, the voltage remains the same parallel then the system voltage remains 12 volts butbut the current rating of the circuit is a sum of all the the current rating is 100 100 200Ah. Similarly, if twodevices.solar panels of 17V and 5 amps are connected inparallel then the system will produce 17 Volts, 10Exa m ple :amps.Lets two batteries of 12v,100Ah are connected inStep 7: WIRINGDIY OFF GRID SOLAR SYSTEM: Page 10
The rst component we are going to wire is theCharge Controller. At the bottom of the ChargeController, there are 3 signs in my charge controller.The rst one from the left is for the connection of theSolar Panel having positive ( ) and negative (-) sign.The second one with plus ( ) and minus (-) sign is forthe Battery connection and the last one for the directDC load connection like DC lights.As per the charge controller manual always connectthe Charge Controller to the Battery rst because thisallows the Charge Controller to get calibrated towhether it is 12V or 24V system. Connect the red ( )and black (-) wire from the battery bank to the chargecontroller.After connecting this inverter terminal for batterycharging is connected to corresponding positive andnegative terminals of the battery.Now you have to connect the solar panel to thecharge controller. At the backside of the Solar Panel,there is a small junction box with 2 connected wireswith positive( ) and negative (-) sign. The terminalwires are normally smaller in length. To connect thewire to the charge controller you need a special typeconnector which is commonly known as MC4connector. See the picture. After connecting the solarpanel to the charge controller the green led indicatorwill light if sunlight is present.No t e : First connect the black /negative wire from thebattery to the charge controller's negative terminal,then connect the positive wire.Note: Always connect the Solar Panel to ChargeController while facing the Panel away from the sunor you may cover the panel with a dark material toavoid sudden high voltage coming from the solarpanel to the Charge Controller which may damage it.After connecting the battery with charge controlleryou can see the Charge Controller indicator led lightsup to indicate the Battery level.S AFE T Y :It is important to note that we are dealing with the DCcurrent. So the positive ( ) is to be connected topositive ( ) and negative (-) with negative (-) fromSolar Panel to Charge Controller. If it gets mixed up,the equipment can go burst and may catch re. Soyou need to be extremely careful when connectingthese wires. It is recommended to use 2 color wires i.e.red and black color for positive ( ) and negative (-). Ifyou don't have a red and black wire you may wrap redand black tap at the terminals.2. In between the charge controller and battery bankConnect the dc load or dc light at last.Besides this, you can monitor the di erent parametersin your o -grid solar system by remote data logging3. In between battery and inverterM e t e ring a nd Da t a lo g g ing :If you are interested to know how much energy isproduced by your solar panel or how much energy isconsumed by the appliances you have to use energymeters.Addit io na l Pro t e ct io n :For DIY based energy meter you can see myThough charge controller and inverter have inbuiltinstructable on ENERGY METER which has bothfuses for protection, you can put switches and fuses in metering and data logging capability.the following places for additional protection andisolation.After wiring everything the o -grid Solar system isready for use.1. In between solar panel and charge controllerDIY OFF GRID SOLAR SYSTEM: Page 11
DIY OFF GRID SOLAR SYSTEM: Page 12
Step 8: Selecting the Solar CableDIY OFF GRID SOLAR SYSTEM: Page 13
Upda t e d o n 22. 0 7. 20 194. The expected loss in percentageThe current generated from the solar panels shouldreach the Battery with minimum loss. Each cable hasits own ohmic resistance. The voltage drop due to thisresistance is according to Ohm’s lawThe rst two parameters ( Vmp and Imp) can be easilyfound from the speci cation sheet on the backside ofthe solar panel or from the datasheet. The cablelength depends on your installation. The losspercentage considered for good design is around 2 to3%.V I x R (Here V is the voltage drop across the cable, Ris the resistance and I is the current).The resistance ( R ) of the cable depends on threeparameters:1.Cable Length: Longer the cable, more is theresistance2. Cable Cross-section Area: Larger the area, smaller isthe resistanceIn the earlier step, we have already nalized the Solarpanel, the rating. From the Solar panel speci cationsheet Vmp 36.7V and Imp 6.94A ( rounded o tonext higher number i.e 37V and 7A). Let the distancebetween the Solar panel and the Battery is 30 feetand the expected loss is 2%. By using the above valuesin the online calculator by RENOGY, The cable size is12 AW G .The calculation screenshot is also attached for3. The material used: Copper or Aluminum. Copper has reference.lesser resistance compared to AluminiumYou can buy the Solar cables from Amazon orIn this application, copper cable is preferable.AliexpressYou can calculate the cable size by using RENOGYonline calculator.You can read my Instructables on Selecting SolarCables and How to Make MC4 Connector.You need to enter the following parameters :1. Solar Panel Operating Voltage (Vmp)No t e : The voltage grade of the cable should bematched with the Solar Panel maximum systemvoltage.2. Solar Panel Operating Current (Imp)Ima ge Cre d it : Banggood3. Cable Length from Solar Panel to BatteryDIY OFF GRID SOLAR SYSTEM: Page 14
DIY OFF GRID SOLAR SYSTEM: Page 15
Step 9: Selecting the Correct Size Power Inverter Battery CablesUpda t e d o n 17. 12. 20 19battery bank.It is very important to be sure you are using theappropriate cable size for your inverter/battery.Failing to do so could lead to your inverter notsupporting full loads and overheating, which is apotential re hazard. Use this as a guide for choosingthe proper cable size, and be sure to contact aprofessional electrician or our tech team with anyadditional questions you may have.(1500 W )/(24 Vdc) 62.5 ASo, 62.5 A is the maximum current that the cableneeds to support in order to properly provide thecurrent to the inverter. The next higher size availableon the table is 100A.Use the above chart as a guide to determine whichsize cable will be best for your application.1. What size inverter do you have?2. What is the DC voltage of your battery bank?3. Now divide the inverter’s wattage by your batteryvoltage; this will give you the maximum current foryour cables.Exa m ple Ca lcula t io nCurrent (Amps ) Power (Watts ) / Voltage (Volt)In our example, we can see that 2/0 AW G cablewould be appropriate.NO T E: For distances over 10 feet, the voltage dropover the cables will occur due to resistance throughthe wiring. If you will need to run cables longer than10 feet, it is recommended that you increase the cablesize in order to compensate for voltage loss. If you areunsure about your application feel free to give us acall and we will be able to assist you in nding theright cable.Consider 1500 Watt inverter connected to the 24VDIY OFF GRID SOLAR SYSTEM: Page 16
Step 10: MOUNTING THE SOLAR PANELDIY OFF GRID SOLAR SYSTEM: Page 17
After design the solar system. Buy all the componentswith an appropriate rating as per the previous steps.Now it is time to mount the solar panel. First, choose asuitable location on the rooftop where there is noobstruction sunlight.Pre pa re t he m o unt ing s t a nd: You can make iton your own or it is better to buy one from any store.In my case, I have taken the drawing from the solarpanel company and made it at a nearby welding shop.The tilt of the stand is nearly equal to the latitudeangle of your location.I made a small wooden mounting stand for my 10Watt solar panel. I have attached the pictures so thatanyone can make it easy.T ilt ing : To get the most from solar panels, you needto point them in the direction that captures themaximum sunlight. Use one of these formulas to ndthe best angle from the horizontal at which the panelshould be tilted: If your latitude is below 25 , use the latitude times0.87. If your latitude is between 25 and 50 , use thelatitude, times 0.76, plus 3.1 degrees.For more details on tilting click hereFirst place the stand in such a way that the face isdirected towards the south.Mark the leg position overthe roof.To get the south direction use this android appcompassThen make a rough surface at each leg of the standby using a sharp object. I made around 1Sq feet sizerough surface over the roof at each leg. This is helpfulfor perfect bonding between the roof and concrete.Pre pa re co ncre t e m ix: Take cement and stoneswith a 1:3 ratio then add water to make a thick mix.Pour concrete mix at each leg of the stand. I made aheap shape concrete mix to give maximum strength.M o unt s t he pa ne ls t o t he s t a nd: At thebacksides, the solar panel has inbuilt holes formounting. Match the solar panel holes with thestand/platform holes and screw them together.W ire t he s o la r pa ne l: At the back sides of thesolar panel a small junction box is there with apositive and negative sign for polarity. In a large-sizesolar panel, this junction box has terminal wires withMC4 connector but for small size panel, you have toconnect the junction box with external wires. Alwaystry to use red and black wire for the positive andnegative terminal connection. If there is provision forearth wire the use a green wire for wiring this.DIY OFF GRID SOLAR SYSTEM: Page 18
DIY OFF GRID SOLAR SYSTEM: Page 19
Step 11: INVERTER AND BATTERY STANDI made the above inverter and battery stand by thehelp of a carpenter. The design idea I got from thisinstructable. The design is really helpful for me.panel, 3 horizontal holes are provided for su cientventilation. A glass window is provided at the frontside to view the di erent led indications in theinverter.At the backside, I made a big circular hole just behindthe inverter fan for fresh air suction from outside.In the inclined plane of the inverter stand, I haveLater I covered the hole by using plastic wire mesh.mounted the charge controller. In the future, I willFew small holes are also made for inserting the wiresinstall my own made energy meter also.from solar panel, charge controller and inverter to thebattery and ac output to the appliances. At both sidesDIY OFF GRID SOLAR SYSTEM: Page 20
DIY OFF GRID SOLAR SYSTEM: Page 21
Step 12: Solar PV Design WorksheetI found a nicely documented worksheet on Solar PVDesign from Renewable Energy Innovation page.system.I hope it will be useful. The full credit goes to theThis is a simple design worksheet for stand-alone solar authors of Re-InnovationPV systems. It explains the design process andexplains some of the practicalities of building aDIY OFF GRID SOLAR SYSTEM: Page 22
NaRRDkR8This vid also helped, but you went into detail.Can’t wait to start my own system soon, thanks !Hello thank you for the great article I will be setting up a 4 panel 300 watt each panel system. Ihave been reading about micro inverters what is your opinion on them ?Dear sir.Can I use Two Monocrystalline solar panel ( Pv panel) 100 watt MPPT charge controller 30Amp Two 12V, 100ah solar power batteries (Deep cycle Battery) to power PURE SINE WAVEINVERTER 3000watt? This materials can it work perfectly.please kindly reply me back here orrockieroyal@gmail.com.comHi,Your system definitely work.But exact calculation can be done after knowing the following inputs.1. Total loads in watts2. Battery back up time you need3. Location of the installation.Thanks(1)- TOTAL LOADS IN WATTS1). 6X40watts -Energy Saver Bulbs. 240watt 2). 1x50watt - Standing Fan. 50watt3). (Power 100-240v, 50/60Hz, 1.0A)-LG LEDTV. 55watt 4). Strong Encoder . 25watt5). DSTV. 25watt 6). LG HomeTheatre. -------------------------------Total loads in watts. ----------------------------------Note: this are the appliances i want use solar power system from(2)- BATTERY BACK UP TIME YOU NEED6hours to 12hours at night time with Two 12v, 100ah Battery .can the battery withstand itDIY OFF GRID SOLAR SYSTEM: Page 23
(3)- NigeriaPlease sir.how can i achieve this guildline from you?how did you get 30% loss and where did u get the sum 1.3Thanks . very good work. kindly could you help. I intend to install a small home installer. with 150wpv.12v100amp battery with 20a charger controller without inverter. my usage will be of a DC tv32w. receiver 18w and 3lights on 33w. the question is do i require circuit breaker/fuse in myInstallation and where please also spacify the size to be use. Thanking you in advance.wafush@gmail.comHiYou need to use a trip switches 25 A to 32A , put them in a consumer box!!Which circuit breaker should i choose for a small 300 w system.Depends on your controller and wires I use a 96v controller so need a 63A breaker, type questioninto your browser should come up with answer that's what I did hope this help!!how do i design a system for outdoor fencing only.Thks.Wow, this is a great site , I learn a lot. I appreciate the CEO and the content postersVery useful workbook for design Solar off-Grid power plant. Helpful for beginners, Learners andtrainers to train trainees.Krishna shrivastava07415324645deba168, I want to thank you so much for posting this article. I am not an electrical engineer somany of the articles already on Instructables on this subject or on the internet seemed incompleteto me because they did not explain many of the details that you did. Perhaps for the electricallyinclinded those finer points are common knowledge and not necessary, but for me it exactly what Ineeded. The step-by-step approach with explanations and links to products was fantastic.I have never written an Instructable but I appreciate all the time and effort it requires to writesomething like this, so thank you very, very much.Glad my work is helpful for you.Your kind words really motivate me to write an article like this in the future.Thank you so much.Good post great guy!Done 12VDC automated lighting system & 220VAC emergency system- 140W Poly Solar Panel- 100A VRLA Battery- 10A PWM Controller- 5W LED Bulb x 5- 1000W Pure Sine Wave Inverter- Multiple Circuit Breakers9w2xez@gmail.comDIY OFF GRID SOLAR SYSTEM: Page 24
Bos boleh kongsi dgn saye tak carenye ini email saye wanmuhdhafiz@gmail.comInformative. ThanksIs there any way to build a system that pulls from a battery first, and then would pull from the gridafter you used up all the electricity that got stored throughout the day from solar?Are you in the US? You can install solar panels and feed them into the grid if so. By law the powercompanies have to buy any electricity you produce. In some states it's much easier to implementthan others though, check with local solar companies. You always use off the grid, but whateveryou produce is fed into the grid during daytime. That offsets your electric bill. In most states theelectric company just gives you a credit for whatever you produce, not a check in the mail.There are automatic switches for generators that switch from grid to generator during a poweroutage. Shouldn't be hard to create something similar that will auto switch over when battery levelis down. Those auto power outage switches aren't cheap though. Controlling the switch could bedone with an Arduino or similar controleer, but you'd still need the heavy duty switch to switch overthe load.Important consideration: when you are selling your solar power into the grid the IRS gets involvedand you will PAY taxes for the wonderful earnings of your solar array. If you are looking at ROI foryour grid-tied system it might be a small thing or a large thing depending on your situation so justbe aware especially if you are trying to save money over time.Now at night when you draw energy from the grid. you're still paying the same rate as everyonewithout any panels, no tax refund.Hey, one thing i see all the time with solar projects is all anybody uses is 12v deep cycle batteries.These batteries were mostly meant for boats, high cranking amps and could be discharged morewithout killing the life of the battery. The best battery to use is deep cycle 6v batteries wired inseries to give you one big 12v battery. If you want lots of power stored for longer use, use 6v batts.Another thing that you need to think of if you are going off grid is your solar array needs to be bigenough to not only run the things you want but also put out enough power to recharge the batteriesat the same time or each time you start to use the batteries they will just be drained more and moreuntil they are dead. System needs to be bigger than for just running the house. If you are totally offgrid then your system needs to keep the batteries charged the whole time the house is drainingpower. Same thing either way you look at it.Thanks for the information, please i have a question if i am to use 2 6V instead of 1 big 12v battery,does the AH size matters? what i am interested in is getting lots of power power stored for longeruse.Having made something similar (though not yet solar powered) the capacity doesn't matter as longas both series batteries are the same. (Which is why I use 12v fire alarm rated sla batteriesinstead.) My total capacity on 12v is around 500Ah (about 6000wh.) with a 1000w inverter on itthat I've never run past 500w.Is there a battery for an off grid system that will power a 220v appliance?DIY OFF GRID SOLAR SYSTEM: Page 25
You'll need an inverter capable of supplying 220vac. They do make them, but 115vac is morecommon in the us.Seeing the usual gushing over "solar" energy, a contrarian point of view is needed. "Solar" energyis, obviously, nothing but battery power. I'll stick to the grid any day rather than see a countrysidelittered with millions of dead batteries. Let the energy companies do what they do best. Of course,it's fun to mess with the technology but, as a practical matter of sunlight availability especially incertain parts of the country, you're going to go to the grid someday for some period of time.and itain't gonna be cheap. The only really viable application is where there is no grid (unless we'retalking about the poles!)These dead batt
Jul 22, 2019 · DIY OFF GRID SOLAR SYSTEM by opengreenenergy Day by day the price of the solar panel falls gradually. But still, installation of a complete o -grid solar system is costly. So I write this instructable to get all the components of your solar system separately and assemble it all by yourse
