Transcription
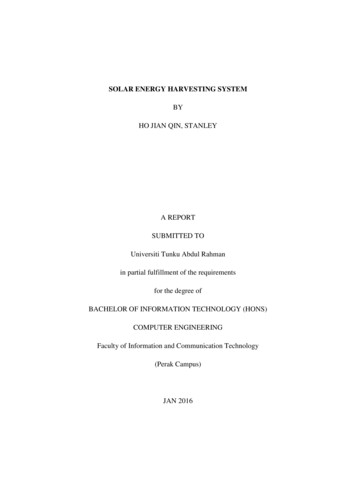
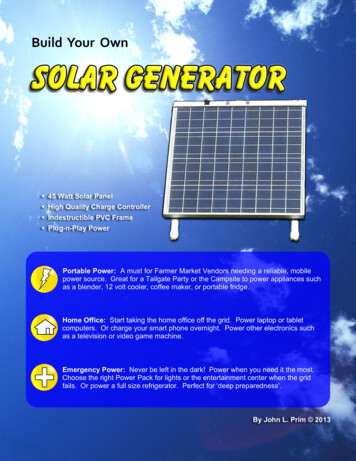
Build Your Own45 Watt Solar PanelHigh Quality Charge ControllerIndestructible PVC FramePlug-n-Play PowerPortable Power: A must for Farmer Market Vendors needing a reliable, mobilepower source. Great for a Tailgate Party or the Campsite to power appliances suchas a blender, 12 volt cooler, coffee maker, or portable fridge.Home Office: Start taking the home office off the grid. Power laptop or tabletcomputers. Or charge your smart phone overnight. Power other electronics suchas a television or video game machine.Emergency Power: Never be left in the dark! Power when you need it the most.Choose the right Power Pack for lights or the entertainment center when the gridfails. Or power a full size refrigerator. Perfect for ‘deep preparedness’.By John L. Prim 2013
Permission is Granted to Freely Copy and Share Widely.This DIY Portable Solar Generator Plan is Donation Ware.Please Visithttp://www.zdcore.com/donate.htmlTo Donate.This Free Plan is Available athttp://www.zdcore.com/patently-absurd.html
1Important NoticeWarningNECSection 690-18Prevent Panel Power ProductionThis is extremely important for onereason - electricity can kill you look at the table below.SAFETY REMINDERWear protective gear, including:Ÿ Safety GlassesŸ Ear plugs / muffsWhen using power tools:Ÿ Take off jewelryŸ Avoid loose clothingŸ Tool guards in placeŸ Secure work piece when possibleBeware of trip hazardsWhen you connect the solar panel to themounting frame, take every precautionto prevent electric shock.The panel can produce some powereven with indoor light as an energysource.The solar panel cords have coveredconnectors making it almost impossibleto accidentally cross the negative topositive terminal.Always disconnect or cover the panelwhen working on a solar generator.No Light No PowerBody ReactionACDCTingle1 milliamp6 milliampShockCan Move - Reflex2 milliamp9 milliampSevereCan’t Let Go - BurnsStop Breathing20 milliamp90 milliampHeart AttackProbable Death100 milliamp500 milliampHeart StopsDeath Occurs in Minutes 1 amp 1 ampBuild Your Own Solar Generator
Safety is Always FirstFIVE POWER TOOL RULES1. Keep tools in good condition withregular maintenance.2. Use the right tool for the job.3. Examine tool for damage before use.DO NOT USE DAMAGED TOOLS!4. Operate tools according to themanufacturers’ instructions.WORKBENCHŸ Keep clean and free of clutterŸ Area free of slip & trip hazardsŸ Good lighting equals good work5. Properly use the right personalprotective equipment.THESE TOOLSCOME WITHNO SPARE PARTSPERSONAL PROTECTIONŸ Safety glassesŸ Hearing protectionŸ Proper gloves (when needed)Ÿ Dust mask and/orŸ Adequate ventilationPOWER TOOLSŸ Take off jewelryŸ Avoid loose clothingŸ Tool guards in placeŸ Secure work piece when possibleMAKE YOURS LASTA LIFETIMEBuild Your Own Solar GeneratorELECTRICALŸ Do not overload outletsŸ Turn off tools not in useŸ Extension cords in good conditionŸ De-energize power when wiring
2IntroductionSuper StormClimate change is here.And the resulting super storms are leaving millions without power. And without homes.While a few will continue to deny climate change reality, and some others may argue climatechange didn’t cause Super Storm Sandy, the hard truth is climate change made the storm much,much worse.How?Sea levels rise. Because of global warming, Sandy slammed a greater volume of seawater atthe coast. In depth, this amounts to about 8 more inches of water. It may not, at first glance,seem like much. But such meager inches turned the super storm’s surge into a super flood.Is this the new “normal”? For the foreseeable future, this is the new normal. And each and everyone of us should be more prepared for these storms, super sized by global warming.We should also take a longer view and mitigate climate change before it becomes much, muchworse. We have the technology to do this. The real question is whether we have the will to widelyharness and use such technology.And we must answer this question here and now, for time is not on our side.Build Your Own Solar Generator
Solar PowerPhotovoltaics (PV) - a method of generating electrical power by converting solarradiation into direct current electricity using semiconductors that exhibitthe photovoltaic effect. Photovoltaic power generation employs solarpanels composed of a number of solar cells containing aphotovoltaic material. (Wikipedia)Solar power is the solution for both disaster preparedness and for reducing the threats of climatechange far into the future. And even small solar can make a large difference for a brightertomorrow.Up to 15% of electricity in an American home is consumed by electronic devices, from televisionsand computers to constantly charging one’s cell phone.A portable solar generator with regular daily usecan result in a 15% reduction in one’s electric bill.Average Home Yearly ConsumptionDeviceKilowatt HoursLooking at the table to the right, the total yearlyconsumption of electronic devices is 516 Kilowatthours.Desktop Computer255Laptop Computer83Let’s compare that number.LCD TV ( 40")77Power Tool37Hand-Held Vacuum29Cordless Phone26MP3 Player6Cell Phone3A coal fired plant at 40% efficiency uses about700 pounds of coal to power a 100 watt light bulbfor one year.100 Watts x 10 1 Kilowatt700 pounds x 10 7,000 pounds7,000 pounds x 516 Kilowatts 3,612,000 lbs3,612,000 lbs 1,806 tons of coalSource:ACEEEThe average American homeowner uses 1,806 tons of coal per year to power just the electronicdevices listed. That’s a lot of coal. It’s also a lot of pollution contributing to global warming.A ton of coal pollutes about 2.5 tons of carbon dioxide or more, depending on the grade of the coal.1,806 x 2.5 4,514 tons of CO2 released into the atmosphere every year.Now multiply that by millions upon millions of homes. All this, just for some electronic devices.There’s a better way to produce this energy. Portable solar generators can power our most usedelectronic devices. It reduces the electric bill, lowers air pollution, and slows climate change. Itprevents storms from becoming much, much worse. And when the storms do come, we’re ready.And it’s not about preparing for “doomsday.” It’s about preparing for a solar powered world.We have the technology. Let’s build and use it.Build Your Own Solar Generator
Dare to CompareSolar Mak TechnologyHarbor Freight ToolsiPower Station ‘45’Thunderbolt ‘45’Solar Power:45 WattsSolar Power:45 WattsPower PackHand CarryPower PackNoBattery:18 AhBattery:NoInverter:400 / 800 WattsInverter:NoNoAC Outlet:2AC Outlet:DC Socket:2DC Socket:2USB Port:1USB Port:1Jumper Cables:YesJumper Cables:NoAir Compressor:YesAir Compressor:NoThe iPower Station 45 solar panel is higher quality and more efficient than the Thunderbolt 45amorphous panels. With the iPower Station, one is getting more power in a ready and ruggedmobile package.Current pricing for the Thunderbolt Kit is about 200.00. The DIY iPower Solar Generator inthis manual is about 210.00. Adding a portable power pack brings the price for theiPower Station 45 to 310.00.The US 30% Federal Solar Tax credit can be applied to the iPower Station 45, as long as it’slimited to providing power for home use. One can have a high quality solar power station foras little as 200.00, after the tax credit.Ready and reliable. Unmatched price to performance. Made for the Middle Class.Only iPower Station delivers power where and when you need it most.Build Your Own Solar Generator
3 Solar GeneratorComponent SourcesArrayPrice EachAmount45 Watt Solar Panel - ULS14 Amp Charge Controller - ULS112 Volt Power Cord - RS1Red Electric Tape - HF1Battery PackPrice Each5 in 1 Power Pack - HFPVC FrameAmountSubtotal1Price EachAmount1 inch (Number 6 - 10’ ) Pipe - SB1Slip Tee - SB3End Cap - SB245* Elbow - SB2Screw Tab Cap - SB1MiscellaneousSubtotalPrice EachAmountMounting Clamps - Local6Lock Pin - HF1Self Drilling Screw - HFSetNuts, Bolts, and Washers - HFSetSubtotalSubtotalTOTAL:Instructions: Print this page. Click on the blue link for supplier pricing. Write the price ofeach, then calculate total cost. Place a single mark in the blue box from the lower left corner tothe upper right corner when an item is ordered. Place another mark from the upper left corner tothe lower right corner when the item is received.Build Your Own Solar Generator
Solar PanelEfficiency vs. Real PerformanceDue to the manufacturing process, Mono panels are black and Poly panels are blue.Monocrystalline panels are, technically, more efficient than Polycrystalline panels.How does that translate to real world performance? Let’s compare the amp rating output of a 45watt solar panel:Ÿ Mono panel produces 2.6 ampsŸ Poly panel produces 2.5 ampsIn this case, the Mono produces a tenth of an amp more than the Poly panel. But a Mono panelcan cost two to three times more than a Poly panel.Under real world conditions, the Poly panel offers a better price to performance. For a portablesolar generator, a Poly panel is a much better return on investment.Panel SpecificationsIn other words, one’s portable solar generator will pay for itselfmuch, much faster while delivering almost the sameType:Polycrystallineperformance as a Mono panel.Weight:11 lbsCurrent price for a 45 watt Poly solar panel is about 100.00.Module Size: 22” x 26” x 1.38”NECSection 690 - 8As a safety precaution because apanel can occasionally produce morethan its rated output, an additionalmultiplying factor of 125% is used.We’ll look at this more closely as wego over the solar generator build.Build Your Own Solar GeneratorTotal Watts:45 WattsMax Volts:17 VoltsMax Power:2.5 AmpsTemp Range:-40 to 185 (F)Tolerance:5%Junction:IP-65Source:UL Solar
Charge ControllerMPPT vs PWMMulti Point Power Tracking (MPPT) is claimed to increase solar power production up to 30%compared to Pulse Width Modulation. But there’s a number of catches:Ÿ As the solar panel heats up, MPPT drops off and is comparable to PWM.Ÿ Under the best real world conditions, MPPT increases production about 20%.Ÿ MPPT is much more expensive than PWM.Looking at the output of a 45 watt panel, production is increased about half an amp per sun hour.Keep in mind, such increase only occurs when the solar panel is operating in a cooler climate(winter season).For portable solar generators, PWM offers the best price to performance.Not all PWM controllers are equal. We highly recommendCharger SpecificationsSpecialty Concepts patent Automatic Sequencing Chargerfor the following reasons:Type:Patent PWMŸŸŸŸŸŸŸŸOver 30 years experience.Indirect lightening protection built in.Robust field reliability rate of 99.89%.Terminal block for easy wire connection.Reverse leak protection - no night time losses.Easy read LED power production indicator.10 year warranty.Made in USA.UL 1714:YesFM approved:YesCSA approved:YesEfficiency:99%Solid State:YesWeather proof:YesCurrent price for the ASC 12 volt / 4 Amp controller is about Auto shut off: 40.00.Rating:Source:Build Your Own Solar GeneratorYes12 Volts / 4 AmpUL Solar
PVC ComponentsThe PVC FrameThe solar panel, charge controller, and power cord are permanently mounted to the PVC frame.PVC is chosen over an aluminum / metal frame because it’s rust proof, lightweight, and extremelyeasy to handle. Unlike a metal frame, a PVC frame can last as long as the solar panel, producingpower for 40 years or more. Other benefits include:ŸŸŸŸŸElectrically non-conductive (safety feature).Resistant to fracturing due to its elasticity (low maintenance).Resistant to salt, chemicals, and corrosive soils (long lasting).Good stiffness, making it strong for heavy duty use (low maintenance).Easy to recycle, making it better for the environment (reduce pollution and reuse).Our biggest reasons for choosing PVC centers around how we use the solar generator daily inreal life. It must be:1. Easy to carry.2. Fast and easy to set up.3. Safe to use, with no pinch points.4. Easy to close and store when not in use.5. Folds flat as one unit, so nothing is misplaced.The frame took the most time for us to design and test.Keeping it straight and simple means paying attentionto the details that matter most.PVC SpecificationsType:Furniture GradeSize:6Outer Diameter:Inner Bore:UV Resistant:It’s the easiest to use portable solar generator, madefor the middle class.And it’s also what makes it so insanely great.1”YesSlip Tee:3 totalEnd Cap:2 total45* Elbow:2 totalCurrent pricing for a single 10 foot length of size 6 PVC Screw Tab Cap:pipe and all the fittings for the frame is about 30.00.Source:Build Your Own Solar Generator1.315”1 totalSimplified Building
Other ComponentsPower CordPower Cord SpecificationsThe Enercell 12VDC power adapter plug w/ switchcomes with a 10 Amp fuse built in and 18 gauge cord.Rating:12 Volts / 10 AmpsSource:Radio ShackLock Pin SpecificationsLock PinThis locks the legs of the solar generator in place whenin use. Also increases stability in higher wind conditions.Length:3 inchesSource:Harbor FreightSelf Drill ScrewsSelf Drill ScrewsSelf drilling screws permanently connect PVC fittings tothe pipe for the solar generator frame.Nuts, Bolts and WashersLength:VariousSource:Harbor FreightNuts, Bolts, and WashersPermanently secures the Mounting clamps to the solarpanel and charge controller. Flat / lock washers arealso necessary.Length:VariousSource:Harbor FreightMounting Clamps (QuickLatch Pipe Hanger)These mount the solar panel and charge controller to theframe with snap in place ease. Source from a localelectric supply or hardware store. A total of six areneeded. More info:Manufacturer: ArlingtonPart Number: MM2025Mounting ClampsManufacturer:Source:ArlingtonLocal StoreUPC: 54518Size: 1”Last but not least, we’ll also need electric tape.Current pricing for all the remaining components comes to a total of about 40.00.Build Your Own Solar Generator
Build ItBalance of SystemBalance of system (BOS) usually refers to all the components that make up aphotovoltaic system except for the panels. This normally includes the inverter,batteries, racks, mounts, wiring, and switches.We’ve taken a slightly different approach in defining balance of system. Instead,we’ve focused on balance of generation for the best price to performance.A portable solar power generator is made up of all the components mentionedabove, including a solar panel, controller, and necessary wiring.Balance of generation includes design cost, land, site preparation, installation,operation and maintenance costs. Let’s briefly examine each one:Ÿ Design CostThis is an open source solar generator design. Design cost is kept to an affordablelevel with contributions from many, many people. As an Open Product Sponsor, asmall fee is provided to the solar generator project. In other words, your designcost is already covered!Ÿ InstallationInstallation is mainly labor cost. It varies depending on the size of the system andnumber of components involved. In this case, you’re saving on labor cost becauseyou’re building the solar power generator.Ÿ Land / Site PreparationThe best benefit of portable solar power is there is no land / site preparation. Allone has to do is point it at the sun to produce power. It’s easy to use power whenand where you need it most.Ÿ Operation / MaintenanceThe solar generators is “plug and play,” making it very easy to operate. There issome maintenance involved. It should be regularly inspected once in the springand once in the fall.Overall, this solar generator provides the best price to performance in its class.Build Your Own Solar Generator
1. Set UpOrganize one’s work space. Wear protectiveequipment and follow safe work practices.Ÿ WorkbenchA workbench can be a fold out table or a sheet ofplywood secured to 2 sawhorses. Make sure there isample space to move and work.Ÿ ToolsTo the right is listed the tools required to build thesolar generator. A tape measure is also needed.Notice a drill driver is the only power tool. Almost allthese tools can be found in a tool kit, making it easierto organize, carry, and store.Ÿ Supply BoxesOne way to make the work easier is to organizecomponents into supply boxes. In this way, parts areeasily found. Completed assemblies can be storeduntil they’re installed on the solar generator.Always plan your work and take your time building thesolar generator.Build Your Own Solar GeneratorTools Needed1Miter Box Saw2Screwdriver Set3Drill Bit Set4Needle Nose Pliers5Electrician Pliers6Wire Strippers7Drill Driver
2. PVC Cut ListŸ PrepareSet up the miter saw and gather all yourPVC parts together. Print out the mountingframe diagram and use it as a guide.Store the other tools / supply boxes underthe workbench. Keeping your work benchuncluttered helps to focus one’s attentionon the work at hand.Miter saw steadies work piece for cuttingAll cuts are straight, not mitered. The miterbox helps steady the work and saw for astraight, true, and clean cut.Ÿ Cut ListThe PVC pipe is cut into four pieces. Onefor the pivot, one for the cross bar, and twofor the mount. Lengths are as follows:Pivot Leg: 17 ¼ ”Cross Bar: 20 ¼”Mounting Legs: 23 ¾”Use a paper towel to wipe off excessshavings from the PVC pipe after each cut.Mounting legs identified by red electric tapeŸ Lay Out PartsOnce cuts are complete, put away the mitersaw under the workbench.Pull all the PVC parts out of the supply boxand double check all the pieces are on hand.Place the drill driver, a 3/32 drill bit, and selfdrilling screws on the workbench.We can now begin assembly of the mountingframe.Legs, Slip Tees, and Cross BarBuild Your Own Solar Generator
3. PVC Frame AssemblyŸ Dry FitDry fit the PVC frame assembly togetherbefore any permanent attachment with thescrews.This ensures each piece is in the right place.And if it isn’t, then it can be easily detachedand put in the right place.First, lay out the three legs and attach a sliptee to the top of each one. Then slide thecross bar through the slip tees. Attach eachend cap to the ends of the cross bar.The center pivot leg is shorter than the outermounting legs. The outer mounting legs arethe same length.Firmly press all fittings into place, makingsure they’re in all the way.Now measure the distance on the cross barfrom outside end to end. It should be about20 ½”.Last, attach the feet to the legs.The screw tab cap is attached to the bottomof the center pivot leg.The 45* elbows are attached to the bottomof the outer mounting legs.Check that the mounting frame is level. Setit up as shown in the picture, making sureall the feet are even and level with theground. Adjust them until they are level andtrue.Checking Frame FitŸ Ready FastenersBuild Your Own Solar Generator
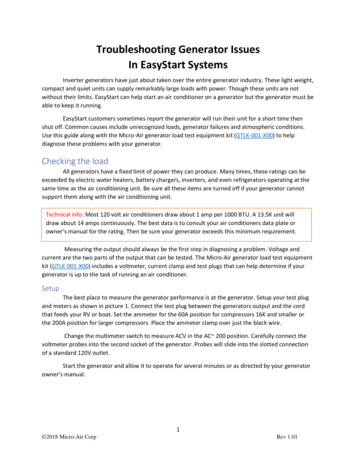
CDABHIEFGPay Careful Attention to the Fastener Points!Ÿ Permanent PVC AttachmentTake your time screwing the pieces together. Drilling in the wrong place will result in the framefailing to fold open properly. Pay close attention for drilling in the right spot.1. Lay the mounting frame flat on the workbench. The feet on the outer mounting legs should bepointing upward.2. Set up the drill driver with a 3/32” drill bit. Use the tape measure to center the pivot leg on thecross bar. The center should be about 10¼” from the outer edge of either end cap.3. Then drill one hole [A] through the slip tee and into the center bar. Then drill another hole [B]through the slip tee and into the pivot leg. Use the screwdriver to insert a self drilling screw intoeach hole.4. Next, drill a hole through each end cap and into the cross bar. Use the screwdriver to insert aself drilling screw into hole [C] and [D].5. Repeat the procedure for the feet. Drill a hole through the tab cap and into the pivot leg [E].Then drill a hole through each elbow into the mounting legs [F] and [G]. Use the screwdriver toinsert a self drilling screw into each of the holes.6. Important! For the last step, drill a hole through the two remaining slip tees [H] and [I] andinto the mounting legs only. Do Not Drill Holes Into The Cross Bar. The outer mounting legslip tees act as a hinge on the cross bar so the solar generator can easily fold open and closed.Use the screwdriver to insert a self drilling screw into each of the holes.7. Mounting frame assembly is complete. Set it aside next to your workbench. Remove the solarpanel from the box. Put it face down on cardboard (reuse a piece of the box) on top of theworkbench.Build Your Own Solar Generator
4. Solar Panel AttachmentŸ Clamp AssemblyThe solar panel should be lying face down onthe workbench. You’ll need a screwdriverand pliers. Thread should be quarter 20.Take out four each of the following:- ¾ ” long bolt- nut- lock washer- flat washerThe bolt assemblies are for securing eachQuickLatch pipe hanger to the panel.Ÿ Clamp AttachmentAbout a third of the way in from each side ofthe solar panel are four holes.Over each hole, line up a QuickLatch alongthe panel’s lip. Line up and drop a boltthrough the QuickLatch and panel hole.Then add to the underside of the lip a flatwasher, lock washer, and nut.Last, use the pliers to hold the nut whileusing the screwdriver to tighten the bolt.This secures the QuickLatch in place.Ÿ Snap In Mounting FrameTake the frame and insert each mounting leginto the QuickLatches, two per leg.Firmly press down on the leg near eachQuickLatch. You should hear a couple ofclicks as each QuickLatch snaps closed.Last, drill a hole in each QuickLatch into themounting leg. Then use the screwdriver toinsert a self drilling screw in each hole.The solar panel is now firmly attached to theframe. The solar generator is 75% complete.Build Your Own Solar Generator
Solar WiringNECNational Electrical CodeHere is where we slightly depart fromthe NEC but still meet its intent.In stationary solar generators, acombiner box brings together all theleads from each solar panel.Inside that box, all positive wires areconnected to a bus bar, and allnegative wires are connected to aseparate bus bar. This combines allthe power coming from the panels atthe bus bar.The benefits of using a glass tube fuseinclude:ŸAffordableŸMeets intent of the NECŸSmall and easy to installŸProvides overcurrent protectionŸAvailable at most auto parts storesEven with all these benefits, this fuseisn’t approved by the NEC forresidential (stationary) use.It’s possible the NEC could beupdated to allow for use in low voltageapplications, such as a portable solargenerator. But it’s unlikely.A single positive and negative wire isthen attached to each bus bar leadingto the positive and negative terminalon the charge controller.The NEC’s main focus is safe wiringpractices regarding high voltages inboth residential and commercialapplications.The combiner box can also be fusedfor overcurrent protection to preventcomponent damage and fire.Regardless, it’s still a good standard tofollow to develop good work practices.These combiner boxes are designedfor stationary applications, notportable ones. They’re too expensiveand bulky to be used in a portablesolar generator.To meet our need for a safe portablesolar generator, we’ll use a DC fusefrom the auto, marine, and recreationvehicle (RV) industries.Glass tube fuses are standard andaffordable. And it’s proven technology.We’ll need to replace the 10 amp fusein the 12 volt power cord with a5 amp fuse.Build Your Own Solar GeneratorThe portable solar generator meetsthat intent by providing overcurrentprotection between the solar chargecontroller and the power pack.Glass Tube FuseNote: A wire amp rating should always beequal or greater than the fuse rating.It ensures the fuse blows in the case of aprolonged power surge malfunction.It prevents wires catching fire and stopsdamage to other components in the circuit.
5. Charge Controller WiringŸ Attach Pipe ClampsThread should be quarter 20. Take out twoeach of the following:- ¼” bolt- lock washer- nutLine up the QuickLatch on the back edge ofthe charge controller. Drop the boltthrough the hole and secure them togetherwith the needle nose pliers and screwdriver.Ÿ Snap To Solar GeneratorTake the controller and insert it over thecenter pivot leg on the cross bar.Firmly press the controller against the crossbar. You should hear a couple of clicks aseach QuickLatch snaps closed.Last, drill a hole in on top of eachQuickLatch and Pivot Tee into the cross bar.Use the screwdriver to insert a self drillingscrew in each hole.The controller is now firmly attached to theframe.Ÿ Attach Power CordCarefully pull the negative and positive leadapart about 3 inches. The positive lead hasa small ( ) tag on it. Wrap some redelectric tape around the positive cord(near the cord split) for easier identification.Using the wire stripper to expose about 1inch of wire on each lead. Twist each wireand fold it in half - this ensures a goodcontact on the controller. On the controllerbus bar, use a screwdriver to secure thenegative lead to the negative terminalmarked “battery.” Repeat for the positivelead to the positive “battery” terminal.Build Your Own Solar Generator
6. Solar Panel Wiring and Lock PinŸ Positive Cable AttachmentUsing the electrician pliers/cutter, cut off theconnector and strip the wire back about ¼inch. Wrap some red electric tape aroundthe positive cable for easier identification.On the controller bus bar, use a screwdriverto secure the positive wire lead to thepositive terminal marked “pv.”Lightly tug on the cable to ensure it’s firmlyattached to the positive pv terminal on thecharge controller.Ÿ Negative Cable AttachmentUsing the electrician pliers/cutter, cut off theconnector and strip the wire back about ¼inch.On the controller bus bar, use a screwdriverto secure the negative wire lead to thenegative terminal marked “pv.”Lightly tug on the cable to ensure it’s firmlyattached to the negative pv terminal.Notice the LED indicator lights up - showingthe solar panel is producing power.Ÿ Lock PinFold open and set the solar generator on aflat surface.Using the drill driver and a 5/16” bit, carefullydrill a hole completely through the rightmounting leg and slip tee.Wipe off PVC shavings and insert the lock pin.The iPower Solar Generator is complete.Build Your Own Solar Generator
7. Plug and PlayOperating your portable solar generator is easy. As long as a power pack has a 12 volt outlet,then it can be solar charged by the iPower Solar Generator.The LED on the 12 volt plug is always lit no matter if the switch is in the “on” or “off” position. It’san easy visual indication the fuse inside is good. If the LED isn’t lit on the plug, then the fuse hasprobably blown and needs replacing.Insert the 12 volt plug into the 12 volt socket of the power pack, then switch the plug into the “on”position. If the battery is low, then the LED on the charge controller will light up, showing that it’srecharging the battery.As the battery reaches full charge, the charge controller LED will begin flashing on and off. Oncethe battery is fully charged, then the LED will go out. Turn the plug switch to the “off” position andremove the plug from the power pack’s 12 volt socket.To store the iPower Generator, pull the lock pin from the frame. Wrap the power cord into a loopand hang it from the lock pin. Then attach the lock pin around the cross bar near the chargecontroller. Fold closed for storage or travel.The iPower Solar Generator is a “set it and forget it” device. When a power pack needsrecharging, fold open the generator. Aim it at the sun, lock pin the cross bar, plug it in and switchit on. That’s it!It’s completely “plug and play.” Sets up in less than a minute. It’s power when and where youneed it the most.Build Your Own Solar Generator
4Power Packs5 in 1 Power PackThis is the very first power pack we used with our solargenerators. And it’s still one of the best. We’vepowered everything from laptop computers to blenders.The power pack can be fully charged in 3 to 6 hourswith a 45 watt solar generator.It’s much faster than charging from a home outlet, whichcan take up to 48 hours or more.Power Pack SpecificationsType:Hand CarryDC Outlets:2AC Outlets:2Inverter:400 / 800 WattsAir Compressor:260 psiSolar charging a power pack is always faster becausethere are no power conversion losses.Jumper Cables:YesBattery:18 AhAnd best of all, solar energy is free.Source:Harbor FreightBuild Your Own Solar Generator
Other PacksThere are hundreds of Power Packs that are easily charged with an iPower Solar Generator.They come in many different shapes, sizes, colors, batteries, and power inverters.The minimum requirement for any of these power packs is a 12 volt socket so it can be quickly andeasily charged with one’s portable solar generator.If you’re looking to have emergency back up power to run a full size refrigerator during longerutility outages, then an iPower Pro is the way to go.Our iPower Station Pro is more versatile, with a larger solar generator and bigger storage batterywhen utility outages last more than a few hours.It’s important to carefully look over a power pack’s specifications, then choose the one bestmatching your energy requirements.Build Your Own Solar Generator
Electricity BasicsCOPPER WIREBATTERYOhm’s LawVoltage is the difference in electrical charge between two points. There must bemore electrons at one point and fewer at the other point to maintain voltage.Electrons carry a negative charge. When a wire is connected between the twopoints, electrons flow from the negative to the positive terminal.Remember that Current is the electron flow in a conductor, such as copper wire.Insulators are used to safely contain electricity. Plastic is an insulator, because ithas high resistance to electron movement.Resistance is measured in Ohms. The relationship between voltage, current andresistance is explained by Ohm’s law.OHM’S LAW: E I x RE VoltageI AmpsR OhmsIf the value of any two is known, then the third can be calculated.Build Your Own Solar Generator
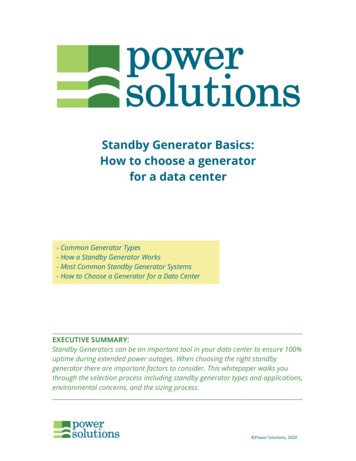
To make it easier to remember these relationships, one can use Ohm’s Triangle:VAOE is
The DIY iPower Solar Generator in this manual is about 210.00. Adding a portable power pack brings the price for the iPower Station 45 to 310.00. The US 30% Federal Solar Tax credit can be applied to the iPower Station 45, as long as it’s limited to providing power for home