Transcription
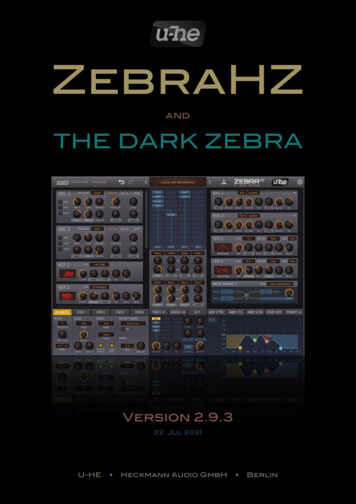
ZebraHZandTHE DARK ZEBRAVersion 2.9.322. Jul 2021U-HE Heckmann Audio GmbH Berlin
Table of ContentsIntroduction5The Dark Zebra .5ZebraHZ .5Installation .6Terms of Use .7User Interface8Basic Operation .8Upper Bar .9GUI size .10Synthesis Window.10Main grid .11Lane Mixer .12Lane Compressors .13Performance Window.14Lower Bar and Lower Pane.15Preset Browser16Overview .16Directory Panel (folders) .17Presets Panel (files) .19Preset Info Panel .21Installing More Soundsets.21Preset Tagging .22Search by Tags .23Search by Text .24Global Settings26PITCH .26GLIDE.26VOICE .27MICROTUNING.27SWING .272
Generators28OSC main panel .28PHA/SNC (Phase/Sync) .29OSC FX .30MIXER .30List of Spectral Effects .31OSC Lower Panel .33OSC Wave Editor .35Wave Selector .35GeoMorph & SpectroMorph .36GeoBlend & SpectroBlend .37FMO main panel .39FMO lower panel .40Noise .41VCF .42XMF .44Diva VCF .46COMB .48SIDEBAND .51SHAPER .52Distortion .53RING .55MIX .56FOLD .57Modulators58List of Modulation Sources .58Modulation Matrix .59ENV .60MSEG .63LFO .65LFOG .67MOD MAPPER .68MMix .70Outputs and Effects71The FX Grid .71MODULATION FX .723
DELAY .73REVERB .74COMPRESSOR .75EQ .76NU REV .77RESONATOR .78Performance79Arpeggiator / Sequencer .79Hands-on tutorial .79General Settings .80Per Step Settings .81XY Pad programming .83Configuration85About MIDI CC .85MIDI Learn.86MIDI Table .87Preferences .88Tips & Tricks90Motion viewer for modulators .90Spectralize .90Modulation inverter .91Absolute value .91Vibrato under control .91More MSEG points .91Modulation Target Lists92Generators .92Modulators .98Global .100Effects .101Flow Diagrams106Delay Modes .106XMF Modes.108FX Grid .109NKS1104
TOCINTRODUCTIONIntroductionJust a few sections of the main Zebra2 user guide are missing in this version: There is no‘Quick Start Tutorial’, as it is assumed that you already know the absolute basics. Neitherthe Zebrify nor the Zrev chapters are repeated here, as there are no special versions ofthose effects for ZebraHZ. However, all important reference information is included, so youshouldn’t have to refer to the regular Zebra2 user guide very often, if at all.The Dark ZebraThe Dark Zebra is a bank of 400 presets, a collaboration between Hollywood composerHans Zimmer and u-he’s own Howard Scarr. Practically all Zebra sounds used in themovies The Dark Knight and The Dark Knight Rises are included, plus a few extras thatwere made at the same time but didn’t quite fit in the scores.New in version 2.9 All presets now include XY pad control and are NKS compatible. Especially the ‘simpler’presets benefit greatly from the extra controls!ZebraHZZebraHZ is Hans Zimmer’s custom version of Zebra2. Many of the following extensionsare required by The Dark Zebra: 8 extra filters (4 x highpass and 4 x lowpass) based on Diva models4 comb filter modules instead of 28 MSEGs instead of 424 modulation matrix slots instead of 12X/Y pads also appear as regular modulation sources4 polyphonic compressors, one for each lane of the main grid3 Polymoog -style resonators with additional full-range bandNote: For even more powerful physical modelling capabilities, version 2.9 has twice asmany comb filters as version 2.8, and three Resonators instead of just one.Online resourcesFor downloads, news and support, go to our websiteFor heated debates about u-he products, go to our forumFor friendship and informal news updates, go to our facebook pageFor u-he presets (paid or free), go to our patch library (PatchLib)For video tutorials and more, go to our youtube channelFor personal pics and a few videos, go to our instagram pageFor audio demos of soundsets, go to our soundcloudpresets global generators modulators outs fx perform config targets5
TOCINTRODUCTIONInstallationDouble-click the installer (Mac or PC) and follow instructions.Important: If you are updating an existing ZebraHZ installation, please either use thesame paths as the original and select the same set of plug-in formats, or remove the oldversion before installing the new one. To avoid crashes or other “strange behaviour” whileloading presets, please do not mix old and new versions.Serial Number: ZebraHZ uses the same serial number as Zebra2. Load ZebraHZ, rightclick on the data display then select enter serial number. If you can’t find your Zebra serialnumber, go to u-he.com/my-licenses/ and follow the “request” instructions.Default PathsmacOSPresets (local)Presets brary/AppSupport/u-he/com.u-he.ZebraHZ MacHD/Library/Application tion Support/u-he/Tunefiles/WindowsPresets (local)Presets \Support\ (*.txt Tunefiles\Support ZebraHZ supports AU, VST2 / VST3 and AAX. You can run Zebra2 and ZebraHZ inparallel, as they are now separate plug-ins. ZebraHZ and Zebra2 both require a serial number issued after mid-2009. If your Zebra2serial is older, go to u-he support and request a new one. If your email address haschanged since then, please let us know. If you can’t remember when you purchasedZebra2, please retrieve your original serial number before installing ZebraHZ. If youstart Zebra2 with an obsolete code, it will ask you to contact support@u-he.com so wecan send you a new one. No worries, you really can’t break anything!UpdatesAs a combination of soundset and plug-in, The Dark Zebra cannot be directly downloadedfrom its product page. In general, u-he soundset updates can only be downloaded afteryou have requested a license email: If you ever need an update, go to the My Licensespage at u-he.com and enter the e-mail address you originally used to purchase The DarkZebra. Our system will reply with an e-mail containing all your u-he plug-in serial numbers(including the one for Zebra2) plus temporary download links for any u-he soundsets youcurrently own, including the latest Dark Zebra / ZebraHZ installer.presets global generators modulators outs fx perform config targets6
TOCINTRODUCTIONTerms of Use1. Before using this soundset, you must have purchased a legitimate license for Zebra2as well as for The Dark Zebra soundset.2. The Dark Zebra may not be distributed without the written consent of the copyrightholder, Heckmann Audio GmbH.3. You may not distribute resampled or otherwise replicated parts of The Dark Zebra inany product, commercial, free or otherwise. This includes, but is not limited to, samplelibraries and sample-based synthesizers. You may, however, create such derivates foryour own musical works as long as these derivates are only distributed in the context ofthe musical work.4. The Dark Zebra / ZebraHZ can only be resold together with your Zebra2 license.Heckmann Audio GmbH, BerlinImprint / ImpressumTeam u-he 2021 (Q3) Urs Heckmann (boss, concepts, big code)Jayney Klimek (office management)Howard Scarr (user guides, presets, grump)Rob Clifton-Harvey (IT admin, backend development)Sebastian Greger (graphic design)Jan Storm (framework, code)Alexandre Bique (all things Linux)Oddvar Manlig (business development)Viktor Weimer (support, presets, the voice)Thomas Binek (QA, bug-hunting, presets)Henna Gramentz (office supervision, support)Frank Hoffmann (framework, browser)Alf Klimek (rock-star vocals, studio)Sebastian Hübert (media, synthwave)David Schornsheim (more code)Stephan Eckes (yet more code)Luca Christakopoulos (communication design)Special thanks Brian Rzycki for maintaining PatchLib.presets global generators modulators outs fx perform config targets7
TOCGUIUser InterfaceBasic OperationAlthough operating ZebraHZ is fairly intuitive, there are a few points worth mentioning Standard controlsValues are adjusted via click-and-drag, with fine control by holdingdown a SHIFT key. The knobs are either bipolar like Pan in thisimage, or unipolar like Volume. Most bipolar knobs are centrezero, but there are exceptions e.g. the Delay times.Double-click resets a knob to its default value. If your mouse has a scroll wheel, hoverover any control then roll the wheel. For finer control, hold SHIFT.Assignable controlsMost of Zebra’s modules include freely assignable controls that directlymodulate important parameters. Select a source by clicking the label (or theknob if unassigned). The target is the knob above or to the right, indicatedby a small triangle.Note that both assignable controls in the VCF module affect Cutoff. Also,what appear to be assignable controls in the envelopes are actually pre-attack and post-sustain options (see ENV).Parameter lockingRight-click on a control and select ‘Lock’. The lock only prevents the valuefrom changing when you switch presets, it does not prevent you fromadjusting the value directly. To unlock, right-click again and untick ‘Locked’in the menu. Example: Lock both Microtuning options to audition variouspresets, all with the same non-standard tuning.Note: Right-clicking a knob also lets you assign XY control – a quick alternative to themore flexible method described in the section about programming the XY pads.Switches and the mouse wheelMost of the rectangular buttons open drop-down menus. However, most of them willalso react to the mouse wheel – which is particularly useful in the ARP CTRL panel.If your mouse wheel is rastered i.e. it has noticeable ‘ticks’, you should check that theMouse Wheel Raster preference is switched on (see Preferences). This ensures thateach tick will correspond to a sensible step, usually an integer.presets global generators modulators outs fx perform config targets8
TOCGUIUpper BarSYNTH, PERFORM, PRESETSThe buttons on the left select the 3 main windows.DATA DISPLAYThe central display has three main jobs: Firstly, it shows the preset name. You can stepthrough the presets by clicking on the triangles to the left and right. Clicking on the nameopens a list of all presets in the current directory – a convenient way to load a preset without having to open the PRESETS window. Since version 2.9.1 you can even load a presetby dragging it from your desktop (or any system window) onto the data display.Secondly, it shows the value of the parameter being edited. Watch the display wheneveryou need to set specific values. After about 2 seconds, it reverts to the preset name.Thirdly, right-clicking on the display toggles between compatibility mode 2.3 (a faint ‘2.3’appears on the right) and the regular 2.5 . While editing 2.3 presets, remember that thismode does not support some more recent features and improvements. Also, the soundcan change when you switch from 2.3 to 2.5, mainly due to the improved XMF module.A small indicator at the bottom left lights up whenever MIDI data is being received.INITIALIZE (init)At the top of the context menu (right-click on the display) is a simple template called inityou can load whenever you want to program from scratch. The main grid contains an oscillator and the effects grid has an inactive Chorus/Phaser (ModFX1).UNDO / REDOThe curved arrows to the left of the data display can be used to fix recent ‘mistakes’. Although the number of steps in the undo buffer is limited, you can even undo a change ofpreset so that switching presets before saving doesn’t mean losing your work.SAVEStores the preset into the currently selected folder or the ‘User’ folder, depending on the Save Presets To setting. To select a different folder, click onPRESETS and navigate in the directory. Then click on [SAVE], give your preset a name and details you want to appear in PRESET INFO area of thebrowser. Please avoid using the characters \ / ? % * : " Right-clicking on [SAVE] opens a menu with a choice of file formats. The recommendedh2p option is our normal cross-platform format (editable text), while h2p extended includesextra readable information. The native option is the standard format of your system (.fxpfor VST and AAX, .aupreset for Audio Units). If you have loaded the VST2 version you willalso see the option nksf: See the NKS chapter towards the end of this document.BADGEClicking on the u-he badge opens a popup menu containing links to thisuser guide, to the documents folder, to our company homepage, to ourKVR support forum as well as to our presence in various social networks.presets global generators modulators outs fx perform config targets9
TOCGUIGUI sizeRight-clicking anywhere in the background of the control bar or lower pane opens a menuwith options for GUI sizes (as percentages and as width x height in pixels). Sizes largerthan the current screen will appear disabled (greyed-out).A more permanent GUI size setting is available in the Preferences.Synthesis WindowClick on the SYNTH button in the upper bar.UPPER BARMAIN GRIDGENERATORSRACKMODULATORSRACKLANE MIXERLOWER BARLOWER PANEareas of the SYNTH windowGenerators rackThe area to the left contains control panels for each active module in the main grid (seethe next page).Modulators rackThe area to the right contains panels for all control signals (envelopes, LFOs etc.) currently in use. Modulators automatically appear as soon as they are used anywhere.If the rack isn’t tall enough to show all active panels, a scroll bar will appear. Right-clickin an empty area of each rack to choose auto scroll – the rack scrolls (if necessary) toreveal the panel belonging to the module selected in the grid, or selected on top – themodule selected in the grid moves to the top of the rack.Note that the order of panels in the generators rack will seldom reflect the patch structure as it is defined in the grid. However, you can swap the positions of adjacent panelsby clicking in the narrow space between them.presets global generators modulators outs fx perform config targets10
TOCGUIMain gridThe center of the Synthesis window is a grid consisting of four vertical lanes. This areais used for connecting generators together, whereby the signal flow is top to bottom.To add a module, click on an empty cell and select from the list. Drag modules aroundthe grid, deactivate via double-click (or Mac: cmd click, Win: alt click), specify inputrouting or remove the module via right-click. Clicking on a module will highlight the corresponding control panel in the generators pane.IMPORTANT: Oscillators and noise generators (as well as FMOs in certain modes) donot process audio, so when placed on top of one another in the same lane, the signalsare simply mixed together.OSC1OSC2OSC4XMF1OSC3Lane 1Lane 1Lane 2Lane 2In the above example, both OSC1 and OSC2 flow into XMF1 (cross mod filter). TheXMF1 output is then mixed with (not processed by!) OSC3, and the mixture flows downlane 1. OSC4 flows down lane 2 as well as modulating XMF1 cutoff (the red arrow).Routing between lanesAny module can route signals between thelanes. Right-click on a module to select thesource (‘Input’) lane.In this example, OSC1 is processed by theComb module in lane 1. Both OSC1 andNoise1 are filtered by VCF1 in lane 2.Note that the vertical position can matterwhen routing between lanes: If Noise1 ismoved to where VCF1 is now, it will take itsinput from Comb1 instead.Note: For the sake of simplicity and brevity,the names of modules as they appear inthe grid, which often differ from the paneltitles, are used throughout this manual.presets global generators modulators outs fx perform config targets11
TOCGUILane MixerBelow the main grid is what looks like a 4-channel mixer. This is where you adjust thepans/volumes and select envelopes as well as route signals to the FX grid.main gridmute buttonfx bus selectL/R pan or balancepan/bal modulationamp envelopevolumevolume modulationMUTEA handy mute button for each lane. In the image above, lane 2 is muted.FX Bus SelectSelects an output for each lane:main. route to the lefthand lane of the FX grid (MASTER)bus1. route to the center lane of the FX grid (R1)bus2. route to the righthand lane of the FX grid (R2)PAN / MODPan position knob plus assignable modulation knob. Right-click on a PAN knob to togglebetween Pan and Bal (balance) modes. Remember that balancing to the left meansfading out the righthand channel of your stereo signal, while panning to the left meansmoving it over to the left.Amp EnvelopeSelects an envelope for each lane’s amplifier.Gate.a simple on/off envelope, but with enough release to avoid clicksEnv(n).envelopes 1 to 4VOL / MODLane volume knob and assignable modulation knob. Modulation here scales the volumefrom 0% through 100% (centre) to 200%. In the example above, the modulation wheelfades lane 1 down to silence, irrespective of the VOL value (which is about 70 here).Note: If you want a unipolar modulation source to fade a lane in from zero it’s best touse the modulation matrix instead.presets global generators modulators outs fx perform config targets12
TOCGUILane CompressorsEach lane in the main grid has its own polyphonic (per voice) compressor. All controlsappear in the lower area, like the Diva VCF modules.Click COMP1-4 in the lower bar On/OffTo save CPU, lane compressors can be switched off.GRGain reduction indicatorMode (the vertical 3-way switch)ECO .original lo-fi version, with low CPU-hit.SMOOTH.smooth compression, the best choice for most situations.STRONG .very powerful compression, best for bold percussive sounds.ATTACKThe time it takes for the compressor to fully work after the threshold has been reached.Attack can affect the brightness: very fast values cause the compressor to reduce gainimmediately, which can dull the attack of the original sound. When ATTACK is set tozero, it is only one sample long.RELEASEThis adjusts the recovery time i.e. the time the compressor takes to return to unity gainafter the input signal has fallen below the threshold. Very short release can distort lowfrequency input, overly long release can ‘clamp’ the sound down and not releaseenough before the next ‘attack’ arrives. When RELEASE is set to zero, the release isonly one sample long.INPUTThe input level before the signal reaches the compressor.THRESHOLDThe level above which compression is applied and below which it is released. LowerTHRESHOLD values result in more compression than higher values.COMPThe amount of compression – think of this as a dry / wet crossfade.OUTPUTCompensates for any loss or gain resulting from the compression.presets global generators modulators outs fx perform config targets13
TOCGUIPerformance WindowClick on the PERFORM button in the upper bar to open the Performance Window. Thefour X/Y pads can simultaneously control up to 16 parameters each Performance window, with a different ‘XY’ panel selected below Click to jump to a new position – find different variations of the sound Click and drag to move smoothly – for realtime morphing Double-click to reset to the centerNext to each pad is a large field where you can add a functional description (double-click).Note: NKS hardware owners might generally prefer to use the 8 knobs instead of the pads,as the X and Y dimensions are independent. The Dark Zebra presets, however, aregeared towards 2D control.Clicking on the [ ] icon at the top right of each pad toggles between thethe pad and a list of X/Y assignments. You can also make assignmentshere without having to open the XY panel in the lower area. Drag & dropassignment also works (as in the above image), but as the generator andmodulation racks are not currently visible, this is mainly useful for assigning XY to the lanemixer and effect parameters.For details, see the section about programming XY Pads in the PERFORMANCE chapter.presets global generators modulators outs fx perform config targets14
TOCGUILower Bar and Lower PaneThe lower bar switches the contents of the lower pane:GLOBALOutput levels, the FX grid and FX panel, miscellaneous preset settings. Go thereOSC1 to OSC4Wave Editor, oscillator load/save, miscellaneous oscillator settings. Go thereFMO1-4Additional settings for all 4 FMOs in a single panel. Go thereMSEG1-8The 8 Multi-Stage Envelope Generators. Go thereXY1For programming the X/Y pads. Go thereARP CTRLFor programming the arpeggiator / sequencer. Go thereMM1-12 / MM13-24Two pages of modulation matrix slots (1 to 12 and 13 to 24). Go thereDIVA VCFThe Diva filters. Go thereCOMP1-4The 4 lane compressors. Go therepresets global generators modulators outs fx perform config targets15
TOCPRESETSPreset BrowserOverviewYou can load a preset in the current folder by clicking on the data display, or step throughthem by clicking on the arrow symbols either side of the data display or even drag a preset file from a system window or your desktop and drop it onto the data display. But ofcourse Zebra also has a powerful preset browser – click PRESETS in the upper bar:LayoutFolders are on the left, presets in the centre and information about the currently activepreset on the right. If there is no PRESET INFO panel on the right, click on the [ ] buttonin the top righthand corner and tick Show Preset Info. The same menu also offers ShowTags in Preset Info – untick if you prefer not to see any tags there.Default, initWhen ZebraHZ starts it checks whether Local contains a preset called default. If so, thisis loaded instead of Batcave Syncing Down. If you want a simple template every timeyou start a new instance, right-click on the data display and select init. Then select theLocal folder and save it under the name default (which does not appear in the browser).If a fresh instance doesn’t load your new default, it probably landed in User, in whichcase you should change Save Presets To in the Preferences and repeat the above.PATCH FORMATAt the bottom right of the browser you can specify the format in which your patches willbe saved. The default is .h2p (recommended). To save in the plugin version’s own format, select native. The .h2p extended format can include comments for each line.SAVE ONLY ACTIVE MODULESUnused modules will not be saved with the preset. Activating this option causes newlycreated modules to adopt settings from previously loaded presets.presets global generators modulators outs fx perform config targets16
TOCPRESETSBYPASS EFFECTSMirrors FX BYPASS in the GLOB/FX panel. Click to temporarily deactivate all effects inthe grid. This switch is truly global – you won’t hear any effects until you deactivate it!Directory Panel (folders)Local and User FoldersDark Zebra patches are sorted into 9 folders, and there’s an untagged ’best of’ selectionin the ‘Local’ root. At the bottom of ‘Local’ is the entire Zebra2 factory library. After selecting a preset you can step through the others using the cursor keys.‘Local’ is meant primarily for factory content, so you should save all your own creationsinto the ‘User’ folder (see the Save Presets To preference).MIDI Programs‘Local’ also contains a special folder called ‘MIDI Programs’. When the first instance ofZebraHZ starts, all presets in that folder (up to 128) are loaded into memory so they canbe selected via MIDI Program Change message. Important: To ensure a fixed order itis important to rename them e.g. ‘000 rest-of-name’ to ‘127 rest-of-name’.‘MIDI Programs’ can contain up to 127 sub-folders, switchable via MIDI Bank Selectmessages (CC#0). Send Bank Select first, then Program Change. ‘MIDI Programs’ itselfis bank 0, while sub-folders are addressed in alphabetical order starting with bank 1.Important: The content of ’MIDI Programs’ cannot be changed on the fly. Any changesthere will only be updated when the host application is restarted.Smart FoldersThese are not regular folders, but the results of querying a database of all presets. Thecontent is therefore dynamic; it will change whenever the underlying data changes.Search History is a list of past searches. To make them more permanent, right-click andselect Save Search To empty the list, right-click on ‘Search History’ and select Clear.Saved Searches contains any ‘Search History’ entries that have been saved. To removeentries here, right-click and Delete. Items dragged from ‘Saved Searches’ and droppedinto the ‘Local’ or ‘User’ root will create a folder containing real copies of all the listedpresets. This is quite a powerful tool for reorganizing your presets, but requires care!Bank smart folders reference metadata about preset origin – the version of the factorylibrary or the name of the soundset with which the preset was installed. See Preset Infoa few pages down. You can create your own custom banks: Drag & drop one or morepresets onto the ‘Bank’ folder then enter a suitable bank name into the dialogue box.To remove Bank attributes from selected presets, either drag & drop them onto the ‘noBank’ folder you will see at the bottom of the Bank list, or right-click on the Bank and select Remove Presets from Bank. Empty Banks will disappear.presets according to origin, as also shown in PRESET INFO (3rd line down).Favourites: 8 smart folders, one for each colour (1-8). See the Presets context menu afew pages down. Only one Favourite can be set per preset. Presets dropped onto oneof the ‘Fav
The Dark Zebra The Dark Zebra is a bank of 400 presets, a collaboration between Hollywood composer Hans Zimmer and u-he’s own Howard Scarr. Practically all Zebra sounds used in the movies The Dark Knight and The Dark Knight Rises are included, plus a few extras that were
