Transcription
INFORMATION TECHNOLOGYEnterprise Application SystemsMicrosoft OutlookUserGuideOutlookGuideDesktop AppMt. San Antonio CollegeInformation Technology1100 North Grand Avenue Building 23Walnut, CA 91789Help Desk 909.274.4357
Outlook 2016 Desktop AppTable of ContentsAccessing Outlook.2Logging in to Outlook.2Navigating through Outlook.3Working with Email.4Replying and Forwarding Email .4Organizing Email.4Searching Messages .6Creating Contacts/Contact Groups .7Adding Email Signature .8Setting Out-of-Office Replies .101Winter 2018
Outlook 2016 Desktop AppAccessing OutlookOutlook is part of the Microsoft Office Suite and offers two versions of this application: adesktop application and a web application. This user guide will focus on the desktop application.For Outlook Web Application help, please visit the Mt. SAC Office 365 website.1. To access Outlook, find the Outlook icon on your computer desktop and double- clickthe icon.You can also search for Outlook on your windows search bar.Logging in to Outlook1. On the login screen, your My Portal username will be auto-filled followed by‘@mtsac.edu’. DO NOT CHANGE THIS.2. Enter your My Portal password in the password field and click OK.2Winter 2018
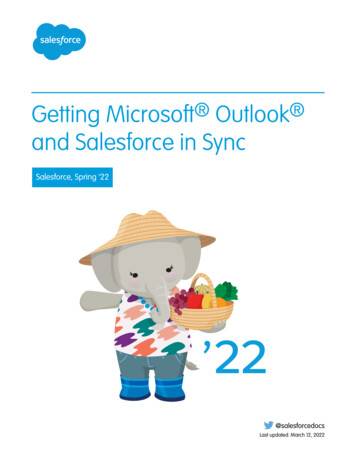
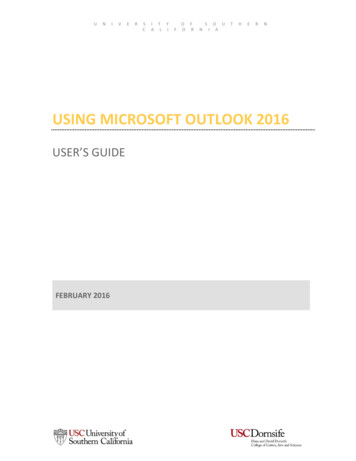
Outlook 2016 Desktop AppNavigating through OutlookRibbon- group of actionable items available for your current selection on the screenStatus Bar- provides number of items on the folder you have selected and status of internetconnectionZoom In/Out Slider- found to the right of the slider, allows users to increase/decrease text sizeof the preview paneNavigation Bar- allows users to switch between tasks such as mail, calendar, and peopleArrows/Carets- these can be found throughout the interface for expanding or collapsingdetails. For ribbon views use the Ribbon Display Options on the upper right-hand corner of yourwindowFolder Pane- consists of your favorites, inbox (s), and foldersEmail List (mid screen) – view list of read and unreadPreview (Reading) Pane- area where you can read and view email text and details*Note: All panes can be sized differently by clicking and dragging the vertical pane line.3Winter 2018
Outlook 2016 Desktop AppWorking with EmailReading email- click on the email desired in the email list.Creating a new message- click on the New Mail option in the ribbon.Replying and Forwarding Email1. In the Reading Pane, click Reply, Reply All, or Forward.Mountie Tip #1: If the Reading Pane is off or if you’ve opened the message in its own window,on the Home or Message tab, click Reply, Reply All, or Forward.2. Write your message.3. Click Send.Mountie Tip #2: If you want all replies to automatically open in a new window, from the File menu,click Options Mail. Under Replies and forwards, check the Open replies and forwards in a newwindow box.Mountie Tip #3: If you want to forward two or more messages to the same recipients in one message, inthe message list, press and hold Ctrl as you click each message. Then, click Home Forward. Eachmessage is forwarded as attachments in one new message.Organizing EmailCreating folders:1. On the folder (left) pane, right-click where you want to add the folder, and click NewFolder.2. In the Name box, enter a name for the folder and press Enter.4Winter 2018
Outlook 2016 Desktop AppCreating rules:3. Choose Rules Manage Rules & Alerts from the ribbon or choose the File tab andthen choose Manage Rules & Alerts.4. In the Rules and Alerts dialog box, on the E-mail Rules tab, choose New Rule.5Winter 2018
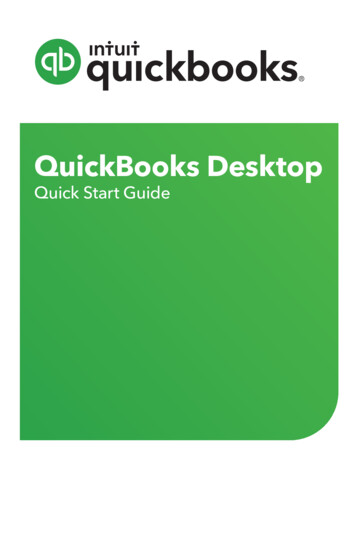
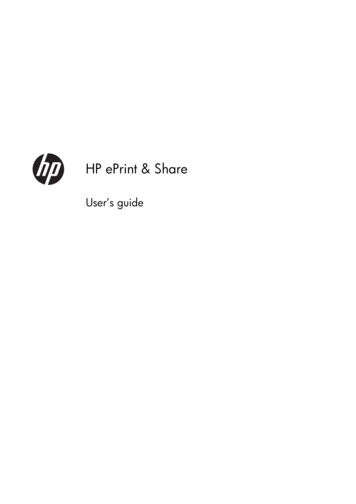
Outlook 2016 Desktop App5. In the Rules Wizard, under Step 1: Select a template, pick one of the defaulttemplates under Stay Organized, Stay Up to Date, or, Start from a blank rule.6. Edit the rule description to your needs. Click Finish when done.Searching Messages1. Find the search box above the list of your emails.2. To find a word that you know is in amessage, or a message from a particularperson, type the word or person's name(you can use first, last, and partial names) inthe search box. Messages that contain theword or name you specified appear with thesearch text highlighted in the results.6Winter 2018
Outlook 2016 Desktop AppCreating Contacts/Contact GroupsCreating Contacts:1. Click People at the bottom of the screen.2. In the New group, choose New Contact.3. Enter a name and any other information that you want to include for the contact.4. If you want to immediately create another contact, choose Save & New (this way, youdon't have to start over for each contact).Creating Contact Groups (Distribution Lists):1. On the Navigation Bar, click People.2. Under My Contacts, pick where you want to add the contact group. For this example,click Contacts.3. Click Home New Contact Group.4. On the Contact Group tab, in the Name box, type a name for the group.7Winter 2018
Outlook 2016 Desktop App5. Click Add Members, and then add people from your address book or contacts list.(*Note: To add someone who is not in your address book or contacts, create or add aperson as a contact.)6. Click Save and Close.Mountie Tip #4: A contact group is a list of email addresses collected under one name, where amessage sent to a contact group will go to all recipients in the list. A contact group is not global;therefore the contact group will only be available for selection by the user who created the list.An address list under the Mt. SAC Global Address Book is created and managed by the systemadministrator (e.g. IT Helpdesk).Listserv email lists (e.g. Announce-C) are not part of Lotus Notes and will not be affected by themigration.Adding Email Signature1. Select File Options Mail. Under Compose messages, select Signatures.8Winter 2018
Outlook 2016 Desktop App2. Under Select signature to edit, choose New, and in the New Signature dialog box, typea name for the signature.3. Under Edit signature, type the signature, chose OK.4. Under Choose default signature, set the following options for your signature:9Winter 2018
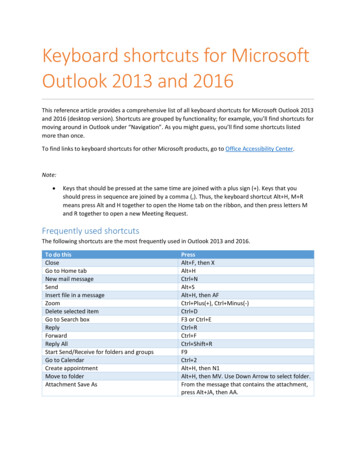
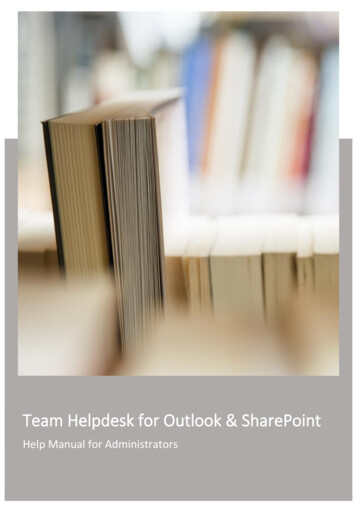
Outlook 2016 Desktop AppOption 1: In the New messages list, choose the signature that you want to be addedautomatically to all new email messages. If you don't want to automatically add a signature tonew messages, choose (none).Option 2: In the Replies/forwards list, choose the signature that you want to be addedautomatically (auto sign) when you reply to or forward messages. Otherwise, accept the defaultoption of (none).Setting Out-of-Office Replies1. Select File Automatic Replies.2. In the Automatic Replies box, select Send automatic replies.Optionally, set a date range for your automatic replies. This will turn off automatic replies at the dateand time you enter for the end time. Otherwise, you'll need to turn off automatic replies manually.3. On the Inside My Organization tab, type the response that you want to send while youare out of the office.10Winter 2018
Outlook 2016 Desktop App4. Select OK to save your settings.Turn off automatic out-of-office repliesWhen Outlook is setup to send automatic replies, you'll see a message under the ribbon withthis information. Select Turn off to disable automatic out-of-office replies. If you want tomodify the dates for your automatic reply or the message sent, use the steps above to modifyyour settings.11Winter 2018
desktop application and a web application. This user guide will focus on the desktop application. For Outlook Web Application help, please visit the Mt. SAC Office 365 website. 1. To access Outlook, find the Outlook icon on your computer desktop and double- click the icon. You can also sear