Transcription
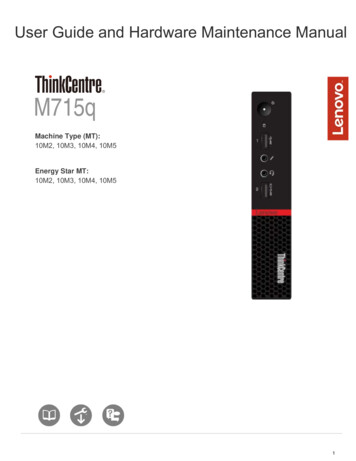
User Guide and Hardware Maintenance ManualM715qMachine Type (MT):10M2, 10M3, 10M4, 10M5Energy Star MT:10M2, 10M3, 10M4, 10M51
ContentsOverviewFront view 3Rear view 4System board 6Machine type and model label 7Locking the computer 8Specifications 9Replacing hardwareBefore replacing hardware 10Handling static-sensitive devices 11Understanding replaceable parts 12Replacing customer-replaceable units (CRUs)Before replacing CRUs 13Replacing CRUsRemoving the computer cover 17Power adapter 18Vertical stand 19VESA mount bracket 21External optical drive 22I/O box 24Power adapter bracket 25Internal speaker 27Mouse 29Keyboard 31System fan 322.5-inch storage drive 33M.2 Storage drive 35Memory module 37Coin-cell battery 39Wi-Fi card 41Completing the parts replacement 45Replacing field-replaceable units (FRUs)Before replacing FRUs 47Replacing FRUsInternal speaker holder 48Heat sink 49Microprocessor 51Front Wi-Fi antenna 54Rear Wi-Fi antenna 56System board 57Completing the parts replacement 59Notices & Trademarks 612
OverviewFront viewNoteYour computer model might look slightly different from the illustration.1 Power buttonUsed to turn on your computer. You also can use the power button to turn offyour computer when you cannot use the Microsoft Windows shutdownprocedure normally to turn off your computer.2 Storage drive status indicatorThis indicator is on when the storage drive is in use.3 USB 3.0 connectorUsed to connect a device, such as a keyboard, mouse, scanner, printer, orPDA, that requires a USB 2.0 or USB 3.0 connection.44 Microphone connector4Used to connect a microphone to your computer. You can use the microphoneto record sounds or use speech-recognition software.5 Headset connectorUsed to connect a headset or headphones to your computer.6 Always On USB 3.0 connectorUsed to connect a device that requires a USB 2.0 or USB 3.0 connection, suchas a keyboard, a mouse, a scanner, a printer, or a personal digital assistant(PDA). With the power adapter connected, you can charge the automaticallydetected device even when the computer is in hibernation mode or turned off. Ifthe Always On USB connector function is not enabled, open the PowerManager program and enable the function. To open the Power Managerprogram, see “Accessing a program on the computer” on page 38. To enablethe Always On USB connector, refer to the help system of the Power Managerprogram. Copyright Lenovo 2016.3
OverviewRear viewNoteYour computer model might look slightly different from the illustration.7 Wi-Fi antenna slotUsed to install the rear Wi-Fi antenna cable connector that is optional. The rearWi-Fi antenna is installed on the rear Wi-Fi antenna cable connector.8 Padlock loopUsed to secure a padlock.9 Ethernet connectorUsed to connect an Ethernet cable for a LAN.10 Optional connector (optional)Optional connector, depending on your computer model.11 Security-lock slotUsed to secure a Kensington-style cable lock.12 Power adapter connectorUsed to connect the power adapter to your computer for power supply.13 DisplayPort connectorUsed to send or receive audio and video signals. An audio or video device,such as a high-performance monitor, can be attached to this connector.14 USB 3.0 connectorUsed to connect a device, such as a keyboard, mouse, scanner, printer, orPDA, that requires a USB 2.0 or USB 3.0 connection.15 DisplayPort connectorUsed to send or receive audio and video signals. An audio or video device,such as a high-performance monitor, can be attached to this connector.4
16 USB 2.0 connectorUsed to connect a device, such as a keyboard, mouse, scanner, printer, or PDA,that requires a USB 2.0 connection. This USB 2.0 connector supports the smartpower on feature that enables you to turn on the computer or wake it upfrom S4 hibernation mode by pressing Alt P on the keyboard. You can enableor disable the smart power on feature from the Setup Utility program.17 Headphone connectorUsed to connect headphones to your computer.18 USB 2.0 connectorUsed to connect a device, such as a keyboard, mouse, scanner, printer, orPDA, that requires a USB 2.0 connection.19 USB 2.0 connectorUsed to connect a device, such as a keyboard, mouse, scanner, printer, orPDA, that requires a USB 2.0 connection. Copyright Lenovo 2016.5
OverviewSystem boardSeeNoteFront vieworRear viewfor additional component descriptions.1 M.2 Wi-Fi card slot2 Coin-cell battery3 SATA 3.0 storage drive connector4 System fan connector5 Optional serial connector6 Optional display connector7 M.2 storage drive slot8 Microprocessor socket9 Thermal sensorpresence switch connector (Intrusion switch10 Coverconnector)11 Internal speaker connector12 Memory slot (DIMM 1)13 Memory slot (DIMM 2)6
OverviewMachine type and model labelThe machine type and model label identifies the computer. When youcontact Lenovo for help, the machine type and model information helpssupport technicians to identify the computer and provide faster service.The machine type and model label is attached on the side of thecomputer as shown. Copyright Lenovo 2016.7
Locking the computerLocking the computer coverLocking the computer cover helps prevent unauthorized access to theinside of your computer. Your computer features a padlock loop so thatthe computer cover cannot be removed when a padlock is installed.Attaching a Kensington-style cable lockYou can use a Kensington-style cable lock to secure your computer toa desk, table, or other nonpermanent fixture. The cable lock connectsto the security-lock slot at the rear of your computer. Depending on thetype selected, the cable lock can be operated with a key orcombination. The cable lock also locks the buttons used to open thecomputer cover. This is the same type of lock used with manynotebook computers. You can order such a cable lock directly fromLenovo by searching for Kensington at:http://www.lenovo.com/support.8
SpecificationsSpecificationsStorage drives65-watt power adapter90-watt power adapterUp to two storage drivesVideo featuresThe integrated graphics card supports the following:Audio featuresDisplayPort connectorsVGA connector (optional)The integrated audio card supports the following:Power supplyInput/Output (I/O)featuresExpansionNetwork featuresPhysical dimensionsWeight (without thepackage) Copyright Lenovo 2016.Headphone connectorHeadset connectorInternal speakerMicrophone connectorAudio connectors (headphone connector, headset connector, andmicrophone connector)Display connectors (DisplayPort connectors and VGA connector (optional)Ethernet connectorSerial connector (optional)USB connectorsExternal optical drive box (optional)Memory slotsStorage drive bayEthernet LANWireless LAN (optional)Bluetooth (optional)Width: 35 mm (1.4 inches)Height: 179 mm (7.0 inches)Depth: 183 mm (7.2 inches)Maximum configuration as shipped: 1.3kg (2.9 lb)9
Replacing hardwareBefore replacing hardwareAttentionDo not open your computer or attempt any repairs before reading the Important Product InformationGuide.Read these notes before replacing hardware:Some of the hardware components explained in this manual are optional.Use computer components provided only by Lenovo.When installing or replacing an option, use the appropriate instructions explained in this manual alongwith the instructions that come with the option.In most areas of the world, Lenovo requires the return of defective CRUs (Customer ReplaceableUnits). Information about this will come with the CRU or will come a few days after the CRU arrives.10
Replacing hardwareHandling static-sensitive devicesDo not open the static-protective package containing the new component until the defectivecomponent has been removed and you are ready to install the new component. Static electricity,although harmless to you, can seriously damage computer components.When you handle parts and other computer components, take these precautions to avoid staticdamage:Limit your movement. Movement can cause static electricity to build up around you.Always handle parts and other computer components carefully. Handle PCI/PCI-Express cards,memory modules, system boards, and microprocessors by the edges. Never touch any exposedcircuitry.Prevent others from touching the parts and other computer components.Touch the static-protective package containing the part to a metal expansion-slot cover or otherunpainted metal surface on the computer for at least two seconds. This reduces static electricity fromthe package and your body before you install or replace a new part.When possible, remove the new part from the static-protective package, and install it directly in thecomputer without setting the part down. When this is not possible, place the static-protective packagethat the part came in on a smooth, level surface and place the part on the package.Do not place the part on the computer cover or other metal surface. Copyright Lenovo 2016.11
Replacing hardwareUnderstanding replaceable partsCustomer-Replaceable Units (CRUs)CRUs are computer parts that a user can upgrade or replace. There are two types of CRUs: selfservice and optional-service.Self-service CRUsYou can install self-service CRUs easily. These CRUs might be standalone,latched, or secured by up to two screws.Examples of self-service CRUs include the keyboard, mouse, any USB device,and the power cord. Other self-service CRUs might include memory modules,adapter cards, hard disk drives, and optical drives.NoteUsers are responsible for replacing all self-service CRUs.Optional-service CRUs Handling optional-service CRUs requires some technical skills and simple tools(such as a screwdriver).These CRUs are isolated parts within the computer. They are usually concealedby an access panel that is secured by more than two screws. You must removethe screws and panel to access the specific CRU.Optional-service CRUs can be removed and installed by users or, during thewarranty period, by a Lenovo service technician.Field-Replaceable Units (FRUs)FRUs are computer parts that a trained technician can upgrade or replace.For detailed FRU information, such as the FRU part numbers and supported computer models, goto:http:/www.lenovo.com/serviceparts-lookupCRUs and FRUs locationsRefer to the following illustrations to check the locations of CRUs and FRUs within the computer.NoteSome of the following parts are optional on some models.12
Self-service CRUs1Power adapter bracket2Power adapter3Power cord4Computer cover5Vertical stand1013 Copyright Lenovo 2016.Internal speakerKeyboard14Mouse23VESA mount bracket24External optical drive25External optical drive box26I/O box13
Optional-service CRUs147Memory module12System fan16Wi-Fi card17Coin-cell battery18M.2 storage drive21Storage drive bracket222.5-inch storage drive
FRUs Copyright Lenovo 2016.6System board8Microprocessor9Internal speaker holder11Heat sink15Front Wi-Fi antenna19Chassis22Rear Wi-Fi antenna15
Replacing customer-replaceable units (CRUs)Before replacing CRUsCustomer Replaceable Units (CRUs) are computer parts that a user can upgrade or replace. Thereare two types of CRUs: self-service and optional-service.AttentionDo not open your computer or attempt any repairs before reading the Important Product InformationGuide.The following is a listing of self-service and optional-service CRU replacement procedures.Self-service CRU procedures:Removing the computer cover 17Replacing the power adapter 18Replacing the vertical stand 19Replacing the VESA mount bracket 21Replacing the external optical drive 22Replacing the I/O box 24Replacing the power-adapter bracket 25Replacing the internal speaker 27Replacing the mouse 29Replacing the keyboard 31Optional-service CRU procedures:Replacing the system fan 32Replacing the 2.5-inch storage drive 33Replacing the M.2 storage drive 35Replacing a memory module 37Replacing the coin-cell battery 39Replacing the Wi-Fi card 41NoteTo replace a component that is not in the list above, contact a Lenovo service technician. The supportphone numbers are available at: http://www.lenovo.com/support/phone16
Replacing CRUsRemoving the computer coverAttentionDo not open your computer or attempt any repairs before reading the Important Product InformationGuide.CautionBefore you open the computer cover, turn off the computer and wait several minutes until the computeris cool.1Remove any media from the drives and turn off all connected devices and the computer. Then,disconnect all power cords from electrical outlets and disconnect all cables that are connectedto the computer.234Hold the sides of your computer and gently lay it down so that the computer cover is facing up.Unlock any locking device that secures the computer cover.Remove the computer cover. Copyright Lenovo 2016.17
Replacing CRUsReplacing the power adapterAttentionDo not open your computer or attempt any repairs before reading the Important Product InformationGuide.123Remove any media from the drives and turn off all connected devices and the computer. Then,disconnect all power cords from electrical outlets and disconnect all cables that are connectedto the computer.If the power adapter bracket is available, remove the power adapter bracket. See Replacingthe power adapter bracket.Replace the power adapter.14182If the power adapter bracket is available, install the power adapter bracket. See Replacing thepower adapter bracket.
Replacing CRUsReplacing the vertical standAttentionDo not open your computer or attempt any repairs before reading the Important Product InformationGuide.1Remove any media from the drives and turn off all connected devices and the computer. Then,disconnect all power cords from electrical outlets and disconnect all cables that are connectedto the computer.2Replace the vertical stand.Type11 Copyright Lenovo 2016.219
Type21202
Replacing CRUsReplacing the VESA mount bracketAttentionDo not open your computer or attempt any repairs before reading the Important Product InformationGuide.123Remove any media from the drives and turn off all connected devices and the computer. Then,disconnect all power cords from electrical outlets and disconnect all cables that are connectedto the computer.If the power adapter bracket is available, remove the power adapter bracket. See Replacingthe power adapter bracket.Replace the VESA mount bracket.142If the power adapter bracket is available, install the power adapter bracket. See Replacing thepower adapter bracket. Copyright Lenovo 2016.21
Replacing CRUsReplacing the external optical driveAttentionDo not open your computer or attempt any repairs before reading the Important Product InformationGuide.1Remove any media from the drives and turn off all connected devices and the computer. Then,disconnect all power cords from electrical outlets and disconnect all cables that are connectedto the computer.23Disconnect the external optical drive adapter from the USB connectors on the external opticaldrive and the computer.Replace the external optical drive.1222
43456Connect the external optical drive adapter to the USB connectors on the external optical driveand the computer. Copyright Lenovo 2016.23
Replacing CRUsReplacing the I/O boxAttentionDo not open your computer or attempt any repairs before reading the Important Product InformationGuide.1Remove any media from the drives and turn off all connected devices and the computer. Then,disconnect all power cords from electrical outlets and disconnect all cables that are connectedto the computer.23Disconnect the I/O box cable from the USB connectors on the computer.Replace the I/O box.14242Connect the I/O box cable to the USB connectors on the computer.
Replacing CRUsReplacing the power adapter bracketAttentionDo not open your computer or attempt any repairs before reading the Important Product InformationGuide.NoteThe power adapter bracket is installed on the Video Electronics Standards Association (VESA) mountbracket.1Remove any media from the drives and turn off all connected devices and the computer. Then,disconnect all power cords from electrical outlets and disconnect all cables that are connectedto the computer.2Replace the power adapter bracket.1 Copyright Lenovo 2016.225
3264
Replacing CRUsReplacing the internal speakerAttentionDo not open your computer or attempt any repairs before reading the Important Product InformationGuide.1234Remove any media from the drives and turn off all connected devices and the computer. Then,disconnect all power cords from electrical outlets and disconnect all cables that are connectedto the computer.Remove the computer cover. For details, see Removing the computer cover.Record the routing and connection of the internal speaker cable, and then disconnect thecable from the system board.Replace the internal speaker.1 Copyright Lenovo 2016.227
3285Connect the cable of the new internal speaker to the internal speaker connector on the systemboard.6Reinstall the removed parts and computer cover. For details, see Completing the partsreplacement.
Replacing CRUsReplacing the wireless mouseAttentionDo not open your computer or attempt any repairs before reading the Important Product InformationGuide.NoteThe wireless mouse is available only on some models.1Remove any media from the drives and turn off all connected devices and the computer. Then,disconnect all power cords from electrical outlets and disconnect all cables that are connectedto the computer.234Disconnect the USB dongle from your computer. Then, take away your failing wireless mouse.Remove the new wireless mouse from the package.Replace the wireless mouse.1 Copyright Lenovo 2016.229
3456NotesThe green LED indicates that the mouse is ready for use.The flashing amber LED indicates a low battery power level.Push the power switch to the off position when you are not using the mouse to extend thebattery life.After disconnecting the USB dongle from your computer, store it in the wireless mousecompartment or in the wireless keyboard compartment.30
Replacing CRUsReplacing the wireless keyboardAttentionDo not open your computer or attempt any repairs before reading the Important Product InformationGuide.NoteThe wireless keyboard is available only on some models.1Remove any media from the drives and turn off all connected devices and the computer. Then,disconnect all power cords from electrical outlets and disconnect all cables that are connectedto the computer.234Remove your failing wireless keyboard.56Take away the USB dongle from the keyboard compartment or from the wireless mousecompartment and connect it to an available USB connector on the computer.Take out the new wireless keyboard from the package.Open the battery compartment cover, and install two AAA batteries according to the polarityindicators.Close the compartment cover. The keyboard is ready for use. Copyright Lenovo 2016.31
Replacing CRUsReplacing the system fanAttentionDo not open your computer or attempt any repairs before reading the Important Product InformationGuide.1Remove any media from the drives and turn off all connected devices and the computer. Then,disconnect all power cords from electrical outlets and disconnect all cables that are connectedto the computer.23Remove the computer cover. For details, see Removing the computer cover.4Replace the system fan.Record the routing and connection of the system fan cable, and then disconnect the cablefrom the system board.156322Connect the cable of the new system fan to the system fan connector on the system board.Reinstall the computer cover and reconnect the cables. For details, see Completing the partsreplacement.
Replacing CRUsReplacing the 2.5-inch storage driveAttentionDo not open your computer or attempt any repairs before reading the Important Product InformationGuide.123Remove any media from the drives and turn off all connected devices and the computer. Then,disconnect all power cords from electrical outlets and disconnect all cables that are connectedto the computer.Remove the computer cover. For details, see Removing the computer cover.Remove the storage drive bracket.NoteCarefully handle the storage drive bracket to avoid breaking the front Wi-Fi antennacable. Copyright Lenovo 2016.33
4Replace the 2.5-inch storage drive.156342Reinstall the storage drive bracket.Reinstall the computer cover and reconnect the cables. For details, see Completing the partsreplacement.
Replacing CRUsReplacing the M.2 storage driveAttentionDo not open your computer or attempt any repairs before reading the Important Product InformationGuide.1Remove any media from the drives and turn off all connected devices and the computer. Then,disconnect all power cords from electrical outlets and disconnect all cables that are connectedto the computer.234Remove the computer cover. For details, see Removing the computer cover.Remove the storage drive bracket. For details, see Replacing the 2.5-inch storage drive.Replace the M.2 storage drive.Type11234 Copyright Lenovo 2016.
Type25361234Reinstall the removed parts and computer cover, and then reconnect the cables. Fordetails, see Completing the parts replacement.
Replacing CRUsReplacing the memory moduleAttentionDo not open your computer or attempt any repairs before reading the Important Product InformationGuide.If your computer supports one memory module, install the module into the DIMM 1 slot. If yourcomputer supports two memory modules, install one memory module into the DIMM 1 slot first andthen install the other into the DIMM 2 slot.1Remove any media from the drives and turn off all connected devices and the computer. Then,disconnect all power cords from electrical outlets and disconnect all cables that are connectedto the computer.234Remove the computer cover. For details, see Removing the computer cover.Remove the storage drive bracket. For details, see Replacing the 2.5-inch storage drive.Replace the memory module.1 Copyright Lenovo 2016.237
35384Reinstall the removed parts and computer cover, and then reconnect the cables. For details,see Completing the parts replacement.
Replacing CRUsReplacing the coin-cell batteryAttentionDo not open your computer or attempt any repairs before reading the Important Product InformationGuide.Your computer has a special type of memory that maintains the date, time, and settings for built-infeatures, such as parallel connector assignments (configurations). A coin-cell battery keeps thisinformation active when you turn off the computer.The coin-cell battery normally requires no charging or maintenance throughout its life; however, no coincell battery lasts forever. If the coin-cell battery fails, the date, time, and configuration information (includingpasswords) are lost. An error message is displayed when you turn on the computer.To replace the coin-cell battery,1Remove any media from the drives and turn off all connected devices and the computer. Then,disconnect all power cords from electrical outlets and disconnect all cables that are connectedto the computer.234Remove the computer cover. For details, see Removing the computer cover.Remove the storage drive bracket. For details, see Replacing the 2.5-inch storage drive.Replace the coin-cell battery.1 Copyright Lenovo 2016.239
354Reinstall the removed parts and computer cover, and then reconnect the cables. For details,see Completing the parts replacement.To dispose of the coin-cell battery, refer to the “Lithium coin-cell battery notice” topic in the Safety andWarranty Guide.40
Replacing CRUsReplacing the Wi-Fi cardAttentionDo not open your computer or attempt any repairs before reading the Important Product InformationGuide.NoteThe locations of Wi-Fi antenna connectors might vary.1Remove any media from the drives and turn off all connected devices and the computer. Then,disconnect all power cords from electrical outlets and disconnect all cables that are connectedto the computer.234Remove the computer cover. For details, see Removing the computer cover.Remove the storage drive bracket. For details, see Replacing the 2.5-inch storage drive.Remove the Wi-Fi card cover.Type1 Copyright Lenovo 2016.41
Type2542Replace the Wi-Fi card.Type11234
Type261234Reinstall the Wi-Fi card cover.Type1 Copyright Lenovo 2016.43
Type 2744Reinstall the removed parts and computer cover, and then reconnect the cables. For details,see Completing the parts replacement.
Replacing CRUsCompleting the parts replacementAttentionDo not open your computer or attempt any repairs before reading the Important Product InformationGuide.After completing the installation or replacement for all parts, reinstall the computer cover and reconnect thecables.To reinstall the computer cover and reconnect the cables to your computer, do the following:1Ensure that all components have been reassembled correctly and that no tools or loosescrews are left inside your computer.2Ensure that the cables are routed correctly before reinstalling the computer cover. Keep cablesclear of the hinges and sides of the computer chassis to avoid interference when reinstallingthe computer cover.3Install the computer cover. Copyright Lenovo 2016.45
45646Install the screw to secure the computer cover.If a locking device is available, use it to lock the computer.Reconnect the external cables and power cords to the corresponding connectors on thecomputer.
Replacing field-replaceable units (FRUs)Before replacing FRUsBefore replacing an FRU (Field Replaceable Unit), read the following:Only certified and trained personnel can service the computer.Before replacing an FRU, read the entire section on replacing the part.Be extremely careful during writing operations such as copying, saving, or formatting.The sequence of the drives in the computer that you are servicing might have been altered. If youselect an incorrect drive, data or programs might be overwritten.Replace an FRU only with another FRU of the correct model.When you replace an FRU, ensure that the model of the machine and the FRU part number arecorrect by referring to the website: http://www.lenovo.com/serviceparts-lookupAn FRU should not be replaced because of a single, unreproducible failure.Single failures can occur for a variety of reasons that have nothing to do with a hardware defect, suchas cosmic radiation, electrostatic discharge, or software errors. Consider replacing an FRU only whena problem recurs. If you suspect that an FRU is defective, clear the error log and run the test again. Ifthe error does not recur, do not replace the FRU.Only replace a defective FRU.To identify the FRU type of a computer component, see FRUs definition.AttentionDo not open your computer or attempt any repairs before reading the Important Product InformationGuide.The following is a listing of FRU replacement procedures that are to be performed by certifiedand trained personnel.Internal speaker holder 48Heat sink 49Microprocessor 51Front Wi-Fi antenna 54Rear Wi-Fi antenna 56System board 57NoteTo replace a part that is not listed above, see the listing of CRU replacement procedures in Beforereplacing CRUs earlier in this document. Copyright Lenovo 2016.47
Replacing FRUsReplacing the internal speaker holderAttentionDo not open your computer or attempt any repairs before reading the Important Product InformationGuide.1Remove any media from the drives and turn off all connected devices and the computer. Then,disconnect all power cords from electrical outlets and disconnect all cables that are connectedto the computer.23Remove the computer cover. For details, see Removing the computer cover.45Record the routing and connection of the internal speaker cable, and then disconnect thecable from the system board.Remove the internal speaker. For details, see Replacing the internal speaker.Replace the internal speaker holder.14826Connect the cable of the internal speaker to the internal speaker connector on the systemboard.7Reinstall the removed parts and computer cover, and then reconnect the cables. For details,see Completing the parts replacement.
Replacing FRUsReplacing the heat sinkAttentionDo not open your computer or attempt any repairs before reading the Important Product InformationGuide.CautionThe heat sink might be very hot. Before you open the computer cover, turn off the computer and waitseveral minutes until the computer is cool.1Remove any media from the drives and turn off all connected devices and the computer. Then,disconnect all power cords from electrical outlets and disconnect all cables that are connectedto the computer.23456Remove the computer cover. For details, see Removing the computer cover.Remove the system fan. For details, see Replacing the system fan.Remove the internal speaker. For details, see Replacing the internal speaker.Remove the internal speaker holder. For details, see Replacing the internal speaker holder.Replace the heat sink. Copyright Lenovo 2016.49
17502Reinstall the removed parts and computer cover, and then reconnect the cables. For details,see Completing the parts replacement.
Replacing FRUsReplacing the microprocessorAttentionDo not open your computer or attempt any repairs before reading the Important Product InformationGuide.CautionThe heat sink and microprocessor might be very hot. Before you open the computer cover, turn off thecomputer and wait several minutes until the computer is cool.1Remove any media from the drives and turn off all connected devices and the computer. Then,disconnect all power cords from electrical outlets and disconnect all cables that are connectedto the computer.2345678Remove the computer cover. For details, see Removing the computer cover.Remove the system fan. For details, see Replacing the system fan.Remove the internal speaker. For details, see Replacing the internal speaker.Remove the internal speaker holder. For details, see Replacing the internal speaker holder.Remove the heat sink.
Do not open your computer or attempt any repairs before reading the Important Product Information Guide. Read these notes before replacing hardware: Some of the hardware components expl