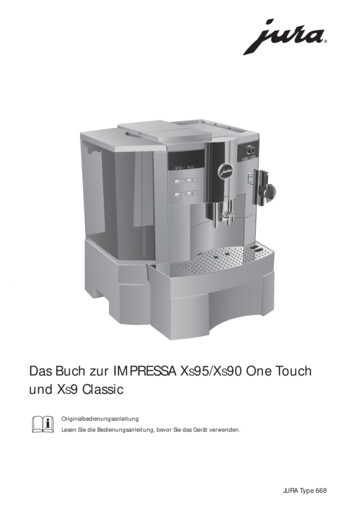
Transcription
IMPRESSA J9 One Touch TFT Instructions for UseKEFor your safety: read and understand manual before use.
Table of contentsYour IMPRESSA J9 One Touch TFTIMPORTANT SAFEGUARDS4Control elements81 Preparing and using for the first time10JURA on the Internet.10Setting up the machine.10Filling the water tank.10Filling the bean container.10First-time use.11Inserting and activating the filter.12Determining and adjusting the water hardness.14Adjusting the grinder.152 Preparation16Ways of preparing a beverage.16Espresso and coffee.17Preparing two specialty coffees.17Latte macchiato, cappuccino.18Warm milk and milk foam.19Ground coffee.19Permanently setting the amount of water for the cup size.20Hot water.213 Daily operation22Switching on. 22Daily maintenance. 22Switching off. 234 Permanent settings in programming mode24Product settings.25Maintenance settings. 27Energy-saving mode.28Automatic switch-off.29Unit for amount of water.29Restore factory settings.30Language.31Color scheme.31Viewing information. 322
Table of contents567891011Maintenance33Rinsing the machine. 33Rinsing the cappuccino frother.34Cleaning the cappuccino frother.34Dismantling and rinsing the cappuccino frother.35Changing the filter.36Cleaning the machine. 37Descaling the machine .38Cleaning the bean container.41Descaling the water tank.41Display messages42Troubleshooting43Transport and environmentally friendly disposal45Transport / Emptying the system.45Disposal.45Technical data46Index47JURA contact details / Legal information52Symbol descriptionWarningsJJ DANGERThis is the safety alert symbol. lt is used to alert you to potential personal injuryhazards. Obey all safety messages that follow this symbol to avoid possible injuryor death.DANGER indicates a hazardous situation which, if not avoided, will result in deathor serious injury.J WARNING WARNING indicates a hazardous situation which, if not avoided, could result indeath or serious injury.J CAUTION CAUTION, used with the safety alert symbol, indicates a hazardous situationwhich, if not avoided, could result in minor or moderate injury.NOTICENOTICE is used to address practices not related to personal injury.Symbols usedTPrompt to take action. This symbol means that you are being prompted toperform some action.EInformation and tips to make it even easier to use your IMPRESSA.‘Coffee’Display message3
IMPORTANT SAFEGUARDSIMPORTANT SAFEGUARDSFollow the basic safetyprecautionsWhen using electrical appliances, basic safety precautions shallalways be followed, to reduce the risk of fire, electric shock, and/orinjury to persons, including the following:ZZ Read all instructions.ZZ Do not touch hot surfaces. Use handles or knobs.ZZ To protect against fire, electric shock and injury to persons, donot immerse power cord, plugs, or body of machine in wateror other liquid.ZZ Close supervision is necessary when any appliance is used byor near children.ZZ Unplug from outlet when not in use and before cleaning.Allow to cool before putting on or taking off parts, and beforecleaning the appliance.ZZ Do not operate any appliance with a damaged cord or plug orafter the appliance malfunctions, or has been damaged in anymanner. Return appliance to the nearest authorized servicefacility for examination, repair or adjustment.ZZ The use of an accessory attachment not recommended by theappliance manufacturer may result in fire, electric shock, orinjury to persons.ZZ Do not use outdoors.ZZ Do not let the cord hang over the edge of a table or counter,or touch hot surfaces.ZZ Do not place on or near a hot gas or electric burner, or in aheated oven.ZZ Always attach plug to appliance first, then plug cord into thewall outlet. To disconnect, turn any control to ‘OFF’ thenremove plug from wall outlet.ZZ Do not use appliance for other than intended use.ZZ Use extreme caution when dispensing hot steam, hot wateror hot coffee.ZZ For household use only.SAVE THESE INSTRUCTIONS.Pass them on to any subsequent user.4
IMPORTANT SAFEGUARDSIntended useThe appliance is designed and intended for household use only. Itshall only be used for coffee preparation and to heat milk and water,according to these instructions. Use for any other purpose will bedeemed improper. JURA Elektroapparate AG cannot accept anyresponsibility for the consequences of improper use.People, including children, whoZZ do not have the physical, sensory or mental capabilities to usethe appliance safely orZZ are inexperienced or lack knowledge in how to use the appliance safelymust be supervised by a responsible person when using it, or mustbe instructed in how to use it correctly.Special power cord setinstructionsZZ The power cord is provided to reduce the risk resulting frombecoming entangled in or tripping over a long cord.ZZ The cord shall be arranged so that it will not drape over thecounter top or table top where it can be pulled on by childrenor tripped over.ZZ This appliance has a 3-pin grounded plug.ZZ Do not modify the plug in any way or attempt to defeat thissafety feature.Do NOT use extension cords.If the user chooses to use an extension cord,ZZ the marked electrical rating of the extension cord shall be atleast as great as the electrical rating of the appliance, andZZ if the appliance is of the grounded type, the extension cordshall be a grounding type 3-wire cord, andZZ the longer cord shall be arranged so that it will not drape overthe counter top or tabletop where it can be pulled on by children or tripped over.J WARNINGTo reduce the risk of fire or electric shock, DO NOT remove any service covers. DO NOT modify the appliance in any way that is notdescribed in these instructions. NO user serviceable parts included.Repair MUST be done by authorized personnel only.In the event of signs of damage, for example if there is a smell ofburning, unplug the machine immediately from outlet and contactJURA customer service.5
IMPORTANT SAFEGUARDSJ CAUTIONThis appliance is for household use. Any servicing other than cleaning and user maintenance shall be performed by an authorizedservice representative:ZZ Do not immerse base in water or try to disassemble.ZZ Do not put the appliance or any individual parts in the dishwasher.ZZ Check voltage to be sure that the voltage indicated on thename plate complies with your voltage.ZZ Never use warm or hot water to fill the water container. Usecold water only.ZZ Keep your hands and the cord away from hot parts of theappliance during operation.There is a risk of scalds or burns on the spouts and the cappuccinofrother / nozzle.ZZ Keep children away.ZZ Do not touch any hot parts. Use the handles or knobs provided.ZZ Ensure that the cappuccino frother / nozzle is correctly fittedand clean. If incorrectly fitted or if they become blocked, thecappuccino frother or its parts might come off.6NOTICEZZ Never clean with scouring powders or hard implements.ZZ Ensure that the ventilation slots are not covered.ZZ Never pull out the drip tray during the brewing process. Onlypull the drip tray when the display instructs you or when theappliance is ready for use.NEVER DO(or you will void yourwarranty protection):ZZ Never fill instant coffee, chocolate mix etc. into the bean container or ground coffee funnel (filler funnel for ground coffee).It will damage the functioning of the brewing chamber.ZZ Never fill sugar coated coffee beans into the bean container.In case of doubt, call your dealer.ZZ Never fill anything other than coffee beans into the bean container (no chocolate, no rice, no nuts, no spices, nothing otherthan roasted coffee beans).
IMPORTANT SAFEGUARDSZZ Never fill frozen beans into the bean container. If you storebeans in the freezer, let them thaw 3 to 4 hours before fillingthem into the bean container.ZZ Never fill anything but fresh, cold and clean water into thewater tank, except when decalcifying.ZZ Never use mineral or carbonated water. You can use tap water,bottled water, spring water and reverse osmosis water.ZZ Never do anything with the machine which is not described inthese instructions. In case of doubt, call your dealer.7
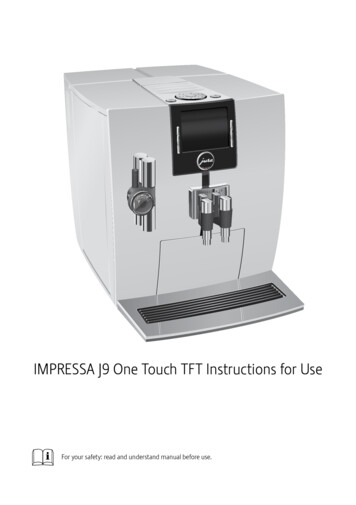
Control elementsControl elements91011121231345J HOT14J HOT67158123456788Bean container coverWater tank coverBean container with aroma preservationcoverWater tankHeight-adjustable cappuccino frotherCoffee grounds containerDrip trayCup platform9101112131415Filler funnel for ground coffeeStorage compartment coverGrinder adjustment switchHot-water nozzleMeasuring spoon for ground coffeeHeight- and width-adjustable coffee spoutPower switch and power cord(side of machine)
Control elements12345Top of the machine1Q On/Off button2 g Rotary Switch3 O P button (programming)Front4 Display5 Buttons (button function depends onwhat is shown in the display)9
11Preparing and using for the first timePreparing and using for the first timeJURA on the InternetVisit us on the Internet. You can download short operating instructions for your machine from the JURA website (www.jura.com). Youwill also find interesting and up-to-date information on yourIMPRESSA and on every aspect of coffee.Setting up the machineWhen setting up your IMPRESSA, please note the following:Place the IMPRESSA on a horizontal surface that is not sensitive to water.Choose a spot for your IMPRESSA which protects the machineagainst overheating. Ensure that the ventilation slots are notcovered.UUUUFilling the water tankNOTICETo enjoy the perfect cup of coffee we recommend changing thewater every day.Milk, sparkling mineral water or other liquids can damage the watertank or the machine.T Only fill the water tank with fresh, cold water.T Open the water tank cover.T Remove the water tank and rinse it with cold water.T Fill the water tank with fresh, cold water and reinsert thetank.T Close the water tank cover.Filling the bean containerThe bean container has an aroma preservation cover. This will ensurethat your coffee beans retain their aroma for longer.NOTICECoffee beans which have been treated with additives (e.g. sugar),ground coffee or freeze-dried coffee will damage the grinder.T Only use roasted, untreated coffee beans to fill the bean container.T Open the bean container cover and remove the aromapreservation cover.10
1Preparing and using for the first timeT Remove any dirt or foreign objects from inside the beancontainer.T Fill the bean container with coffee beans, then close thearoma preservation cover and the bean container cover.First-time useJ WARNINGIf the machine is operated with a defective power cord, there is adanger of potentially fatal electric shock.T Never use a machine which is damaged.T Never use a machine which has a defective power cord.EE The water volume is given as standard in ‘oz’. You can changethis setting to ‘ml’ in programming mode (see Chapter 4 ‘Permanent settings in programming mode – Unit for amount ofwater’).Precondition: The water tank and bean container have been filled.T Insert the power plug into a power socket.3 T Switch on the IMPRESSA using the power switch on theright-hand side of the machine.Q T Press the On/Off button to switch the IMPRESSA on.The JURA logo appears. The display then shows the languages you can choose from.EE To display more languages, press the ‘Next’ button (bottomright).T Press the button that corresponds to the language you want,e.g. ‘English’.‘Saved’ appears briefly on the display to confirm the setting.‘Please press the Rotary Switch.’, the Rotary Switch lights up.T Place a receptacle under the cappuccino frother.k T Press the Rotary Switch.‘System is filling.’, the system fills up with water. The operation stops automatically.‘Please press the Rotary Switch.’11
1Preparing and using for the first timeT Place a receptacle under the coffee spout.k T Press the Rotary Switch.‘Machine is rinsing.’, the machine rinses. The operationstops automatically. ‘Please select product:’ appears on thedisplay. The IMPRESSA is now ready for use.EE The display shows the products you can prepare.Inserting and activatingthe filterYour IMPRESSA no longer has to be descaled if you are using theCLEARYL Blue filter cartridge. If the water hardness is 10 dH or more,we recommend using the filter cartridge.EE If you do not know the hardness of your water, you must findthis out first (see Chapter 1 ‘Preparing and using for the firsttime – Determining the water hardness’).EE Perform the ‘inserting the filter’ operation without any interruptions. This will ensure that your IMPRESSA always producesits best.Precondition: ‘Please select product:’ is displayed.O T Press the P button.‘Maintenance status (1/6)’g T Turn the Rotary Switch until the program item‘Maintenance settings (3/6)’ is displayed.T Press the ‘Filter’ button.‘Filter’T Press the ‘Active’ button.T Press the ‘Save’ button.‘Saved’ appears briefly on the display.‘Insert filter’T Remove the filter cartridge extension from the WelcomePack.T Fit the filter extension on top of a CLEARYL Blue filter cartridge.T Remove and empty the water tank.12
1Preparing and using for the first timeT Open the filter holder and insert the filter cartridge into thewater tank, exerting slight pressure.T Close the filter holder. It will click into place audibly.EE After two months, the filter will cease to work. You can checkthe elapsed time by referring to the date plate on the filterholder in the water tank.T Fill the water tank with fresh, cold water and reinsert thetank.T Place a receptacle (at least 17 oz or 500 ml) under the cappuccino frother.T Press the ‘Next’ button.‘Filter is being rinsed.’, water flows out of the cappuccinofrother.EE You can interrupt rinsing of the filter at any time by pressingany button. Press the Rotary Switch k to continue rinsing ofthe filter.EE The water may be slightly discolored. This is not harmful tohealth and does not affect the taste.Rinsing of the filter stops automatically after approximately17 oz (500 ml). The machine heats up. ‘Please select product:’appears on the display. The filter is now activated.13
1Preparing and using for the first timeDetermining andadjusting the waterhardnessEE If you are using the CLEARYL Blue filter cartridge and haveactivated it in programming mode, you will not be able toadjust the water hardness.The harder the water is, the more frequently the IMPRESSA needs tobe descaled. It is therefore important to adjust the water hardness.The water hardness can be adjusted on a continuous scale between1 dH and 30 dH.LevelDisplay German Degrees of general Parts perIndicator Strip numberDegree ( dH)hardness ( dGH)million (ppm) of ‘reddish’ fieldsNot active––Very soft water 3 3 53.4Soft water 4 4 711Hard water 8.4 8.4 1502Very hard water 14 14 2503Determining the waterhardnessAdjusting the waterhardness14––NoneYou can find out what the water hardness is by using the Aquadur test strip supplied as standard.T Hold the test strip briefly (for 1 second) under flowing water.Shake off the water.T Wait for about one minute.T You will then be able to read the degree of water hardnessfrom the discoloration of the Aquadur test strip and thedescription on the packaging.You can now adjust the water hardness.Precondition: ‘Please select product:’ is displayed.O T Press the P button.‘Maintenance status (1/6)’g T Turn the Rotary Switch until the program item‘Maintenance settings (3/6)’ is displayed.T Press the ‘Water hardness’ button.‘Water hardness’T Press the ‘ ’ or ‘ ’ button to set the water hardness.
1Preparing and using for the first timeT Press the ‘Save’ button.‘Saved’ appears briefly on the display to confirm the setting.‘Maintenance settings (3/6)’O T Press the P button to exit programming mode.‘Please select product:’Adjusting the grinderNOTICEYou can adjust the grinder on a continuous scale to suit the degreeof roast of your coffee.If you adjust the consistency of grind when the grinder is not operating, the grinder adjustment switch could be damaged.T Only adjust the consistency of grind when the grinder is running.The consistency of grind setting is correct if the coffee flows regularly from the coffee spout. In addition a fine, thick crema forms.Example: Proceed as follows to change the consistency of grindduring the preparation of an espresso.T Open the storage compartment cover.T Place a cup under the coffee spout.T Press the ‘Espresso’ button.The grinder starts up. ‘Espresso’ is displayed.T Turn the grinder adjustment switch to the desired positionwhile the grinder is running.The espresso is prepared and the consistency of grind isadjusted.T Close the storage compartment cover.15
22PreparationPreparationJ WARNINGHot coffee, hot steam and hot water can cause scalding. Scalding isa serious burn.T Use extreme care when handling hot liquid or steam.T Allow liquid to cool down before drinking.T In the event of scalding, rinse affected area with cold waterand seek medical attention.T Keep children AWAY.For a summary of the different temperatures, please refer to Chapter 4 ‘Permanent settings in programming mode – Product settings’.EE You can stop preparation of a specialty coffee, specialty coffeewith milk or hot water at any time. Just press any button.EE During the grinding operation you can select the coffeestrength of individual products by turning the RotarySwitch g: ; (extra-mild), ;; (mild), ;;; (normal), ;;;; (strong)or ;;;;; (extra-strong).EE During preparation, you can change the preset amountof water by turning the Rotary Switch g or pressing the ‘ ’and ‘ ’ buttons.EE The water volume is given as standard in ‘oz’. You can changethis setting to ‘ml’ in programming mode (see Chapter 4 ‘Permanent settings in programming mode – Unit for amount ofwater’).EE You can follow the current status of preparation on the display.You can make permanent settings for all products in programmingmode (see Chapter 4 ‘Permanent settings in programming mode –Product settings’).Ways of preparing abeverage16Only some of the specialty coffees you can prepare are shown onthe display at any one time. As soon as you turn the Rotary Switch,more specialty coffees are displayed in the product selector. Theproduct selector disappears automatically after 5 seconds if nopreparation is started.
2PreparationThe following specialty coffees are displayed as �‘Latte macchiato’‘Hot water’‘1 portion milk’UUUUUUUUUUUUAdditional specialty coffees in the product selector:‘Ristretto’‘2 espressi’‘2 coffees’‘2 ristretti’UUUUUUUUEspresso and coffee‘Espresso’ and ‘Coffee’ are prepared following this model.Example: Proceed as follows to prepare one coffee.T Place a cup under the coffee spout.T Press the ‘Coffee’ button.Preparation will now begin. The preset amount of water forcoffee flows into the cup.Preparation stops automatically and ‘Please select product:’appears on the display.Preparing two specialtycoffeesTo prepare two specialty coffees, either use the product selector orpress the appropriate preparation button twice.Example: Proceed as follows to prepare two coffees (using productselector).T Place two cups under the coffee spout.g T Turn the Rotary Switch to view the product selector.g T Turn the Rotary Switch until ‘2 coffees’ is displayed.k T Press the Rotary Switch.Preparation starts and the preset amount of water for coffeeflows into the cups.Preparation stops automatically and ‘Please select product:’appears on the display.17
2PreparationEE Proceed as follows to prepare two cups of coffee at the touchof a button: Place two cups under the coffee spout. Press the‘Coffee’ button twice (within two seconds) to start coffeepreparation.Latte macchiato,cappuccinoYour IMPRESSA can prepare a latte macchiato or cappuccino at thetouch of a button. There is no need to move the glass or cup.Example: Proceed as follows to prepare one latte macchiato.T Remove the protective cover from the cappuccino frother.T Attach the milk pipe to the cappuccino frother. Use the longpipe for a milk carton and the short pipe for a milk container.T Insert the other end of the milk pipe into a milk carton orconnect it to a milk container.T Place a glass under the cappuccino frother.T Turn the setting wheel of the cappuccino frother to the MilkFoam position ü.T Press the ‘Latte macchiato’ button.‘Latte macchiato’, the milk foam is prepared.Preparation stops automatically when the preset amount ofmilk is reached.EE There is a short interval while the hot milk separates from themilk foam. This allows the typical layers of a latte macchiatoto form. You can choose the length of this interval in programming mode (see Chapter 4 ‘Permanent settings in programming mode – Product settings’).Coffee preparation starts. The preset amount of water flowsinto the glass. Preparation stops automatically and ‘Pleaseselect product:’ appears on the display.To make sure the cappuccino frother always works properly, rinseand clean it regularly (see Chapter 5 ‘Maintenance – Rinsing the cappuccino frother’).16
2Warm milk and milkfoamPreparationExample: Proceed as follows to prepare milk foam.T Remove the protective cover from the cappuccino frother.T Attach the milk pipe to the cappuccino frother. Use the longpipe for a milk carton and the short pipe for a milk container.T Insert the other end of the milk pipe into a milk carton orconnect it to a milk container.T Place a cup under the cappuccino frother.T Turn the setting wheel of the cappuccino frother to the MilkFoam position ü.EE If you want to heat the milk turn the setting wheel of the cappuccino frother to the Milk position z.T Press the ‘1 portion milk’ button.‘1 portion milk’As soon as the machine has heated up, ‘Please select product:’ appears.T Press the ‘1 portion milk’ button again.‘1 portion milk’, the milk foam is prepared. Preparation stopsautomatically when the preset amount of milk is reached.‘Please select product:’ appears on the display.To make sure the cappuccino frother always works properly, rinseand clean it regularly (see Chapter 5 ‘Maintenance – Rinsing the cappuccino frother’).Ground coffeeYou can choose to use a second coffee variety, for example decaffeinated coffee, with the filler funnel for ground coffee.EE Never add more than two level measuring spoons of groundcoffee.EE Use ground coffee which is not ground too finely. Very finecoffee can block up the system so that the coffee only comesout in drips.EE If you did not fill the machine with a sufficient amount ofground coffee, ‘Not enough ground coffee’ is displayed andthe IMPRESSA stops the operation.17
2PreparationEE The desired specialty coffee must be prepared within approximately one minute after filling with the ground coffee. Otherwise the IMPRESSA stops the operation and is once moreready for use.All specialty coffees with ground coffee are prepared following thismodel.Example: Proceed as follows to prepare one espresso using groundcoffee.T Place an espresso cup under the coffee spout.T Open the cover of the filler funnel for ground coffee.‘Please add ground coffee.’T Place one level measuring spoon of ground coffee into thefiller funnel.T Close the cover of the filler funnel.‘Please select product:’T Press the ‘Espresso’ button.Preparation will now begin. The preset amount of water forespresso flows into the cup. Preparation stops automaticallyand ‘Please select product:’ appears on the display.Permanently setting theamount of water for thecup sizeIt is easy to make permanent settings for the amount of water for allspecialty coffees and hot water according to the cup size. Adjust theamount once as shown in the following example. Every time youprepare a drink in the future, this amount of water will be dispensed.The permanent settings for adapting the amount of water to the cupsize for all specialty coffees and hot water follow this model.Example: Proceed as follows to permanently set the amount ofwater for one coffee.Precondition: ‘Please select product:’ is displayed.T Place a cup under the coffee spout.T Press and hold the ‘Coffee’ button.‘Coffee’ and the fill volume are displayed.T Hold the ‘Coffee’ button down until ‘Enough water? Pressbutton’ appears.T Release the ‘Coffee’ button.Preparation starts and the coffee flows into the cup.16
2PreparationT Press any button as soon as there is sufficient coffee in thecup.Preparation stops. ‘Saved’ appears briefly on the display. Theset amount of water for one coffee is permanently stored.‘Please select product:’ appears on the display.EE You can alter this setting at any time by repeating the aboveprocedure.EE You can also permanently set the amount for all specialty coffees and hot water in programming mode (see Chapter 4 ‘Permanent settings in programming mode – Product settings’).Hot waterTo obtain a perfect water flow, use the hot-water nozzle. You can findthe hot-water nozzle under the cover of the storage compartment.The following temperatures can be selected for preparing hot water:‘Low’, ‘Normal’, ‘X high’ (approx. 149–203 F (65–95 C)).J CAUTIONThere is a danger of scal
Your IMPRESSA J9 One Touch TFT IMPORTANT SAFEGUARDS 4 Control elements 8 1 Preparing and using for the first time 10 . tions for your machine from the JURA website (www.jura.com). You will also find interesting and up-to-date information on your