Transcription
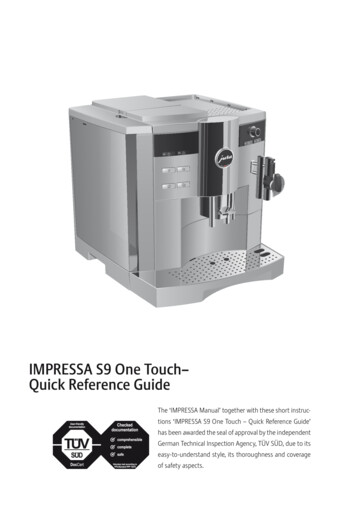
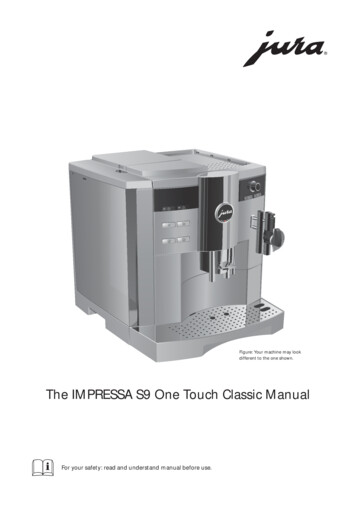
Figure: Your machine may lookdifferent to the one shown.The IMPRESSA S9 One Touch Classic ManualKEFor your safety: read and understand manual before use.
Table of contentsYour IMPRESSA S9 One Touch ClassicIMPORTANT SAFEGUARDS4Control elements81 IMPRESSA S9 One Touch Classic10JURA on the Internet .112 Preparing and using for the first time12Setting up .12Filling the water tank .12Bean container filling.12First-time use .13Using andactivating filter .14Determining and adjusting the degree of water hardness .16Adjusting grinder .17Switching on .17Switching off (standby) .183 Familiarizing yourself with the control options19Preparation at the touch of a button.20One-off settings before and during preparation .20Entering a permanent setting for the amount of water for a cup size.21Permanent settings in programming mode . 22Viewing information and maintenance status .244 Preparation at the touch of a button25Espresso .25Coffee .26Coffee à la Carte .26Cappuccino. 27Latte macchiato . 27Pre-ground coffee .28Hot milk and milk foam .29Hot water .305 Permanent settings in programming mode31Products .31Energy-saving mode (Energy Save Mode, E.S.M. ) . 33Time and weekday .34Programmable switch-on and switch-off time . 35Automatic switch-off .36Rinses . 37Unit amount of water / time format .38Language .396 Maintenance40Maintenance tips .40Rinsing the machine .412
Table of contentsChanging the filter .41Cleaning the machine .43Descaling the machine.45Rinsing the cappuccino frother .48Cleaning the cappuccino frother .49Disassembling and rinsing the Professional Cappuccino Frother .50Cleaning the bean container .51Descaling the water tank .517 Display messages528 Troubleshooting549 Transport and environmentally neutral disposal56Transport / Emptying the system.56Disposal.5610 Technical data57Index58JURA contact details / Legal information60Symbol descriptionWarningsJJ DANGERThis is the safety alert symbol. lt is used to alert you to potential personal injuryhazards. Obey all safety messages that follow this symbol to avoid possible injuryor death.DANGER indicates a hazardous situation which, if not avoided, will result in deathor serious injury.J WARNING WARNING indicates a hazardous situation which, if not avoided, could result indeath or serious injury.J CAUTION CAUTION, used with the safety alert symbol, indicates a hazardous situationwhich, if not avoided, could result in minor or moderate injury.NOTICENOTICE is used to address practices not related to personal injury.Symbols usedTPrompt to take action. This symbol means that you are being prompted toperform some action.EInformation and tips to make it even easier to use your IMPRESSA.COFFEEDisplay message3
IMPORTANT SAFEGUARDSFollow the basic safetyprecautionsWhen using electrical appliances, basic safety precautions shallalways be followed, to reduce the risk of fire, electric shock, and/orinjury to persons, including the following:Z Read all instructions.Z Do not touch hot surfaces. Use handles or knobs.Z To protect against fire, electric shock and injury to persons, donot immerse power cord, plugs, or body of machine in wateror other liquid.Z Close supervision is necessary when any appliance is used byor near children.Z Unplug from outlet when not in use and before cleaning.Allow to cool before putting on or taking off parts, and beforecleaning the appliance.Z Do not operate any appliance with a damaged cord or plug orafter the appliance malfunctions, or has been damaged in anymanner. Return appliance to the nearest authorized servicefacility for examination, repair or adjustment.Z The use of an accessory attachment not recommended by theappliance manufacturer may result in fire, electric shock, orinjury to persons.Z Do not use outdoors.Z Do not let the cord hang over the edge of a table or counter,or touch hot surfaces.Z Do not place on or near a hot gas or electric burner, or in aheated oven.Z Always attach plug to appliance first, then plug cord into thewall outlet. To disconnect, turn any control to ‘OFF’ thenremove plug from wall outlet.Z Do not use appliance for other than intended use.Z Use extreme caution when dispensing hot steam, hot wateror hot coffee.Z For household use only.SAVE THESE INSTRUCTIONS.Pass them on to any subsequent user.4
Intended useThe appliance is designed and intended for household use only. Itshall only be used for coffee preparation and to heat milk and water,according to these instructions. Use for any other purpose will bedeemed improper. JURA Elektroapparate AG cannot accept anyresponsibility for the consequences of improper use.People, including children, whoZ do not have the physical, sensory or mental capabilities to usethe appliance safely orZ are inexperienced or lack knowledge in how to use the appliance safelymust be supervised by a responsible person when using it, or mustbe instructed in how to use it correctly.Special power cord setinstructionsZ The power cord is provided to reduce the risk resulting frombecoming entangled in or tripping over a long cord.Z The cord shall be arranged so that it will not drape over thecounter top or table top where it can be pulled on by childrenor tripped over.Z This appliance has a 3-pin grounded plug. As a safety feature,this plug will fit in a polarized outlet only one way.Z If the plug does not fit fully in the outlet, reverse the plug. If itstill does not fit, contact a qualified electrician.Z Do not modify the plug in any way or attempt to defeat thissafety feature.Do NOT use extension cords.If the user chooses to use an extension cord,Z the marked electrical rating of the extension cord shall be atleast as great as the electrical rating of the appliance, andZ if the appliance is of the grounded type, the extension cordshall be a grounding type 3-wire cord, andZ the longer cord shall be arranged so that it will not drape overthe counter top or tabletop where it can be pulled on by children or tripped over.J WARNINGTo reduce the risk of fire or electric shock, DO NOT remove any service covers. DO NOT modify the appliance in any way that is notdescribed in these instructions. NO user serviceable parts included.Repair MUST be done by authorized personnel only.5
In the event of signs of damage, for example if there is a smell ofburning, unplug the machine immediately from outlet and contactJURA customer service.J CAUTIONThis appliance is for household use. Any servicing other than cleaning and user maintenance shall be performed by an authorized service representative:Z Do not immerse base in water or try to disassemble.Z Do not put the appliance or any individual parts in the dishwasher.Z Check voltage to be sure that the voltage indicated on thename plate complies with your voltage.Z Never use warm or hot water to fill the water container. Usecold water only.Z Keep your hands and the cord away from hot parts of theappliance during operation.There is a risk of scalds or burns on the spouts and the cappuccinofrother / nozzle.Z Keep children away.Z Do not touch any hot parts. Use the handles or knobs provided.Z Ensure that the cappuccino frother / nozzle is correctly fittedand clean. If incorrectly fitted or if they become blocked, thecappuccino frother or its parts might come off.NOTICEZ Never clean with scouring powders or hard implements.Z Ensure that the ventilation slots are not covered.Z Never pull out the drip tray during the brewing process. Onlypull the drip tray when the display instructs you or when theappliance is ready for use.NEVER DO(or you will void yourwarranty protection):6Z Never fill instant coffee, chocolate mix etc. into the bean con-tainer or ground coffee funnel (filler funnel for ground coffee).It will damage the functioning of the brewing chamber.Z Never fill sugar coated coffee beans into the bean container.In case of doubt, call your dealer.Z Never fill anything other than coffee beans into the bean container (no chocolate, no rice, no nuts, no spices, nothing otherthan roasted coffee beans).
Z Never fill frozen beans into the bean container. If you storebeans in the freezer, let them thaw 3 to 4 hours before fillingthem into the bean container.Z Never fill anything but fresh, cold and clean water into thewater tank, except when decalcifying.Z Never use mineral or carbonated water. You can use tap water,bottled water, spring water and reverse osmosis water.Z Never do anything with the machine which is not described inthese instructions. In case of doubt, call your dealer.7
Control elementsControl elements81921011312J HOT4J HOT13J HOT 14567Figure: Your machine may look different to the one shown.12345678Bean container coverBean container with aroma preservationcoverWater tank with handlePower switch and power cord(back of machine)Coffee grounds containerDrip trayCup platform891011121314Fineness of grind switchCup trayCover of filler funnel for pre-ground coffeeFiller funnel for pre-ground coffeeProfessional Cappuccino FrotherHeight-adjustable coffee spoutHot water spout
Control elements41523Front left1Display2Rotary Switch cover3f Rotary switchQ On/off buttonc Maintenance buttoni 1 Espresso button4 2 Espressi buttono 1 Coffee buttond 2 Coffees buttone Coffee à la Carte buttonv Pre-ground coffee buttonFront right4ö Selector switcha Hot water portion symbolm Hot water symbolp Cappuccino buttonz Milk portion symboln Milk symbolq Latte Macchiato button5Professional Cappuccino Frother9
1 IMPRESSA S9 One Touch Classic1IMPRESSA S9 One Touch ClassicCoffee that fulfils yourwildest dreams10With the new flagship of the IMPRESSA S range, cappuccino andlatte macchiato are prepared at the touch of a button without youhaving to move the cup. With its elegant platinum styling andupgraded design, this high-quality product is fully in keeping withcontemporary trends and exudes superiority, solidity and competence. It impressively demonstrates these attributes with eachcoffee specialty that you enjoy.ZOne Touch Cappuccino/Latte macchiato: Your IMPRESSA S9makes a cup of cappuccino at the touch of a button, withoutyou having to move the cup. Hot milk foam, flowing into thecup and slowly starting to fill it. Steam which rises, awakeningthe anticipation of a delicious specialty. Aromatic coffee,blending with the milk, pushing up the milk foam topping.These are the protagonists in a sensuous drama – the dramaof perfect coffee preparation. A latte macchiato can also bemade equally easily and sensuously at the touch of a button.ZEnergy-saving mode (Energy Save Mode, E.S.M. ): TheIMPRESSA S9 One Touch Classic actively assists you in savingenergy. With the various stages of the energy-saving mode,you can adjust the energy-saving potential to suit the way youlike to enjoy your beverages. The machine can be completelydisconnected from the power grid at the main switch – forinstance if you are going to be absent for some time.ZControl philosophy: You can ‘navigate’ reliably through alloperating and programming steps simply by turning andpressing the switch. The information on the plain text andgraphic display is in full view at all times. The focus is on yourpersonal taste. Simply select the coffee strength, amount ofwater and temperature according to your individual preferences.
1 IMPRESSA S9 One Touch ClassicZJURA on the InternetProfessional technology for the home: The active bean monitoring feature of your IMPRESSA S9 banishes the sound ofempty rotating coffee grinders and the inconvenience ofhalf-full cups once and for all. It always shows you in goodtime when the coffee beans need replenishing. The filling levelof the 10 oz (280 g) bean container is continuously opticallymonitored.Visit us on the Internet.@ At www.jura.com you will find interesting and up-to-dateinformation on your IMPRESSA and on every aspect of coffee.11
2 Preparing and using for the first time2 Preparing and using for the first timeThis chapter provides you with the information you need to use yourIMPRESSA without any problems. You will prepare your IMPRESSAstep-by-step for your first coffee experience.Setting upWhen setting up your IMPRESSA, please note the following:Z Set the IMPRESSA down on a horizontal surface that is notsensitive to water.Z Choose a spot for your IMPRESSA which is protected againstoverheating.Filling the water tankTo enjoy perfect coffee we recommend changing the water everyday.NOTICEMilk, sparkling mineral water or other liquids can damage the watertank or the machine.T Only fill the water tank with fresh, cold water.T Remove the water tank and rinse it with cold water.T Fill the water tank with fresh, cold water and reinsert.Bean container fillingNOTICEThe bean container has an aroma preservation cover. This will ensurethat your coffee beans retain their aroma for longer.Coffee beans which have been treated with additives (e.g. sugar),ground coffee or freeze-dried coffee will damage the grinder.T Only use roasted, untreated coffee beans to fill the bean container.T Open the cover of the bean container and remove the aromapreservation cover.T Remove any dirt or foreign objects inside the bean container.T Fill the bean container with coffee beans, then close thearoma preservation cover and the bean container cover.12
2 Preparing and using for the first timeFirst-time useJ WARNINGIf the machine is operated with a defective power cord, there is adanger of potentially fatal electric shock.T Never use a machine which is damaged.T Never use a machine which has a defective power cord.E The water volume is given as standard in ‘oz’. You can changethis setting to ‘ml’ in programming mode (see Chapter 4 ‘Permanent settings in programming mode – Unit for amount ofwater’).Precondition: The water tank and bean container are full.T Insert the power plug into a power socket.3 T Switch on the IMPRESSA using the power switch on the backof the machine.The on/off button Q lights up (standby).Q T Press the on/off button to switch the IMPRESSA on.The pre-set language appears on the display.T Open the cover of the Rotary Switch.g T Turn the Rotary Switch until the desired language is displayed. For Example: LANGUAGE ENGLISHk T Press the Rotary Switch to confirm the language.CONFIRMED appears briefly on the display to confirmthe setting.TIME --:-g T Turn the Rotary Switch to set the hour.TIME 12:00 (example)k T Press the Rotary Switch to confirm the hour setting.TIME 12:00g T Turn the Rotary Switch to set the minutes.TIME 12:45 (example)k T Press the Rotary Switch to confirm the minute setting.CONFIRMED appears briefly on the display.WEEKDAY MONDAYg T Turn the Rotary Switch to set the weekday.WEEKDAY WEDNESDAY (example)13
2 Preparing and using for the first timek T Press the Rotary Switch to confirm the setting.CONFIRMED appears briefly on the display.FILL SYSTEM / PRESS RINSE, the maintenancebutton c lights up.T Place a receptacle under the hot water spout and anotherunder the frother.c T Press the maintenance button.SYSTEM FILLS, the system fills up with water and themaintenance button flashes. A small amount of water flowsfrom the frother and the hot water spout.This operation stops automatically. WELCOME TO JURAappears on the display.HEATING UPPRESS RINSE, the maintenance button c lights up.T Place a receptacle under the coffee spout.c T Press the maintenance button.The machine rinses itself, stopping automatically.COFFEE READY appears on the display. Your IMPRESSAis ready to use.E After first-time use do not disconnect the IMPRESSA from thepower grid for 24 hours to ensure that it is in the optimumoperating condition.E When a coffee specialty has been prepared for the first time,it is possible that FILL BEANS is shown on the display asthe grinder has not yet been completely filled with coffeebeans. In this case prepare a different coffee specialty.E If you have not been able to use the machine for the first timecorrectly and fully, contact customer support in your country(see ‘JURA contact details / Legal information’).Using andactivating filterYour IMPRESSA no longer has to be descaled if you are usingCLEARYL filter cartridges.E Perform the ‘Insert filter’ operation without interruptions. Thiswill ensure that your IMPRESSA always produces its best.Precondition: COFFEE READY is displayed.T Open the cover of the Rotary Switch.14
2 Preparing and using for the first timek T Keep the Rotary Switch pressed until MAINTENANCEappears on the display.g T Turn the Rotary Switch until FILTER NO is displayed.k T Press the Rotary Switch to enter the program item.FILTER NOg T Turn the Rotary Switch until FILTER YES is displayed.k T Press the Rotary Switch to confirm the setting.CONFIRMED w appears briefly on the display to confirmthe setting.INSERT FILTER / PRESS RINSE, the maintenancebutton c lights up.T Remove a CLEARYL filter cartridge and the filter cartridgeextension from the Welcome Pack.T Fit the extension on top of the filter cartridge.T Remove the water tank and empty it.T Lift the cartridge holder and insert the filter cartridge intothe water tank, applying slight pressure.T Close the cartridge holder. It will click into place audibly.T Fill the water tank with fresh, cold water and reinsert.T Place a receptacle (at least 17 oz or 500 ml) under the frother.E If you are using the Professional Cappuccino Frother, set theselection lever of the frother to the steam position n.c T Press the maintenance button.FILTER RINSING, water flows out of the frother.E You can interrupt rinsing of the filter at any time by pressingany button.E The water may be slightly discolored. This is not harmful tohealth and does not affect the taste.Filter rinsing stops automatically after approx. 17 oz (500 ml).COFFEE READY appears on the display. The filter is nowactivated.15
2 Preparing and using for the first timeDetermining andadjusting the degreeof water hardnessLevelThe harder the water is, the more frequently the IMPRESSA needs tobe descaled. It is therefore important to adjust the water hardness.The water hardness can be adjusted on a continuous scale between1 dH and 30 dH.Display German Degrees of general Parts perIndicator Strip numberDegree ( dH)hardness ( dGH)million (ppm) of ‘reddish’ fieldsNot active––––Very soft water 3 3 53.4NoneSoft water 4 4 711Hard water 8.4 8.4 1502Very hard water 14 14 2503E However, if you are using the CLEARYL filter cartridge and haveactivated it, you will not be able to adjust the water hardness.You can find out what the water hardness is by using the Aquadur test strip supplied as standard.T Hold the test strip briefly (for one second) under flowingwater. Shake off the water.T Wait for about one minute.T You will then be able to read the degree of water hardnessfrom the discoloration of the Aquadur test strip and thedescription on the packaging.You can now adjust the water hardness.Example: To change the water hardness from 16 dH to 25 dH,proceed as follows:Precondition: COFFEE READY is displayed.T Open the cover of the Rotary Switch.k T Keep the Rotary Switch pressed until MAINTENANCEappears.g T Turn the rotary switch until HARDNESS 16 dH isdisplayed.k T Press the Rotary Switch to enter the program item.16 dHg T Turn the Rotary Switch until 25 dH is displayed.16
2 Preparing and using for the first timek T Press the Rotary Switch to confirm the setting.CONFIRMED w appears briefly on the display.HARDNESS 25 dHg T Turn the Rotary Switch until EXIT is displayed.k T Press the Rotary Switch to exit programming mode.COFFEE READY is shown on the display.Adjusting grinderNOTICEYou can adjust the grinder continuously to suit the roast of yourcoffee.If you adjust the consistency of grind when the grinder is not operating, the grinder adjustment switch could be damaged.T Only adjust the consistency of grind when the grinder is running.The consistency of grind setting is correct if the coffee flows regularly from the coffee spout. In addition a fine, thick crema forms.Example: To change the fineness of grind during coffee preparation,proceed as follows:T Open the cover of the bean container.T Place a cup under the coffee spout.o T Press the 1 Coffee button.The grinder starts and 1 COFFEE is displayed.T Turn the fineness of grind switch to the desired positionwhile the grinder is running.The coffee will be prepared and the fineness of grind isadjusted.Switching onWhen the IMPRESSA is switched on, a prompt for the rinse operationautomatically appears which is initiated by pressing the maintenance button.This setting can be changed in programming mode so that themachine automatically activates the switch-on rinse (see Chapter 5‘Permanent settings in programming mode – Rinses’).Precondition: Your IMPRESSA is switched on at the power switchand the on/off button Q is illuminated (standby).17
2 Preparing and using for the first timeQ T Press the on/off button to switch the IMPRESSA on.WELCOME TO JURA appears briefly on the display.HEATING UPPRESS RINSE, the maintenance button c lights up.T Place a receptacle under the coffee spout.c T Press the maintenance button.The machine rinses itself, stopping automatically.COFFEE READY appears on the display. Your IMPRESSAis ready to use.Switching off (standby)When you switch your IMPRESSA off, the spouts with which a coffeespecialty or milk have been prepared are rinsed.T Place a receptacle under the coffee spout and the frother.Q T Press the on/off button.MACHINE RINSING appears on the display, and thecoffee spout is rinsed.SPOUT RIGHT / PRESS RINSE.c T Press the maintenance button.MACHINE RINSING, the right coffee spout is rinsed.E When you prepare a milk product, but have not performedcappuccino cleaning, CLEAN CAPPUCCINO appears andthe maintenance button c lights up. For ten seconds you canstart the ‘Clean cappuccino frother’ procedure by pressing themaintenance button c.The IMPRESSA is switched off (standby mode), and theon/off button Q lights up.E When your IMPRESSA is switched off, a hissing noise may beaudible. This is normal and does not have any effect on themachine.18
3 Familiarizing yourself with the control options3 Familiarizing yourself with the control optionsJ WARNINGHot coffee, hot steam and hot water can cause scalding. Scalding isa serious burn.T Use extreme care when handling hot liquid or steam.T Allow liquid to cool down before drinking.T In the event of scalding, rinse affected area with cold waterand seek medical attention.T Keep children AWAY.With the IMPRESSA, you can prepare an excellent coffee or milk specialty at the touch of a button. You also have the option of adjustingthe coffee strength and temperature, as well as the amount of waterto your personal taste.This chapter will allow you to become familiar with all controloptions with the aid of examples. To familiarize yourself with yourIMPRESSA, we recommend that you make a point of actively tryingthe facilities described in this chapter. You will find this is well worthwhile.Learn how to perform the following:Z Preparation at the touch of a buttonZ One-off settings before and while your drink is being preparedZ Adjusting the default amount of water to suit the cup sizeZ Permanent settings in programming modeE You can stop the machine at any time while a coffee or milkspecialty or hot water is being prepared. To do this, press anybutton.E The water volume is given as standard in ‘oz’. You can changethis setting to ‘ml’ in programming mode (see Chapter 5 ‘Permanent settings in programming mode – Unit for amount ofwater’).19
3 Familiarizing yourself with the control optionsPreparation at thetouch of a buttonPrepare your favourite coffee specialty at the touch of a button.All coffee specialties are prepared following this model.Example: This is how to prepare one coffee.Precondition: COFFEE READY is displayed.T Place a cup under the coffee spout.o T Press the 1 Coffee button.1 COFFEE and the pre-set coffee strength is displayed.The pre-set amount of water flows into the cup. Preparationstops automatically. ENJOY appears on the display.COFFEE READY is then displayed.E To prepare 2 coffees, place two cups under the coffee spoutand press the 2 Coffees button d.One-off settings beforeand during preparationIt is possible to make various settings before and during preparation.These one-off settings are always follow the same model and are notstored.Changing the coffeestrength before preparationThe coffee strength of Coffee à la Carte can be changed beforepreparation. The following coffee strength options can be selected:Z ö (xmild)Z öö (mild)Z ööö (normal)Z öööö (strong)Z ööööö (xstrong)Example: Proceed as follows to to prepare a strong cup of Coffee àla Carte.Precondition: COFFEE READY is displayed.T Place a cup under the cof
Z One Touch Cappuccino/Latte macchiato : Your IMPRESSA S9 makes a cup of cappuccino at the touch of a button, without you having to move the cup. Hot milk foam, flowing into the cup and slowly starting to fill it. Steam which rises, awakening th
